
Handmade accessories have a special charm that factory-made items can never truly replace. Among the many small crochet projects loved by beginners, the crochet cherry keychain stands out for its playful appearance and practical use. This miniature charm combines decorative value with everyday function, making it an excellent project for gifting, selling, or simply adding personality to your own keys, bags, or zipper pulls.
A crochet cherry keychain is inspired by the familiar fruit shape and enhanced with soft decorative foliage. The design is intentionally simple so that beginners can gain confidence while still learning how to shape three-dimensional crochet pieces. Even though the project is small, it introduces essential techniques such as shaping, closing openings neatly, attaching decorative elements, and assembling parts into a finished accessory.
This guide explains the general flow of creating a crochet cherry keychine using beginner-friendly language and well-structured sections. You will learn what tools are needed, which abbreviations appear in patterns of this type, and how the overall construction process comes together to form a polished handmade charm.
Materials Needed
Before beginning, it is important to gather all tools and supplies in advance. Having everything within reach makes the process smoother and prevents interruptions during crafting.
The following table summarizes the materials commonly used for this project.
Material
-
4-ply yarn
-
Crochet hook
-
Keychain ring
-
Stitch marker
-
Cotton wool
-
Darning needle
-
Scissors
Abbreviations
Patterns and tutorials often rely on shortened forms of common crochet terms. Understanding these abbreviations makes it easier to follow instructions and recognize shaping cues.
The abbreviations used in projects like this generally follow US terminology.
| Abbreviation | Meaning |
|---|---|
| sc | Single crochet |
| hdc | Half double crochet |
| dc | Double crochet |
| inc | Increase |
| sl st | Slip stitch |
| mr | Magic ring |
| sc2tog | Single crochet two together |
| sk | Skip |
Shaping the Cherry Body
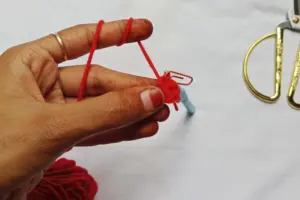
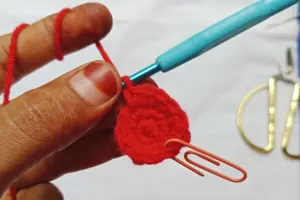
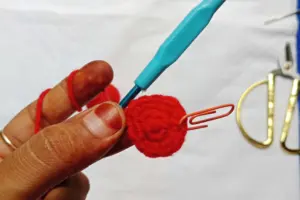
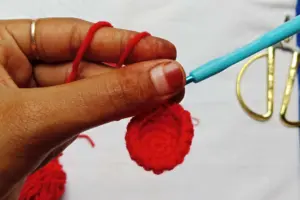
The cherry body begins as a compact rounded form. The general idea is to build a small circular fabric base that gradually expands and then narrows again. This shaping creates the soft fruit-like appearance that defines the keychine.
At the early stage, the focus is on forming an even and balanced structure. Careful attention to tension helps maintain a smooth surface without gaps. As the fabric grows, the piece naturally takes on a dome-like appearance. This stage lays the foundation for the entire project, so it is worth working slowly and checking the shape as you go.
Adding Volume and Softness
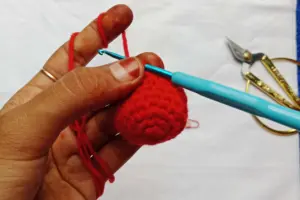
Once the body has reached its basic form, filling is introduced to give it a plush and realistic feel. The stuffing is inserted gradually, allowing you to adjust firmness before the opening is closed.
A well-filled cherry should feel soft but not loose. Press gently around the surface to ensure that the filling spreads evenly and that no hard lumps remain. This step transforms a flat crochet piece into a three-dimensional charm that holds its shape over time.
Closing and Smoothing the Shape
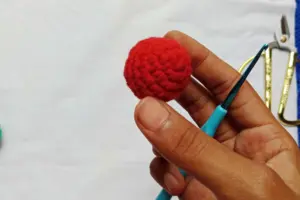
After the desired firmness is achieved, the remaining opening is carefully sealed. The aim here is to draw the fabric together so that the top blends seamlessly with the rest of the piece.
Neat closing not only improves appearance but also secures the stuffing inside. A tidy finish prevents fibers from peeking through and ensures that the cherry remains durable during daily use. Taking a few extra moments here can greatly enhance the final look of your keychain.
Creating the Decorative Foliage
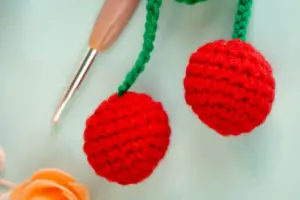
Once the main cherry form is complete, attention shifts to the decorative foliage that gives this keychain its recognizable character. These leafy elements are created as lightweight, flowing pieces that attach neatly to the top area of the cherry. Their purpose is both visual and functional, as they help conceal join points while adding charm and realism.
The foliage is shaped to resemble gentle curves rather than sharp edges, allowing it to drape naturally over the cherry surface. Beginners often enjoy this part because it introduces decorative shaping without requiring complex techniques. Careful handling of the yarn helps the leaves maintain a soft yet defined outline.
Attaching the Foliage to the Cherry
After the decorative elements are complete, they are carefully positioned on the cherry body. This step focuses on balance and symmetry so that the finished charm looks polished from every angle.
Use a needle to guide the yarn through the body of the cherry, anchoring the foliage securely in place. A firm but gentle hand ensures the attachment remains invisible from the outside while holding up well to daily handling. This joining process blends the decorative pieces into the body, making the cherry appear as one cohesive design rather than separate components.
Integrating the Keychain Hardware
With the decorative details in place, the next step involves transforming the crochet piece into a functional accessory. The keychain ring is introduced at this stage to provide a secure way to attach the cherry to keys, bags, or zippers.
The ring is positioned so that the weight of the charm is evenly supported. This prevents the cherry from tilting or twisting when carried. Strong yarn ends are used to fasten the hardware firmly, ensuring that the charm remains durable during everyday use.
Refining the Overall Finish
Finishing touches are what elevate a simple handmade item into a professional-looking accessory. This stage involves gently smoothing the surface, trimming any visible yarn ends, and confirming that all parts are firmly secured.
Spend a few moments examining your cherry keychine from different angles. Small adjustments, such as redistributing filling or lightly reshaping the body, can greatly improve the overall appearance. These refinements help your finished piece look clean, balanced, and visually appealing.
Caring for Your Crochet Cherry Keychain
Proper care ensures that your crochet keychain remains beautiful over time. Although it is small, it benefits from gentle handling and occasional cleaning.
You can maintain its condition by following these basic care tips.
-
Avoid prolonged exposure to moisture
-
Store in a dry place when not in use
-
Lightly spot clean with mild soap if needed
-
Allow to air dry fully before reusing
These simple practices will help preserve the shape and color of your handmade charm.
Final Thoughts
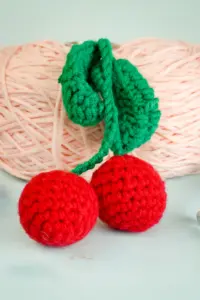
The crochet cherry keychain is a delightful blend of creativity and practicality. From shaping the soft body to adding decorative foliage and securing the keychain hardware, each stage contributes to a charming finished piece that reflects personal craftsmanship.
As your next step, consider making several cherry keychains in different yarn textures to experiment with variety and refine your technique. They make thoughtful handmade gifts, attractive craft fair items, and fun accessories for everyday use.