

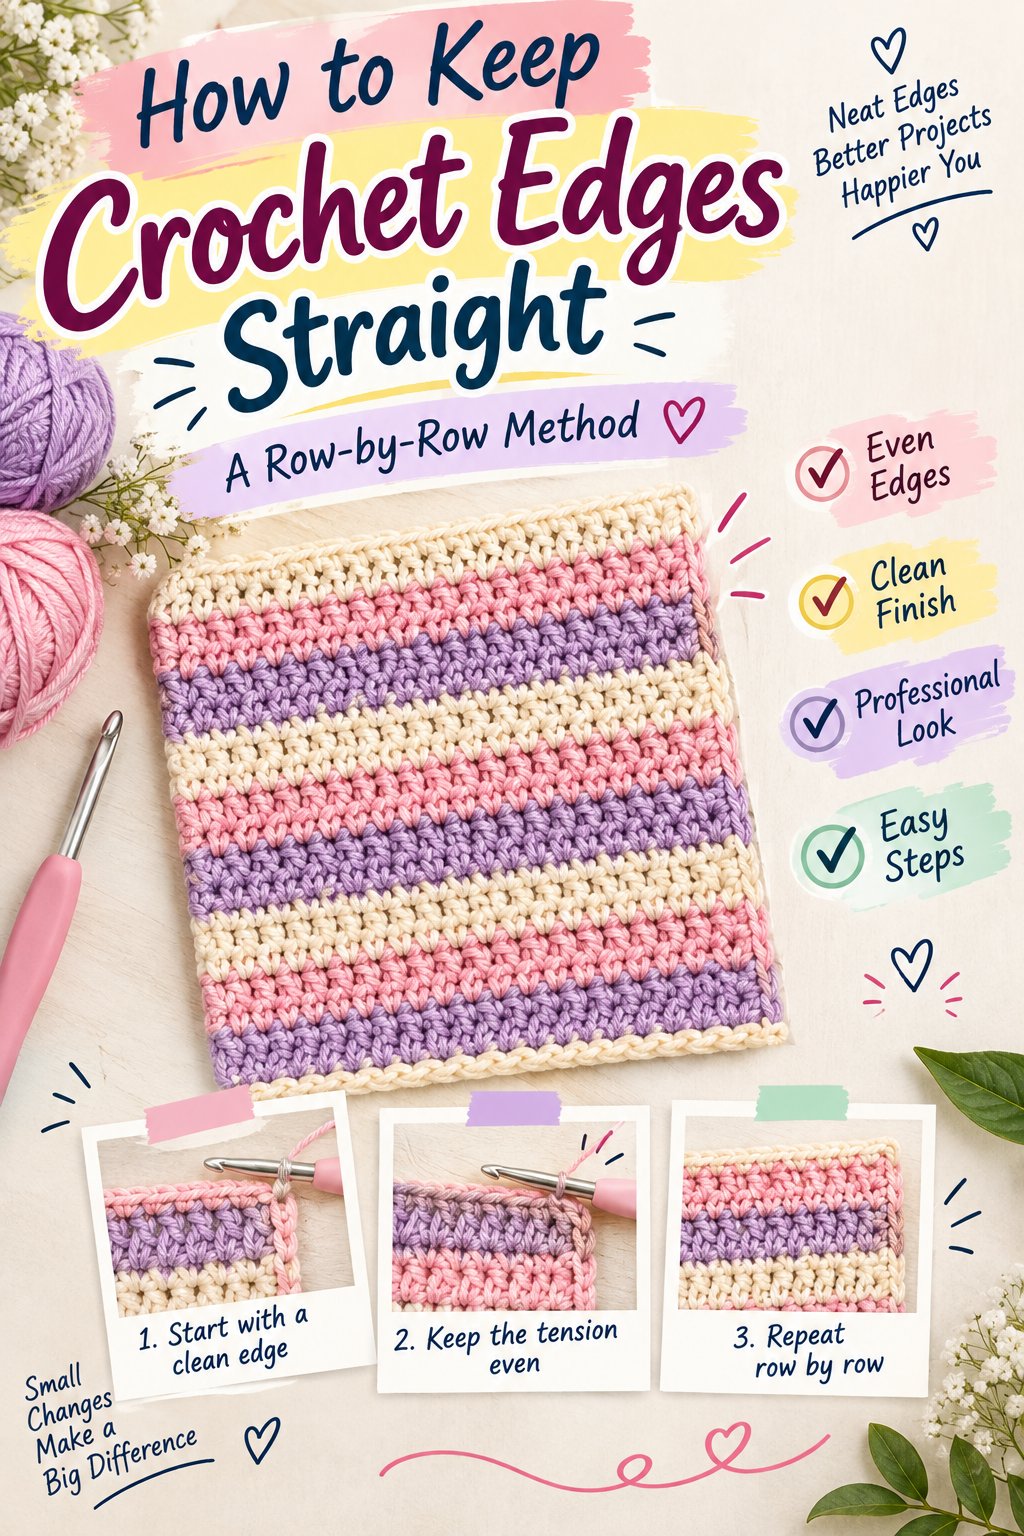
How to keep crochet edges straight comes down to repeating the same stitch count, turning-chain rule, and edge tension on every row. Identify the first and last stitch, decide whether the turning chain counts, and verify the row total before continuing. A marker and consistent tension prevent most slanted, wavy, or uneven crochet sides.
Key Facts / Quick Answer
A rectangular crochet panel must have the same stitch count on every row.
A single crochet turning chain usually does not count; a double crochet turning chain usually does.
If the turning chain counts, skip the first stitch and work the final stitch into the chain’s top.
If the turning chain does not count, work into the first real stitch and ignore the chain at the end.
Count each row during the first 5-10 rows, then check every few rows.
A stitch marker costs about $0.10-$0.50 per marker, while correcting a large distorted panel can take 30-90 minutes.
How Do Straight Crochet Edges Work?
Straight crochet edges depend on a stable stitch count and repeatable placement at both row ends. Each row needs the same number of actual stitches, and the crocheter must treat the turning chain consistently. One extra stitch widens the fabric; one missing stitch narrows it, creating a diagonal edge over several rows.
A crochet stitch has identifiable parts: the front and back loops at the top, the vertical post, and the space or base where the next stitch belongs. At row ends, the turning chain can resemble a stitch, especially in double crochet, so beginners often work into it twice or fail to work into it at all.
The safest method is to establish three facts before crocheting:
- The target stitch count, such as 30 single crochet stitches.
- Whether the turning chain counts as the first stitch.
- The exact location of the first and final stitch.
For a 30-stitch rectangle, every completed row should contain 30 counted stitches. A foundation chain may contain 31 chains for single crochet, 32 for half double crochet, or 33 for double crochet, depending on the pattern’s turning-chain convention.
What Happens When the Count Changes?
| Row result | Fabric change after 10 rows | Visible symptom | Correct response |
|---|---|---|---|
| 30 stitches on every row | 0 stitches | Parallel sides | Continue and spot-check |
| 31 stitches on every row | +10 stitches | Edge flares outward | Undo to the first incorrect row |
| 29 stitches on every row | -10 stitches | Edge angles inward | Undo to the first incorrect row |
| Alternating 29 and 31 stitches | Average width may remain similar | Wavy or stepped edge | Mark both edge stitches |
| Uncounted turning chain | Variable | Gaps or bulky side | Follow one chain rule consistently |
A single mistake near the edge can be hard to see immediately. After five rows, however, a repeated increase or decrease produces a measurable width change. Measure the first row and the tenth row with the same relaxed tension; a difference of more than 3-5% usually indicates a stitch-placement problem rather than ordinary yarn variation.
How to Keep Crochet Edges Straight With Turning Chains
The turning chain controls row height and may or may not count as a stitch. Crochet patterns should state the convention, but when instructions are unclear, the stitch anatomy and row count provide the practical answer. Never switch between counting and ignoring the chain halfway through a project.
A turning chain raises the working yarn to the height of the next stitch. It does not automatically become a counted stitch. The convention varies by stitch and designer, so the written pattern takes priority over a general rule.
When Does the Turning Chain Count?
A counted turning chain functions as the first stitch of the new row. The crocheter skips the first base stitch, works into the second stitch, and places the final stitch into the top of the previous turning chain. This method is common with double crochet and taller stitches because the chain approximates their height.
| Stitch | Common turning chain | Usually counts? | First working location | Final stitch location |
|---|---|---|---|---|
| Single crochet | 1 chain | No | First base stitch | Last real stitch |
| Half double crochet | 2 chains | Sometimes | First or second base stitch | Last real stitch or chain top |
| Double crochet | 3 chains | Often | Second base stitch | Top of previous turning chain |
| Treble crochet | 4 chains | Often | Second base stitch | Top of previous turning chain |
The phrase “usually counts” is not a substitute for the pattern instruction. Some modern patterns use a no-count chain for double crochet to reduce gaps. The row total determines whether the chosen method is working.
When Should the Turning Chain Not Count?
A no-count turning chain acts only as a height lifter. Work the first actual stitch into the first base stitch, and do not work into the turning chain when returning across the row. This approach often produces a denser edge, especially in single crochet and half double crochet.
For a 20-stitch half double crochet row using a no-count chain, chain 2, turn, and place the first half double crochet into the first stitch. Continue across until 20 half double crochet stitches are present. The turning chain remains outside the count.
A common error is mixing systems: the crocheter works into the first stitch as though the chain does not count, then adds a final stitch into the chain as though it does count. That creates 21 stitches instead of 20 and makes the edge expand.
Are Chainless Starting Stitches Better?
Chainless starting stitches replace a traditional turning chain with a constructed stitch that more closely matches the height and width of the next stitch. They can reduce corner gaps and produce a cleaner vertical edge, but they require more control than a standard chain.
Common alternatives include:
- A stacked single crochet for a taller starting column.
- A chainless half double crochet made with a controlled loop.
- A standing double crochet when beginning a new color or round.
- A stacked double crochet using the first stitch post and loops.
- A chainless treble crochet for tall, open fabric.
Chainless starts are useful for blankets, scarves, and visible garment edges where side gaps are distracting. They are less useful when the pattern specifically requires a counted turning chain for stitch multiples or decorative symmetry.
What Is the Reliable Row Routine?
A reliable row routine uses a marker, a fixed turning direction, and a row-end count. The crocheter makes the first stitch, marks it, works across, identifies the final stitch before completing it, and counts the finished row. This process takes approximately 15-30 seconds for a small row.
Use the following sequence for a rectangular panel:
- Read the pattern’s turning-chain instruction before making the row.
- Make the turning chain with the same tension used for ordinary chains.
- Turn the work in the same physical direction every time.
- Identify the first stitch, which may be beside the chain or beneath it.
- Place a locking stitch marker through the first actual stitch.
- Work across without twisting the top edge.
- Find the final stitch before inserting the hook.
- Complete the final stitch, then count the row.
- Compare the row width with the previous row every 3-5 rows.
- Correct the first wrong row instead of compensating in a later row.
Marking the first stitch is especially helpful in single crochet, where the top loops can disappear beside a turning chain. For counted-chain double crochet, mark the top of the first stitch or the turning chain, according to the pattern’s definition.
How Should You Hold the Edge?
Hold the fabric so the top loops face upward and the edge stitch is not stretched open. Pulling the fabric sideways can expose a false stitch or hide the actual final stitch. Let the fabric rest flat before counting.
The first and last two stitches often receive more tension than the middle stitches because the crocheter changes hand position at the edge. In practice, deliberately relax the yarn on the first stitch and tighten the final loop only enough to match the neighboring stitches. Pulling both edge stitches tighter can make the sides contract.
| Control point | Typical target | Warning sign | Adjustment |
|---|---|---|---|
| First stitch loop height | Matches neighboring stitch | Edge dips inward | Loosen hook lift slightly |
| Last stitch width | Matches middle stitches | Edge pinches | Stop tightening final loop |
| Turning-chain tension | Same as foundation chains | Side gaps or flare | Make chain firm, not tight |
| Row width change | Less than 3% | Panel tapers or widens | Recount and inspect ends |
| Turning direction | Same direction each row | Edge twists | Turn like a book page each time |
Which Method Produces the Cleanest Edge?
No single edge method is best for every stitch. A no-count chain usually gives the cleanest dense edge, a counted chain preserves conventional stitch height, and a chainless start minimizes visible gaps. The best choice depends on stitch type, fabric density, and whether the edge will remain exposed.
| Method | Typical learning time | Edge appearance | Best project use | Main risk |
|---|---|---|---|---|
| Counted turning chain | 5-15 minutes | Flexible, sometimes gapped | Double crochet blankets | Missing chain-top stitch |
| No-count turning chain | 5-10 minutes | Dense, compact | Single crochet washcloths | Accidental extra stitch |
| Chainless starting stitch | 20-60 minutes | Low-gap, column-like | Scarves and garment fronts | Uneven starting column |
| Standing stitch | 10-30 minutes | Clean color change | Joined rounds and stripes | Loose first loop |
| Foundation single crochet | 15-30 minutes | Stable first edge | Stretchy bags and cuffs | Uneven foundation tension |
The counted-chain method is appropriate when a pattern is written around the turning chain as a stitch. The no-count method is often easier for dense fabric because the first and last actual stitches are visible. A chainless stitch improves appearance but does not remove the need to count.
Does the Yarn or Hook Change Edge Straightness?
Yarn and hook choice affect edge visibility, but they do not replace correct stitch placement. Smooth worsted-weight yarn with a moderate hook, such as a 5.0 mm hook for many medium-weight yarns, makes stitch anatomy easier to inspect than fuzzy novelty yarn.
A hook that is too large can create loose turning chains and open side gaps. A hook that is too small can compress the edge, making the first and last stitches difficult to enter. Use the pattern’s recommended hook first, then change by 0.25-0.5 mm only after checking whether the issue is tension rather than count.
| Material or tool | Typical specification | Effect on edges | Suitable response |
|---|---|---|---|
| Smooth worsted yarn | 100 g, medium weight | Clear stitch tops | Good for learning |
| Cotton yarn | 4-ply or medium weight | Low stretch, exposes errors | Use relaxed tension |
| Fuzzy yarn | Eyelash or brushed fiber | Hides stitch anatomy | Mark edge stitches |
| Plastic locking marker | 3-5 cm length | Holds first stitch securely | Remove before blocking |
| 5.0 mm hook | Common medium-yarn size | Moderate loop height | Adjust after a gauge test |
Why Do Crochet Edges Slant?
Crochet edges slant because the row count changes, the wrong edge stitch is used, or the turning chain is handled inconsistently. The most frequent failure is a missing final stitch, followed by an accidental increase when the crocheter works into both the first base stitch and a counted turning chain.
Inspect the project from the side rather than only from above. A straight panel has nearly parallel edge columns. A gradual diagonal indicates repeated stitch loss or gain; isolated bumps usually indicate one misplaced stitch, a color change, or inconsistent tension.
How Do You Find a Missing Final Stitch?
A missing final stitch often hides beside the turning chain because the side edge folds inward. Lay the piece flat, identify the vertical post or top loops of the last stitch, and compare that location with the corresponding stitch on the previous row.
For counted-chain double crochet, the final stitch usually enters the top of the previous row’s turning chain. The top can look like a small chain space, so insert the hook under both visible loops rather than into the nearby gap.
For a no-count single crochet row, the final stitch is the last actual single crochet. The turning chain sits beyond it and should not receive a hook insertion. Marking the first stitch provides a useful boundary when tracing across the row.
How Do You Detect an Accidental Increase?
An accidental increase creates an extra top “V” on the next row and usually widens the fabric by one stitch. Count the first five rows from the foundation upward; the first row with a different total identifies where the error began.
Typical causes include working into the base of a counted turning chain, crocheting around the turning chain instead of into its top, or placing two stitches into a corner space that accepts only one stitch. Do not remove a stitch from the next row to restore the width, because that creates a hidden structural inconsistency.
Can Inconsistent Turning Direction Distort the Edge?
Turning direction affects the visual twist and tension of the side edge, although it does not normally change the stitch count. If the crocheter rotates the work differently on alternating rows, the edge columns can lean, and the fabric may present its front and back sides irregularly.
Turn the piece in one repeatable motion. Many crocheters turn it like a book page, moving the working edge from front to back in the same direction. The exact direction matters less than repeating it.
How Do You Fix Loose or Wavy Edges?
Loose edges can be corrected only when the stitch count is correct and the distortion comes from tension. If the count is wrong, blocking may disguise the problem temporarily but will not restore a true rectangle. Rework the first incorrect row when the difference reaches one stitch or the width changes by more than 3-5%.
Separate the correction into two tests:
- Count the stitches on three consecutive rows.
- Measure each row’s width without stretching.
- Compare the first and last two edge stitches.
- Check whether turning chains are visibly longer than the fabric height.
- Steam or wet-block a small sample only after the count is correct.
Blocking can relax cotton and wool fibers, align minor tension differences, and soften a slightly wavy side. Acrylic yarn responds less predictably to wet blocking and may require careful steam blocking, with the iron kept away from the fibers to prevent flattening or melting.
When Can a Border Hide Uneven Edges?
A border can disguise a small tension variation, but it cannot reliably correct a panel that gains or loses stitches. A border works best when the edge is within approximately one stitch of the intended length over a 20-30 cm section and the fabric lies flat.
Do not use a border to conceal a diagonal caused by repeated counting errors. The border may ruffle, gather, or force the fabric into an unwanted shape because the foundation edge and final edge have different stitch totals.
| Problem size | Typical symptom | Can blocking help? | Recommended action |
|---|---|---|---|
| 1-2 mm per 20 cm | Slight tension variation | Often | Block and reassess |
| 3-5 mm per 20 cm | Mild waviness | Sometimes | Check edge tension |
| 1 stitch difference | Small width change | No, not structurally | Undo to error |
| 2-3 stitch difference | Noticeable taper | No | Frog and recount |
| More than 3 stitches | Strong diagonal or flare | No | Restart from first wrong row |
What Should You Do for Different Projects?
Project structure changes how much edge precision matters. A scarf can tolerate a small variation that a blanket border may expose, while a garment panel needs matching dimensions at armholes, side seams, or necklines.
Blankets and Afghans
Blankets benefit from a fixed stitch marker at each edge and a written row log. For a 100-stitch panel, count every row during the first 10 rows, then count every second or third row until the repeat becomes automatic.
Use a contrasting marker for the first stitch and another for the final stitch when the pattern is highly textured. Granny-style patterns may use spaces rather than top loops, so mark the corner or edge space specified by the pattern.
Scarves
Scarves often use double crochet, half double crochet, or textured repeats that make side gaps visible. A no-count chain or chainless starting stitch can reduce the staircase effect, but the method must match the pattern’s stitch total.
A scarf that is 18 cm wide at the first end and 20 cm wide after 120 rows has gained 2 cm, even if the side appears only slightly angled. Measure after several rows instead of waiting until the project is complete.
Garments
Garments require matching panels, so record row gauge as well as stitch count. If one front panel has 52 rows and the other has 54, the shoulder or side seam may not align even when both pieces have the same width.
Use removable markers at shaping points. When a pattern increases or decreases intentionally, write the new target count beside that row and resume the straight-edge routine afterward.
Textured and Openwork Patterns
Textured patterns can hide the first and last stitch. Work a narrow plain edge, such as one single crochet stitch at each side, only when the pattern allows it. A plain edge makes counting easier but changes the fabric’s appearance and stitch multiple.
In lace, the turning chain may form part of the repeat. Count stitches and chain spaces separately when the instructions distinguish them. A row can have the correct number of stitches but still be wrong if a chain space was skipped.
How Much Time and Money Does Correction Take?
Keeping crochet edges straight costs little in equipment, but it saves substantial reworking time. A basic setup requires one or two locking stitch markers, a measuring tape, and a row counter, with a typical total cost of $2-$12 depending on tool quality.
| Item or task | Typical cost in USD | Typical time | Value to edge control |
|---|---|---|---|
| Two locking stitch markers | $0.20-$1.00 | 10 seconds to place | Identifies edge stitches |
| Tape measure | $2-$8 | 1 minute per check | Detects taper |
| Manual row count | $0 | 15-30 seconds per row | Finds errors early |
| Digital row counter | $3-$12 | 2 seconds per row | Tracks progress |
| Undoing one incorrect row | $0 | 2-10 minutes | Corrects local error |
| Reworking a 50-row panel | $0 | 30-90 minutes | Corrects repeated error |
The frequently cited estimate that counting adds 5-10% to row time is a practical planning figure, not a universal study result. For a 30-minute blanket session, that means approximately 2-3 extra minutes of checking, often less time than undoing several rows.
Most crocheters develop more reliable edge memory after 1-2 weeks of regular practice, although textured patterns and dark yarn can require longer. Practice on a 20-row swatch before committing to an entire blanket or garment panel.
What Are the Most Useful Expert Rules?
Experienced crocheters use visual and numerical checks together. Stitch counting catches errors that look invisible, while edge columns reveal tension changes that counting cannot detect.
- Mark the first stitch immediately after making it.
- Count the row before setting the project down.
- Record the target count in a notebook or phone note.
- Photograph the first correct row-end placement for reference.
- Use smooth, light-colored yarn while learning a new stitch pattern.
- Correct the first wrong row, not the newest row.
- Avoid tightening the final stitch to compensate for a loose turning chain.
- Keep the same hook and yarn tension throughout a panel.
- Check both edge width and stitch total on large pieces.
- Treat pattern instructions as the authority when they conflict with generic conventions.
Expert insight: The final stitch is often easier to locate before the row is completed. Find the last top “V” while the working loop still sits on the hook, then insert into that stitch. After completion, the edge may curl and hide the target.
Expert insight: A tighter first stitch does not repair a missing stitch. It only narrows one point on the edge, producing a pinched side beside an unchanged diagonal.
Expert insight: Counted turning chains can make a mathematically correct edge look uneven because their width differs from ordinary stitches. A chainless start may improve appearance, but it changes technique rather than correcting count errors.
Frequently Asked Questions About How to Keep Crochet Edges Straight
Should I Count the Turning Chain in Single Crochet?
Usually, no. A one-chain turning chain for single crochet normally adds height without becoming a stitch, so work the first single crochet into the first base stitch and ignore the chain at the end. Follow the pattern if it explicitly counts the chain, because mixing conventions changes the row total.
Why Are My Crochet Edges Wavy but the Stitch Count Is Correct?
Correct counts with wavy edges usually indicate uneven tension, loose turning chains, or inconsistent first and last stitches. Measure the fabric without stretching, compare the edge stitches with middle stitches, and block a small sample. If the wave remains after blocking, reduce loop height or use a smaller hook.
Should I Use a Smaller Hook for the Edge?
A smaller hook can make an edge firmer, but it may also create a tight, puckered side. First match the tension of the first and last two stitches to the middle stitches. Change hook size only after confirming that the stitch count and turning-chain placement are correct.
How Often Should I Count Crochet Stitches?
Count every row while learning a stitch pattern or during the first 5-10 rows of a panel. After the edge becomes consistent, count every 3-5 rows and after every increase, decrease, color change, or interruption. Always count the final row before fastening off.
Can Blocking Make a Crochet Rectangle Straight?
Blocking can align fibers and soften minor tension differences, but it cannot correct repeated increases or decreases. A panel with the wrong stitch count will usually return to its distorted shape or develop ruffles when forced flat. Correct the count first, then block to the project’s intended dimensions.
Conclusion: How to Keep Crochet Edges Straight
How to keep crochet edges straight is primarily a matter of stitch-count control, consistent turning-chain placement, and even edge tension. Choose one chain convention, mark the first stitch, locate the final stitch before completing each row, and correct mistakes at the first incorrect row. Those habits produce straighter blankets, scarves, garment panels, and textured crochet fabric without expensive tools.