

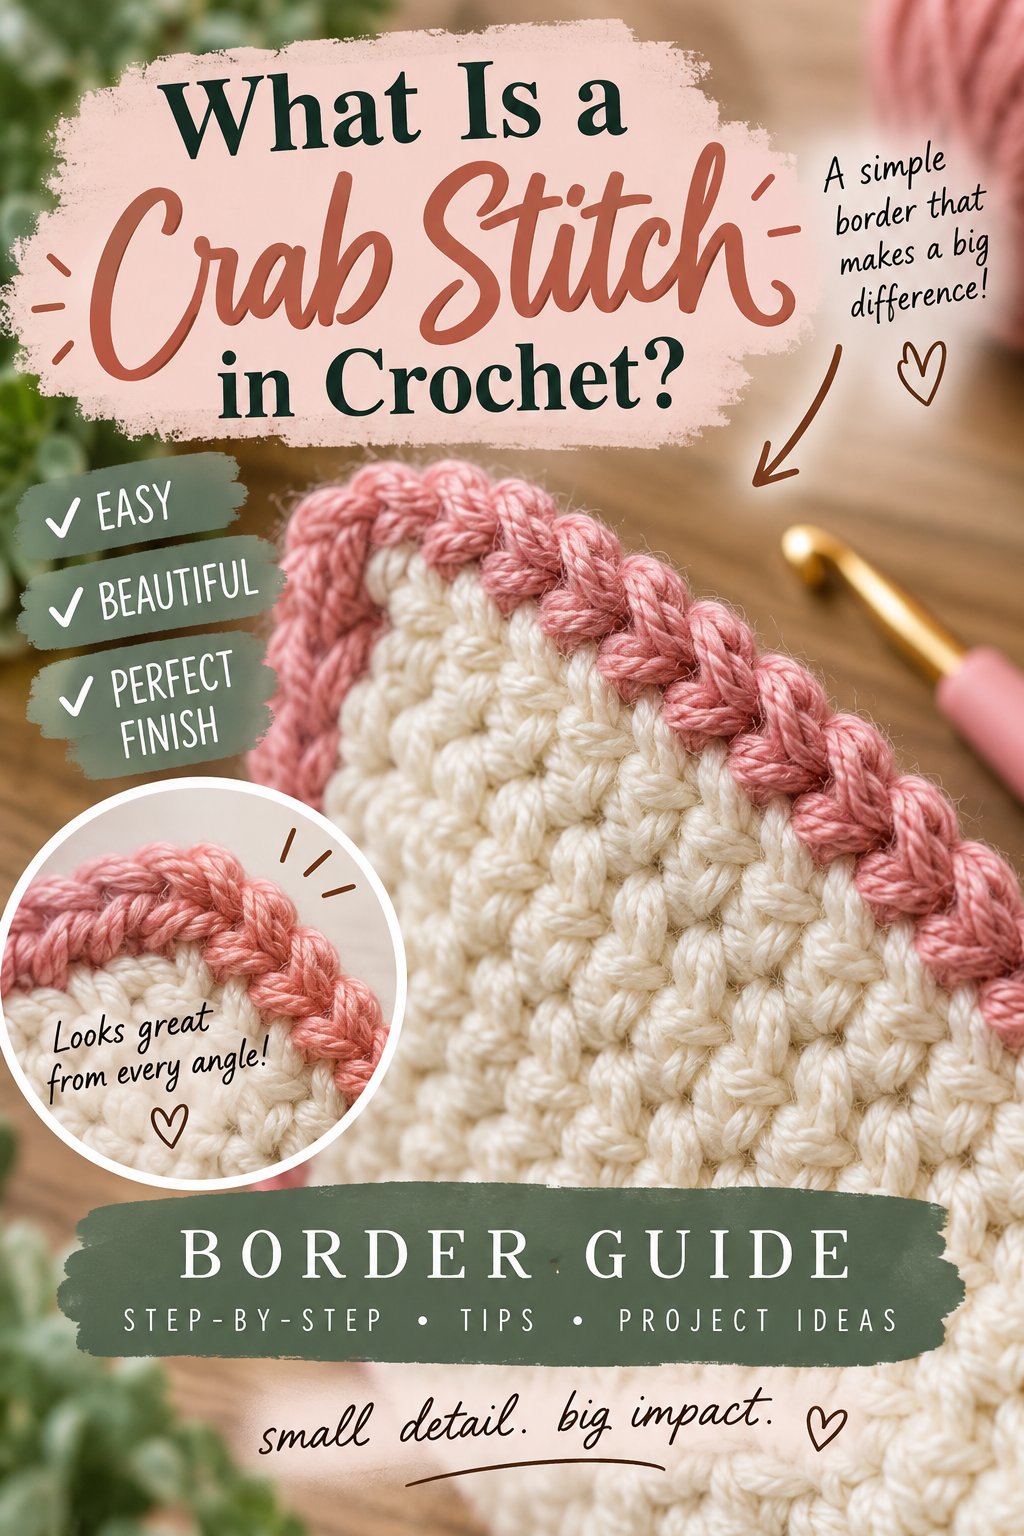
A crab stitch in crochet is a reverse single crochet that forms a firm, cord-like ridge along an edge. Right-handed crocheters usually work from left to right without turning, while left-handed crocheters work from right to left. The technique uses the same basic yarn-over and pull-through sequence as single crochet, but reverses the travel direction.
Key Facts About the Crab Stitch
The crab stitch creates a compact decorative finish rather than a new fabric structure. Because each stitch is worked backward into the previous edge, the loops twist into a raised cord that can visually separate a border from the main fabric.
- Common name: Reverse single crochet, abbreviated RSC in some patterns.
- Direction: Left to right for most right-handed crocheters, without turning.
- Stitch relationship: Usually one reverse single crochet into each available edge stitch.
- Texture: A low, twisted ridge with more definition than ordinary single crochet.
- Typical material effect: Plan for approximately 10-25% more yarn than a comparable single crochet edging, depending on tension and placement.
- Main limitation: Tight execution can draw the fabric inward and create ripples.
The stitch is useful when a project needs a visible perimeter with modest structure. It is less suitable where a soft, highly elastic edge must expand repeatedly, such as a fitted sleeve cuff or a stretchy hat opening.
How Does a Crab Stitch Work?
A crab stitch works by reversing the normal travel direction while retaining the single crochet finishing sequence. The hook enters the next stitch behind the working position, draws up a loop, and then pulls yarn through both loops, producing a twisted ridge.
The work remains facing the same way throughout the round or row. A right-handed crocheter normally begins at the left side of an edge and progresses toward the right. A left-handed crocheter normally moves toward the left. The direction changes because the hand orientation changes, not because the stitch itself has two different constructions.
The twist comes from the relationship between the hook, the previous stitch, and the direction of movement. It does not require rotating the hook through a full circle. Deliberately spinning the hook can distort the loops and create inconsistent tension.
Step-by-Step Method
- Finish the preceding row or round and keep the right side facing you.
- Chain 1 if the pattern or edge requires a turning chain equivalent.
- Insert the hook into the next stitch in the reverse travel direction.
- Yarn over and pull up a loop through that stitch.
- Yarn over again and pull through both loops on the hook.
- Repeat across the edge, keeping the working yarn at a relaxed tension.
- Fasten off or join according to the pattern instructions.
The first stitch can look looser or more open than the remaining stitches. A slip stitch into the starting area, followed by a controlled fastening-off method, usually produces a cleaner transition than forcing the first and last stitches into the same point.
What Should the Hook See?
The hook should enter a complete stitch or a clearly defined edge space, not a random strand selected only because it is nearby. For a top edge made from regular crochet stitches, insert under both loops unless the pattern specifies the front loop, back loop, or an edge-space method.
For a side edge, the available insertion points depend on row height. A common starting ratio is one reverse single crochet per row for single crochet fabric, but taller stitches often need fewer stitches per row to prevent flare. The fabric must determine the spacing.
What Types of Reverse Edging Exist?
The traditional crab stitch is a reverse single crochet, while reverse half double crochet creates a taller and heavier ridge. A forward corded single crochet can imitate a twisted appearance, but its mechanics and visual result vary by designer, so it should not be treated as universally identical.
| Variation | Preparation | Typical height | Best application |
|---|---|---|---|
| Reverse single crochet | No yarn over before insertion | 1 stitch unit | Blankets, coasters, washcloths |
| Reverse half double crochet | Yarn over before insertion | 1.5 stitch units | Thick blankets, baskets, bag edges |
| Reverse double crochet | Usually two yarn overs or pattern-specific method | 2 stitch units | Bold borders on dense fabric |
| Forward corded single crochet | Worked in standard direction with a twist method | 1 stitch unit | Makers who cannot work backward comfortably |
Patterns use variation names inconsistently. A designer may call the standard technique reverse single crochet, crab stitch, or reverse crochet. Read the abbreviation key and stitch instructions rather than relying on the name alone.
Reverse Half Double Crochet
Reverse half double crochet begins with a yarn over before the hook enters the target stitch. The extra yarn-over structure produces a wider, taller ridge than reverse single crochet, but it also consumes more yarn and can exaggerate uneven edge spacing.
This version works well on heavy yarn weights and dense fabric. On lightweight garments, it can feel bulky around the neckline or armhole, where a narrow slip-stitch or single-crochet edge may be more comfortable.
How Much Yarn, Time, and Space Does It Need?
A crab-stitch border usually follows the existing edge at approximately a one-to-one stitch ratio, but yarn use and time vary with stitch height, yarn weight, hook size, and tension. A practical estimate is 10-25% more yarn than a same-length single-crochet border, not a universal 1.5-2 times increase.
| Planning factor | Typical crab stitch value | Practical consequence |
|---|---|---|
| Stitch placement | 1 stitch per edge stitch | Count the base edge before beginning |
| Extra yarn versus single crochet | 10-25% | Reserve an additional 0.1-0.25 skein equivalent |
| Speed versus forward single crochet | 1.5-2 times slower initially | Allow 15-30 minutes for a small 100-stitch edge |
| Additional tool cost | USD $0 | Use the project hook and yarn |
| Hook adjustment | 0.5-1.0 mm larger if tight | Test before committing to the whole edge |
| Practice length | 20-30 stitches | Enough to evaluate twist and tension |
The 1:1 placement rule applies most reliably when the base edge already has evenly spaced stitches. A blanket side made from rows may need a ratio adjustment, and a shaped neckline may require fewer or more placements around curves.
Before beginning a large border, crochet a 20-stitch sample or work one side of the project. Measure whether the edge remains the same length. If the sample contracts by more than roughly 5%, loosen the tension or increase the hook size.
Which Projects Suit This Border?
Crab stitch edging suits projects that benefit from a firm, visible perimeter and do not require substantial stretch. The raised ridge can protect an exposed edge, frame a contrasting color, or provide a compact finish where a decorative scallop would be too delicate.
Suitable applications include:
- Blanket and afghan outer rounds
- Dishcloth and washcloth perimeters
- Coaster edges
- Basket rims
- Tote bag openings
- Pillow covers
- Placemat borders
- Cuffs with limited stretch
- Shawl and scarf ends
- Amigurumi openings that need a defined lip
The technique is less appropriate for highly elastic garments. A ribbed hat brim, sock cuff, or close-fitting waistband needs stretch recovery that this firm edging generally reduces. For those areas, ribbing, front-post and back-post stitches, or a dedicated elastic edging usually performs better.
When Should You Add the Border?
Add the reverse edging after the main fabric has been blocked when the project is flat and stable. Blocking first reveals the true edge length and reduces the chance that the border will lock an avoidable distortion into the finished item.
For acrylic yarn, wet blocking has limited reshaping power compared with wool, so steam blocking should be performed cautiously and without pressing the iron onto the fabric. Cotton often benefits from damp blocking because the fibers can relax and reveal uneven stitch spacing.
Crab Stitch Versus Other Crochet Borders
Crab stitch differs from ordinary single crochet because it prioritizes a twisted surface ridge over maximum flexibility. Slip stitch produces a flatter line, picot creates projections, and single crochet offers a simpler edge that is often easier to shape.
| Border style | Surface profile | Typical stretch | Typical work rate | Best use |
|---|---|---|---|---|
| Crab stitch | Raised twisted cord | Low to medium | 0.5-0.7 of forward single crochet speed | Firm blanket and bag edges |
| Slip stitch | Flat braided line | Medium | 0.7-0.9 of forward single crochet speed | Minimal garment and accessory finishes |
| Picot edging | Pointed decorative bumps | Low | 0.5-0.8 of single crochet speed | Shawls, baby blankets, lace projects |
| Single crochet | Low uniform ridge | Medium to high | Baseline | Shaping and basic structural borders |
| Reverse half double crochet | Thick raised cord | Low | 0.4-0.6 of single crochet speed | Bulky baskets and heavy blankets |
The best alternative depends on the edge’s job. Choose slip stitch when the finish should recede, picot when the perimeter needs a repeated point, and single crochet when you still need to correct the edge count or shape.
A crab stitch also differs from a decorative surface chain. Surface crochet lays a new line on top of existing fabric, whereas reverse single crochet consumes edge stitches and changes the perimeter’s tension.
How Do You Handle Corners and Curves?
Corners require extra spacing because a reverse stitch has limited ability to turn sharply. A square blanket commonly needs two or three crab stitches in the corner space, while a rounded corner may need one stitch or no increase, depending on the base edge.
| Edge situation | Starting placement | Adjustment | Warning sign |
|---|---|---|---|
| Straight blanket side | 1 per base stitch | Keep spacing even | Wavy line indicates excess stitches |
| Square corner chain space | 2-3 stitches | Work into the space without crowding | Corner folds inward |
| Gentle curve | 1 per edge stitch | Test over 10-15 stitches | Edge develops sharp points |
| Tight inward curve | 0-1 per base stitch | Skip selectively | Fabric puckers |
| Outside curve | 1-2 per base stitch | Add only when needed | Border flares outward |
For a corner made from a chain-2 space, placing three stitches into the space can preserve the turn, but the correct number depends on the yarn and the angle. Work the corner loosely, then assess the fabric before continuing.
On a curved neckline, do not force a fixed 1:1 ratio. A curve needs fewer stitches on an inside turn and potentially more on an outside turn. The edge should lie flat when placed on a table.
What Causes Puckering, Curling, and Uneven Stitches?
Puckering usually results from excessive tension or too many border stitches, while a loose or flared edge usually indicates too few placements. Turning the work creates a different texture and direction, so the border can lose its continuous cord appearance.
| Problem | Likely cause | Immediate fix | Long-term prevention |
|---|---|---|---|
| Edge pulls inward | Tight loops or small hook | Undo 5-10 stitches and loosen | Use a 0.5-1.0 mm larger hook |
| Border ripples | Excess stitches on side edge | Remove one placement per section | Calculate row-to-stitch ratio |
| Corner folds | Too few corner stitches | Add one stitch in the corner | Test the turn before full round |
| Ridge looks flat | Wrong insertion point | Recheck complete stitch entry | Practice under both loops |
| First join is visible | Uneven beginning and ending | Rework the final transition | Use a controlled slip-stitch join |
| Twists face different ways | Hook rotated inconsistently | Undo back to the last uniform stitch | Keep the hook orientation stable |
The mistake most often seen in practice is tightening the loop immediately after drawing it up. The new loop should reach approximately the height of the working loop already on the hook. Pulling it smaller makes every following stitch fight for space.
Expert Insight: The Border Can Reveal a Base-Edge Problem
A crab stitch rarely fixes an uneven foundation edge. Its compact ridge makes differences in row height more visible, so a side that looked acceptable under a loose single crochet may show distinct dents after reverse edging.
Check the base edge before adding the finish. If the edge varies by more than one stitch height over a short section, correct the foundation or add a preparatory round that evens the spacing.
Expert Insight: More Yarn Does Not Always Mean Better Coverage
A very tight reverse stitch can consume extra yarn while covering less horizontal distance. The yarn disappears into compressed loops instead of producing a longer border, which is why loosening tension can reduce total consumption even though each stitch looks larger.
What Yarn and Hook Should You Use?
Smooth yarn with clear stitch definition produces the cleanest crab-stitch ridge. Cotton, wool, acrylic, and blends can all work, but fuzzy, boucle, and heavily textured yarns hide the twist and make insertion points difficult to identify.
| Yarn choice | Common weight | Suggested hook adjustment | Visual result |
|---|---|---|---|
| Smooth cotton | 3-4 | Same size or +0.5 mm | Crisp, firm ridge |
| Acrylic worsted | 4 | Same size or +0.5-1.0 mm | Defined, moderate structure |
| Wool worsted | 4 | Same size | Soft ridge with blocking response |
| Bulky acrylic | 5-6 | Same size or +1.0 mm | Heavy, prominent border |
| Boucle or eyelash yarn | 3-6 | Not recommended for beginners | Low stitch visibility |
A contrasting solid color makes the ridge easier to inspect and emphasizes the perimeter. A matching color produces a quieter finish and can conceal small inconsistencies.
If the project uses a recommended 5.0 mm hook, test the edging with 5.0 mm first. Move to 5.5 or 6.0 mm only if the border contracts, the hook catches repeatedly, or the fabric begins to cup.
Is a Crab Stitch Good for Left-Handed Crocheters?
Left-handed crocheters can work the same stitch without changing its construction. The practical direction reverses: a left-handed maker usually moves from right to left, keeps the same side facing, and inserts into the next stitch on the left.
Video demonstrations can create confusion because a left-handed mirror image may appear to travel in the opposite direction from written instructions. The reliable test is visual: each new stitch should form the same twisted ridge and the finished edge should remain flat.
For a pattern written specifically for right-handed makers, follow the stitch mechanics rather than the directional wording. “Work to the right” is hand-dependent, while “insert into the next stitch without turning” describes the technique more reliably.
Can You Use It on Joined Rounds?
A crab stitch can finish a joined round, but the final join needs planning because the first and last stitches meet at a visible seam. Begin near a side or corner rather than in the most prominent center area when the design allows.
A practical joining sequence is:
- Finish the final reverse stitch near the starting point.
- Compare the height and twist of the final stitch with the first stitch.
- Slip stitch into the starting area without pulling tightly.
- Fasten off with a needle or a discreet hook join.
- Weave the tail through nearby loops rather than crossing the ridge sharply.
A seamless appearance is difficult when the first stitch is made directly beside a chain-1 starting point. The transition can be softened, but the border is still a directional stitch rather than a perfectly continuous applied cord.
What Is the Main Limitation of This Stitch?
The main limitation of crab stitch is reduced flexibility combined with sensitivity to tension and edge spacing. The finish can make a garment opening feel firm, draw a blanket edge inward, or expose uneven side-row calculations more clearly than a softer border.
It also has a learning curve. The hand motion feels backward for makers trained to move from right to left, and the hook can catch the previous stitch if the working loop is held too tightly.
Do not choose the stitch solely because it resists curling. A stable base fabric, correct blocking, and an appropriate border count determine whether the finished edge lies flat. The reverse edging adds structure, but it cannot compensate for a distorted foundation.
Frequently Asked Questions About What Is a Crab Stitch in Crochet
Is a crab stitch the same as reverse single crochet?
Yes. In most crochet patterns, crab stitch and reverse single crochet describe the same technique: a single crochet worked in the opposite direction without turning the project. Pattern designers may abbreviate it as crab stitch, reverse sc, or RSC, so check the pattern’s terminology before starting.
Does a crab stitch add stitches?
A crab stitch normally does not add stitches because one reverse single crochet replaces one base-edge stitch. In corners and curves, however, you may need two or three stitches in a space, or fewer placements along an inside curve, to keep the edge flat.
Why is my crab stitch going the wrong way?
The stitch may look wrong if the work was turned, the hook entered the preceding stitch, or the loop was twisted inconsistently. Keep the same side facing, move opposite the normal crochet direction, and compare several consecutive ridges rather than judging one isolated stitch.
Can beginners crochet this edging?
Beginners can learn the edging after becoming comfortable with single crochet, but the reverse movement often feels awkward at first. Practice 20-30 stitches on a scrap swatch, keep the loops loose, and use smooth yarn so the insertion point remains visible.
How do you finish a crab stitch row neatly?
Finish by working the final stitch, then slip stitch into the starting area without tightening the join. Fasten off and weave the tail through nearby loops. Starting near a side seam or corner usually hides the transition better than starting at the visual center.
Does crab stitch prevent curling?
Crab stitch can reduce curling by creating a firm perimeter, but it cannot guarantee a flat project. Excessive tension, an incorrect side-edge ratio, or a naturally curling fabric can still distort the result. Block the base fabric and test the border on one section before completing it.
Conclusion
A crab stitch in crochet is a reverse single crochet edging that creates a compact, twisted ridge without turning the work. Use approximately one stitch per edge stitch as a starting point, reserve 10-25% extra yarn, and increase the hook by 0.5-1.0 mm if the border contracts. Smooth yarn, relaxed loops, deliberate corner spacing, and a blocked foundation produce the most reliable finish.