

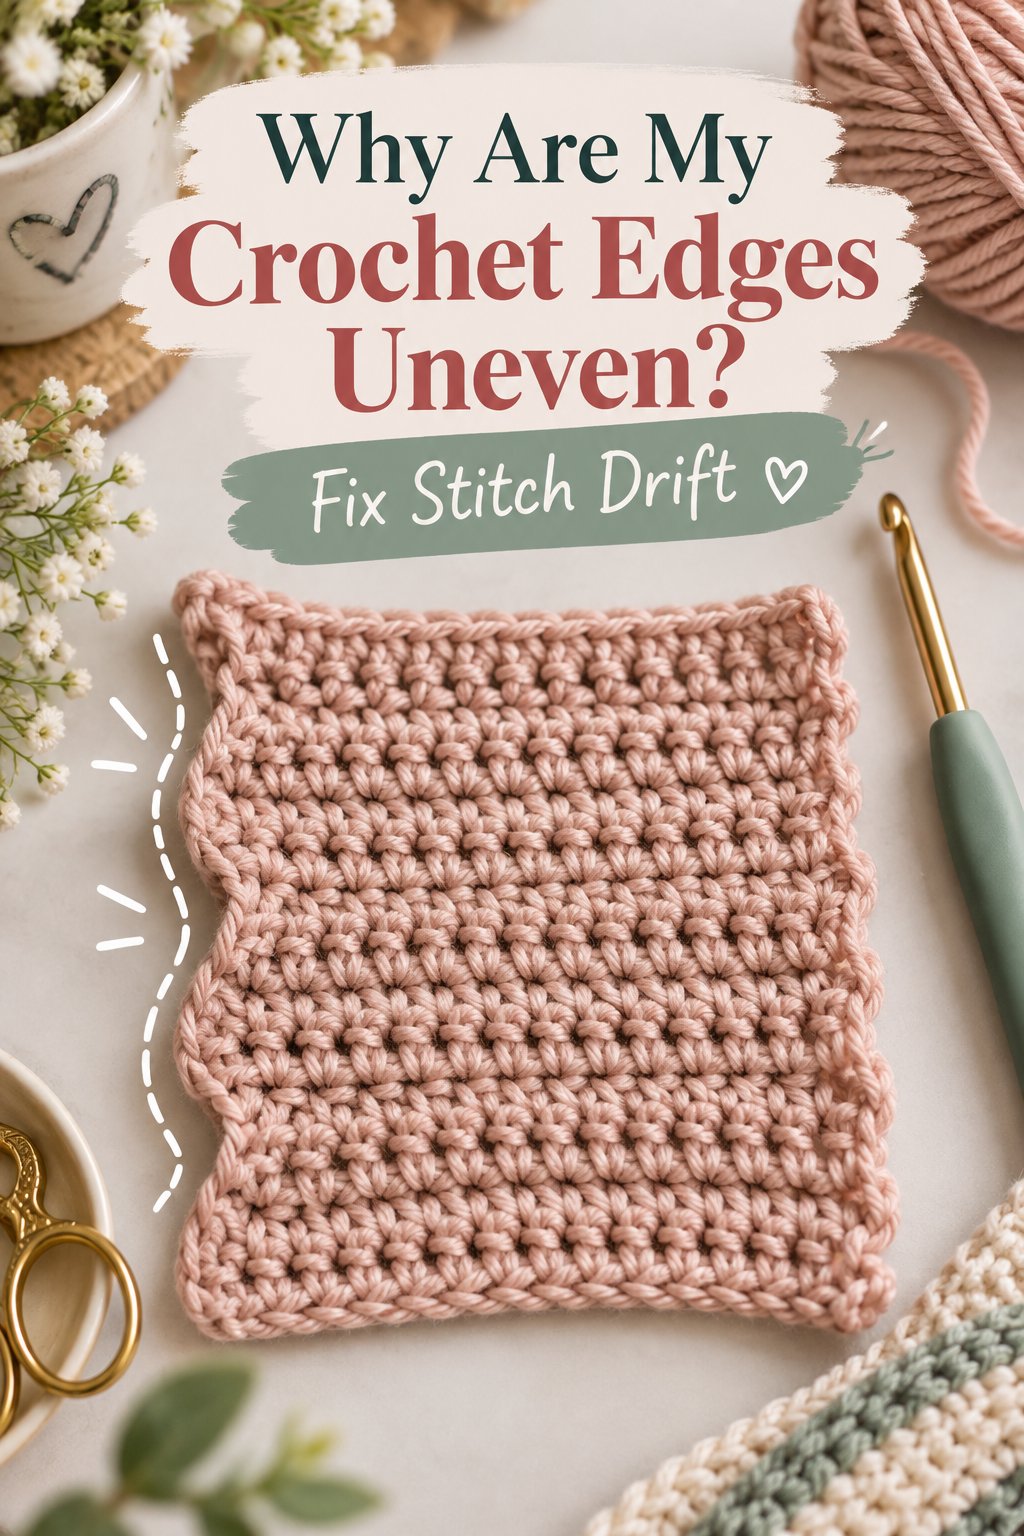
Why are my crochet edges uneven? Uneven crochet edges are sides that wave, step inward, or flare outward because stitch counts, turning-chain treatment, or yarn tension change between rows. The most common cause is one missed or extra stitch at a row end, but foundation chains, hook changes, stitch orientation, and textured patterns can also distort the edge.
Key Facts
A project that narrows by one stitch per row usually has a repeated missed stitch at the first or last position.
A project that widens by one stitch per row often includes both the turning chain and the stitch beside it when only one should count.
Single crochet usually uses chain 1 without counting it as a stitch; double crochet commonly uses chain 3 as the first stitch, but the pattern controls.
Count stitches before turning whenever the edge matters. For a 30-stitch row, the next row should also contain 30 stitches.
Blocking can relax tension ripples, but it cannot restore stitches that were never worked.
Locking stitch markers typically cost $2-$5 and can prevent hours of unraveling on a blanket.
What Uneven Crochet Edges Reveal
Uneven crochet edges reveal a change in stitch count, stitch height, fabric tension, or row placement. A straight side requires the same number of functional stitches in every row and a consistent method for handling the first and last stitch. The shape of the edge often identifies the error before you unravel anything.
A steadily narrowing piece points to repeated decreases caused by missed stitches. A steadily widening piece points to accidental increases, commonly created by working into both a turning chain and the adjacent stitch. Waves that alternate between tight and loose rows usually indicate tension changes or inconsistent turning chains rather than a fixed count error.
Measure the stitch count across two or three consecutive rows before making repairs. If the count changes, correct the stitch placement first. If the count remains stable but the side still ripples, investigate tension, hook size, foundation-chain tightness, and blocking.
Quick Diagnosis Table
| Edge appearance | Typical count change | Most likely cause | First check |
|---|---|---|---|
| Narrows evenly | Minus 1 stitch per row | Missed first or last stitch | Count the final stitch |
| Widens evenly | Plus 1 stitch per row | Turning chain counted twice | Check chain and adjacent stitch |
| Alternating waves | Stable or changing count | Uneven tension | Compare loop size |
| Stair-step edge | Stable count with offsets | Turning position changes | Mark row starts |
| Loose first edge | Stable count | Foundation chain too relaxed | Compare chain width |
| Tight first edge | Stable count | Foundation chain too tight | Use a larger starting hook |
Expert insight: Many crocheters inspect the side edge first, but the more reliable evidence is the top row. The top loops form a repeated series of small “V” shapes. Counting those Vs is usually more accurate than counting vertical posts or trying to judge the fabric by eye.
How Turning Chains Change Edge Shape
Turning chains change edge shape because they may function as the first stitch or only lift the working loop to the next row’s height. The pattern’s instruction determines whether the chain is included in the stitch count. Applying a single rule to every stitch height is a common source of edge drift.
For single crochet, chain 1 often provides height and does not count as a stitch. For half double crochet, chain 2 may or may not count. For double crochet, chain 3 often counts as the first stitch, although many modern patterns use a chain 2 that does not count to create a tighter edge.
Read the pattern’s stitch-count instruction as the controlling rule. If the pattern says “chain 3, turn, dc in first stitch,” the chain may count or may be a height-only chain depending on the stated convention. Never infer the rule solely from chain length.
Turning-Chain Rules by Stitch
| Stitch | Common turning chain | Common count treatment | Usual first insertion point |
|---|---|---|---|
| Single crochet | Chain 1 | Does not count | First actual stitch |
| Half double crochet | Chain 2 | Pattern-dependent | First stitch or second position |
| Double crochet | Chain 2-3 | Often counts with chain 3 | Second stitch if chain counts |
| Treble crochet | Chain 3-4 | Frequently counts | Second stitch if chain counts |
| Linked double crochet | Chain 2-3 | Pattern-dependent | Follow row-specific instruction |
Finding the Hidden End Stitch
The hidden end stitch is the last actual stitch at the row edge, often located beside the turning chain and lower than neighboring stitches. It can lean toward the side, making its top loops difficult to distinguish from the turning chain’s base.
At the end of a row, rotate the work slightly so the top edge faces you. Identify the final “V” created by the last stitch, then compare it with the stitch count. If the turning chain counts, the last actual stitch may be worked before the chain rather than into the chain itself. If the chain does not count, the last stitch is usually the final visible V before turning.
Place a locking marker through the top loops of the first and last actual stitch. On the following row, work into the marked positions according to the pattern. This is especially useful for dark yarn, fuzzy yarn, chenille, and rows longer than 40 stitches.
Which Edge Pattern Matches Your Mistake?
The edge pattern usually distinguishes a count error from a tension problem. A triangle shape means the project loses width repeatedly, a flare means it gains width repeatedly, and an hourglass shape means the width changes direction or the fabric tension varies.
Use the project’s measured width and stitch count together. A 5% width change with the same stitch count suggests tension or gauge variation. A stitch-count change confirms that insertion or turning-chain management is involved.
- Triangle effect: The work becomes narrower toward the top.
- Flare effect: The work becomes wider toward the top.
- Hourglass effect: The sides move inward and outward over different row groups.
- Sawtooth edge: The row ends form visible steps because the turning position changes.
- One-sided wave: One edge is irregular while the other remains straight, pointing to a repeated problem at one side.
Shape-Based Troubleshooting
| Visual pattern | Width change over 10 rows | Count pattern | Corrective action |
|---|---|---|---|
| Triangle | Minus 2-5 cm | Drops 1 stitch repeatedly | Mark first and last stitches |
| Flare | Plus 2-5 cm | Gains 1 stitch repeatedly | Exclude an unintended chain |
| Hourglass | Minus 2 cm, then plus 2 cm | Irregular | Count every row and check tension |
| Sawtooth | Less than 1 cm per row | Often stable | Standardize turning position |
| One-sided wave | 1-3 cm on one edge | Usually changes | Inspect that edge’s stitch only |
How to Prevent Uneven Sides
Crochet edges stay straighter when the stitch count, turning method, and tension remain constant from row to row. A reliable routine uses physical markers, written counts, and a brief visual inspection instead of relying on memory or the apparent width of the fabric.
Follow this process for a new project:
- Make the foundation chain with deliberate, even tension.
- Record the required stitch count beside the pattern.
- Mark the first and last actual stitch of the first completed row.
- Complete the next row using the pattern’s turning-chain rule.
- Count the top loops before turning.
- Compare the row width with the previous row.
- Correct the row immediately if the count differs.
- Recheck after every 5-10 rows on long projects.
A row counter records progress, but it does not prove stitch accuracy. A counter can tell you that 25 rows are complete while the fabric has lost five stitches. Stitch markers and physical counting solve different problems.
Expert insight: Marking both edge stitches is more effective than marking only the turning chain. The turning chain can count differently from one pattern to another, while the marker identifies the actual fabric stitch you need to locate.
Stitch-Management Options
| Method | Typical cost | Time per row | Best use | Main limitation |
|---|---|---|---|---|
| Locking stitch markers | $2-$5 per pack | 5-10 seconds | Blankets and dark yarn | Requires repositioning |
| Manual counting | $0 | 20-60 seconds | Rows under 30 stitches | Easy to interrupt |
| Row counter | $3-$10 | 2-5 seconds | Tracking total rows | Does not verify stitches |
| Edge markers plus counting | $2-$15 | 30-75 seconds | Long straight projects | Slightly slower |
| Paper tally sheet | Under $2 | 15-30 seconds | Repetitive motifs | Can be misplaced |
When Tension Is the Real Problem
Tension is the real problem when stitch counts remain constant but the edge width changes from row to row. A tighter working hand produces shorter stitches and narrower fabric, while a looser hand produces taller or wider stitches. Switching hooks, yarn brands, or crochet posture can intensify the difference.
Check three consecutive rows. If each row has the required number of stitches but the widths vary by more than a few millimeters, measure gauge rather than frogging immediately. A typical small swatch of 10 cm may vary by 1-2 cm when tension changes significantly, even with the same stitch count.
Common tension triggers include:
- Holding the yarn tightly during difficult stitches.
- Pulling the turning chain shorter than the working stitches.
- Crocheting faster after becoming familiar with the pattern.
- Working with hand fatigue during a long blanket session.
- Changing from a metal hook to a plastic hook with a different grip.
- Replacing yarn with a different fiber, twist, or thickness.
Keep the hook size fixed during the project. If the fabric feels too tight, test a larger hook on a new swatch rather than changing midway through the main piece.
Turning-Chain Height and Edge Quality
Turning-chain height affects the vertical alignment of row ends. A chain that is too short pulls the edge downward, while a chain that is too loose creates a gap or a visible bump. The correct height depends on stitch structure and the pattern’s stated method.
Typical Turning-Chain Measurements
| Stitch height | Typical chain length | Common edge issue | Practical adjustment |
|---|---|---|---|
| Single crochet | 1 chain | Tight corner | Keep chain relaxed |
| Half double crochet | 2 chains | Gap or leaning edge | Test chain 1 if pattern permits |
| Double crochet | 2-3 chains | Tall gap | Use the pattern’s non-counting method |
| Treble crochet | 3-4 chains | Loose corner | Avoid pulling chain tight |
| Moss stitch | 1 chain | Uneven spacing | Work into chain spaces consistently |
A stacked single crochet can replace a chain-3 turning method in some double-crochet fabrics. It creates height from stacked stitch loops rather than a separate chain and may reduce side gaps. The technique requires consistent insertion into the stacked loops, so it is not automatically easier.
Skipping the turning chain works well for many single-crochet rows when the chain only adds height. It is unsuitable when the pattern explicitly counts the chain or when a taller stitch needs additional vertical lift.
How to Fix an Uneven Crochet Edge
Fix an uneven crochet edge by first identifying whether the problem is a changed count, inconsistent tension, or a distorted foundation chain. Correct an active row by unraveling to the first wrong position, then rework the row with markers. A completed project may need frogging, blocking, or a border depending on the size and location of the defect.
Do not add random stitches to force the edge straight. That may hide one symptom while changing the total geometry of the project.
Repair Choices by Error Size
| Error size | Project status | Typical repair time | Recommended method | Expected result |
|---|---|---|---|---|
| 1 stitch in 1 row | Active row | 1-2 minutes | Unravel and rework | Fully restored edge |
| 1 stitch across 5 rows | Active project | 5-15 minutes | Frog to first error | Usually invisible |
| 2-4 cm over 20 rows | Finished panel | 30-60 minutes | Border or partial unravel | Improved, not perfect |
| More than 5 cm | Finished panel | 1-4 hours | Unravel to error | Best structural correction |
| Tension-only ripple | Finished panel | 20-40 minutes | Wet block and pin | Often improved |
Expert insight: Repair the earliest confirmed error, not the most visible point. A missed stitch at row 4 can cause a severe lean by row 30, but correcting row 30 alone leaves the underlying width change in place.
What Blocking Can and Cannot Fix
Blocking can relax uneven tension, open stitch spaces, and align a fabric whose stitch count is already correct. Blocking cannot recreate a missing stitch, remove a true increase, or make a triangular panel rectangular without distorting the finished fabric.
For acrylic yarn, steam blocking can permanently alter the fiber and flatten texture, so use controlled heat and avoid touching the yarn with the iron or steamer. For wool and some animal fibers, wet blocking can reshape the fabric more gently, but excessive stretching may prevent the piece from returning to its intended dimensions.
Test a small corner or swatch first. Record the pre-blocking width, apply the chosen method, and compare the result after drying completely.
Situational Fixes for Common Projects
Different crochet projects expose different edge errors. A scarf shows width drift quickly because its sides are long and uninterrupted, while a granny-stitch blanket may hide increases inside corner spaces or shell groups. Ribbing can look uneven even when its stitch count is correct because rows contract and expand.
Blanket Edges
Blanket panels need markers every 10-20 stitches, especially when the row contains repeated groups. Count complete groups as well as individual stitches. If a pattern has six groups of five stitches, verify both six groups and the expected total count.
A border can correct a minor visual difference of approximately 1-2 cm when the fabric is structurally sound. A border cannot reliably fix a blanket that gains or loses several stitches per row.
Scarves and Rectangles
Long scarves magnify a small error. Losing one stitch every 10 rows may create a visible taper after 100 rows. Measure the width at the beginning, middle, and end rather than judging the entire scarf while it lies loosely on a surface.
For a rectangular panel, compare diagonals after laying it flat. If one diagonal is substantially longer, the piece may be skewed by tension or edge placement even when the stitch count matches.
Granny Stitch and Cluster Patterns
Granny patterns require counting spaces, clusters, and corner increases. Working into an extra space at a row end can create a flare that looks like a tension problem. Follow the pattern’s instruction for whether the turning chain replaces a cluster or only raises the hook.
Joined Rounds
Joined rounds can create a jog rather than a straight seam. The jog is often caused by slip-stitch height, joining position, or a beginning chain that counts inconsistently. Use an invisible join or a standing stitch only when the pattern supports that construction.
Should You Frog the Project or Add a Border?
Frogging is preferable when the stitch count changes repeatedly, the width difference exceeds roughly 2 cm, or the edge will remain visible without a border. A border is reasonable when the count is stable, the distortion is minor, and the finished dimensions still meet the project’s purpose.
Unraveling usually costs no yarn because the material can be reused, but it costs time and may roughen delicate fibers after repeated handling. A 20-row repair commonly takes 15-45 minutes, while a large blanket can require several hours if the error is far below the current row.
Repair Decision Guide
| Condition | Count status | Visual impact | Best choice | Typical time |
|---|---|---|---|---|
| One missed stitch just completed | Wrong by 1 | High if repeated | Frog immediately | 1-2 minutes |
| Stable count, mild ripple | Correct | Low | Block first | 20-40 minutes |
| Minor edge difference | Correct or off by 1 | Medium | Add a border | 30-60 minutes |
| Repeated narrowing | Drops each row | High | Frog to first error | 30 minutes to several hours |
| Delicate, fuzzy yarn | Uncertain | Variable | Avoid repeated frogging | Test a swatch first |
A border should be designed, not improvised. Use a smaller hook if the border flares, add stitches only at corners, and space edge stitches evenly according to row height. Single crochet along a double-crochet side may require approximately one stitch per row, but the correct ratio depends on yarn, hook, and tension.
Why Are My Crochet Edges Uneven After Counting?
Crochet edges can remain uneven after counting when the stitch count is correct but the stitch height, tension, turning-chain size, or foundation chain varies. Counted rows may still lean if the first and last stitches are loose, if the fabric is not resting flat, or if the pattern naturally creates a textured edge.
Check whether the work is being stretched during measurement. A relaxed fabric and a pulled fabric can differ by several centimeters on a large piece. Also compare the first and last stitch heights, because a single oversized edge stitch can create a visible wave without changing the count.
Frequently Asked Questions About Why Are My Crochet Edges Uneven
Why is only the first crochet row uneven?
The first row is often uneven because the foundation chain has inconsistent tension or the hook is inserted into different parts of each chain. A tight chain contracts the lower edge, while loose chain spaces create gaps. Use a hook one size larger for the foundation chain if the first row feels difficult, then switch to the stated size.
Can I straighten crochet edges without unraveling?
You can sometimes straighten crochet edges without unraveling by wet blocking, steam blocking suitable synthetic yarn cautiously, or adding a carefully measured border. These methods work best when the stitch count is correct and the distortion is under about 1-2 cm. They cannot repair repeated increases or decreases.
Why does one side of my crochet project look worse?
One side usually looks worse because the first or last stitch is being treated differently from row to row. The problem may also come from turning the work in a way that hides the edge stitch. Mark the actual first and last stitches, then inspect that side after each row for five consecutive rows.
Do crochet edges become straighter with practice?
Crochet edges generally become straighter with practice because hand tension, stitch recognition, and row-end placement become more consistent. Practice alone does not replace counting, however. A repetitive pattern can reinforce the same error, so combine practice with a fixed turning-chain rule and periodic stitch-count checks.
Should I use a border on a crooked crochet blanket?
Use a border on a crooked crochet blanket when the fabric has a stable stitch count and the edge difference is small enough for the border to absorb. Measure each side first. If the blanket narrows or widens substantially, unraveling to the earliest error will produce a more stable result than forcing the border to compensate.
How often should I count crochet stitches?
Count crochet stitches after every row when learning a new pattern or working a shaped rectangle. For a familiar pattern, count every 5-10 rows and whenever you finish a repeat section. Always recount after interruptions, because a single missed stitch can change the edge direction over the next several rows.
Conclusion: Why Are My Crochet Edges Uneven?
Why are my crochet edges uneven? The answer is usually a missed or added stitch at a row end, an unclear turning-chain rule, or changing tension. Count the top loops, identify whether the fabric narrows or widens, mark the first and last actual stitches, and correct the earliest confirmed error. Use blocking for tension distortion and a border only for minor, structurally stable flaws.