

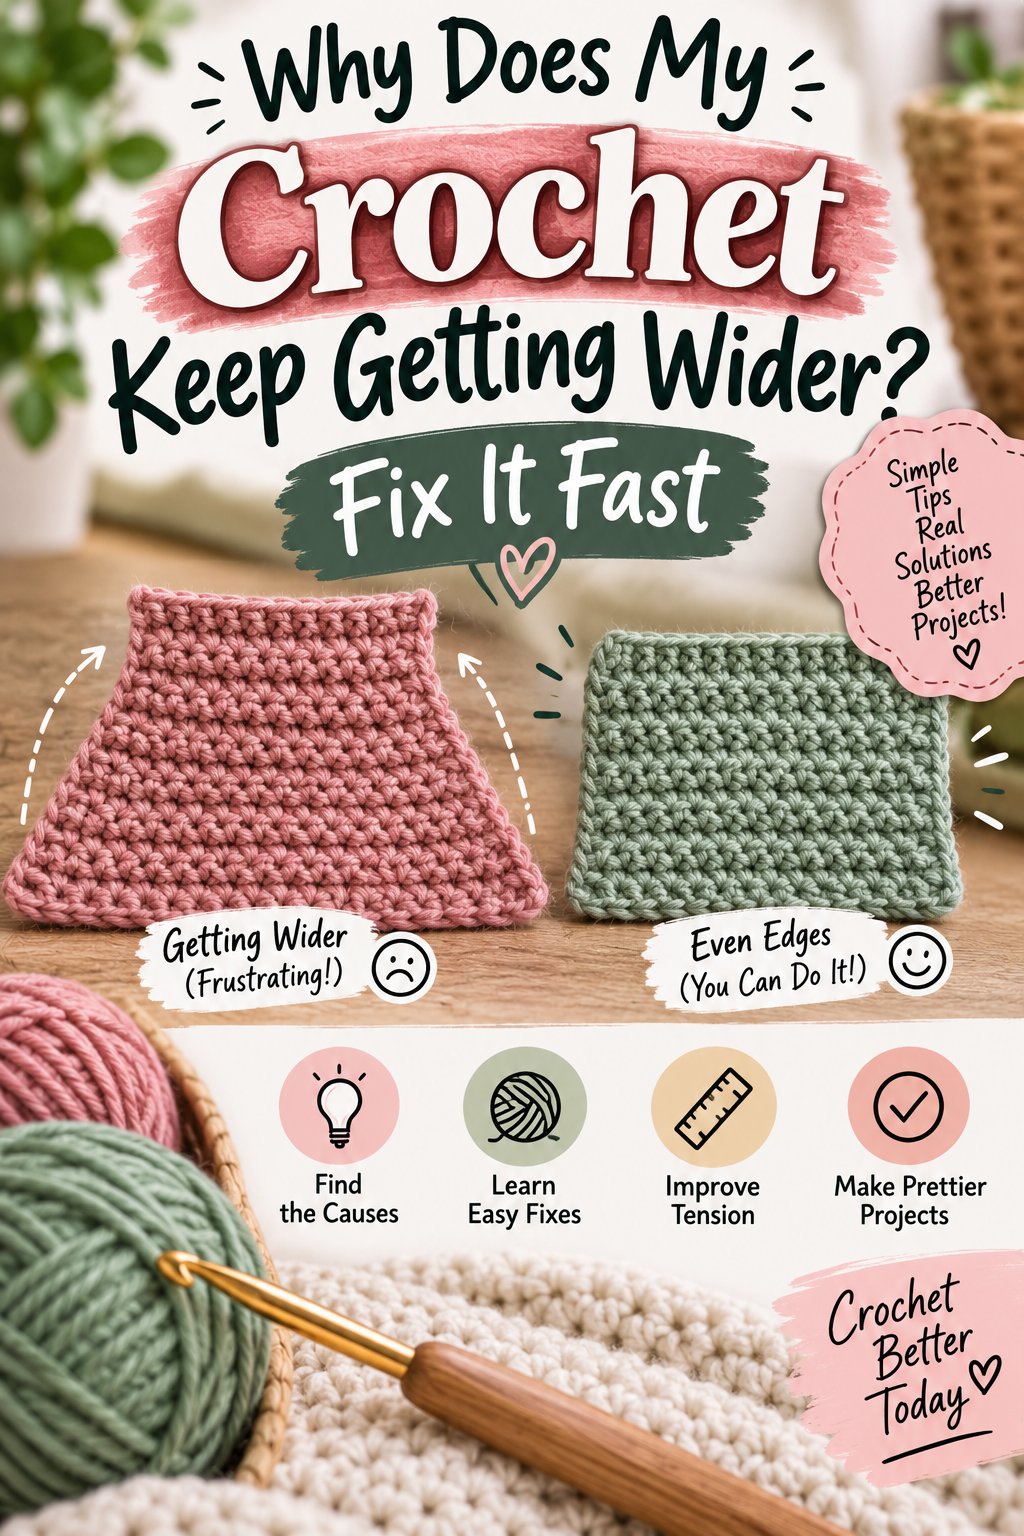
Why does my crochet keep getting wider? Crochet fabric usually widens because the stitch count increases at one or both row ends, although looser tension can also make the same number of stitches occupy more space. The fastest diagnosis is to count stitches, compare row widths, and inspect the first and last stitch before choosing a repair.
Key Facts and Quick Answer
One unintended stitch per row adds 50 stitches across a 50-row project and gradually changes a rectangle into a trapezoid.
A widening edge usually comes from working into the wrong turning-chain space, adding a stitch beside the first or last stitch, or splitting one stitch.
If every row has the correct count but becomes physically wider, the main problem is tension or gauge, not increases.
Single crochet turning chains generally do not count as stitches; double crochet turning chains commonly count as one stitch, depending on the pattern.
Frogging is the only reliable correction for major stitch-count growth. Blocking can improve shape, but it cannot remove extra stitches.
Count one complete row before repairing anything. Guessing from the edge often misidentifies the first incorrect row.
Why Crochet Fabric Widens
Crochet fabric widens when either the number of stitches rises from row to row or each stitch becomes physically larger. Stitch-count growth creates a mathematical increase, while tension drift changes gauge without changing the count. The two problems can look similar, but they require different repairs.
A rectangular swatch should maintain nearly the same stitch count and width across its rows. If a foundation contains 30 working stitches, a plain row should normally contain 30 stitches unless the pattern explicitly adds increases. A row with 31 stitches may look harmless, but repeated growth changes the edge angle.
The most common location is the row end. Beginners often finish the final stitch, then work another stitch into the turning chain or the gap beside the edge stitch. The opposite error also occurs: a crocheter skips the true first stitch, then compensates by adding a stitch elsewhere.
| Symptom | Likely cause | Confirmation test | Usual correction |
|---|---|---|---|
| Both edges flare gradually | One extra stitch at each row or one recurring edge increase | Count several rows and compare both sides | Undo to the first wrong row |
| One edge slopes outward | Extra stitch at one row end | Mark the sloping edge and inspect row ends | Remove the edge stitch |
| Width increases but count stays constant | Looser tension or larger golden loop | Count stitches and measure 10 cm of fabric | Rework with consistent tension |
| Edge has small holes or bumps | Turning-chain placement error | Trace the top V stitches at the edge | Identify the true first or last stitch |
| One row is suddenly much wider | Accidental increase or pattern mistake | Compare the sudden-change row with the previous row | Undo only to that row |
The stitch-count test
Lay the project flat without stretching it. Count the top V-shaped stitches across one complete row, including the edge stitches but excluding a turning chain when the pattern says it does not count. Repeat the count on three rows.
If the counts are 30, 31, and 32, the project is gaining stitches. If the counts remain 30 while the measured width grows, tension is changing. If counts vary unpredictably, both stitch placement and tension may be involved.
How Turning Chains Change the Edge
Turning-chain rules determine whether the chain belongs to the row’s stitch count. A turning chain that counts as a stitch creates an extra vertical column at the edge, while a chain that does not count leaves the first actual stitch directly beside the turning point.
Pattern conventions differ, so the written instructions control the result. The Craft Yarn Council defines gauge as the number of stitches and rows in a specified measurement, a useful reminder that both stitch quantity and physical dimensions matter when checking crochet fabric.
| Stitch type | Common turning-chain height | Common counting rule | Where the next row often starts |
|---|---|---|---|
| Single crochet | Chain 1 | Usually does not count | First stitch immediately beside the chain |
| Half-double crochet | Chain 2 | Often does not count | First half-double crochet beside the chain |
| Double crochet | Chain 3 | Commonly counts as one stitch | Second stitch, with the chain occupying the edge column |
| Treble crochet | Chain 4 | Often counts as one stitch | Second stitch, unless the pattern states otherwise |
The dangerous moment comes at the return pass. If a double-crochet turning chain counts as a stitch, placing a double crochet into the same edge space can create an increase. If a single-crochet chain does not count, skipping the first actual stitch creates a decrease.
A practical edge-marking method
At the end of a row, place one removable marker through the final actual stitch. Place a second marker through the first actual stitch after turning. On the next pass, work only within the marked boundaries unless the pattern instructs an increase.
Markers do not replace counting. They identify the boundary so that counting becomes repeatable, especially when the first or last stitch is compressed by the turning chain.
Foundation Chain and First-Row Errors
The foundation chain is a series of chains, not a series of completed row stitches. The starting slip knot and working loop are not normally counted as stitches. Treating either as a stitch can make the first row too long or shift every later edge.
A typical first-row instruction such as “single crochet in the second chain from hook” leaves the chain nearest the hook unworked as a turning chain. The active loop on the hook is not a chain to enter. The slip knot anchors the yarn but does not provide a top V for a normal stitch.
Inspect the foundation from the underside before beginning. Each chain has a front loop and a back ridge, and the pattern may specify which strand to use. Inserting into inconsistent parts of the chain can make the first row uneven even when the stitch count is technically correct.
| Foundation mistake | Immediate result | Later appearance | Best prevention |
|---|---|---|---|
| Working into the chain nearest the hook | First row gains one stitch | One edge begins wider | Skip the instructed number of chains |
| Treating the slip knot as a stitch | False starting stitch | Row count and edge position shift | Count only chain spaces with a usable entry |
| Missing the final foundation chain | First row loses one stitch | One edge pulls inward | Mark the required last chain |
| Inserting through inconsistent loops | Uneven row width | Twisted or ridged foundation | Use the same chain strand throughout |
| Making loose foundation chains | First row appears shorter or wider | Edge gauge differs from later rows | Use a larger hook for the chain only |
Less Obvious Causes of Extra Width
Not every increase happens at an edge. A split stitch, accidental shell, repeated yarn over, or misplaced post stitch can add width inside the row. These errors are harder to see because the outer edge may remain visually straight for several rows.
A stitch normally has a top V made by a front loop and back loop. Inserting the hook between vertical strands can split the stitch or enter a space that the pattern did not designate. The result may resemble two adjacent stitches, particularly in half-double and double crochet fabric.
Pattern repeats create another trap. A written instruction such as “repeat across” may require a final edge stitch after the repeat. Stopping immediately after the last repeat can produce a decrease, while repeating one group too many produces an increase. Read the full row instruction before counting.
- Accidental increases in shell, V-stitch, and granny patterns
- A second yarn over in a tall stitch
- Working around a post stitch instead of into the top loops
- Inserting into a chain space and the adjacent stitch
- Repeating a motif one time too many
- Mistaking a skipped stitch for an available space
Why only one side may get wider
A project that widens on one side usually has a single recurring edge error, not a general tension problem. The crocheter may be adding a stitch after the turning chain on every return row or placing the final stitch into both the last stitch and the turning-chain space.
A project that widens on both sides may have one extra stitch at each edge, a turning-chain rule applied incorrectly on both ends, or a pattern increase that has been repeated unintentionally. Mark the first and last stitch separately to distinguish these cases.
Tension Without Guesswork
Tension makes crochet wider when the stitch count stays constant but the loops, stitches, or spaces become larger. A relaxed grip, a different sitting position, fatigue, a new yarn lot, or a hook change can alter width even when the crocheter follows the pattern exactly.
The golden loop is the loop pulled up immediately after inserting the hook and drawing up yarn. For consistent fabric, raise that loop to approximately the height of the hook shaft rather than lifting it high or choking it tightly against the hook head.
Measure a representative section, not a stretched edge. A 10 cm or 4-inch gauge measurement across the middle of the fabric reveals width change more accurately than comparing a loose foundation chain with a finished row.
| Tension variable | Typical effect | Diagnostic clue | Adjustment |
|---|---|---|---|
| Larger golden loop | Wider, softer stitches | Same count, greater row width | Raise loops only to shaft height |
| Tighter grip | Narrower, denser fabric | Hook movement feels restricted | Relax fingers and slow down |
| Larger hook | Larger stitches and spaces | Width changes immediately after swap | Return to the original hook |
| Loose foundation chain | First edge exceeds later gauge | Foundation looks longer than row | Use a smaller chain hook |
| Fatigue after many rows | Gradual width increase | Later rows feel faster and looser | Stop, measure, and reset tension |
Expert insight: changing hook material can change tension indirectly, even when hook size is identical. A polished aluminum hook may glide through yarn faster than a grippy bamboo hook, encouraging larger loops. The nominal size controls hook diameter, not the crocheter’s hand behavior.
How Much Damage Can One Extra Stitch Cause?
One extra stitch per row adds one stitch to every subsequent row if the error is not corrected. In a 50-row project, that pattern creates approximately 50 additional stitch placements by the final row, although the physical width depends on stitch type, yarn, and gauge.
Suppose a 30-stitch row measures 20 cm. If an extra stitch appears every row, the final row has 80 stitches after 50 rows. That is not a 50 percent width increase in every real fabric because the edge may distort and tension may compress, but the project cannot remain a 20 cm rectangle.
| Project example | Starting count | Error pattern | Final counted increase | Typical consequence |
|---|---|---|---|---|
| 20-row scarf section | 30 stitches | 1 extra each row | 20 stitches | Noticeable edge slope |
| 50-row blanket section | 80 stitches | 1 extra each row | 50 stitches | Trapezoid or rippled edge |
| 40-row hat panel | 60 stitches | 1 extra each row | 40 stitches | Poor seam alignment |
| 25-row garment panel | 100 stitches | 1 extra every fifth row | 5 stitches | Mild but measurable flare |
The cost of correction is usually time rather than money. Early frogging may take 2-5 minutes for one row, while finding and undoing an error 10 rows back can take 30-60 minutes, depending on stitch height and how firmly the yarn has been worked.
Typical direct material cost ranges from USD 0 to USD 20. Undoing and reusing the yarn costs nothing, but hiding a widening section with additional rows, a border, or replacement yarn may require part of another USD 5-20 skein.
Diagnosis Before Repair
The correct repair begins with locating the first row whose count or width differs from the established pattern. Repairing the newest row without finding that point often leaves hidden increases underneath and causes the edge to widen again.
Use a contrasting scrap yarn to mark the row where the count first changes. If the fabric is fuzzy, photograph the edge under bright side lighting; shadows reveal extra edge stitches more clearly than overhead light.
A reliable repair process
- Stop crocheting as soon as the width looks suspicious.
- Count the current row, then count two or three earlier rows.
- Compare the measured width at the same number of stitches.
- Inspect both row ends for a stitch beside the turning chain.
- Trace internal V stitches for splits, spaces, and accidental increases.
- Mark the first incorrect row with scrap yarn or a locking marker.
- Undo one row at a time until the count returns to the intended number.
- Rework the row with boundary markers and the stated turning-chain rule.
- Count the repaired row before continuing.
- Measure again after three new rows, not only after completing the project.
Do not pull rapidly when frogging tall stitches. A tight loop can pull through a neighboring stitch and make the true unraveling point difficult to identify. Ease the working yarn backward, then place the hook into the live loop before continuing.
Which Fix Should You Choose?
Frogging is the best repair when stitch count has increased significantly or when the project must fit a measurement. Borders and blocking can improve minor visual defects, but neither method removes extra stitches. Accidental decreases can disguise growth in low-stakes projects while permanently distorting the edge.
| Repair method | Typical time | Material cost | Preserves dimensions | Appropriate use |
|---|---|---|---|---|
| Frog to first wrong row | 2-60 minutes | USD 0 | Yes | Garments, hats, panels |
| Add a border | 15-90 minutes | USD 0-10 | Sometimes | Minor edge waviness |
| Block the fabric | 20-60 minutes | USD 0-15 | No, if count is wrong | Tension irregularity |
| Decrease gradually | 5-30 minutes | USD 0 | No | Fuzzy blankets or hidden edges |
| Keep the shape and adapt pattern | 0-20 minutes | USD 0-20 | No | Decorative, non-fitting projects |
When blocking can help
Blocking can relax cotton, wool, and some plant fibers into a more even shape. Steam or wet blocking may open lace and align stitches, but the fiber, yarn label, and care instructions determine the safe method. Acrylic often responds better to controlled steam than to soaking, and excessive heat can flatten or permanently change the fabric.
Blocking cannot turn 34 stitches into 30 stitches. It may make a slightly uneven 30-stitch panel look straighter, but a trapezoid caused by repeated increases remains structurally wider at one end.
When a border is enough
A border is reasonable when the count is correct and the edge has mild tension variation, or when the project is decorative and the final dimensions are flexible. A single extra stitch over a long edge may be absorbed by a carefully planned border, but several extra stitches usually create ripples or require uneven spacing.
Use a foundation single-crochet or slip-stitch edging to stabilize a loose edge before adding decorative rounds. Test the first border round over a short section; if it puckers, the border is too tight, and if it ruffles, too many stitches were added.
Project-Specific Decisions
Project purpose determines how strict the repair must be. A blanket can tolerate a small visual correction that would make a sweater sleeve unusable, while a hat depends on circumference and cannot safely absorb repeated increases along a straight side.
| Project type | Acceptable width variation | Preferred action | Main risk if ignored |
|---|---|---|---|
| Fitted sweater panel | 0-1 cm over 50 cm | Frog to the first wrong row | Seams and garment ease change |
| Hat crown or band | 0-0.5 cm | Recount and repair immediately | Circumference becomes incorrect |
| Scarf | 1-3 cm, depending on style | Border or selective repair | Edge twists or flares |
| Blanket | 2-5 cm may be visually tolerable | Border, blocking, or frogging | Rippling and excess yarn use |
| Amigurumi body | 0 stitches beyond pattern | Frog and recount rounds | Shape and stuffing tension fail |
Amigurumi needs special attention because increases are usually intentional and count-driven. A single extra stitch can shift the position of eyes, limbs, or color changes. In a flat blanket, the same error may be hidden by texture, but in a stuffed form it changes the silhouette.
For garments, compare the panel against the schematic before deciding. If the width difference changes sleeve, armhole, or neckline dimensions, repair the stitch count rather than relying on a border.
Preventing Future Widening
Consistent counting prevents most crochet growth before it becomes expensive. Record the intended stitch count at the start of the pattern, mark the first and last working stitches, and check the row after every major color change or pattern repeat.
Expert insight: counting every row is most useful when paired with a location check. A total of 30 stitches does not prove that the edge is correct if one internal increase was offset by an accidental decrease elsewhere. Count the row, then inspect the first, last, and repeat boundaries.
- Use the same hook size, brand, and handle style throughout the project.
- Place a marker in the first and final actual stitch.
- Write the target count on a paper label beside the project.
- Count after each row until five consecutive rows match.
- Measure width after the first 5 rows and again after every 10 rows.
- Check the golden loop when your fabric begins feeling looser.
- Keep the project supported so its weight does not pull stitches open.
- Recheck gauge after changing yarn color, fiber, or skein.
A stitch marker placed in the turning chain can mislead you when the chain does not count as a stitch. Place markers in actual stitch loops or use a scrap-yarn running marker that clearly separates the edge from the turning chain.
Frequently Asked Questions About Why Does My Crochet Keep Getting Wider
Why is my crochet getting wider on one side only?
One-sided widening usually means an extra stitch is being added at the same edge on repeated rows. Inspect the row end beside the turning chain, then compare the first and last stitch counts. A marker in the true final stitch usually reveals whether the turning-chain space is being worked twice.
Can I fix widening crochet without undoing it?
Minor growth can sometimes be disguised with a border, controlled decreases, or blocking, but these methods do not restore the original stitch count. For fitted garments, hats, and structured panels, undoing to the first incorrect row is the only dependable repair because hidden increases affect later measurements.
Why does my crochet get wider even when I count correctly?
Correct counts with increasing width indicate tension drift, a larger golden loop, a hook change, or a looser foundation. Measure the same number of stitches across several rows. If the count stays constant but the measurement grows, make a small tension swatch and reset your loop height.
Should the turning chain count as a stitch in crochet?
The turning chain commonly does not count in single crochet and often does count in double crochet, while half-double crochet varies by pattern. Follow the designer’s written instruction rather than applying a universal rule. Working both the chain and the adjacent edge stitch when only one should count creates an increase.
How do I find the exact row where my crochet went wrong?
Count the current row and compare it with earlier rows, moving backward until the first mismatch appears. Mark that row, inspect both edges and any pattern repeats, then undo one row at a time. Photographing the edge under side lighting helps locate extra stitches in dark or fuzzy yarn.
Can blocking straighten a trapezoid-shaped crochet project?
Blocking can smooth tension differences and align a slightly uneven edge, but it cannot correct a trapezoid created by extra stitches. If the stitch count changes from row to row, frog to the first wrong row before blocking. Blocking should finish a correct structure, not compensate for incorrect stitch math.
Conclusion
Why does my crochet keep getting wider? In most cases, the project is gaining accidental stitches at an edge, inside a repeat, or beside a turning chain. Count first, distinguish stitch-count growth from tension drift, and frog to the first wrong row when dimensions matter. Marked edges, consistent golden loops, and regular measurements prevent the same widening from returning.