

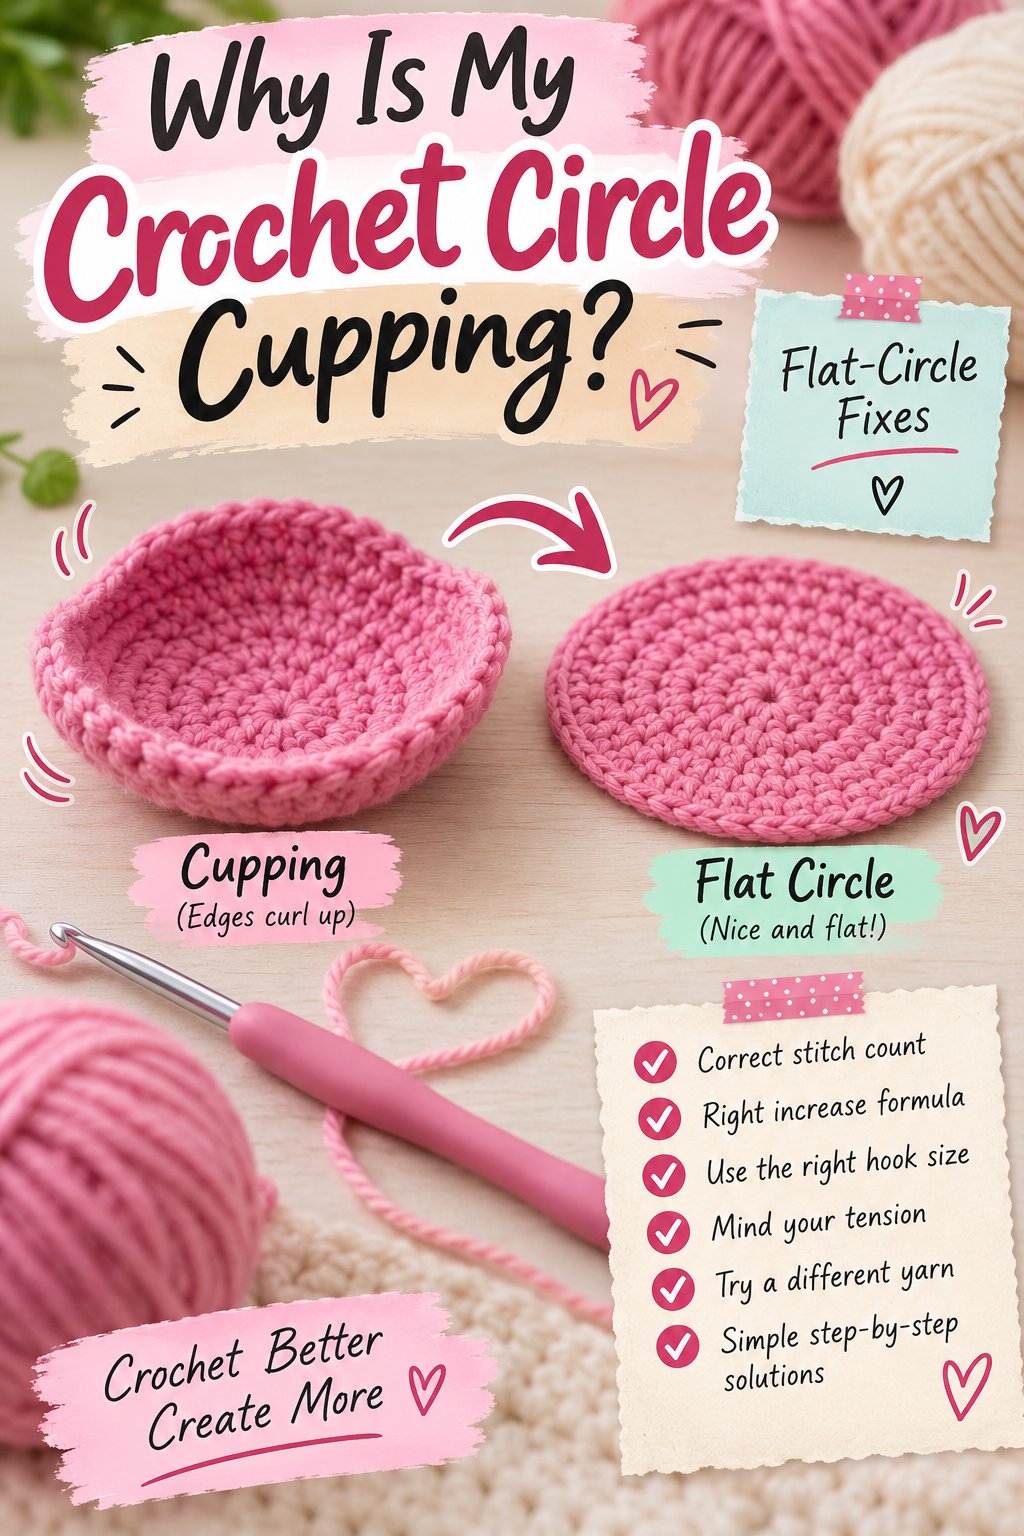
Why is my crochet circle cupping? A crochet circle cups when its outer edge is too short for the fabric’s growing radius, usually because a round has too few increases, the starting count is too low, or tension has tightened. The cure is to restore the correct stitch count, loosen the fabric, or both.
Key Facts
A cupped circle usually needs more stitches on its outer edge, not more blocking.
Standard starting counts are about 6-8 single crochets, 8-10 half double crochets, and 12-14 double crochets.
A typical repair takes 5-30 minutes if the problem is corrected within the first four rounds.
Count the completed round, including or excluding turning chains according to the pattern’s instructions.
A firm table test reveals shape problems more reliably than holding the work in your hands.
A wavy edge means the opposite problem: too many stitches or overly loose tension.
What Cupping Means in a Crochet Circle
A cupped crochet circle curves upward because the circumference of the newest round cannot span the circle’s required outer edge. The fabric relieves that shortage by bending into a bowl, and the deeper the cup becomes, the less likely blocking alone is to correct it.
A flat circle expands in two directions at once. Each round increases the radius, while the new stitches must provide enough horizontal coverage around the perimeter. If the pattern adds too few stitches, the edge contracts relative to the center.
Lay the piece on a hard, level surface after every one or two rounds. A mild upward lift of 2-5 millimeters may come from normal handling, but a center that remains visibly raised or an edge that will not touch the table indicates a structural problem.
The most useful diagnosis is the stitch total. If Round 4 should contain 24 single crochets but contains 22, those two missing stitches affect every later round. Continuing without correction makes the shortage larger relative to the required circumference.
How to Tell Cupping From Normal Crochet Curvature
| Visual result | Likely condition | Typical measurement | First response |
|---|---|---|---|
| Center rises, edge curves upward | Too few stitches | 2-15 mm center lift | Check total and increases |
| Edge ripples or flares | Too many stitches | 3-20 mm loose wave | Remove an increase pattern |
| Edge stays flat but fabric feels stiff | Tight tension | Gauge 5-15% smaller | Relax grip or change hook |
| Center hole pulls inward | Magic ring tension | Hole under 2 mm | Loosen starting ring |
| Six-sided outline with flat sides | Stacked increases | Six visible corners | Stagger increase positions |
| Spiral seam changes height | Round construction | Seam rises 1-4 stitches | Check joining method |
A circle can also cup because the crocheter changes from relaxed to tight tension. That case may produce the correct stitch count while still creating a smaller fabric diameter than the pattern expects.
How Does Flat-Circle Math Work?
Flat crochet circles need a repeatable increase rate because each additional round expands the perimeter. The common planning rule is total stitches in Round N equal the starting stitch count multiplied by N, although yarn, stitch height, gauge, and pattern construction can require adjustments.
For example, a single crochet circle that begins with 6 stitches commonly adds 6 stitches per round:
- Round 1: 6 stitches
- Round 2: 12 stitches
- Round 3: 18 stitches
- Round 4: 24 stitches
- Round 5: 30 stitches
A double crochet circle often begins with 12 stitches and adds 12 stitches per round:
- Round 1: 12 stitches
- Round 2: 24 stitches
- Round 3: 36 stitches
- Round 4: 48 stitches
- Round 5: 60 stitches
These are starting frameworks, not universal laws. Short stitches need fewer initial stitches because their rows grow more slowly around the radius. Taller stitches cover more horizontal distance, so they usually need more stitches in the first round.
The mathematical idea comes from circumference, approximately 2πr. Crochet stitches do not behave like identical points on a perfect geometric curve, so the practical formula is a stitch-architecture rule rather than a demand for laboratory precision.
What Stitch Count Should Each Stitch Type Use?
| Stitch type | Common Round 1 count | Typical increase each round | Round 4 checkpoint |
|---|---|---|---|
| Single crochet | 6-8 stitches | 6-8 stitches | 24-32 stitches |
| Half double crochet | 8-10 stitches | 8-10 stitches | 32-40 stitches |
| Double crochet | 12-14 stitches | 12-14 stitches | 48-56 stitches |
| Treble crochet | 15-18 stitches | 15-18 stitches | 60-72 stitches |
A pattern may deliberately use a different count to create a spiral, a textured surface, a denser base, or a particular finished diameter. Do not replace the designer’s formula automatically. First determine whether the written instructions, your interpretation, or your tension caused the mismatch.
Expert insight: The starting number is only half the equation. A circle can begin with a correct 12-double-crochet ring and still cup in Round 3 if one increase is missed in each repeat.
Why Are Missed Increases the Most Common Cause?
Missed increases create a local shortage that becomes visible as general cupping after several rounds. The mistake often occurs at the first stitch, the final stitch before a slip stitch, or a chain space that the pattern counts as part of the round.
Count the finished stitches, not the number of visible “V” shapes alone. A turning chain may count as a stitch in one pattern and function only as height in another. A chain-2 space may receive stitches in the following round without itself counting as a stitch.
Use this checkpoint method:
- Read the pattern’s stated total before beginning the round.
- Mark the first stitch with a locking marker.
- Place a second marker after every repeat during a difficult round.
- Count the completed round before joining or turning.
- Compare the actual total with the printed total.
- Undo the round immediately if the numbers differ.
Joined rounds can hide errors because the slip stitch creates a seam and the turning chain changes height. Spiral rounds eliminate the seam but make the beginning harder to locate. Both constructions can lie flat when their totals and tension are appropriate.
Common Stitch-Counting Errors
| Error location | What the crocheter does | Result by Round 4 | Correction |
|---|---|---|---|
| First stitch | Works into the slip stitch instead | One extra or missing stitch | Identify the true first stitch |
| Turning chain | Counts a non-counting chain | One extra stitch per round | Follow the pattern convention |
| Chain space | Skips the space | Local tight section | Work the specified stitches into it |
| Increase pair | Makes one stitch instead of two | Missing increase | Inspect every increase marker |
| Final repeat | Stops before the round closes | Short final section | Count from marker to marker |
| Back loop only round | Enters the wrong loop | Narrow ridge or tight edge | Match the stated loop position |
Is Tension Making the Crochet Circle Cup?
Tension makes a circle cup when the stitches become too tight to cover the intended radius, even if the numerical stitch count is correct. A smaller hook, a tight grip, dense yarn, or changing hand position can reduce the fabric’s diameter enough to pull the edge upward.
Measure the circle while it lies flat, then compare it with the pattern’s listed diameter. If your stitch count matches but your diameter is 10% or more smaller, tension is a stronger suspect than missing increases.
A hook one size larger often creates a modest improvement, but it cannot compensate for a missing increase pattern. A 3.5 mm hook changed to 4.0 mm may loosen the fabric, while changing to 5.5 mm can create holes, alter drape, and change the finished size.
Cotton is especially revealing because it has little spring and holds a tight structure. Acrylic can relax slightly with handling and gentle steam, while wool may respond more noticeably to wet blocking. Fiber behavior changes the appearance, but it does not replace correct stitch geometry.
Four Practical Tension Tests
| Test | Procedure | Useful threshold | Meaning |
|---|---|---|---|
| Diameter test | Compare circle with pattern size | 10% smaller | Tension likely too tight |
| Hook comparison | Work one round with next hook size | 1-3 mm edge change | Hook may help |
| Grip test | Relax fingers for 10 stitches | Visible flattening | Hand tension contributes |
| Gauge test | Measure 10 cm of fabric | 5-15% mismatch | Recheck hook and yarn |
Expert insight: Many crocheters change hooks too early. If a circle has 6 missing stitches, a larger hook may soften the symptoms while preserving the mathematical error, so count first and alter tools second.
How Do You Fix a Cupped Crochet Circle?
You fix a cupped crochet circle by locating the first round with a stitch shortage, undoing to that point, and restoring the prescribed increases. If the stitch count is correct, test a looser tension or larger hook; use blocking only after the geometry is sound.
Follow this repair sequence:
- Stop adding rounds. A deeper bowl is harder to diagnose and may waste 20-60 minutes of work.
- Flatten the piece. Place it on a table without stretching the edge.
- Count the current round. Compare the actual total with the pattern total.
- Inspect the previous round. Find the first point where the totals diverged.
- Frog to that round. Remove stitches carefully, especially with fuzzy yarn.
- Redo the increase round. Use markers at the beginning and repeat boundaries.
- Lay the circle flat again. Check after one complete new round.
- Adjust tension only if the total is correct. Change by one hook size first.
- Block after completion. Blocking can refine a nearly flat circle, not rebuild missing circumference.
How Much Work Does the Repair Usually Take?
| Problem found | Typical repair time | Material cost | Expected result |
|---|---|---|---|
| One missed increase in current round | 5-10 minutes | $0 | Usually fully corrected |
| Wrong total through Round 3 | 10-20 minutes | $0 | Usually fully corrected |
| Tight hook through Round 5 | 10-25 minutes | $0-$10 | Better drape and flatness |
| Severe bowl shape after Round 6 | 20-30 minutes | $0 | Requires substantial frogging |
| Fuzzy yarn with tangled stitches | 15-40 minutes | $0 | Slower, with possible yarn wear |
The cost is usually zero because the repair uses the existing yarn and hook. A replacement hook typically costs about $2-$10 in United States craft stores, while a new skein may cost $4-$15 if repeated frogging damages the yarn.
Which Fix Should You Choose?
The best correction depends on whether the shortage comes from stitch count, tension, or the pattern’s intended shape. Add or restore stitches for a mathematical error, change the hook for a gauge problem, and reserve blocking for minor residual unevenness.
| Adjustment | Best use | Typical time | Main trade-off |
|---|---|---|---|
| Restore missed increases | Stitch total is low | 5-20 minutes | Requires frogging |
| Add one increase | Mild cup with correct pattern count | 5-10 minutes | May alter stitch distribution |
| Increase starting count | Problem begins in Round 1 | 10-20 minutes | Changes final diameter |
| Use one larger hook | Correct count, tight fabric | 10-25 minutes | Looser fabric and larger gauge |
| Block finished circle | Minor 1-3 mm lift | 15-30 minutes | Cannot fix major shortages |
| Change stitch height | Formula repeatedly fails | 20-45 minutes | Changes texture and size |
Adding extra increases at random can produce a flat round temporarily, but it may create ripples in the next round. Distribute any corrective stitches evenly rather than placing several in one location.
A pattern designed for a basket base may intentionally use a slightly firm circle. A hat crown, doily, or blanket motif usually needs a flatter result. The intended object matters.
When Should You Block the Circle?
Block a crochet circle after its stitch count and gauge are correct, especially when the remaining lift is small and the fiber responds to moisture or steam. Do not use blocking to force a severely cupped circle flat because the edge will often spring back or become distorted.
For wool, wet blocking can relax uneven stitches, but test colorfastness first. For acrylic, use low heat cautiously because excessive heat can permanently flatten stitch texture. Cotton often benefits from damp shaping but may retain tension-related distortion.
Pin from the center outward when shaping a round motif. Measure opposite points to keep the piece symmetrical, and allow it to dry completely before removing the pins.
Why Does a Circle Ripple Instead of Cup?
A crochet circle ripples when the outer edge has too many stitches for its radius, which is the opposite of cupping. Extra circumference has nowhere to go, so the edge forms waves, ruffles, or a lettuce-like border.
| Shape problem | Stitch condition | Common cause | Corrective action |
|---|---|---|---|
| Deep cup | Too few stitches | Missed increases | Restore increase rate |
| Mild dome | Correct count, tight gauge | Small hook or grip | Relax tension or size up |
| Flat center, ruffled edge | Too many stitches | Extra increases | Remove one increase repeat |
| Six-sided circle | Increases stacked | Same locations every round | Stagger increases |
| Uneven crescent | Local count error | Missed or doubled stitch | Recount each segment |
Remove excess stitches cautiously. If a pattern calls for six increases per round and the edge ruffles, first verify that the yarn and hook match the intended gauge. A loose hook can create waves even with mathematically correct totals.
Expert insight: A perfectly flat result is not always the goal. A firm, slightly cupped base can support a basket or amigurumi shape, whereas the same curvature is a defect in a blanket center.
What Other Factors Can Distort a Flat Circle?
Yarn thickness, fiber recovery, hook material, round construction, and project handling can change the circle’s shape after the increase math is correct. These factors are secondary causes, but they explain why two crocheters can follow identical instructions and produce different results.
Check these conditions before rewriting a pattern:
- Mixed yarn weights: A thicker strand creates a larger stitch and changes the circumference.
- Different fiber blends: Wool, cotton, acrylic, and bamboo have different stretch and recovery.
- Hook material: Aluminum, plastic, and wood can alter glide and hand tension.
- Color changes: Carrying a contrasting yarn can tighten one section.
- Joining method: A slip-stitched seam may pull one area inward.
- Project handling: Holding the work in the air hides mild cupping.
- Changing crocheters: A tighter second crocheter can compress later rounds.
- Textured stitches: Bobbles, clusters, and front-post stitches consume more yarn and space.
A circle made from worsted-weight cotton with a 4.5 mm hook behaves differently from one made from lightweight acrylic with a 5.0 mm hook. Compare gauge, not labels alone. “Worsted” is a category, not a universal measurement.
Does the Project Type Change the Diagnosis?
| Project | Desired shape | Frequent issue | Practical target |
|---|---|---|---|
| Blanket center | Flat and flexible | Uneven increase spacing | Less than 3 mm lift |
| Hat crown | Flat before side walls | Too many crown stitches | Smooth, non-ruffled disk |
| Basket base | Firm, slightly rigid | Over-loose edge | 0-5 mm lift acceptable |
| Amigurumi base | Curved eventually | Intentional shaping mistaken for error | Follow designer’s rounds |
| Doily | Flat and open | Fine yarn tension | Match blocked diameter |
| Coaster | Flat and stable | Tight cotton fabric | No visible center dome |
An amigurumi sphere may begin with a flat circle and then deliberately cup as decreases or unchanged stitch counts shape the body. Do not flatten every curved project. Compare the current round with the pattern’s intended construction.
What If the Pattern’s Formula Produces Cupping?
If a published pattern cups while your stitch count, yarn, and gauge match the instructions, the increase rate may not suit your particular stitch or fiber. Test one additional evenly spaced increase in the next round, then evaluate the edge before making a permanent rewrite.
Pattern formulas can fail for several reasons:
- The designer used a different tension.
- The yarn has a different twist or fiber composition.
- The stitch has an unusual width-to-height ratio.
- A chain or turning instruction is ambiguous.
- The pattern contains a transcription error.
- The design intentionally builds a shallow bowl.
Record the original total and your changes. If one extra increase flattens the circle without creating waves, repeat that adjustment consistently and note the revised formula for future projects.
A practical rule is to change one variable at a time. If you add stitches, change the hook, and block simultaneously, you will not know which correction worked.
When Should You Start Over?
Start over when the circle has a deep cup, several incorrect rounds, or a wrong foundation count that cannot be corrected without visible distortion. Restarting at Round 2 often takes less time than forcing a misshapen piece through six additional rounds.
Restart if any of these conditions apply:
- The center lift exceeds 10-15 millimeters.
- The actual count differs by more than one full repeat.
- The foundation ring is too tight to expand.
- The yarn has split after repeated frogging.
- The edge alternates between tight sections and ruffles.
- The project’s final diameter depends on exact symmetry.
Continue repairing when the problem is a single missed increase, a 1-3 millimeter lift, or a hook-size mismatch discovered early. Experienced crocheters frog without hesitation because later rounds amplify small errors.
Frequently Asked Questions About Why Is My Crochet Circle Cupping
Should I add more stitches to a cupping circle?
Add more stitches only after confirming that the circle has fewer stitches than the pattern requires or that the current increase rate is insufficient for your yarn and stitch. Place extra increases evenly around the round. Randomly adding several stitches in one section can replace cupping with rippling.
Why is my crochet circle cupping with the correct stitch count?
A correct stitch count can still cup when tension is too tight, the hook is too small, or the yarn is denser than the pattern sample. Compare the finished diameter with the stated gauge. If your circle is at least 10% smaller, work a test round with one larger hook.
Will blocking flatten a bowl-shaped crochet circle?
Blocking can flatten a circle with a minor 1-3 millimeter lift when the stitch count and gauge are already correct. Blocking usually cannot repair a deep cup caused by missing increases. The edge lacks actual circumference, so moisture or pins cannot permanently create those missing stitches.
Why does my crochet circle look like a hexagon?
A crochet circle often looks hexagonal when increases stack directly above one another in the same positions each round. Staggering increase locations distributes the corners and creates a smoother outline. The shape is usually cosmetic if the stitch total and finished flatness are correct.
Is a cupped crochet circle useful for any project?
A cupped circle can be useful for an amigurumi body, bowl, basket base, or hat crown transition when the pattern intends three-dimensional shaping. A blanket, coaster, doily, or flat motif generally requires a level surface. Judge the curve against the project’s purpose rather than treating every cup as an error.
How often should I check a crochet circle while working?
Check the circle on a hard table every one or two rounds, especially during the first five rounds. Early checks reveal missed increases before they multiply. Count the stitches at each checkpoint and record the total beside the pattern instructions.
Conclusion: Why Is My Crochet Circle Cupping?
Why is my crochet circle cupping? The usual reason is an outer edge with too few stitches for the growing radius, caused by missed increases, an unsuitable starting count, or tight tension. Count the round, compare the diameter, frog back to the first error, and change the hook only when the stitch math is correct.