

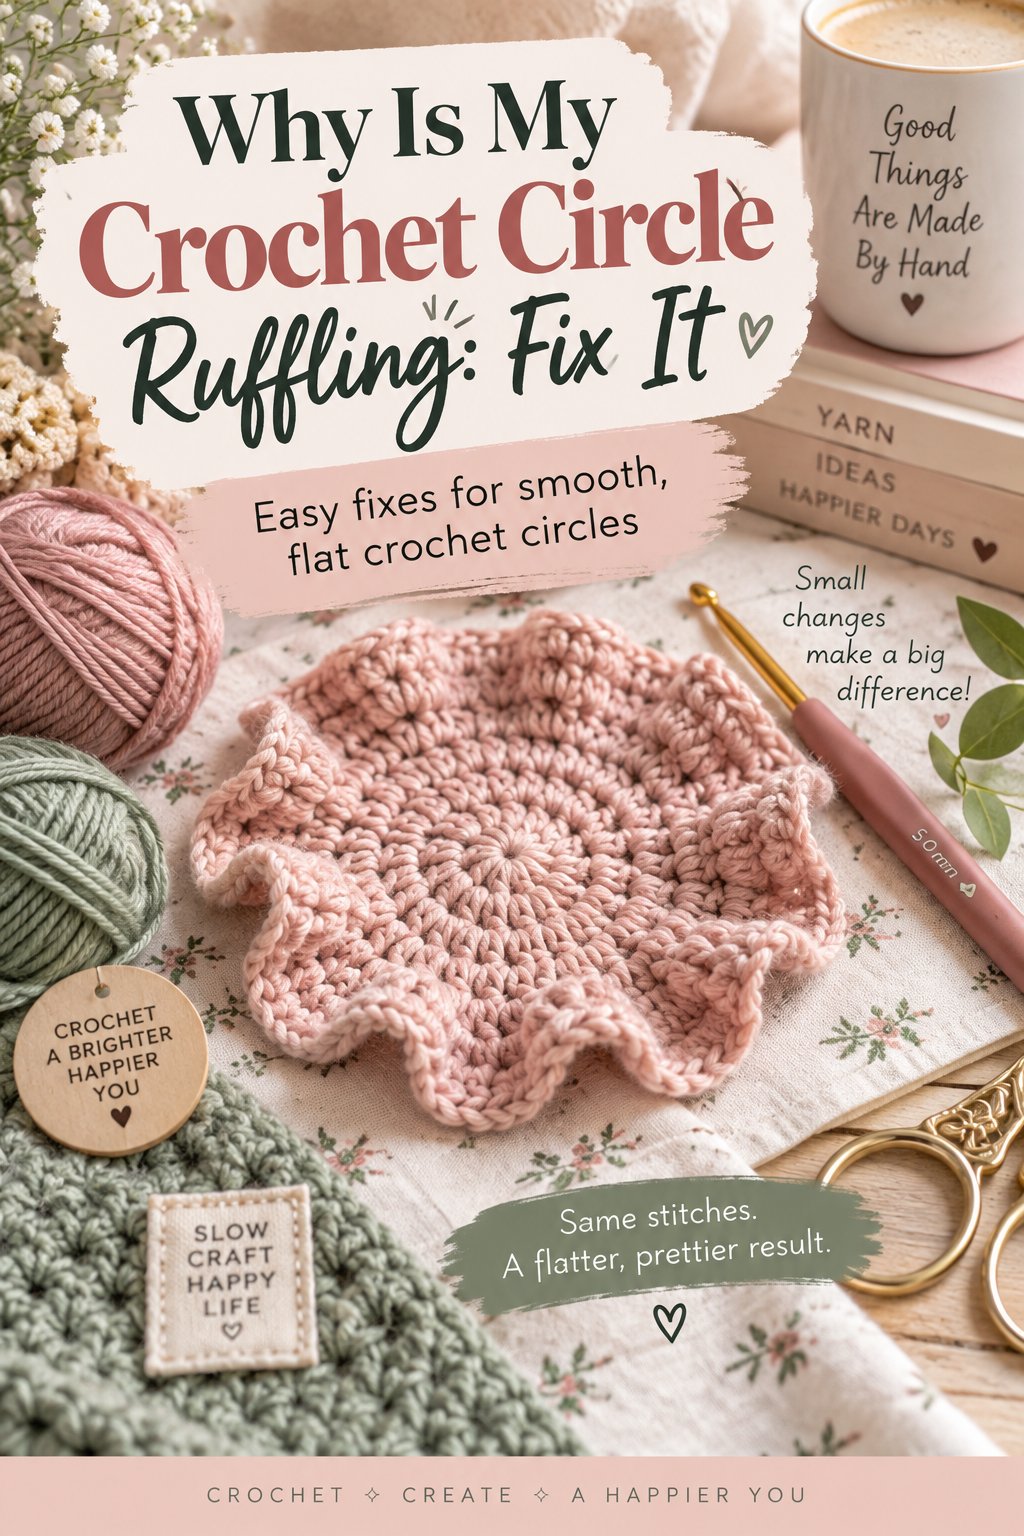
Why is my crochet circle ruffling? A crochet circle ruffles when its outer edge contains more fabric than the growing circumference can accommodate, usually because a round has too many stitches or increases. Loose tension, an unsuitable stitch-height formula, stacked increases, and counting errors can add the same excess and produce waves instead of a flat disk.
Key Facts / Quick Answer
Ruffling means the circle has excess circumference, not too little fabric.
The fastest test is to count the completed round and compare it with the pattern total.
Typical increases per round are 6-8 for single crochet, 8-10 for half double crochet, and 12-14 for double crochet.
A circle that ruffles in Rounds 2-3 usually has a center-count or turning-chain error.
A circle that becomes wavy after Round 5 usually has a repeat, tension, or accidental-increase problem.
A skipped-increase round can rescue a slight wave, but frogging is more reliable when the ruffle is pronounced.
Why Is My Crochet Circle Ruffling?
A ruffled crochet circle has an edge that is physically too wide for its radius. The extra stitches cannot lie on the available flat surface, so the fabric lifts, ripples, or forms soft waves. In practice, the cause is usually an increase count that is too high, although looser later tension can create the same result without an obvious counting mistake.
A flat circle grows in two dimensions. Each new round needs additional stitches around the perimeter, but the exact number depends on stitch height, yarn thickness, hook size, and personal tension. Crochet patterns therefore use standard formulas as starting points rather than universal laws.
The Craft Yarn Council’s standard stitch terminology distinguishes single crochet, half double crochet, double crochet, and treble crochet by stitch construction and height. Those height differences matter because taller stitches generally require more stitches per round to preserve a flat shape.
The Geometry Behind a Wavy Circle
A circle’s circumference increases as its radius increases. Crochet approximates that growth with repeated increases distributed around the round. If the increase rate is too high, the edge grows faster than the fabric can spread outward.
If the increase rate is too low, the fabric pulls inward and cups. A flat result occurs in the zone between those two conditions, and that zone changes with yarn, hook, stitch tension, and stitch type.
A practical workshop rule is: “Count the stitches before you diagnose the tension.” Counting separates a mathematical error from a technique issue in under five minutes.
How Many Stitches Should a Flat Circle Have?
A flat crochet circle commonly begins with about 6-8 single crochet stitches, 8-10 half double crochet stitches, or 12-14 double crochet stitches. Those figures are typical starting ranges, not fixed laws, because a tight crocheter may need fewer increases while a loose crocheter may need more.
The round total follows the starting count when the pattern adds the same number of stitches each round. For example, a pattern beginning with 12 double crochet stitches and adding 12 stitches per round reaches 24 stitches in Round 2, 36 in Round 3, and 48 in Round 4.
| Stitch Type | Typical Round 1 Start | Typical Increase Per Round | Typical Round 4 Total |
|---|---|---|---|
| Single crochet | 6-8 stitches | 6-8 stitches | 24-32 stitches |
| Half double crochet | 8-10 stitches | 8-10 stitches | 32-40 stitches |
| Double crochet | 12-14 stitches | 12-14 stitches | 48-56 stitches |
| Treble crochet | 15-18 stitches | 15-18 stitches | 60-72 stitches |
These totals describe a common continuous-round structure. They do not override the written pattern. A designer may deliberately alter the formula for a spiral, a textured motif, a shaped basket base, or a decorative ruffle.
Why Standard Numbers Sometimes Fail
Standard counts fail when the yarn and technique differ substantially from the assumptions behind the pattern. Cotton yarn has less stretch than acrylic, bulky yarn magnifies small counting errors, and a relaxed grip can make every later stitch wider.
The hook size also changes stitch width. A 5.0 mm hook and a 6.5 mm hook can produce noticeably different circumferences even when both create the same number of stitches with the same yarn.
| Variable | Typical Change | Likely Effect on Circle | Best Diagnostic |
|---|---|---|---|
| Hook size | Plus or minus 1.0 mm | Larger or smaller stitch width | Make a 10-stitch swatch |
| Tension | 10-20% looser | Wider outer rounds and possible waves | Compare stitches per 10 cm |
| Cotton versus acrylic | Fiber-dependent | Less stretch or more recovery | Flatten the work after each round |
| Bulky versus worsted yarn | 1-3 weight classes | Larger visual error per stitch | Count every round |
| Continuous versus joined rounds | 1 seam difference | Possible height or gap distortion | Mark first stitch and seam |
What Does Immediate Versus Progressive Ruffling Mean?
Immediate ruffling appears in Rounds 2-3 and usually points to a center or first-round problem. Progressive ruffling appears after several successful rounds and more often indicates a missed pattern repeat, an extra increase, or changing tension.
The timing gives you a useful diagnostic shortcut. If the fabric waves immediately, inspect the foundation. If it stays flat until Round 5 or later, inspect the round totals and the way increases are distributed.
Ruffling in Rounds 2-3
Early waves commonly come from one of these errors:
- Starting with too many stitches in a magic ring
- Counting the chain-2 or chain-3 as a stitch inconsistently
- Working two stitches into the same base stitch by mistake
- Treating a slip stitch as a counted stitch
- Misreading “increase in every stitch” as “increase in every other stitch”
- Using a pattern written for a different stitch height
Count the center round before undoing anything. If the pattern requires 12 stitches and you have 14, the two extra stitches explain the early wave. Remove them rather than trying to flatten the fabric with blocking.
Ruffling After Round 5
Later waves usually come from one extra increase repeated across a round or from a repeat that ended one stitch too late. One extra stitch in a small circle can be visible; an extra increase in every repeat can create a pronounced flounce.
Tension drift is another common cause. When crocheters relax their hands, later stitches become taller or wider. The stitch count may be correct, but the outer circumference still exceeds the intended geometry.
Measure ten stitches near the center and ten stitches from the newest round. If the outer stitches occupy 10-20% more width, your tension changed enough to affect the shape.
How Can You Diagnose the Exact Cause?
Diagnose a ruffled circle by measuring the round total, locating the first wavy round, and checking whether the problem repeats at regular intervals. This sequence is more reliable than changing the hook immediately, because a smaller hook can disguise an incorrect stitch count without correcting the pattern.
Use a flat surface and good light. Do not stretch the circle while measuring it.
- Place the work on a table without pressing the edge.
- Identify the last round that still lies flat.
- Count every stitch in the next round.
- Compare that total with the pattern’s stated number.
- Check the first and last stitch of each repeat.
- Inspect whether increases stack directly above earlier increases.
- Compare center and outer-round stitch width.
- Decide whether to frog, compensate, or block.
| Observation | Most Likely Cause | Confirmation | Repair |
|---|---|---|---|
| Waves begin in Round 2 | Excess center stitches | Count Round 1 | Frog to the center |
| One section puckers | Local extra increase | Count that repeat | Remove one increase |
| Whole edge waves evenly | Too many increases or loose tension | Compare round total and gauge | Frog one or more rounds |
| Six sharp corners appear | Stacked increases | Mark vertical increase columns | Stagger later increases |
| Edge curls upward | Too few increases | Circle cups when released | Add the required increases |
| Shape changes after a pause | Tension drift | Compare stitch width by round | Rework inconsistent rounds |
The Flat-Surface Test
A correctly proportioned circle should lie mostly flat when placed on a table. A slight lift at the edge can disappear after blocking, but repeated waves that remain after gentle smoothing indicate excess fabric.
Test every two or three rounds on a large project. Early testing limits repair time to about 5-10 minutes, while a late correction on a blanket or rug can require 1-3 hours of frogging and reworking.
Do not press a severe ruffle flat and continue. Pressure can hide the symptom temporarily, but the extra circumference remains in the fabric.
How Do You Fix a Ruffled Crochet Circle?
Fix a ruffled crochet circle by removing incorrect stitches first, then correcting tension or the increase formula. Frogging back to the last flat round is the most dependable repair, while a no-increase round is suitable only for a slight wave that does not alter the project’s required diameter.
Repair Options Compared
| Repair Method | Time, Typical | Material Cost | Best Use | Main Risk |
|---|---|---|---|---|
| Remove one incorrect round | 5-15 minutes | $0 | One-count error | Repeating the same mistake |
| Frog to last flat round | 10-120 minutes | $0 | Pronounced or repeated waves | Lost stitch position |
| Work one round without increases | 5-20 minutes | $0 | Mild, isolated ruffling | Uneven circumference later |
| Change hook size | 5-30 minutes | $0 if available | Slight tension mismatch | Gauge and diameter change |
| Rework with a new stitch formula | 15-90 minutes | $0-$8 | Wrong stitch-height pattern | Pattern proportions change |
| Block after correction | 20-60 minutes | $0-$15 | Minor residual distortion | Cannot remove excess stitches |
Option 1: Frog to the Last Flat Round
Undo the work until the circle lies flat again. Place a stitch marker in the first stitch, recount the repaired round, and restart the next round from the written repeat.
This is the right choice when the ruffle exceeds approximately 1 cm on a small 15-20 cm circle, when waves appear around the entire edge, or when the stitch count is wrong. Blocking cannot remove structural excess.
Option 2: Work One Round Without Increases
Work one stitch into each stitch around the next round when the wave is mild and the previous count is correct. This adds no new circumference beyond normal stitch width, allowing the fabric to catch up.
The method is a compromise. The next round may need to return to the original increase rhythm, or the circle may develop a subtle ridge. Use it for a hat crown, coaster, or decorative motif where a small change is acceptable, not for a precisely sized mandala.
Option 3: Change the Hook Size
A smaller hook reduces stitch width and may calm slight ruffling caused by loose tension. Test one round with a hook 0.5-1.0 mm smaller, then compare the diameter and fabric flexibility.
A smaller hook will not fix two extra increases in every repeat. It can also make the center denser than the edge, producing a stiff disk with a concealed counting problem.
Option 4: Change the Stitch Formula
Switching stitch height requires a new increase plan. Double crochet, half double crochet, and single crochet do not share the same flat-circle formula.
Do not replace double crochet with treble crochet while keeping the same increase count as a guaranteed fix. Taller stitches usually need a different rate, and treble crochet can create a loose, unstable edge if the yarn lacks structure.
Why Do Some Circles Become Hexagons Instead?
A crochet circle becomes polygonal when increases stack in the same vertical columns across multiple rounds. The repeated increase points create local expansion, so the edge forms corners instead of a smooth curve.
Stagger increases by changing the starting point of the repeat or by placing a plain stitch before the next increase. For example, alternating the position of 12 double crochet increases can soften twelve visible corners without changing the total stitch count.
| Increase Pattern | Total Added | Typical Shape | Smoothness |
|---|---|---|---|
| Increase in every stitch | 12-24 stitches | Fast expansion | Very low |
| Increase every second stitch | 6-12 stitches | Regular points | Medium |
| Increase every third stitch | 6-12 stitches | Broad polygon | Medium-high |
| Staggered repeat | 6-12 stitches | Rounded perimeter | High |
| Randomly placed increases | 6-12 stitches | Irregular edge | Low |
Stacked increases are not identical to ruffling. A polygon can remain flat, while a ruffled circle can have a perfectly round outline. Diagnose stitch count and surface behavior separately.
What If the Circle Is Curling Instead of Ruffling?
A curling or cupped circle has too little circumference for its radius, usually because it contains too few increases, uses tighter tension in later rounds, or has a stitch-height mismatch. Ruffling is the opposite condition, with too much edge fabric.
| Shape Problem | Edge Behavior | Stitch-Count Clue | Corrective Direction |
|---|---|---|---|
| Ruffling | Waves lift upward | Too many stitches | Remove increases |
| Cupping | Sides turn upward | Too few stitches | Add increases |
| Polygon shape | Corners form | Count may be correct | Stagger increases |
| Spiral seam | Rounds rise diagonally | Join or marker issue | Use joined rounds |
| Edge flare | Border spreads outward | Border increase excess | Reduce border increases |
A circle that cups slightly can sometimes flatten during blocking. A circle that ruffles because of excess stitches cannot be made mathematically flat by wetting alone.
How Do Yarn, Hook, and Tension Change the Result?
Yarn, hook, and hand tension change the width, height, elasticity, and recovery of every stitch. The same written increase pattern can lie flat in mercerized cotton and wave in soft acrylic if the crocheter’s stitch width differs enough.
In practice, cotton exposes counting errors clearly because it has limited stretch. Acrylic may temporarily conceal small discrepancies, then reveal them after washing or when the piece relaxes.
Yarn Weight and Fiber
A thicker yarn magnifies each stitch’s contribution to circumference. A single accidental increase can add several millimeters to a round made with bulky yarn, while the same error may be less visible in fingering-weight yarn.
Fiber recovery also matters. Elastic wool or acrylic can pull a mild wave inward, but that recovery is not a substitute for correct geometry. Rigid cotton is often easier to diagnose because it preserves the shape you created.
Hook Grip and Body Position
A change in posture can change tension. Crocheting on a sofa, at a table, or while standing may alter wrist angle and yarn feed, especially during long rounds.
Keep the yarn path consistent, avoid gripping the hook tightly, and compare the newest stitches with earlier ones before assuming the pattern is wrong. If later stitches are visibly taller, tension rather than arithmetic is the primary suspect.
When Should You Block the Circle?
Block a crochet circle after correcting the stitch count and only when the remaining distortion is minor. Blocking can relax fibers, even out tension, and improve the edge, but it cannot eliminate a full round of excess increases.
Wet-block cotton and wool when the fiber label permits it; steam-block acrylic cautiously because high heat can permanently flatten or melt synthetic fibers. Use a ruler or blocking mat to preserve the intended diameter.
| Fiber | Typical Blocking Method | Drying Time | Heat Caution |
|---|---|---|---|
| Cotton | Wet block with pins | 6-24 hours | Low to moderate |
| Wool | Wet block with pins | 12-24 hours | Avoid agitation |
| Acrylic | Steam block lightly | 1-4 hours | Avoid direct high heat |
| Polyester | Low-heat test only | 2-8 hours | Shape may resist change |
Block only after the circle passes the flat-surface test. Otherwise, you may spend an hour shaping a defect that should have been removed by frogging.
What Are the Most Common Counting Mistakes?
The most common counting mistakes are inconsistent turning-chain treatment, misplaced increases, missed repeat boundaries, and accidental work into the slip-stitch join. Each error changes the round total or distorts its distribution.
- Counting a chain-2 as a stitch in one round but not the next
- Working into the top of a turning chain when the pattern excludes it
- Splitting one increase across two repeats
- Working twice into a stitch because the previous increase looks like two spaces
- Forgetting that a front-loop or back-loop instruction changes the visible stitch top
- Losing the first stitch after several rounds without a marker
Mark the first actual stitch rather than the turning chain when the pattern does not count the chain as a stitch. If the pattern’s convention is unclear, compare the written round total with the number of visible stitch tops.
An experienced crocheter’s rule of thumb is to count the round immediately after an increase-heavy section, not only at the end of a project. Errors compound, and a one-stitch correction is easier than reconstructing a 96-stitch round.
How Much Does Repair Cost and How Long Does It Take?
Repairing a ruffled crochet circle usually costs $0 in materials because the correction requires labor rather than new yarn. Typical repair time ranges from 5 minutes for one wrong increase to 2 hours for a large rug, blanket, or multi-color mandala.
| Project Size | Typical Diameter | Likely Repair Time | Typical USD Material Cost |
|---|---|---|---|
| Coaster or motif | 10-20 cm | 5-15 minutes | $0 |
| Hat crown | 15-25 cm | 10-30 minutes | $0 |
| Bag base | 25-40 cm | 20-60 minutes | $0-$3 |
| Blanket center | 40-100 cm | 45-120 minutes | $0-$8 |
| Rug or large mandala | 100-180 cm | 1-3 hours | $0-$15 |
These are practitioner estimates, not a published industry tariff. The main cost is the time needed to locate the first incorrect round, especially when dark yarn or textured stitches hide the stitch tops.
Frequently Asked Questions About Why Is My Crochet Circle Ruffling
Will blocking flatten a ruffled crochet circle?
Blocking may soften a slight wave caused by uneven tension, but it will not remove excess stitches or increases. Count the last round first. If the circle has more stitches than the pattern requires, frog to the last flat round and correct the formula before blocking.
Should I use a smaller hook when my crochet circle waves?
A smaller hook can reduce stitch width when your tension is too loose, but it cannot correct an incorrect stitch count. Test a hook 0.5-1.0 mm smaller on a sample round and compare flatness, diameter, and fabric flexibility before changing the entire project.
Why is my crochet circle flat on one side and ruffled on the other?
One-sided ruffling usually indicates a localized extra increase, a missed repeat, or inconsistent tension in part of the round. Count each repeat separately and compare the stitch height on the smooth and wavy sides. Remove the local error rather than changing every increase.
Can I keep crocheting if the circle is slightly ruffled?
Continue only when the wave is minor, the stitch count is correct, and the project allows a small design variation. A no-increase round may settle a slight wave. A pronounced or evenly distributed ruffle will usually become larger and harder to repair.
Why does my crochet circle ruffle after changing yarn?
Changing yarn alters stitch width, elasticity, and height, so the original increase formula may no longer match the new material. Make a small center sample with the replacement yarn, compare its diameter after two or three rounds, and adjust the increase rate before starting the full project.
How do I stop my crochet circle from turning into a bowl?
A bowl shape means the circle has too little circumference for its radius. Confirm that you completed every planned increase, check the round total, and loosen overly tight tension. If the pattern is correct but the fabric still cups, add increases gradually in the next round and reassess it on a flat surface.
Conclusion
Why is my crochet circle ruffling? The usual answer is excess circumference from too many stitches, too many increases, loose later tension, or a stitch formula that does not suit the yarn and hook. Find the first wavy round, count its stitches, compare the total with the pattern, and frog back to the last flat round when the error is structural.
Use a smaller hook only for a genuine tension mismatch. Use blocking only for minor residual distortion. A stitch marker, a round-by-round count, and a flat-surface test every two or three rounds prevent most ruffled circles before repair becomes expensive in time.