

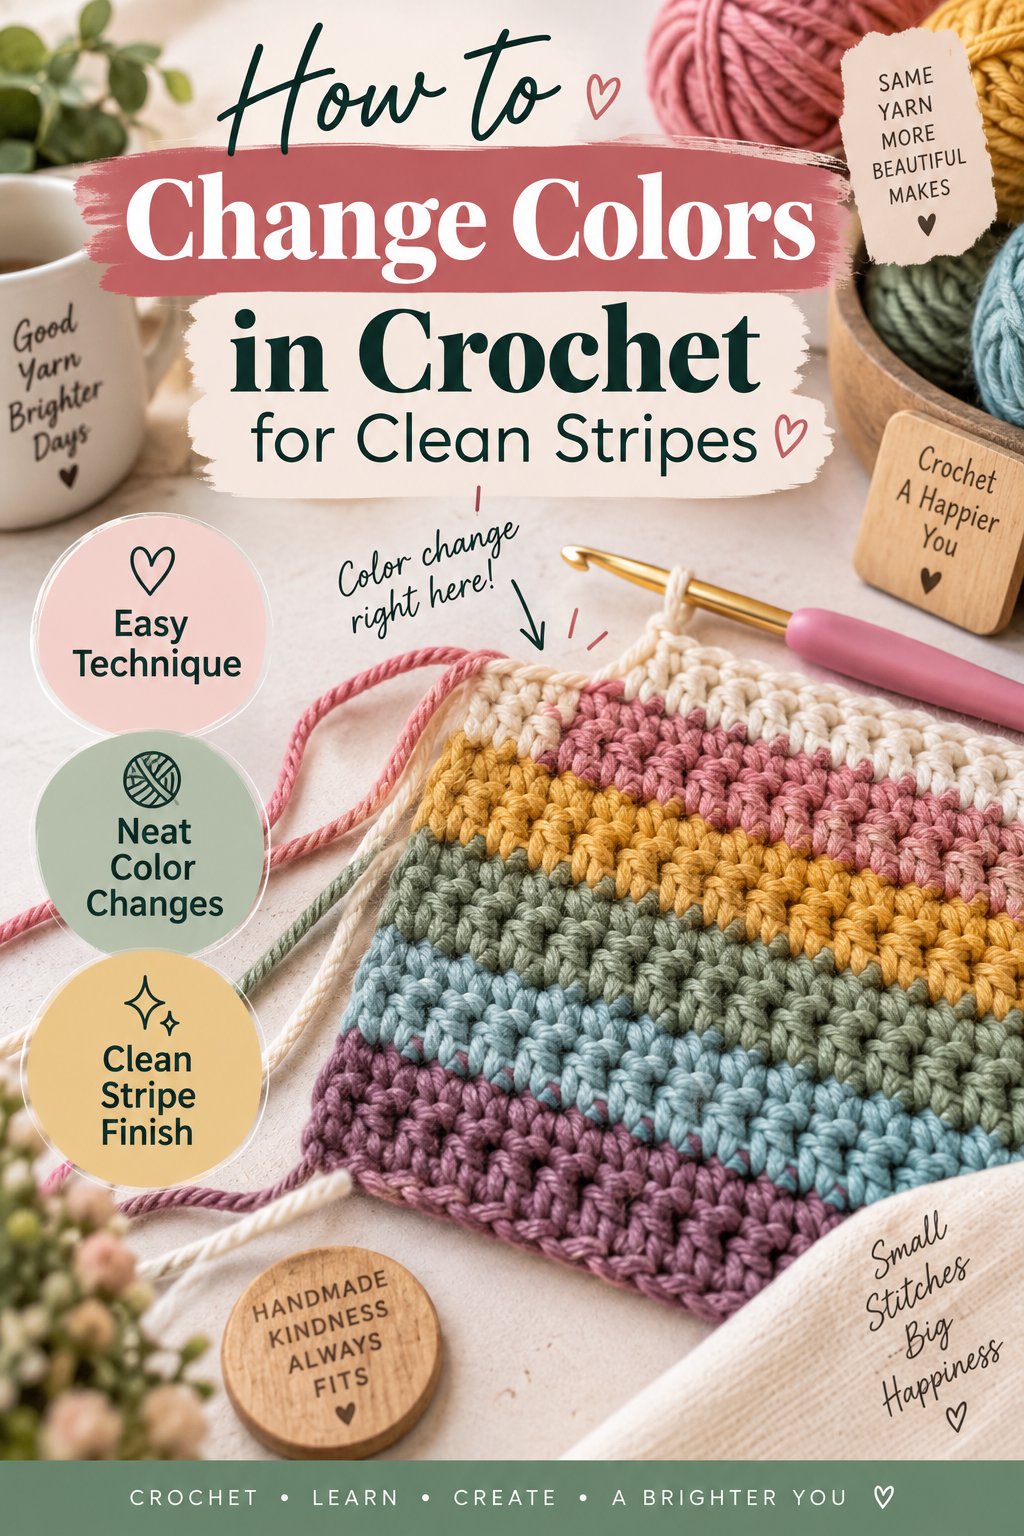
How to Change Colors in Crochet means replacing the working yarn during the final pull-through of a stitch, so the completed stitch shows the new color cleanly. The technique creates stripes, motifs, geometric designs, tapestry crochet, amigurumi details, and multicolored texture without a bulky knot.
Key Facts
Change yarn during the final pull-through of the last stitch made in the old color.
Leave a typical 4-6 inch tail when cutting yarn for later weaving.
A color change usually takes 2-5 seconds; weaving each tail commonly takes 30 seconds to 2 minutes.
Carry yarn for short, frequent changes, use bobbins for isolated blocks, and cut yarn for wide color sections.
Keep carried floats loose enough to match the fabric width, or the project will pucker.
A single crochet, half double crochet, double crochet, and treble crochet each require a different number of loops before the final pull-through.
How the Color Change Works
A crochet color change works by using the incoming yarn for the final loop drawn through the outgoing stitch. The old color therefore completes the visible body of the stitch, while the new color forms the final loop and the top edge, producing a clean transition.
The method applies to flat rows, joined rounds, spiral rounds, granny squares, tapestry crochet, and graph-based designs. The new yarn does not usually enter at the beginning of the next stitch. Waiting that long leaves the previous stitch’s top loop in the wrong color and creates a jagged boundary.
Stitch-specific loop positions
Stop before the final pull-through required to finish the stitch. For a single crochet, insert the hook, yarn over with the old color, pull up a loop, then use the new color for the final pull-through of two loops. For a half double crochet, switch during the final pull-through of three loops.
A double crochet requires the new yarn during the final pull-through of two loops after the first two pull-through stages. A treble crochet also changes during its final pull-through of two loops. The exact visual result depends on the stitch height and fabric tension.
| Stitch | Old-color stopping point | New-color action | Completed loops |
|---|---|---|---|
| Single crochet | Two loops on hook | Pull through 2 loops | 1 stitch |
| Half double crochet | Three loops on hook | Pull through 3 loops | 1 stitch |
| Double crochet | Two loops after first pull-throughs | Pull through 2 loops | 1 stitch |
| Treble crochet | Two loops after staged pull-throughs | Pull through 2 loops | 1 stitch |
In practice, place the new strand over the hook with the tail pointing toward the wrong side. Pull it through without twisting the strand, then adjust both yarns gently. A sharp tug can shrink the final loop and make the stitch narrower than its neighbors.
How much yarn and time does a change require?
A basic color change needs the second yarn, a crochet hook suited to the yarn weight, scissors if the old color will be cut, and a tapestry needle for finishing. Setup takes less than one minute when both yarns are within reach. The stitch change itself generally takes 2-5 seconds.
Typical material cost is about $2-$10 for one additional skein of acrylic or cotton yarn, while premium wool, hand-dyed yarn, or specialty fibers can cost $12-$35 or more. Finishing creates the largest time increase because every cut strand becomes a tail that must be secured.
| Task | Typical quantity or time | Main variable | Practical note |
|---|---|---|---|
| Prepare second color | Under 1 minute | Yarn organization | Place the ball on the side of the next color block |
| Complete one color change | 2-5 seconds | Stitch height | Taller stitches require more staged pull-throughs |
| Leave a cut tail | 4-6 inches | Finishing method | Longer tails help bulky or slippery yarn |
| Weave one tail | 30 seconds-2 minutes | Stitch density | Dense fabric takes longer to penetrate |
| Add one inexpensive skein | $2-$10 | Fiber and brand | Acrylic and common cotton are often lowest cost |
How to Change Colors at the End of a Row
To change colors at the end of a row, work the final stitch until its last pull-through, use the new yarn to complete that stitch, then make the turning chain in the new color. This method produces horizontal stripes with fewer interruptions and keeps the row edge consistent.
- Work the final stitch with the old yarn until the required loops remain.
- Place the new yarn over the hook, leaving a 4-6 inch tail if the old yarn will be cut.
- Pull the new yarn through the remaining loops.
- Tighten the old and new strands until the completed stitch matches neighboring stitches.
- Make the turning chain in the new color unless the pattern specifies another height.
- Turn and work the next row, enclosing or securing the tails as directed.
For single crochet, the turning chain is commonly one chain. Half double crochet often uses two chains, and double crochet commonly uses three, although pattern designers vary in whether those chains count as stitches.
A stripe can look uneven when the turning chain is too loose. Match the turning chain’s height to the first stitch of the new row, then check the edge after two or three rows rather than correcting tension by pulling hard on the tail.
Should you cut the old yarn at every stripe?
Cut the old yarn when the next use is far away, the stripe width is irregular, or the project needs maximum stretch. Carry it up the edge when the same color returns after one intervening row and the edge will be hidden by a border or seam.
A practical rule is to carry a strand only when the vertical distance is one or two rows and the edge will tolerate the extra thickness. Cutting creates two tails per color break, but it avoids a visible ladder and preserves a softer edge.
How to Change Colors in the Middle
To change colors in the middle of a row or round, finish the stitch immediately before the new color area with the incoming yarn on its final pull-through. Begin the next stitch with the new color, and carry or cut the unused yarn according to the distance to its next use.
The location of the change matters. If a chart says the next stitch is blue, the final loop of the preceding stitch should be blue. This places the blue top loop over the correct stitch and keeps the chart’s boundary aligned.
In a dense tapestry fabric, lay the unused strand across the top of the work and crochet over it. In intarsia, keep the colors in separate yarn sections instead of carrying a long strand across the back.
How do you change colors in a crochet round?
In joined rounds, change during the final pull-through of the last stitch, then join with the new color if the pattern uses a slip stitch. In spiral rounds, change during the final pull-through and mark the round start, because the transition will travel slightly unless the pattern includes a jog-control method.
A color jog occurs when the first and last stitches of a round sit at different heights. Single crochet rounds show this most clearly. Joining rounds can create a visible seam, while spirals reduce the seam but may shift the color boundary by one stitch per round.
For a cleaner vertical stripe, use a standing stitch or a carefully placed slip stitch at the round start, then compare the first three rounds before continuing the entire motif. Different designers define “jogless” methods differently, so follow the pattern’s stated stitch count.
| Round format | Color-change point | Main benefit | Main limitation |
|---|---|---|---|
| Joined rounds | Final pull-through before joining | Clear round boundary | Visible seam may form |
| Spiral rounds | Final pull-through before marked start | Fewer seam ridges | Color boundary can jog |
| Standing stitch | New-color start of round | Clean edge appearance | Requires consistent tension |
| Slip-stitch join | Final loop and joining stitch | Stable motif shape | Can compress the edge |
How Should You Carry Unused Yarn?
Carry unused yarn when a color will return within a short distance, usually 1-5 stitches or a few rows. The working color encloses the inactive strand inside the fabric, reducing tails, but the carried strand can add bulk, show through light yarn, or restrict stretch.
Use a carried float for tapestry crochet, Fair Isle-inspired crochet, pixel motifs, and narrow color sections. Keep the inactive strand on the wrong side for flat work, or inside the piece for reversible and three-dimensional projects.
Every few stitches, spread the fabric to its normal width and check the float. A strand that looks loose while the fabric is compressed may become correctly tensioned when the fabric opens. A float pulled tight will pucker the front permanently.
How long can a carried float be?
A typical uncovered float should remain under 1-2 inches in wearables, bags, and children’s items. Longer spans can catch fingers, snag during washing, and pull the fabric inward. Catch a longer float with the working yarn at an intermediate stitch, but alternate the catch position so it does not create a visible vertical bar.
| Float length | Recommended treatment | Likely result | Suitable project |
|---|---|---|---|
| 1-5 stitches | Carry inside stitches | Low bulk | Tapestry motifs |
| 1-2 inches | Catch once if needed | Safer back | Bags and garments |
| 2-4 inches | Use a catch or cut strand | Reduced snag risk | Blankets |
| Over 4 inches | Use bobbin or cut and rejoin | Better drape | Intarsia blocks |
What is color dominance?
Color dominance describes which carried strand appears more visibly on the surface when two yarns are worked together. The strand held consistently lower or closer to the fabric can show more on certain stitch structures, especially in Fair Isle-style designs.
Although crochet does not follow knitting’s rules exactly, consistent strand placement still matters. Choose one color as the background, keep its position stable, and test a small swatch. Changing hand position halfway through a motif can make one color appear thicker.
When Are Bobbins Better Than Carried Yarn?
Bobbins are better when color sections are large, isolated, or separated by many stitches. Each color zone receives its own small yarn supply, so the crocheter avoids dragging a strand across the wrong side and preserves a lighter, more flexible fabric.
Bobbins can be wound on plastic holders, cardboard cards, clothespins, or small yarn cakes. Use one bobbin for each active color section rather than one bobbin for every color in the project. Too many loose bobbins create tangles of their own.
Intarsia differs from tapestry crochet because the unused yarn usually does not travel behind the entire color field. At a boundary, cross the old and new strands once on the wrong side to close the gap, then use the new section’s yarn supply.
| Method | Tail count | Fabric effect | Best application |
|---|---|---|---|
| Cut and weave | 2 tails per break | Softest and most flexible | Wide stripes and blocks |
| Carry inside stitches | Few or no extra tails | Denser, sometimes bulky | Short motif changes |
| Bobbins or intarsia | 2 tails per color section | Light between color zones | Large graphghan pictures |
| Carry up edge | 0 tails for repeated stripes | Slight edge thickness | Two-row stripe patterns |
How to Carry Yarn Up the Side
To carry yarn up the side, leave the inactive color attached at the row edge, work the next row with the active color, and pick up the waiting strand when the stripe returns. Keep the side strand relaxed rather than stretching it diagonally across the edge.
This method works best for two-row or alternating-row stripes. On every second row, bring the waiting yarn up the same edge and use it during the final pull-through of the last stitch. A border of single crochet, half double crochet, or slip stitches can conceal the vertical strands later.
Do not carry a color up five or ten rows simply to avoid weaving tails. The strand can form a tight ladder, snag easily, and distort the edge. For wider intervals, cut the yarn and weave the ends into matching sections.
Which Color-Change Method Should You Choose?
The cleanest method depends on distance, fabric stretch, and whether the wrong side will be visible. Cut and weave gives the least hidden bulk, carrying is fastest for short repeats, bobbins protect drape across isolated blocks, and side carrying suits repeated stripes.
Use these selection criteria:
- Choose cut-and-weave for wide stripes, random blocks, and fitted garments.
- Choose internal carrying for color changes within five stitches.
- Choose bobbins for graphghans, portraits, and large geometric sections.
- Choose side carrying for two-row stripes with a planned border.
- Avoid long carried floats in baby blankets, socks, and open garments.
- Test the wrong side before committing to a visible accessory such as a bag or scarf.
A strand’s fiber content changes the decision. Acrylic yarn tolerates firm handling but can create a stiff carried layer. Cotton has limited elasticity, so tight floats distort it quickly. Wool can hide small tension differences because its fibers grip each other, but dark wool can still shadow through pale stitches.
How Do You Secure and Weave Color-Change Tails?
Secure a cut tail by weaving it through several stitch legs on the wrong side, reversing direction, and trimming only after the strand cannot slide free. A typical 4-6 inch tail gives enough length for three directional passes in medium-weight yarn.
Thread the tail through a tapestry needle. Weave horizontally through three or four stitches, reverse through adjacent stitch legs, then make one final pass in a different direction. Avoid weaving only along the top loops, because those loops can loosen during washing.
The safest path follows the fabric rather than crossing an open gap. In granny squares, weave through dense portions of the stitches and keep the tail within the same color area when possible. For slippery rayon or smooth cotton, leave closer to 6 inches and use a second directional pass.
Can you weave tails as you crochet?
You can weave tails as you crochet when the wrong side is accessible and the color section is large enough to hide the strand. Secure the first inch immediately, then continue the color block while crocheting over or around the remaining tail only if the pattern permits.
Crocheting over a tail is faster but less secure than needle weaving. The tail can work loose if it lies in a straight line or exits at a stitch edge. Use both methods for blankets that will receive frequent machine washing.
What Mistakes Cause Uneven Color Changes?
Uneven color changes usually come from switching too late, tightening the final loop, pulling a carried float, or leaving a tail too short. Each problem changes stitch height or fabric width, so the defect may appear several stitches after the yarn was changed.
| Problem | Visible symptom | Likely cause | Correction |
|---|---|---|---|
| Old color on top loop | Jagged boundary | New yarn added after stitch completion | Switch during final pull-through |
| Puckered motif | Fabric contracts | Float pulled tight | Relax strand at fabric width |
| Loose gap | Hole at boundary | Final loop or join too large | Match neighboring stitch tension |
| Tail slips out | Color section unravels | Tail under 4 inches or one-way weave | Rejoin and weave in three directions |
| Side ladder | Edge looks striped | Yarn carried too far upward | Cut yarn or add a border |
| Color shadow | Inactive strand shows | Dark yarn carried under pale stitches | Use bobbins or cut and weave |
The mistake most people make is correcting a color boundary by pulling the yarn tails after several rows have been added. Tail tension can adjust the joining stitch slightly, but it cannot repair a late color change without undoing the affected stitch.
How can you prevent color bleeding?
Test colorfastness before combining strongly dyed cotton, wool, or hand-dyed yarn with pale yarn. Rub a damp white cloth against each color, then rinse a small swatch in the intended water temperature. If the cloth stains or the water changes color, wash the dark yarn separately before use.
The Craft Yarn Council’s yarn-label guidance identifies fiber content and care instructions as essential information for project planning. Follow the most restrictive care instruction when different fibers share one piece, because a hot wash that suits cotton can distort wool or acrylic.
How do you fix a color change that is already wrong?
Undo back to the stitch where the new color should have entered, then redo the final pull-through with the incoming yarn. If the error is one or two stitches old, correction usually takes less than five minutes and preserves the edge alignment.
For a longer mistake, mark the correct chart position before unraveling. Count stitches in the old and new colors, because replacing a color without restoring the original count can shift every later motif.
How Color Changes Work in Common Projects
Blankets benefit from cut-and-weave for broad stripes, side carrying for predictable two-row repeats, and internal carrying for small geometric accents. A border can hide edge floats, but a border cannot conceal tight strands that have already shortened the blanket’s edge.
Amigurumi usually uses short internal changes, invisible joins, and compact tension. Carry the inactive yarn inside the stuffing area only when the color will return quickly; otherwise cut and weave, because loose strands can show through stretched single crochet.
Graphghans and picture panels need a chart-reading system. Assign one bobbin to each active color island, mark the right side, and count every stitch across the row before turning. Large projects become difficult when one full skein is dragged behind multiple separated color zones.
Garments require the most tension care. A carried strand that feels harmless in a flat swatch can restrict the bust, sleeve, or shoulder area when the fabric stretches during wear. Make the test swatch at the same stitch density and wash it before choosing a management method.
| Project | Recommended method | Typical color interval | Main quality check |
|---|---|---|---|
| Striped blanket | Cut and weave or side carry | 2-10 rows | Straight edges and soft drape |
| Amigurumi | Cut and weave or short carry | 1-8 stitches | No stuffing visible |
| Graphghan | Bobbins or intarsia | 5-40 stitches | Accurate chart count |
| Tapestry bag | Internal carrying | 1-5 stitches | Even front and secure floats |
| Sweater panel | Cut and weave or bobbins | 5-30 stitches | Stretch after washing |
Frequently Asked Questions About How to Change Colors in Crochet
Do you tie a knot when changing crochet colors?
A knot is usually unnecessary and can create a hard bump inside the fabric. Complete the stitch with the new yarn, hold both tails against the wrong side for several stitches, then weave each tail through three or four stitch legs in changing directions.
Why does my crochet color change look like a step?
A stepped boundary usually means the new color was introduced after the previous stitch was fully completed. Undo the final stitch before the boundary and pull the new yarn through its last loops, then begin the next stitch with the new color.
Can you change colors without cutting yarn?
You can avoid cutting yarn by carrying the inactive color inside short color sections or up the side during repeated stripes. Cutting is better when the next use is several rows away, because long carries create bulk, snagging, and edge tension problems.
Should the yarn tail be on the front or back?
Place the yarn tail on the wrong side of the project whenever possible. In reversible crochet, position the tail inside the fabric or between layers, then inspect both faces before trimming because a dark tail can show through pale stitches.
How do you stop crochet stripes from twisting?
Keep each yarn ball on its own side and rotate the work in the same direction at every row turn. If two colors twist around each other, pause after several changes and allow the strands to untwist before continuing.
How much extra yarn do color changes use?
Color changes add little yarn to the stitch count, but carrying and tails affect consumption. For planning, allow an additional 5%-10% for tails, joins, and swatch testing, then buy extra when the project uses hand-dyed yarn with limited dye-lot availability.
Conclusion
How to Change Colors in Crochet becomes predictable when the incoming yarn completes the final pull-through of the outgoing stitch. Use cut-and-weave for flexible wide sections, carry short floats for frequent motifs, use bobbins for isolated blocks, and manage tails with 4-6 inches of length. A small tension swatch reveals the cleanest method before the full project begins.