
If you’re new to crochet and enjoy cute, handmade projects, a Crochet Panda Keychain is the perfect place to start. Small and manageable, this project is full of charm—from puffy cheeks to the classic black-and-white contrast. Using basic shapes and playful features, it’s beginner-friendly while still rewarding.
Ideal as a gift, bag charm, or just for fun, this soft, expressive panda brings joy with every stitch. Its miniature size means less yarn, faster results, and plenty of practice for essential techniques like color changes, textured details, and shaping with stuffing.
This step-by-step guide will walk you through creating your very own Crochet Panda Keychain, making the process simple and enjoyable for beginners.
Materials Needed
All the tools and supplies for this project are simple and accessible.
- Alize Cotton Gold or similar soft cotton-blend yarn in two contrasting shades
- 2.20 mm crochet hook
- Polyester fiber stuffing
- Black yarn for facial embroidery
- Darning or yarn needle
- Sharp scissors
- Optional: stitch marker to track your rounds
This lightweight cotton yarn helps give the panda a smooth surface and solid shape, perfect for finishing with facial embroidery.

Abbreviations
All stitch terms follow US crochet terminology:
- sc – single crochet
- inc – increase
- dec – decrease
- dc – double crochet
- pc – popcorn stitch
- flo – front loop only
- st/sts – stitch/stitches
Learning these basics is essential for reading and following written patterns with confidence.
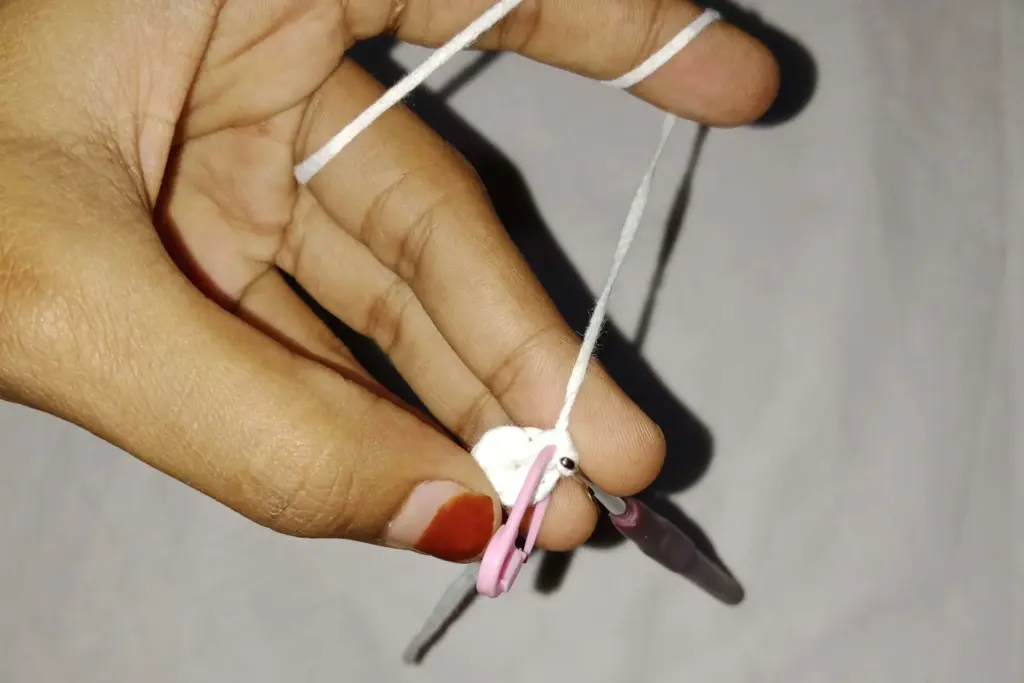
Shaping the Panda’s Base
The foundation of your panda keychain begins with a compact, rounded shape that serves as both the body and head. This form is built with gradual increases, creating a symmetrical oval structure that offers both visual balance and a perfect base for detailing.
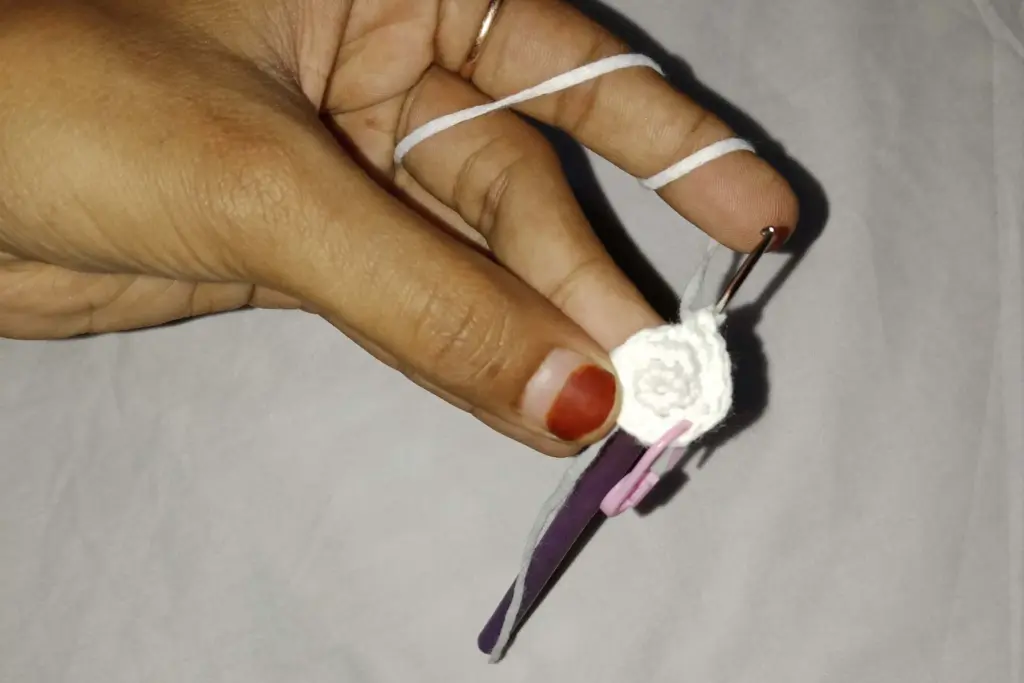
As the shaping progresses, you’ll introduce contrast yarn at key points. These color changes simulate the panda’s signature spots—like the ears and eye patches—without needing to attach extra limbs. The clever use of popcorn stitches adds raised texture, giving dimension to the features while maintaining a simple construction method.
Stuffing for Structure
As your work curves and the shape nears completion, soft fiberfill is gently packed inside. This step gives the panda its firmness and plush feel. The stuffing should be added gradually, pressing lightly and evenly to preserve the roundness without distorting the stitches.
Care is taken to close the base smoothly so the fiber stays secure inside. Even tension in the final rounds ensures a snug seal and keeps the overall silhouette neat. This core stuffing step transforms the flat rounds into a tactile, squeezable mini plush.
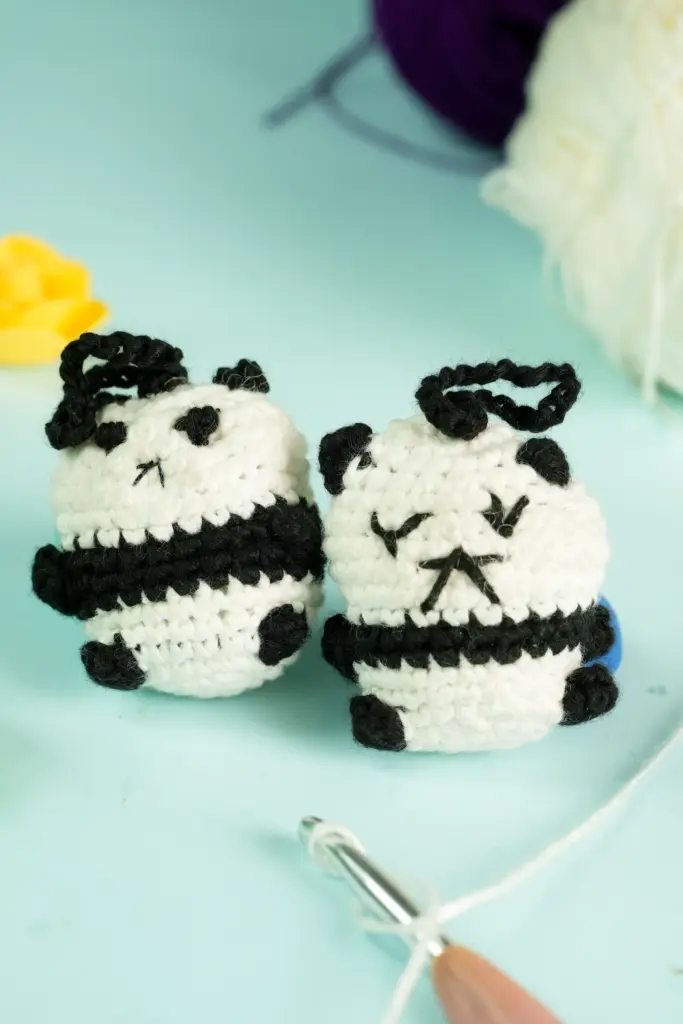
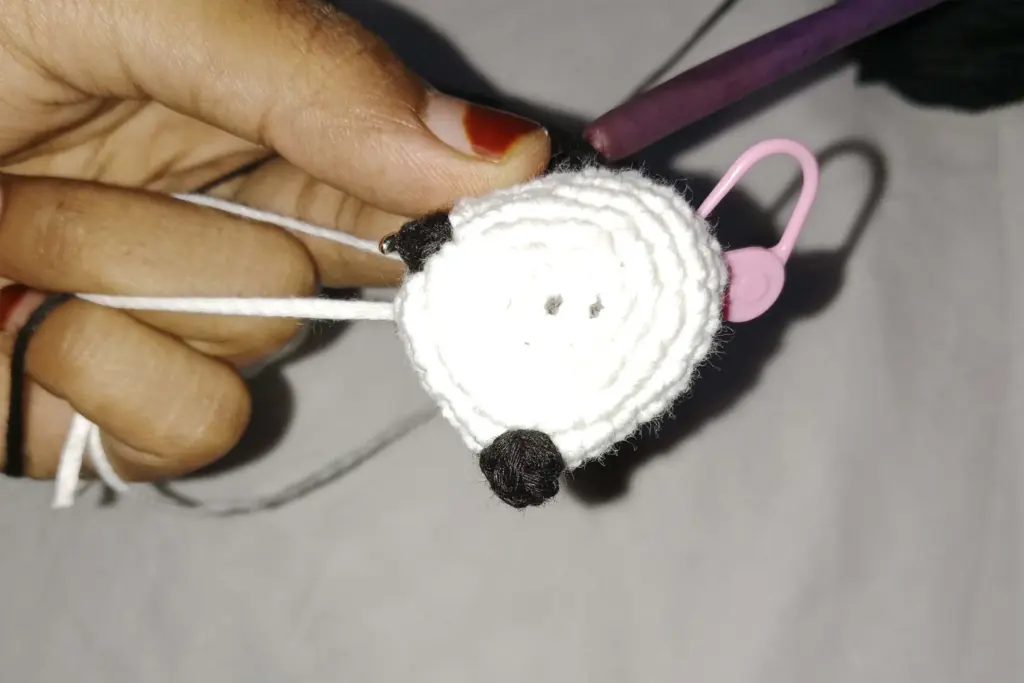
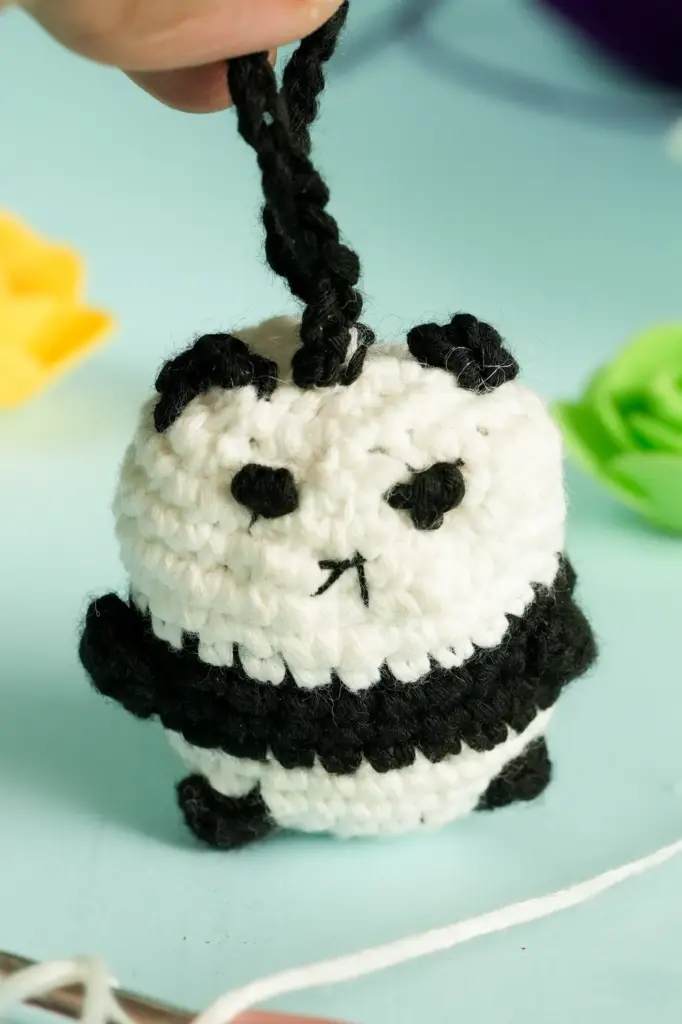
Building the Facial Features
The most charming part of the panda is its expressive face. Using popcorn stitches and carefully placed color changes, textured eyes are built directly into the body during crocheting. This approach eliminates the need to stitch parts separately, which is ideal for beginners looking to avoid complex assembly.
Once the base form is sealed, small black details like the nose and pupils are hand-embroidered using a yarn strand separated into a finer ply. This allows for clean and delicate shaping without overwhelming the soft curves of the head. Even slight variations in stitching give each panda a slightly different personality—adding charm to your final piece.
Adding Ears with Texture
Instead of sewing on separate ears, this panda design incorporates them directly into the body through stitched popcorn shapes. These textured clusters stand out naturally from the head without creating bulk, and they’re cleverly placed to maintain symmetry.
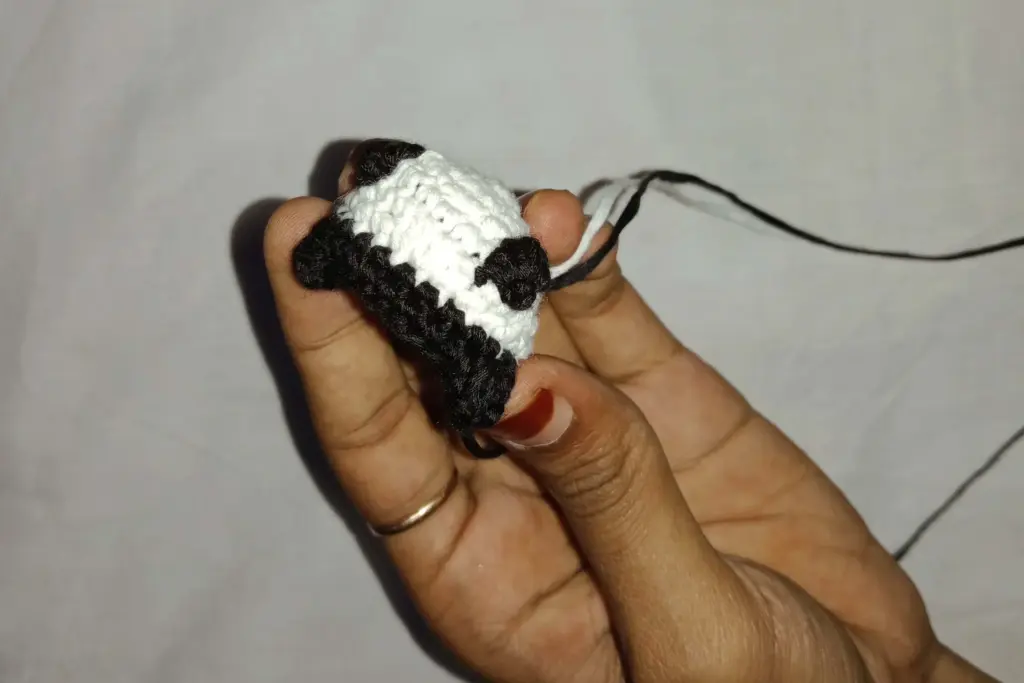
Popcorn stitches are known for their raised, bubbly appearance, which works beautifully to represent the rounded ears of a cartoon panda. These textured shapes are crocheted seamlessly into the surrounding fabric, giving the illusion of three-dimensional ears while keeping the piece small and secure.
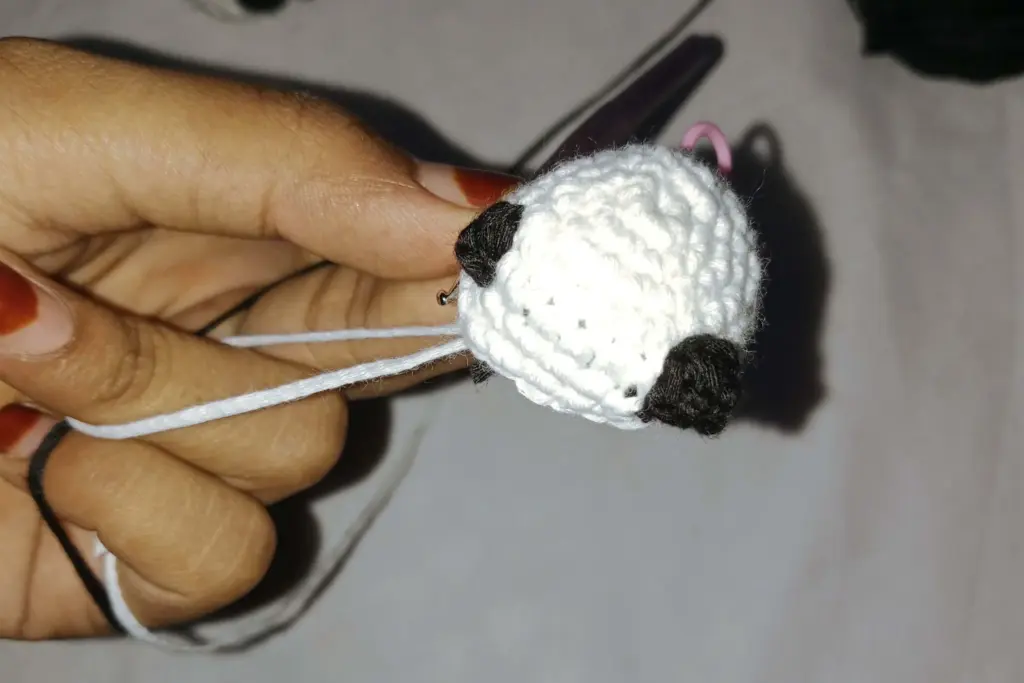
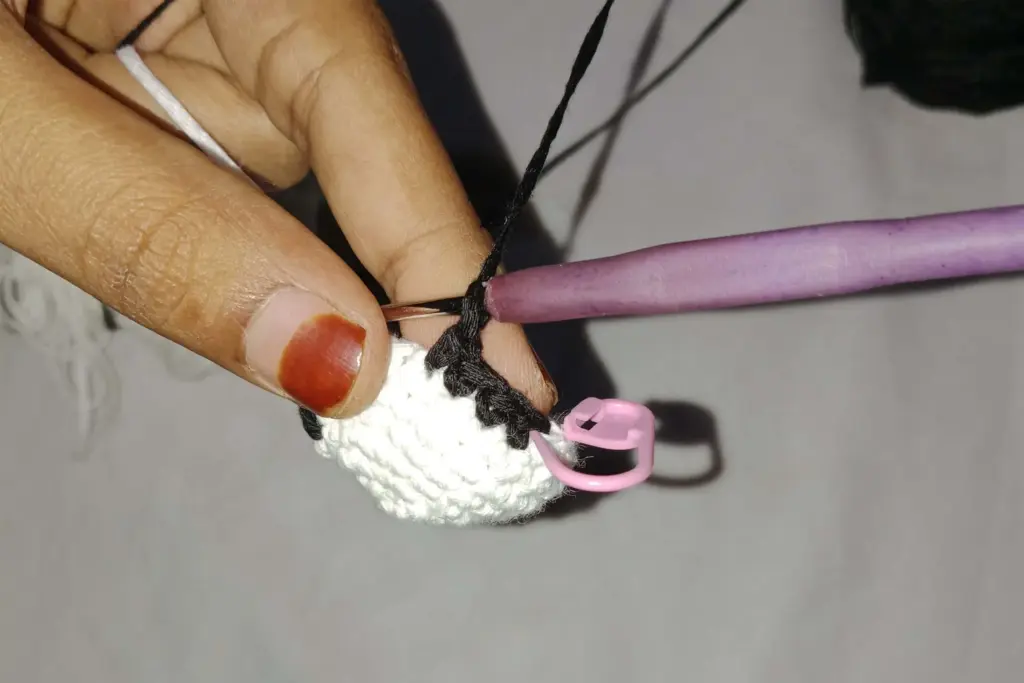
Sealing the Form and Fastening
Once the face is complete and stuffing is in place, the panda shape is gently closed with a series of decreases. This step gives the base its final rounded structure while ensuring the stuffing stays tucked inside. After the final stitches are completed, the yarn is pulled tight and hidden securely within the body to keep the shape smooth and seamless.


This stage requires a bit of care, as the goal is to finish the piece neatly without distorting the surrounding stitches. Beginners often find this part especially satisfying—the transformation from an open form to a fully shaped figure gives a clear sense of completion.
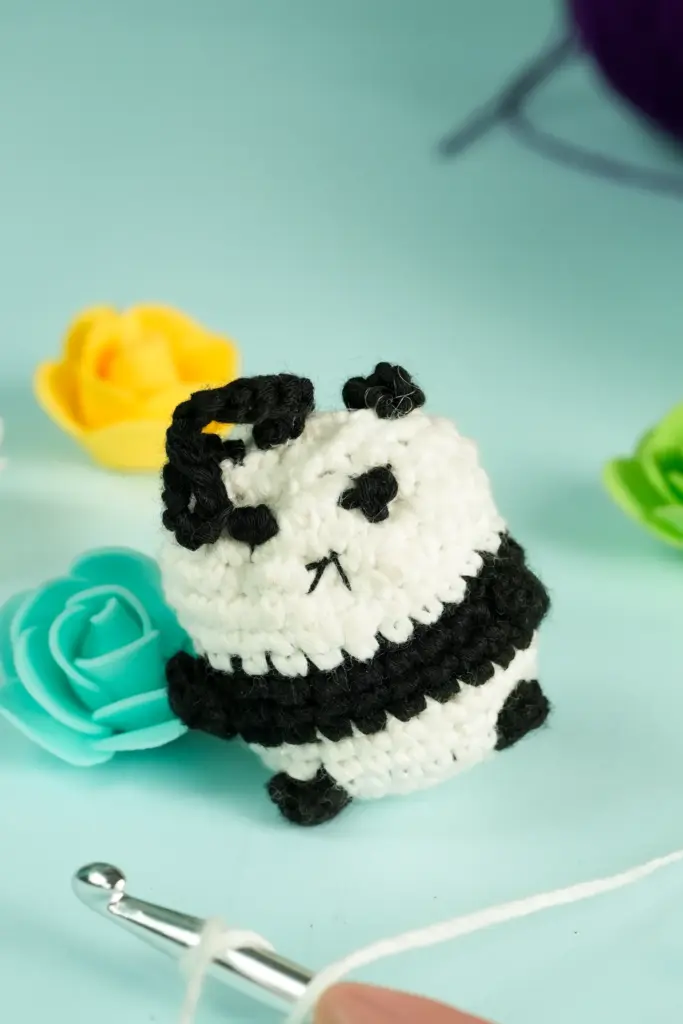
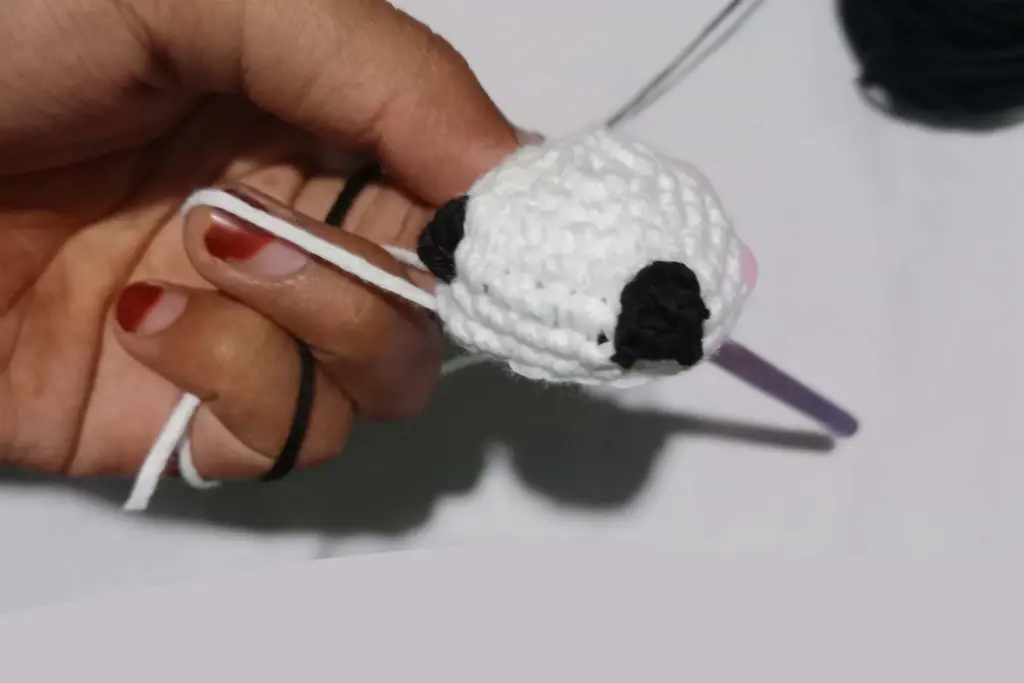
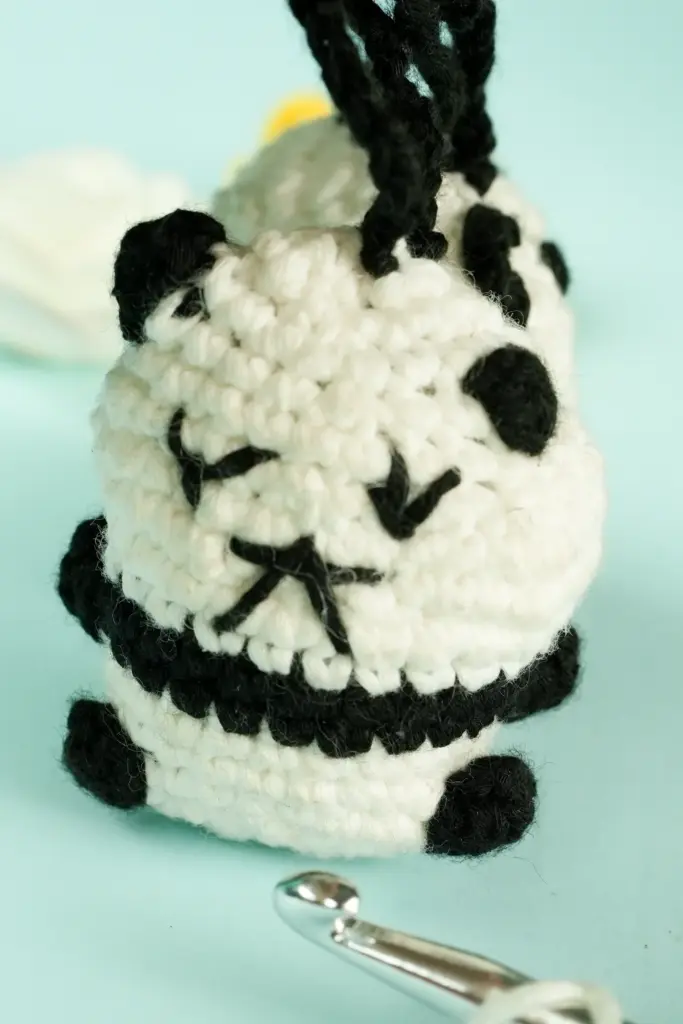
Embroidering the Eyes and Nose
To give your panda its final expressive touch, facial features like the eyes and nose are hand-stitched using a single strand of black yarn. By separating the yarn into thinner plies, you can achieve softer, more delicate lines that sit nicely on the surface.
A small needle is used to guide the thread precisely. The eyes are placed near the popcorn shapes to enhance the “masked” panda look, while the nose is centered to create a gentle, rounded expression. Because these elements are added manually, they can be tweaked to make each panda look unique—happy, sleepy, or even a bit mischievous.
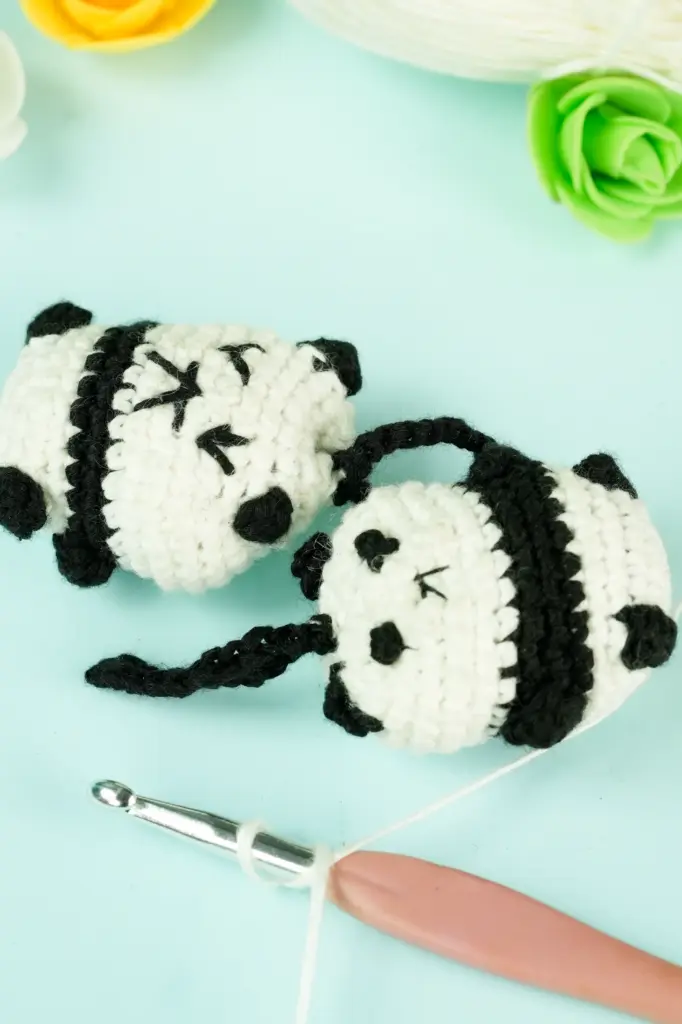
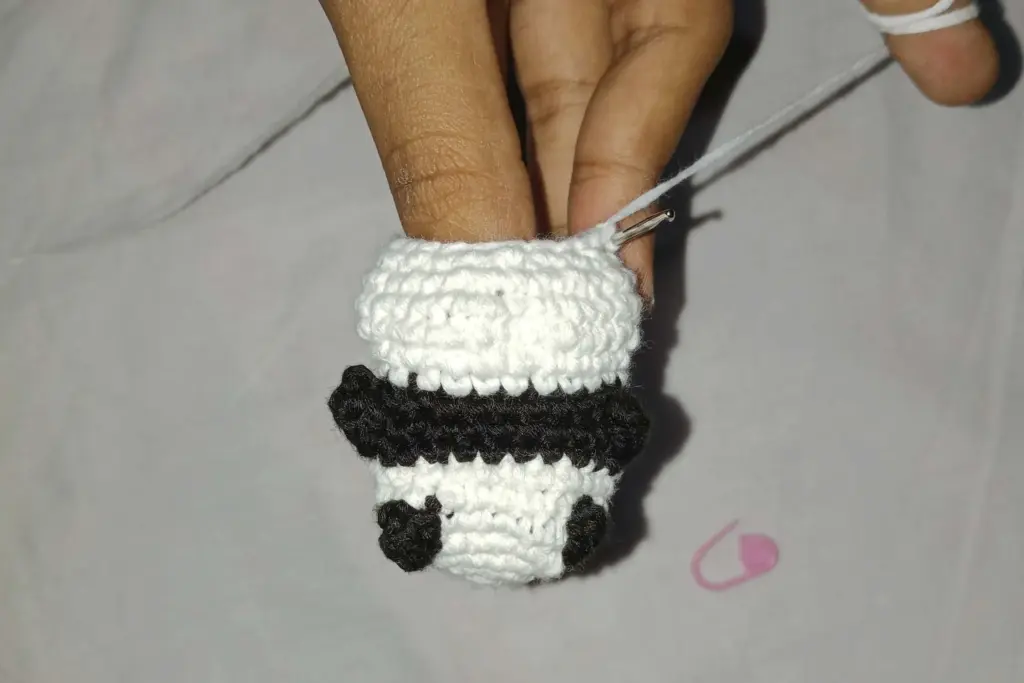
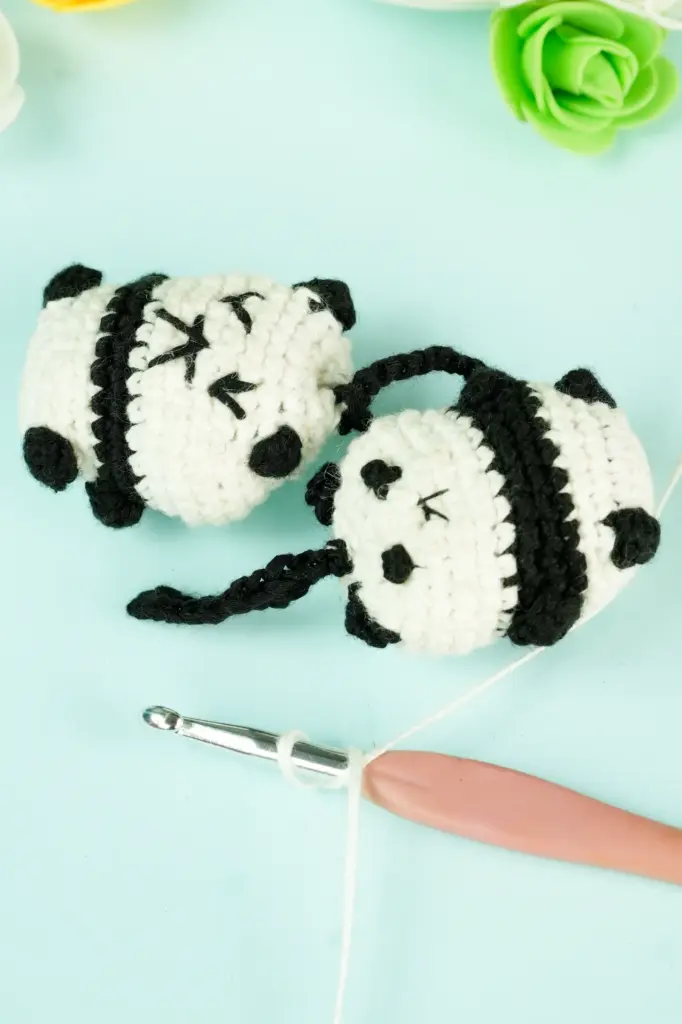
Creating the Keychain Strap
To turn your panda into a portable keychain, you’ll need to add a strap or loop at the top. This can be crocheted as a thin chain and stitched to the crown, or made using premade keychain rings with small jump loops.
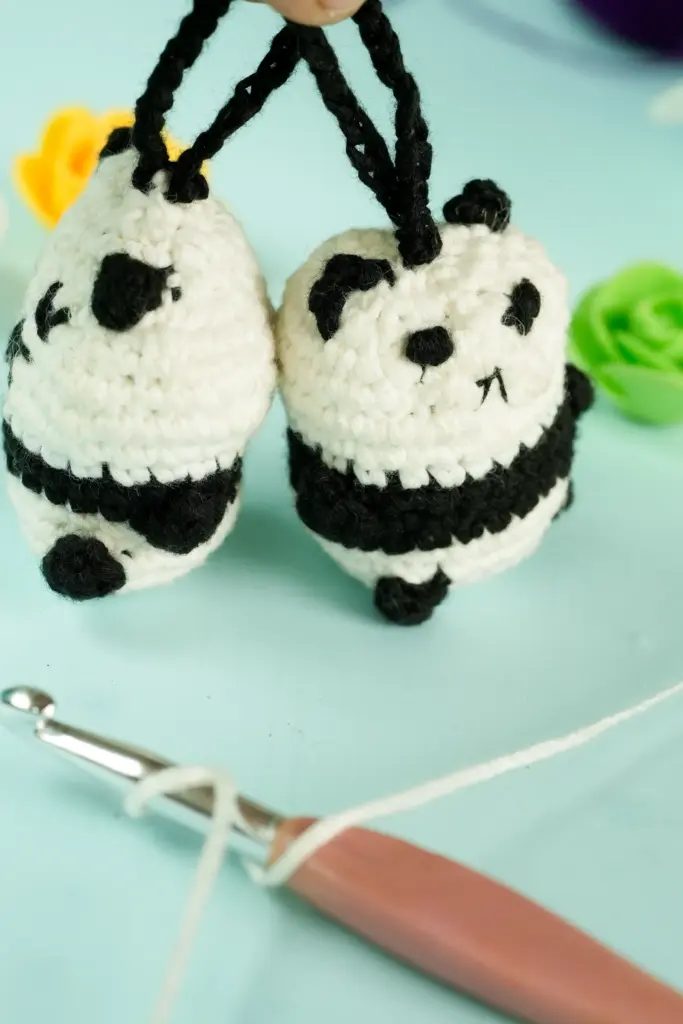
Make sure the attachment is secure enough to handle daily use, especially if it will be clipped onto bags or zippers. If using yarn, leave a long tail for sewing and weave it multiple times through the top center. A little hot glue at the knot can add extra durability if desired.
Customization Ideas
One of the joys of creating your own panda keychain is the ability to customize it. Even small adjustments can dramatically change the personality of the final piece. Here are a few beginner-friendly ways to make your panda stand out:
- Switch yarn colors for a pastel or rainbow panda
- Add tiny accessories like bows, flowers, or hats
- Use embroidery floss for detailed eyes or eyebrows
- Stitch initials or a heart on the back
- Add a scented insert or essential oil dot inside
These little extras make each panda one-of-a-kind and allow for creative exploration without changing the core pattern.
Helpful Reference Table
Below is a quick table to guide you through materials and possible substitutions to suit your preferences or local availability.
| Component | Preferred Option | Alternatives |
|---|---|---|
| Yarn (main color) | Alize Cotton Gold | Cotton blend, lightweight acrylic |
| Hook size | 2.20 mm | 2.5 mm for a looser texture |
| Embroidery yarn | Separated black yarn ply | Embroidery floss, fine cotton thread |
| Stuffing | Poly-fiber | Scrap yarn, cotton filler |
| Needle | Yarn or darning needle | Embroidery needle with large eye |
| Eyes (optional) | Stitched black yarn | Safety eyes, small beads |
| Keychain hardware | Split ring or loop | Lobster clasp, key fob insert |
This chart gives beginners confidence in choosing what they have on hand, and ensures flexibility when gathering supplies.
Final Thoughts for Beginners
Crocheting a panda keychain is not only an enjoyable way to build your skills, but also a chance to craft something cute and personal. It’s a project where texture, shape, and simplicity all come together in one neat little package. The size makes it beginner-friendly, and the step-by-step approach lets you build confidence as you go.
If you’re just starting out, this pattern is perfect for practicing even tension, learning to stuff, shaping with decreases, and applying gentle embroidery. Plus, the final result is functional—you can carry it around, gift it, or display it as a fun desk charm.
So pick up your hook, choose your yarn, and bring this little panda to life—one stitch at a time.