
If you love enjoying coffee or tea on the go, a handmade Crochet Cup Holder is the perfect way to stay stylish and eco-friendly. Not only is it reusable, but it also adds a unique, personal touch to your daily routine. Whether you’re sipping at a café or creating a thoughtful handmade gift, this beginner-friendly project is both fun and practical.
This guide will show you step by step how to crochet a sturdy, comfortable cup holder that fits most standard cups. Using simple stitches and a little yarn, you’ll learn how to make the main sleeve, attach a neat handle, and finish with clean edges—no complicated techniques required, just easy directions and your creativity.
Materials Needed
To make your own crochet cup holder, you’ll need the following supplies based on the tutorial:
- Medium weight yarn (acrylic or cotton yarn recommended for durability)
- 5mm crochet hook
- Yarn needle (for sewing and weaving in ends)
- Scissors
- Measuring tape (optional but helpful for adjusting the fit)
Make sure to pick a yarn that’s soft yet sturdy enough to hold shape. Acrylic yarn works well for this, especially when you want it to dry quickly after washing.
Abbreviations
These crochet terms are in US terminology:
- Ch – Chain
- Sc – Single Crochet
- Slst – Slip Stitch
- St – Stitch
- [] – Stitch count per row
- R – Row
- … – Repeat instructions
These are the basic terms you’ll encounter in this pattern. If you’re new to crochet, practicing these will make this project smooth and enjoyable.
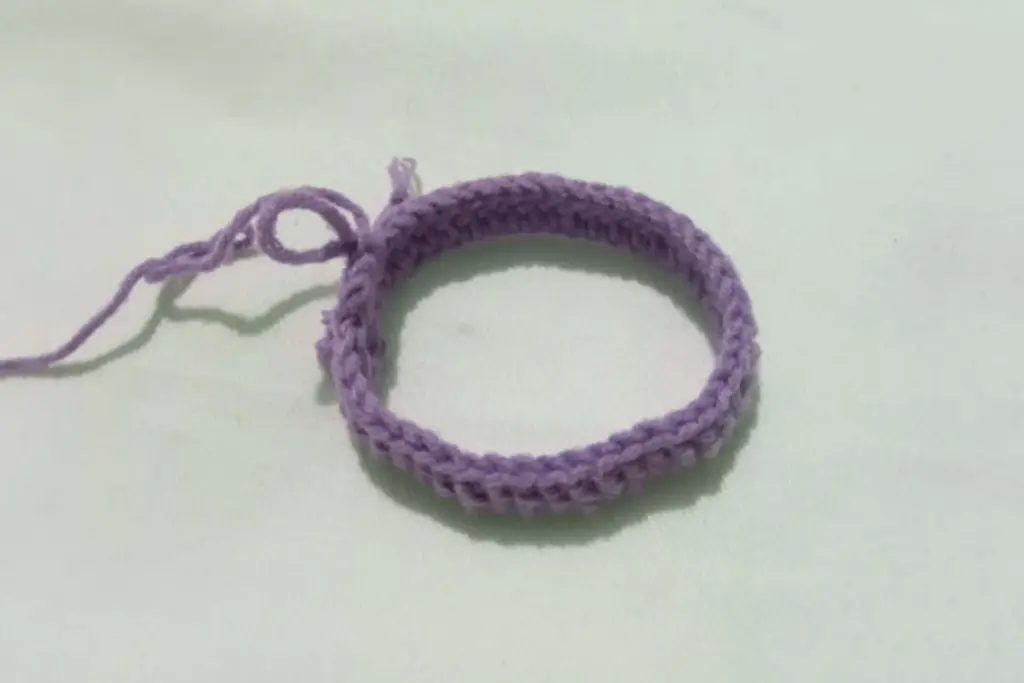
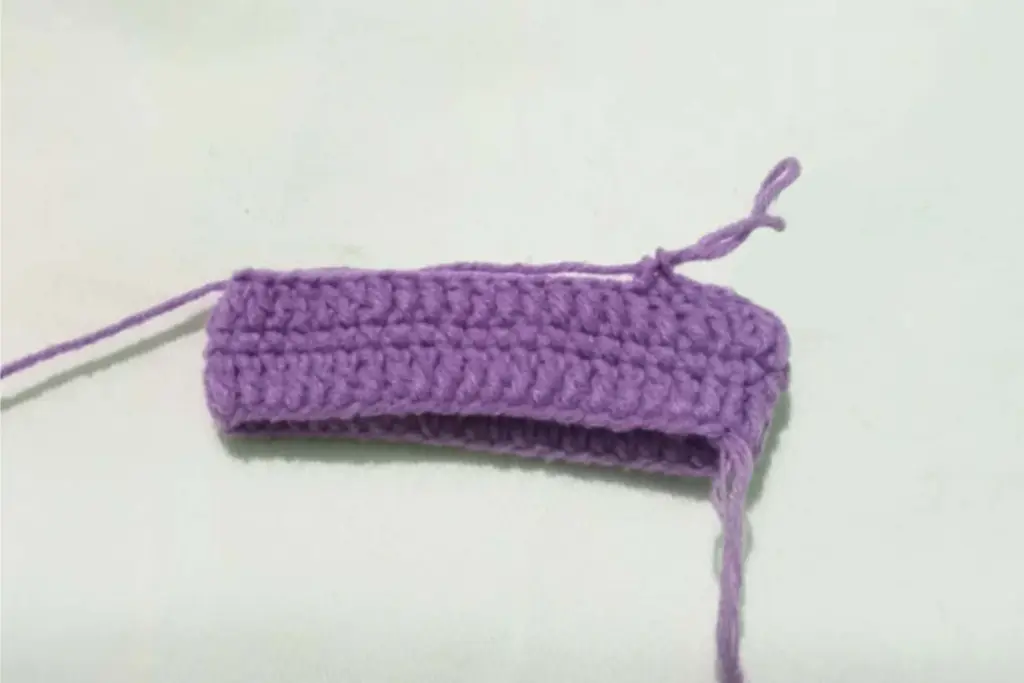
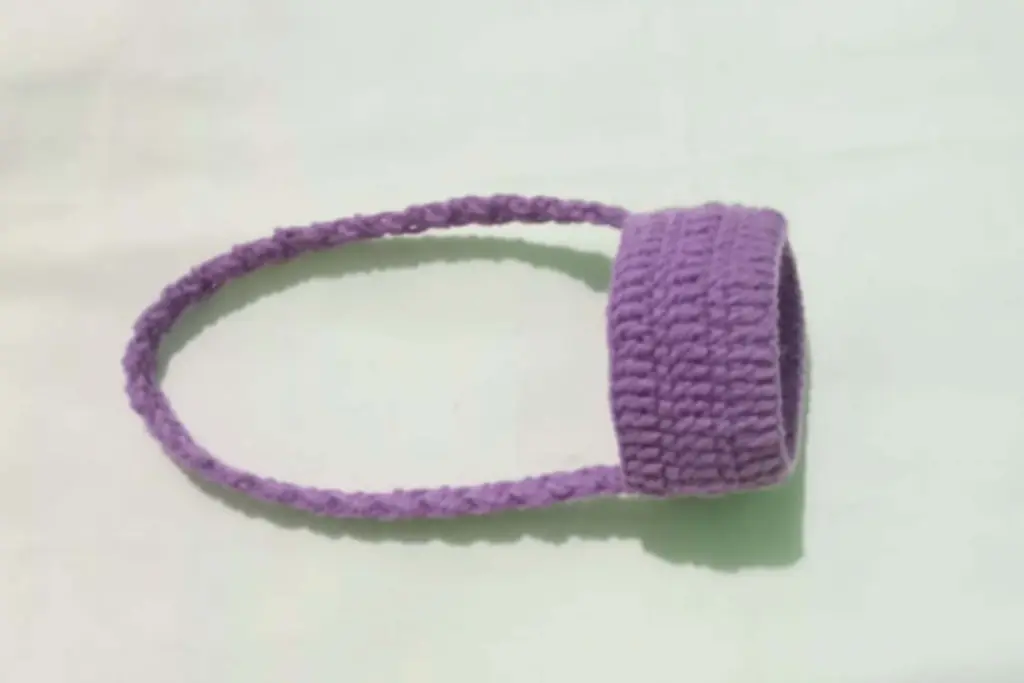
Creating the Initial Base
To begin the cup holder, you’ll first create the foundational length that wraps around the cup. The key here is to adjust your starting row so that it comfortably circles the cup you’re using. In the tutorial, a standard Starbucks-style cup was used as a reference.

The base is worked as a flat strip, which you’ll later fold and sew into a sleeve. The goal is to make sure the starting row gives a snug, tailored fit—not too loose, not too tight. Once it wraps comfortably, you’re ready to begin building upward.
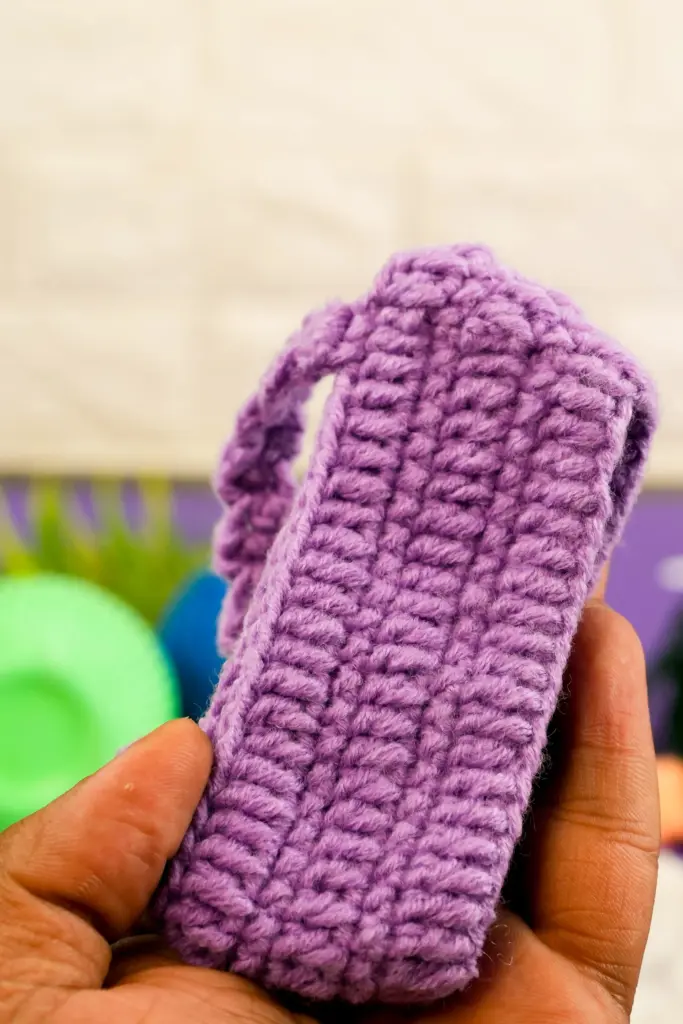
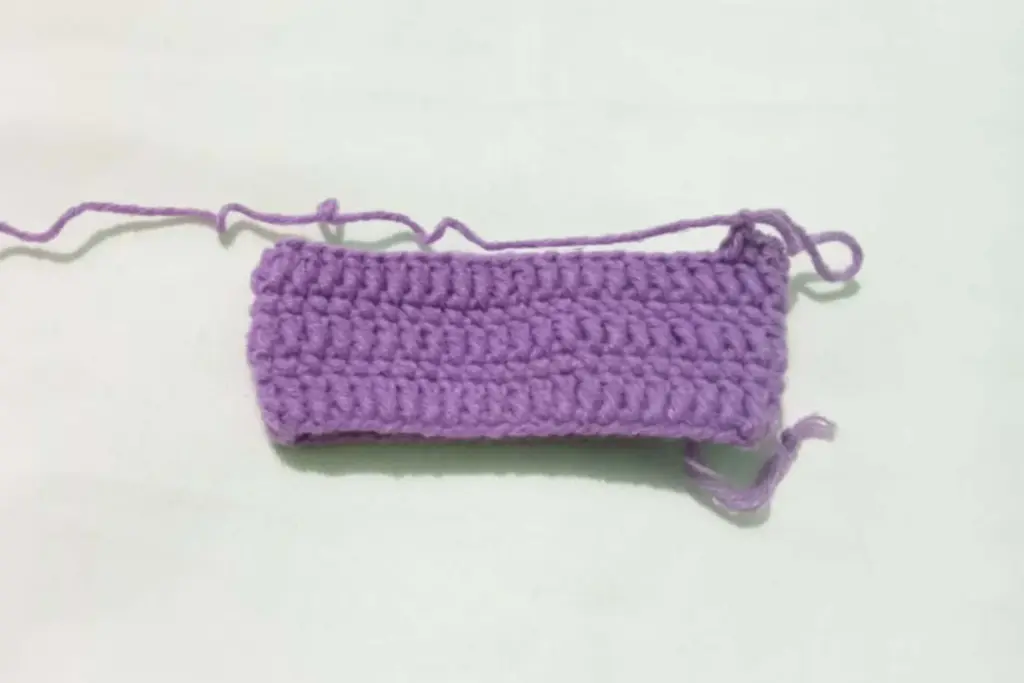
Building Up the Body
After establishing the base length, the pattern transitions into building the body of the holder. This is done by adding simple crochet rows on top of the base, using basic stitches to form a thick, cushioned layer around the cup.
Each new row is stacked evenly and turned as you go, giving the project a neat, even edge on both sides. You continue working back and forth until you’ve created a sleeve tall enough to cradle the body of the cup without slipping.
As you crochet, it’s helpful to occasionally hold your work up to the cup to ensure the height feels right. This keeps the design tailored while maintaining flexibility in the fit.
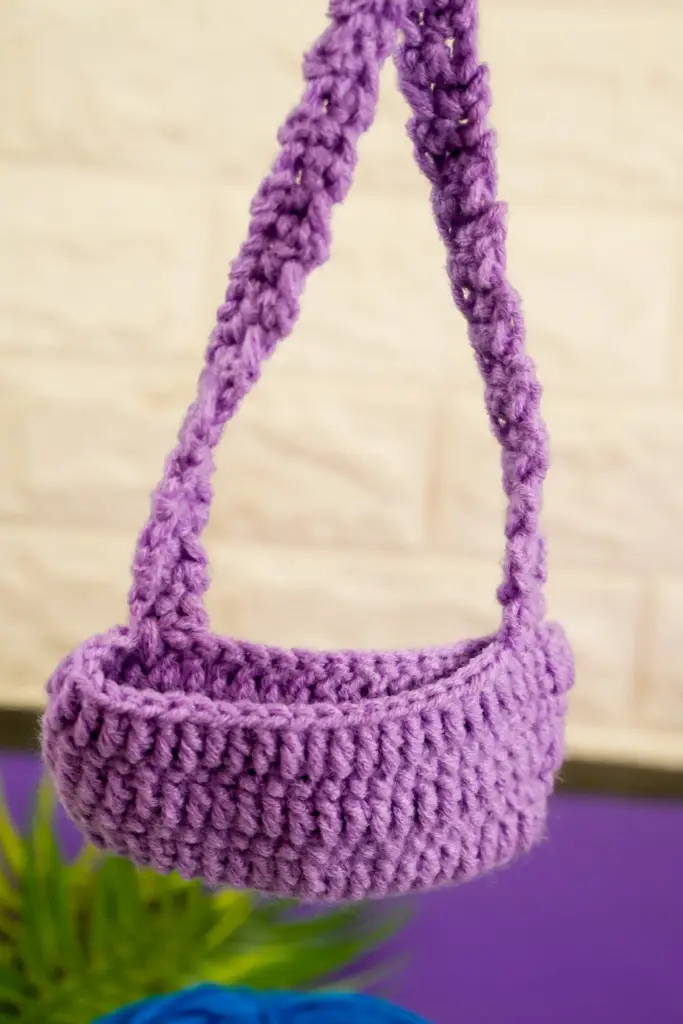
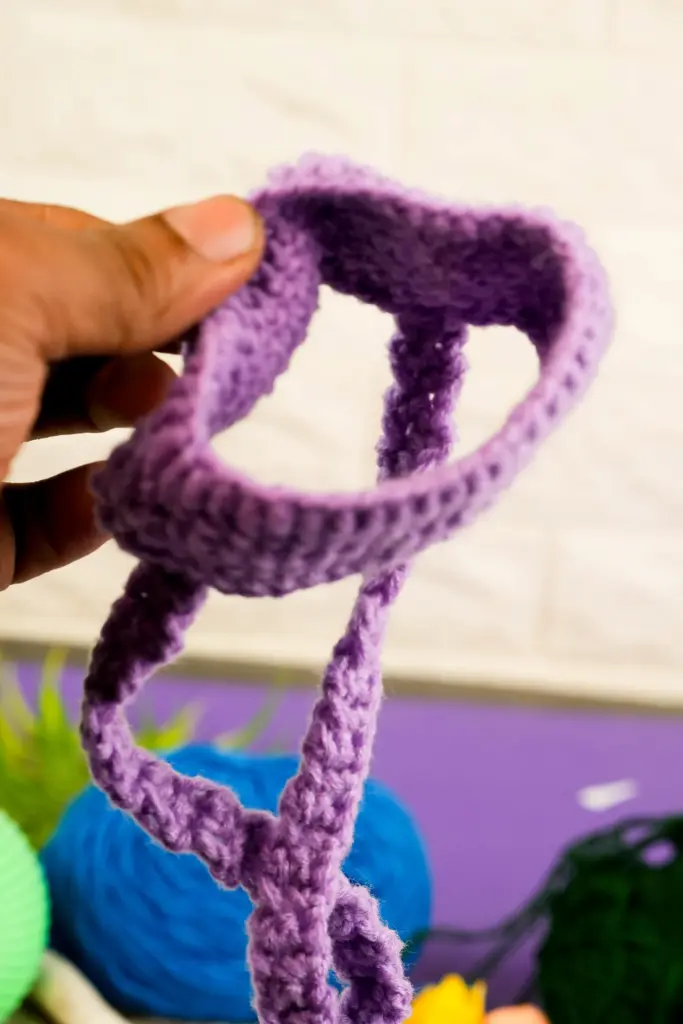
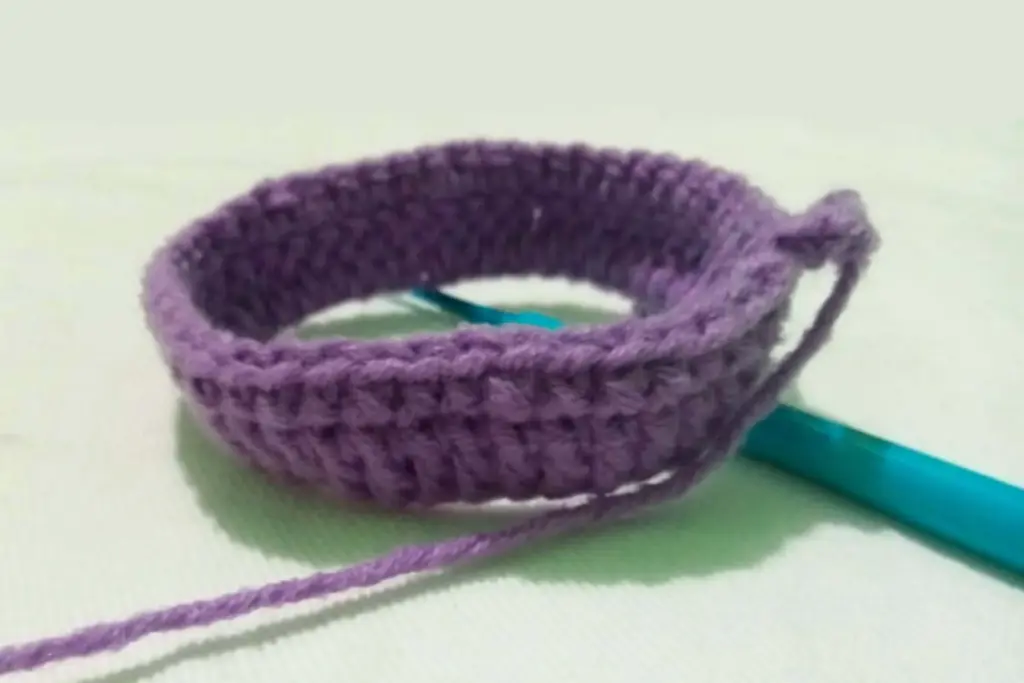
Shaping the Holder Seamlessly
Once the body of the holder is complete, it’s time to shape it into a sleeve. This part involves folding the strip and joining the sides to form a cylindrical shape that hugs the cup.
Rather than relying on knots or visible seams, the sides are stitched together using invisible or near-invisible sewing techniques. This makes the finished holder look clean and uniform from all angles. It also adds strength to the structure without bulk.
The secret to this clean finish is taking your time while sewing. Align your stitches evenly, and always double-check the fold before tightening your yarn. Small adjustments here can make a big difference in the final look.
Preparing for the Handle
Before you begin adding a handle, leave a long tail of yarn. This tail will be used later to sew the handle securely onto the body of the holder. The idea is to build the strap separately and then position it for balance and comfort.
This planning step ensures your handle will sit evenly and not pull the holder out of shape when in use. Think of it like placing the handles of a small bag—you want symmetry, stability, and ease of grip.
You can also hold the holder up with your yarn in place and visually measure where the handle would feel most natural. Marking the spots with stitch markers or scrap yarn can help guide the next stage.
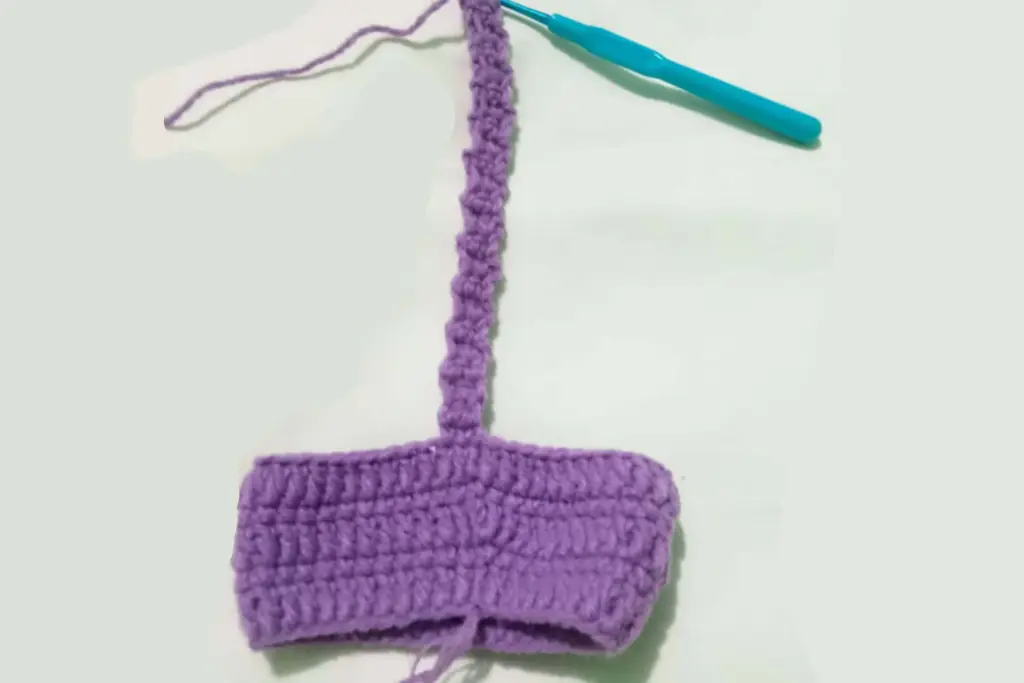
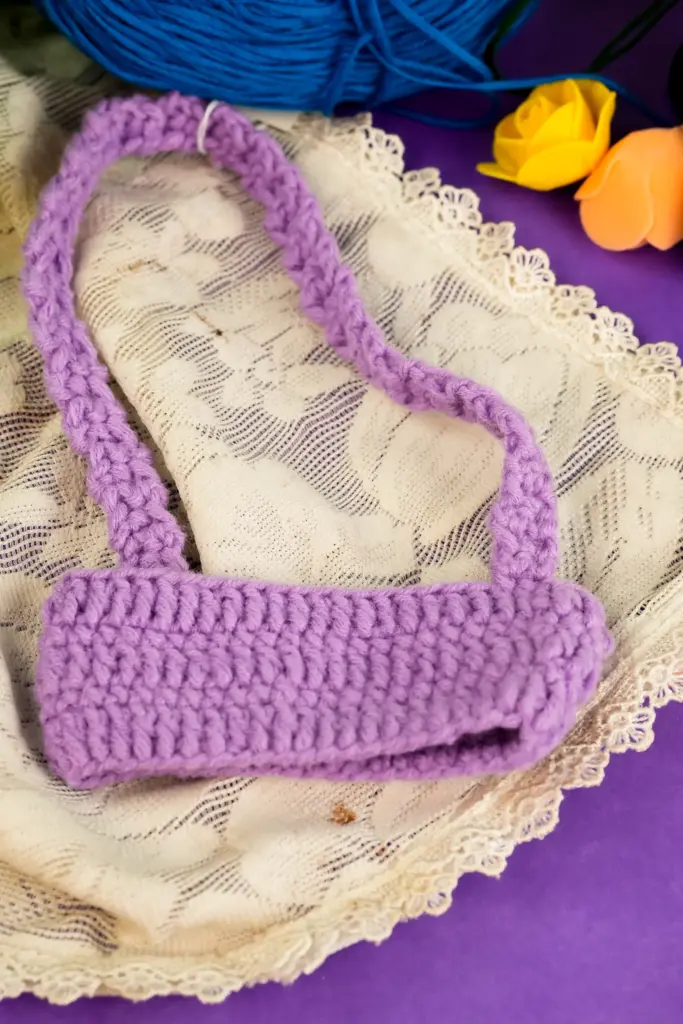
Constructing the Handle
The handle is worked separately and designed to be flat, firm, and comfortable in the hand. Using the same yarn, you’ll create a small rectangular strip by repeating the same basic stitches used in the main body.
The length is adjusted to suit how low or high you want your holder to hang when in use. In the tutorial, the strap was built to be long enough for a relaxed grip but not so long that it felt loose or unstable. The neat part is you can customize this to your own preference.
Once the strip reaches the length you want, don’t forget to leave a generous yarn tail again. This will be used to sew the handle securely to each side of the cup holder.
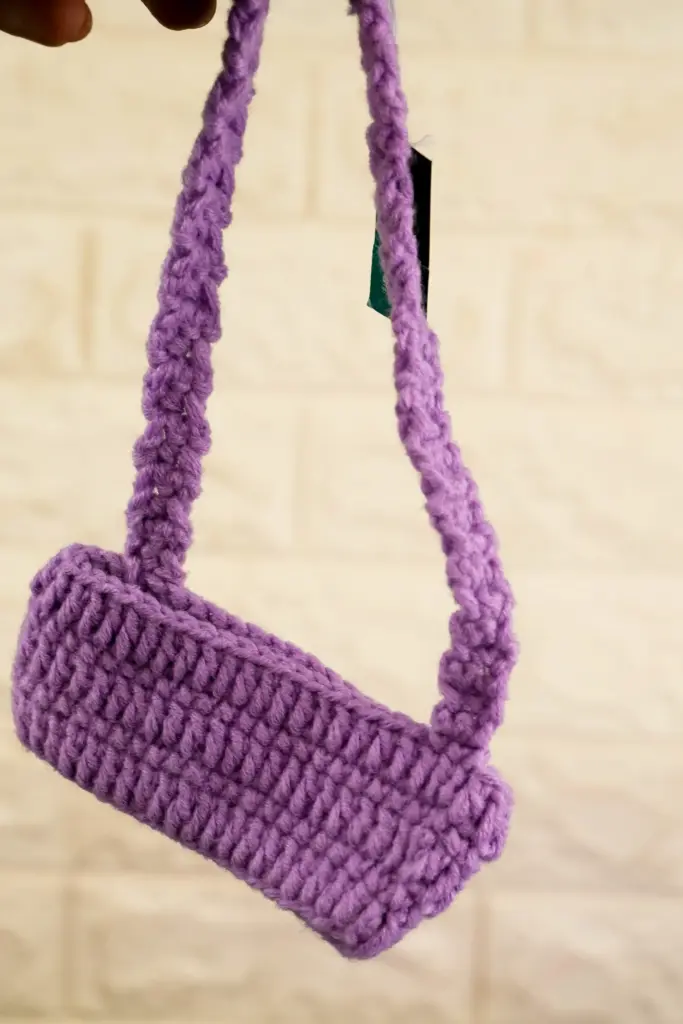
Attaching the Handle with Balance
With both the body and the handle ready, now comes the step of connecting them. The handle is stitched directly onto the sides of the sleeve using the yarn tail and a darning needle.
One crucial part of this step is making sure the handle is evenly placed. If the alignment is off, the holder might lean or twist when in use. It’s helpful to fold the holder flat, position the handle ends at equal distance from the top, and sew them in place with small, tight stitches.
Always test the balance by holding the cup with the handle before finishing the final stitches. This helps ensure it hangs as expected when carried.
Tidying Up the Finishing Touches
After the structure is in place, it’s time to clean up the project. All the loose yarn ends should be carefully woven into the stitches with a yarn needle. This keeps the holder secure and prevents future unraveling.
Then, use scissors to snip off any excess yarn. Make sure not to cut too close to the knot or woven section, as this can weaken the stitch. Once everything looks neat and seamless, give the entire cup holder a gentle stretch to even out the tension.
This final touch not only enhances the look but also helps the holder maintain its shape through repeated use.
Why This Project is Perfect for Beginners
Crocheting a cup holder is a great entry-level project for a few reasons:
- It uses only basic stitches that are easy to master
- The small size makes it quick and satisfying to complete
- It’s practical and stylish—something you can actually use daily
- There’s plenty of room to get creative with yarn colors or textures
You don’t need to be an expert to create something functional and beautiful. Even your first attempt can turn out looking polished with just a bit of patience and attention to detail.
Practical Tips for Best Results
- Use medium weight yarn for structure and flexibility
- Stick with lighter colored yarns for beginners so stitches are easier to see
- Use stitch markers to keep track of beginning and end rows, especially when attaching the handle
- If you’re unsure about proportions, keep measuring your work against the cup as you go
And most importantly—don’t rush. Take breaks, stretch your fingers, and enjoy the rhythm of your stitches.
Table Overview
Here’s a summary of the components, tools, and time needed for this crochet cup holder:
| Element | Details |
|---|---|
| Skill Level | Beginner-friendly |
| Materials | Yarn, crochet hook, needle, scissors |
| Main Construction | Flat panel sewn into sleeve |
| Handle | Separate strap sewn onto both sides |
| Total Time Estimate | 1–2 hours |
| Yarn Suggestion | Medium weight acrylic or cotton |
| Uses | Coffee cups, iced drinks, gift idea |
Final Thoughts
This crochet cup holder is a small project with big payoff. Whether you’re making it for yourself or as a handmade gift, the process is meditative and fun. Once you’ve made one, you’ll likely want to make more in different styles or for different cup sizes.
It’s also a great introduction to practical crochet projects. You build real skills—like pattern reading, shaping, and sewing—while ending up with something cute and usable.
So grab your yarn and hook, and give it a try. Your daily drink routine is about to get a handmade upgrade.