
Crochet roses are one of the most beautiful projects a beginner can try. They’re elegant, easy to make, and endlessly customizable in color and size. If you want to decorate a beanie, a bag, or create a bouquet of handmade blooms, this simple rose pattern will guide you through every step.
With just basic stitches and minimal materials, you can craft a soft flower that looks intricate but is surprisingly simple to make. This project is ideal for crafters who enjoy detailed yet relaxing creations that can be completed in a short time.
The pattern begins with a simple foundation strip, builds gentle petal shapes, and ends with a rolled flower that stays perfectly in place.
You can make small, medium, or large roses depending on your yarn and hook size — the technique stays the same, only the starting length changes.
Materials Needed
You need these following materials before you begin your crochet rose:
- Medium-weight acrylic yarn in your favorite color
- Crochet hook size 3.5 mm (or use a size suitable for your yarn)
- Yarn needle or darning needle for weaving in ends
- Scissors
- Optional: light cotton yarn for smaller roses or chunky yarn for fuller blooms
Tip: Always match your hook size to the yarn weight. A smaller hook creates tighter petals, while a larger hook gives a softer, looser shape.
Abbreviations
- Ch – Chain
- Dc – Double crochet
- Sc – Single crochet
- Sl st – Slip stitch
- YO – Yarn over
Step by step crochet rose keychain pattern
Starting the Foundation Strip
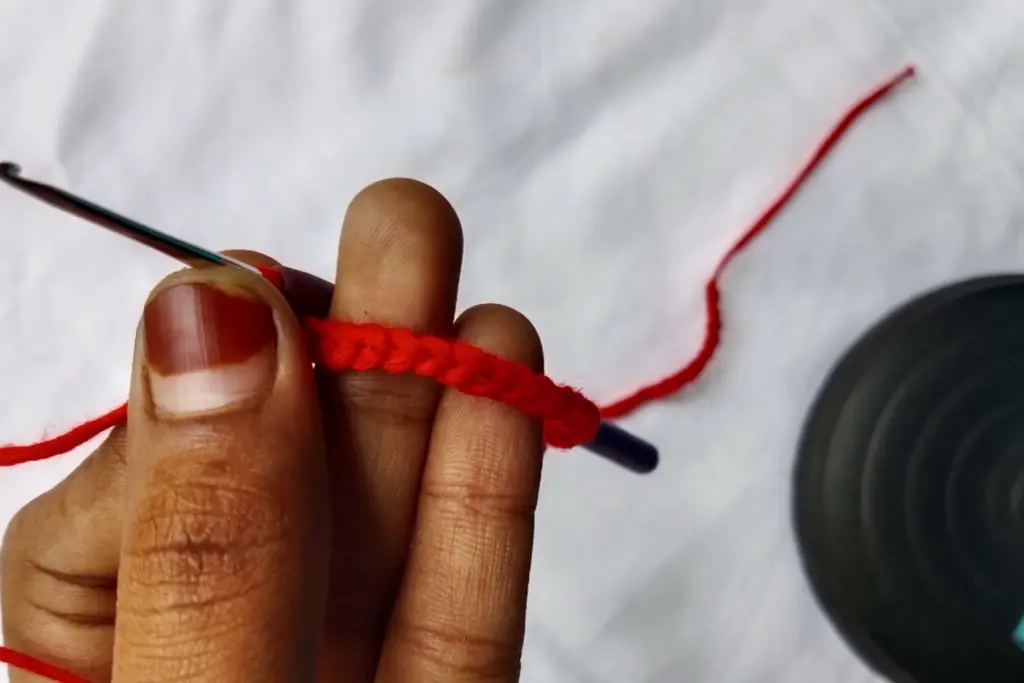
Every rose begins with a base strip that forms the petals later on. This is the stage where you decide how big your flower will be. A shorter strip results in a small rose, while a longer one gives you more layers and a fuller bloom. The key here is consistency — keep your tension even so that the edges of your work remain straight. Once your strip is complete, it will serve as the foundation for building the rose’s delicate curves.
This initial piece may curl slightly, which is completely normal. That natural curl will help when rolling the rose into shape at the end. Beginners often find this part relaxing because it sets the rhythm for the rest of the project without being complicated.
Forming the Petal Ridges
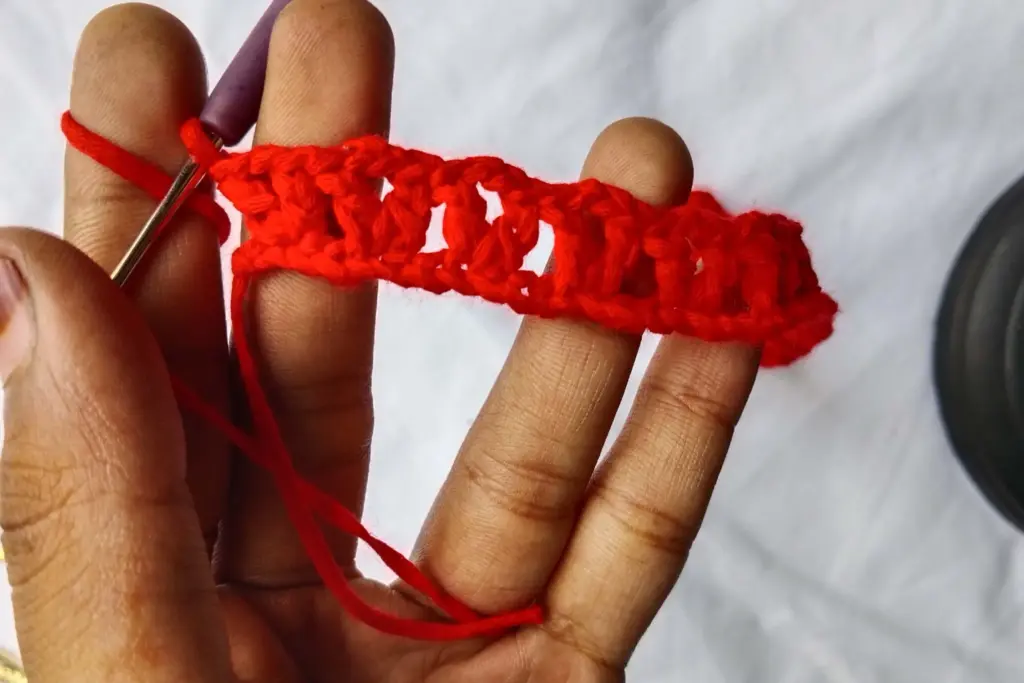
The charm of a crochet rose lies in its gentle waves and ridges that resemble soft, unfolding petals. In this step, you’ll work across your foundation strip, creating small raised shapes that will later curl beautifully when rolled. Focus on keeping your movements fluid and relaxed so the fabric remains flexible.
As you add height to each section, you’ll see a repeating pattern of arches forming — these are the beginnings of your rose petals. The ridges should look slightly rounded but not too stiff. Remember, the softer your stitches, the more natural and lifelike the petals will appear.
Building Depth and Texture
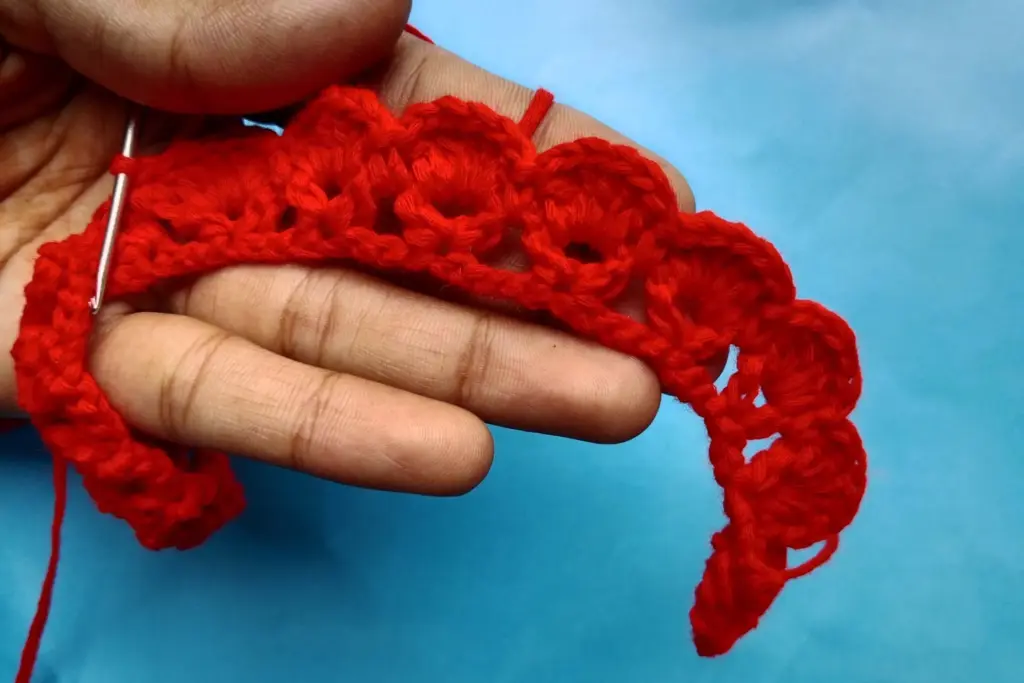
After setting the initial ridges, you’ll move on to developing the flower’s body. This stage adds more volume and defines the rose’s overall texture. Using slightly taller stitches helps create the layered look of real petals. The lower parts form the base, while the upper edges start to curl outward, mimicking the way real roses open.
As the fabric grows, you’ll notice it naturally begins to spiral. That’s exactly what you want — it means the structure is forming correctly. Gently flatten it from time to time to make sure the petals stay even. Don’t worry if it starts to twist; once rolled, this slight twist adds to the realistic appearance.
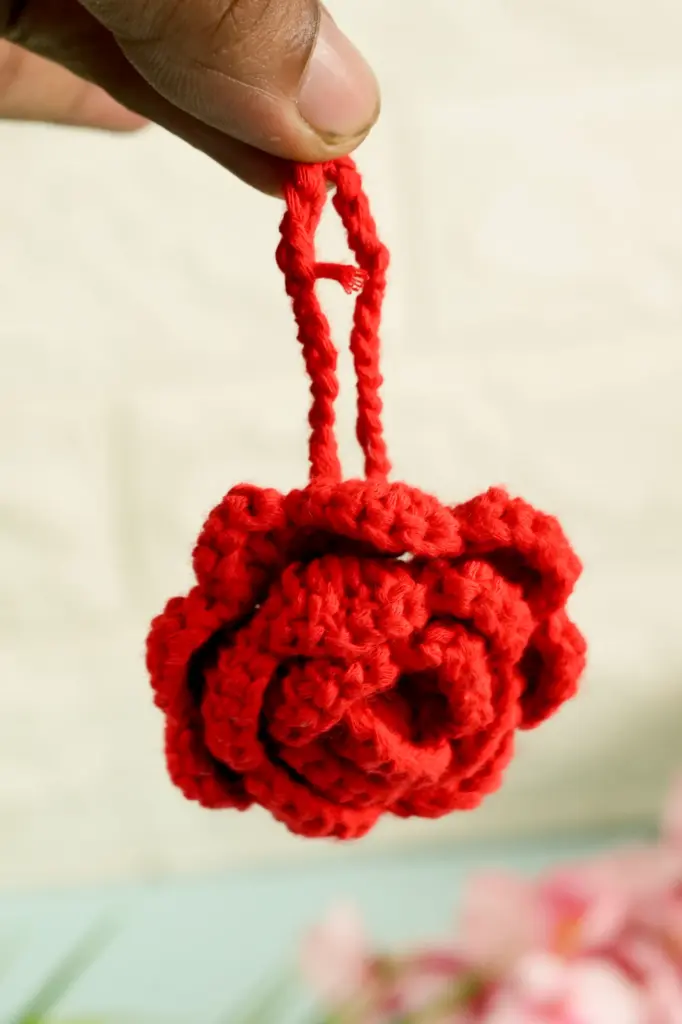
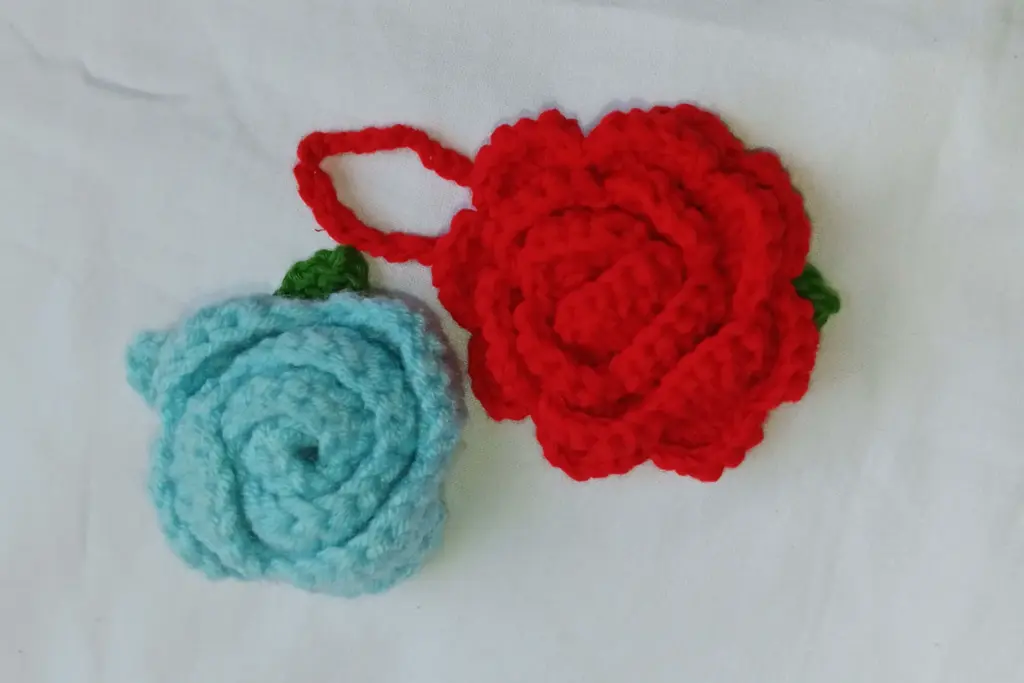
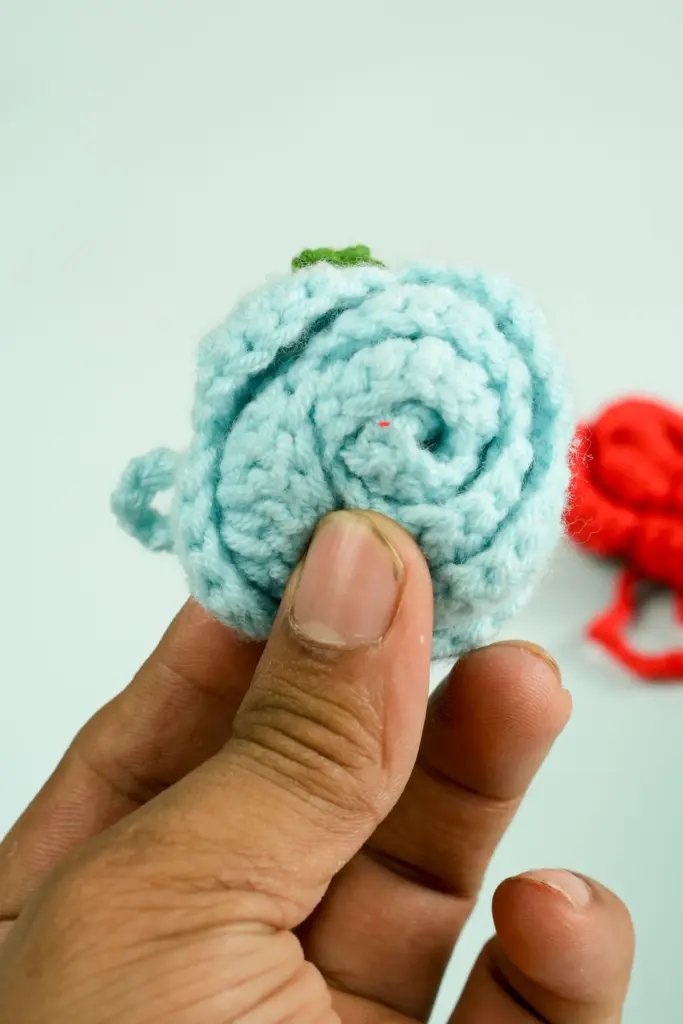
Shaping the Bloom

Once your textured strip is ready, it’s time to bring your rose to life. Begin by gently rolling one end of the strip to form the center of the flower. Keep the roll tight at first so it resembles a small bud. As you continue to wrap the rest of the strip around that center, let the layers loosen gradually. The outer petals should flare out slightly, creating that classic rose-petal curl.
Take your time with this part. Adjust the folds with your fingers until the flower shape feels balanced. Each layer should overlap the previous one naturally, giving a soft spiral effect. When viewed from above, the petals should seem to swirl around a central point — that’s how you know the shaping is right.
Securing the Rose
After you’ve formed the bloom, you’ll need to keep everything in place. Thread the long yarn tail through a darning needle and stitch across the bottom of the flower several times. The goal is to catch each layer near the base so nothing unravels. Your stitches don’t have to be perfectly neat; they’ll be hidden underneath once the rose is complete.
If you prefer, you can also use a bit of fabric glue to strengthen the base, especially if the rose will be attached to accessories like hats or bags. Once secure, weave in any remaining ends neatly to keep the back tidy.
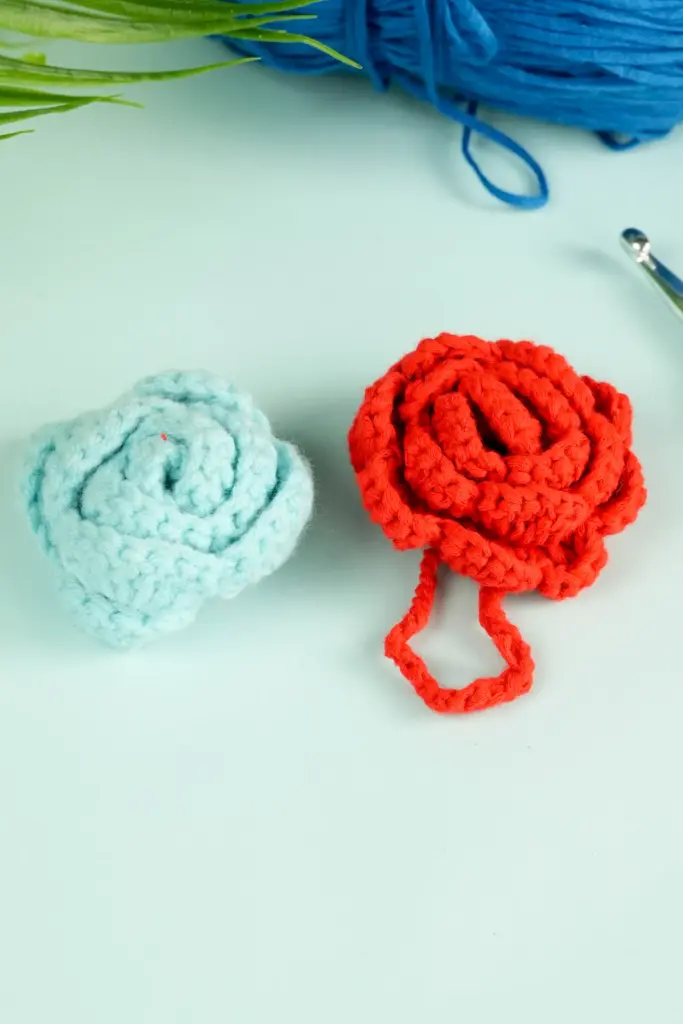
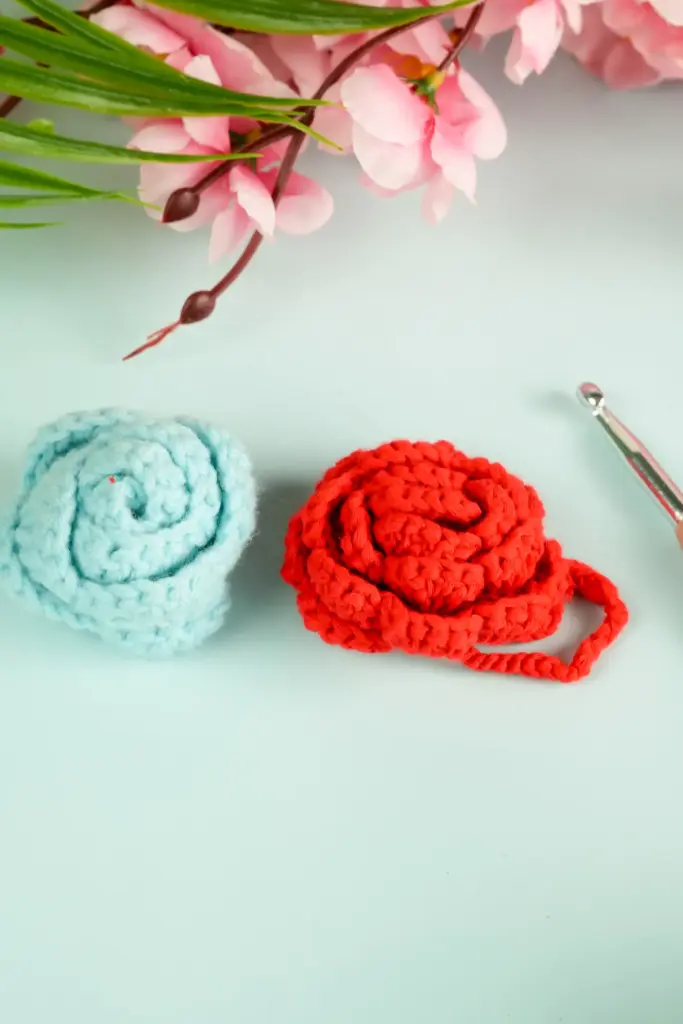
Adjusting the Size
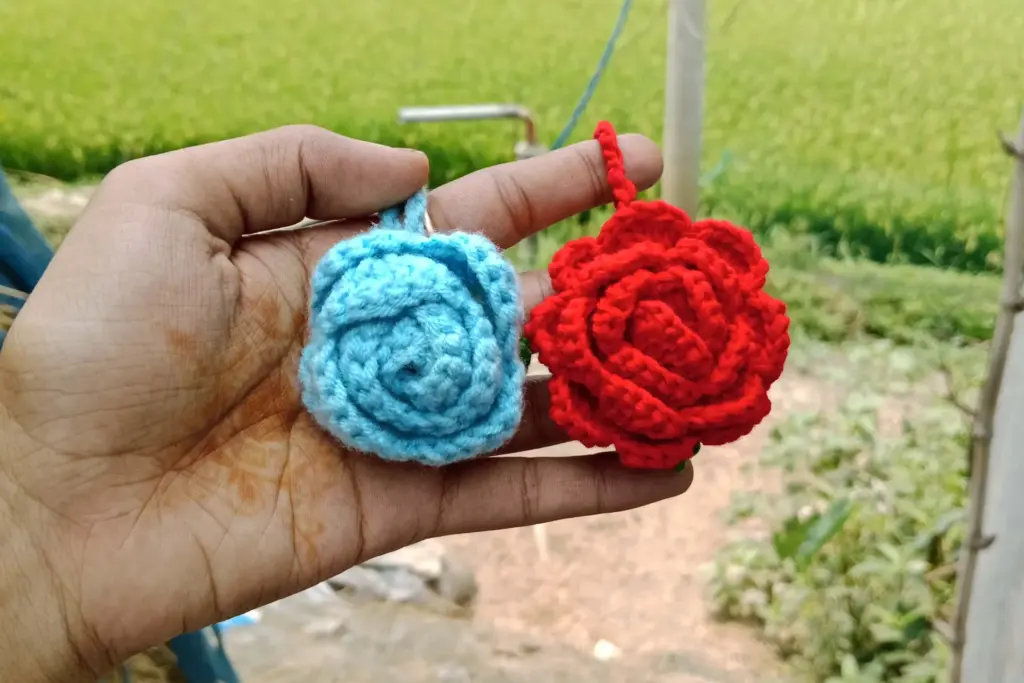
One of the great advantages of this pattern is flexibility. You can easily change the size of your crochet rose by adjusting the starting length or the thickness of your yarn.
- For small roses, use thinner yarn and a smaller hook.
- For larger blooms, use bulkier yarn or add more starting stitches.
These simple adjustments allow you to create a range of flowers that complement each other beautifully when arranged together. Try mixing several sizes in one display — it gives your bouquet a natural, garden-like charm.
Creating Variations
Once you master the basic structure, experiment with textures and colors. Two-tone roses, for instance, can be made by switching yarn shades halfway through the strip to create a gradient effect. You can also use metallic or silk-blend yarns for a touch of luxury.
Another idea is to make a rose with a contrasting center. Start with a light color for the first few layers and switch to a darker hue for the outer petals. This subtle variation gives the rose depth and realism, making it look even more striking when displayed or used as a decorative accent.
Attaching to Accessories
Crochet roses make wonderful embellishments for other handmade pieces. Sew one onto a beanie, scarf, or tote bag to give it a touch of personality. You can also glue a small pin or hair clip to the back to turn your flower into wearable art.
If you’re working on home décor, try gluing the roses onto a wreath, frame, or cushion cover. Their soft texture and handcrafted appearance add warmth to any space. Many crocheters even make several roses and arrange them in a vase as long-lasting floral décor.
Finishing Touches
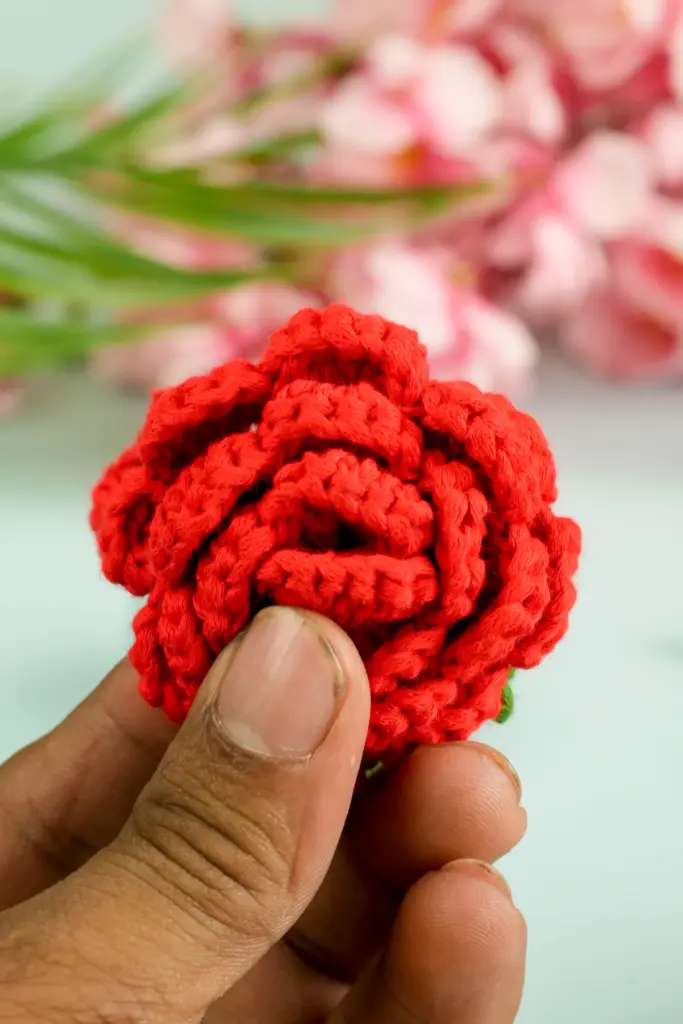
Before displaying or gifting your rose, gently shape the petals with your fingers to open them up slightly. This small adjustment makes the flower look more natural. You can also lightly steam the petals if they appear too stiff — just be careful not to overheat the yarn.
Check that the base is tight and even, and trim any stray fibers. If you’re making multiple roses, vary their sizes slightly for a realistic bouquet effect. A ribbon tied around the stems or a dab of fragrance oil at the base can add a final personalized touch.
Final Thoughts on Crochet Rose Pattern
Crocheting a rose may look intricate at first, but with practice, it becomes a relaxing and deeply satisfying project. Each petal unfolds beneath your hands, turning a simple strip of yarn into a lifelike flower. The beauty of this pattern lies in its adaptability — you can use any color, yarn type, or size you like and still achieve a lovely result.
Whether you attach it to a hat, decorate a gift, or simply display it in a vase, your handmade rose will always carry a personal story. Once you finish one, you’ll likely find yourself making many more — a garden of crochet blooms that never fade.