
A bow keychain is a simple yet charming crochet project that beginners can complete quickly while still achieving a neat, polished result. It works beautifully as a bag charm, a thoughtful handmade gift, or a stylish key accessory. The construction is based on two basic rectangles that are shaped, folded, and secured together, creating a classic bow with a ribbon-like tail. Because the method relies on basic rowing rather than shaping, it is extremely accessible even for those who have only recently learned the basics of crochet.
The tutorial in the transcript demonstrates a design that can be adjusted to any size with ease. By changing the starting length or the number of rows, you can create anything from tiny bows for zipper pulls to larger ones for decorative uses. This guide focuses on the overall process behind the bow, explaining each stage in clear and friendly language suitable for new crocheters.
Materials Needed
This bow requires only a small amount of yarn and a few standard crochet tools. The tutorial uses a medium-weight yarn and a hook size that creates a firm, structured fabric. You can adjust your materials depending on the size and texture you want, but using a similar yarn weight will give you results close to those shown in the transcript.
• Medium-weight yarn for both the bow and the tail
• Crochet hook appropriate for the yarn weight
• Scissors for trimming
• Yarn needle for sewing and weaving in ends
• Keychain clasp or ring
• Optional: slightly thinner yarn or thread if you prefer a slim wrap at the bow’s center
Abbreviations
These abbreviations follow US crochet terminology and represent the most common terms beginners will encounter when working with small rectangular pieces.
mr – magic ring
sc – single crochet
hdc – half double crochet
slst – slip stitch
yo – yarn over
Understanding the Bow Construction
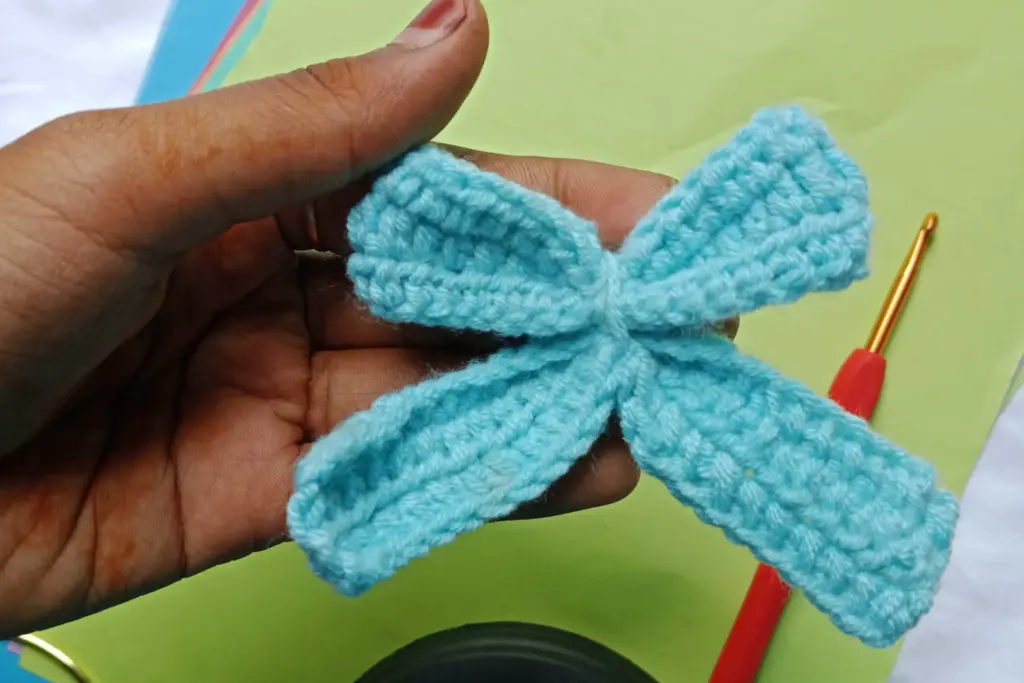
The bow is created from two separate rectangles. The larger one forms the upper part of the bow, while the smaller one acts as the tail underneath. The design avoids complicated shaping, relying instead on clean, even rows. After the rectangle for the bow is completed, it is folded in half and cinched tightly in the middle. This gathering transforms the flat fabric into two curved sides, forming the recognizable bow shape.
The tail panel is placed beneath the folded bow, allowing the ends to extend just slightly beyond the upper piece. Once both rectangles are stacked, the center is wrapped securely with yarn, holding them in place and creating the decorative center band. This central wrapping is what gives the bow its final structure.
Adjusting the Size of Your Bow Keychain
Since both components are rectangles, adjusting the size of the bow is simple and intuitive. To make a smaller bow, you begin with a shorter foundation and create fewer passes. To make a larger one, lengthen the foundation and add extra passes. The same method applies to the tail piece, allowing it to be proportionally shorter, longer, wider, or thinner depending on your preference.
Size and Adjustment Reference Table
Component | What You Change | Effect
Main panel length | Adjust foundation | Determines bow length
Main panel row count | Add or reduce rows | Determines bow height
Tail panel length | Adjust starting length | Controls how long the tail extends
Tail panel row count | Adjust number of rows | Controls how wide the tail appears
Yarn thickness | Finer or thicker yarn | Changes texture and overall scale
Hook size | Slight adjustments | Affects firmness and density
With these adjustments, you can make sets of matching bows in different sizes, all using the same method.
Crocheting the Main Bow Panel
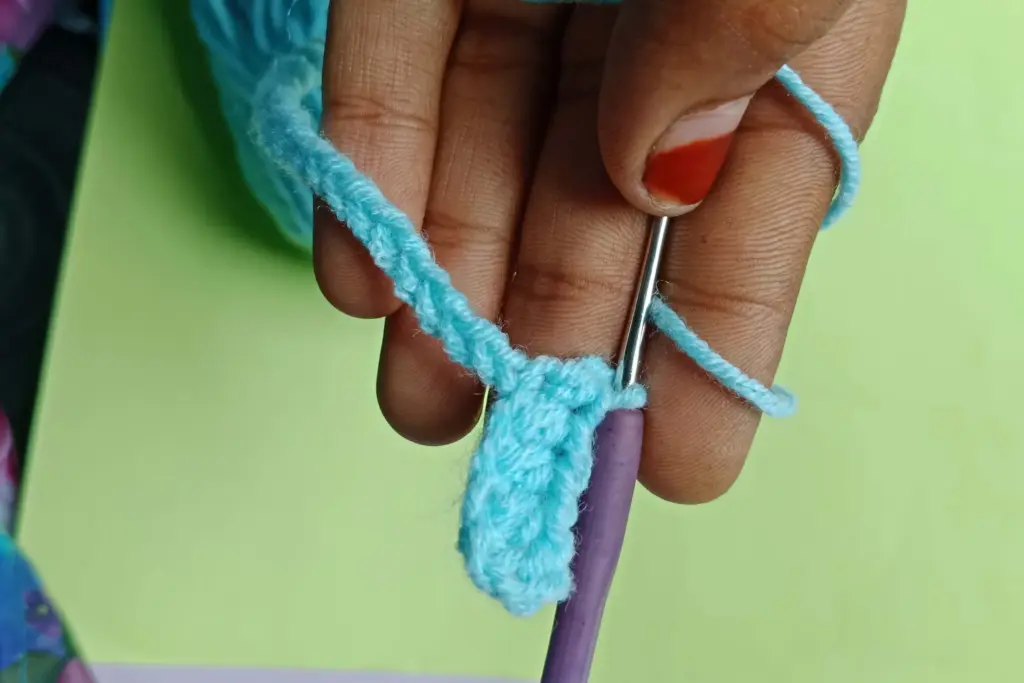
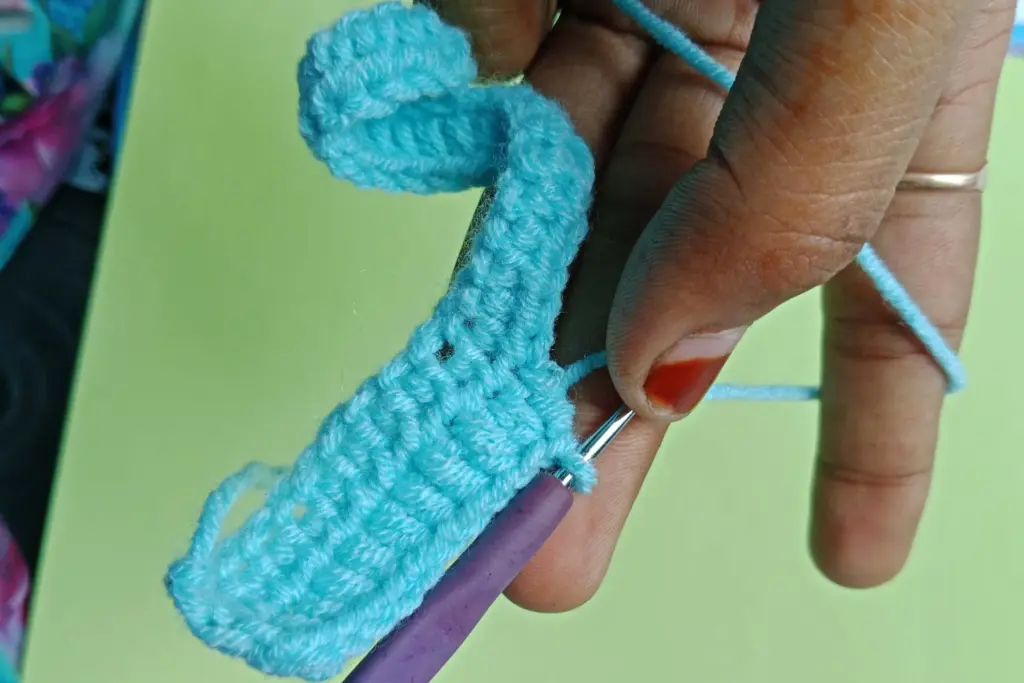
The main panel begins with a simple starting foundation. You work back and forth, building a straight-edged rectangle with a dense texture that will naturally hold its shape later. The focus during this stage is on keeping the rows even and ensuring the edges line up cleanly. Beginners often find this a good opportunity to practice turning rows and identifying the final entry point at the edge.
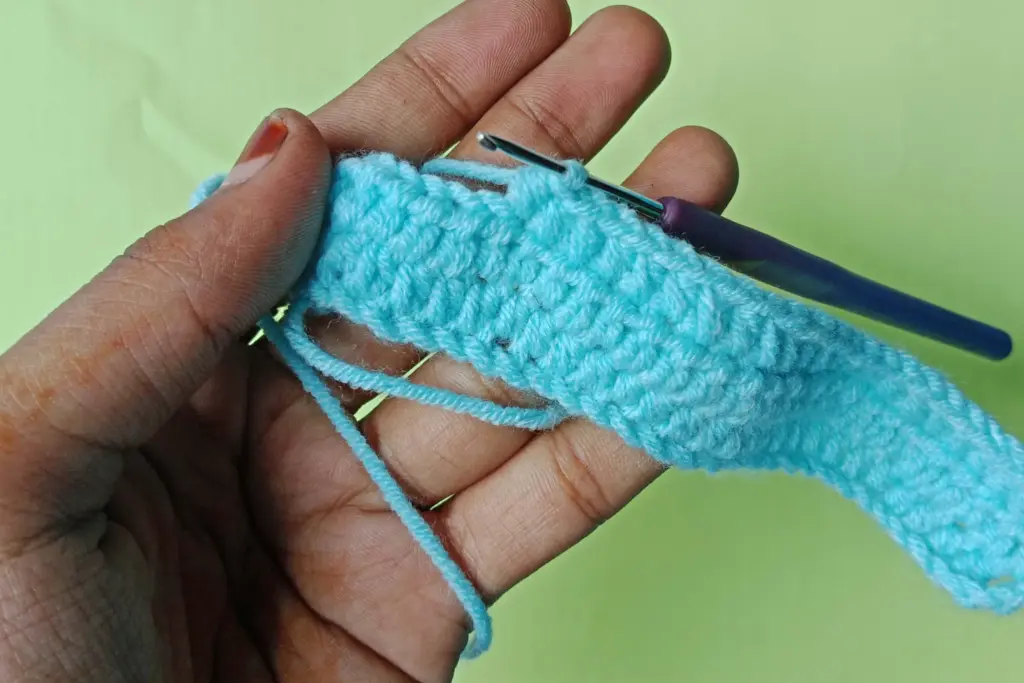
Once the rectangle reaches the intended height, the working yarn is secured with a long tail. This tail becomes essential for shaping the bow, as it is used for sewing the edges together and wrapping the center later. The rectangle is then folded so that the shorter sides meet, forming a doubled shape that already resembles the outline of a bow.
Creating the Bow Tail Panel
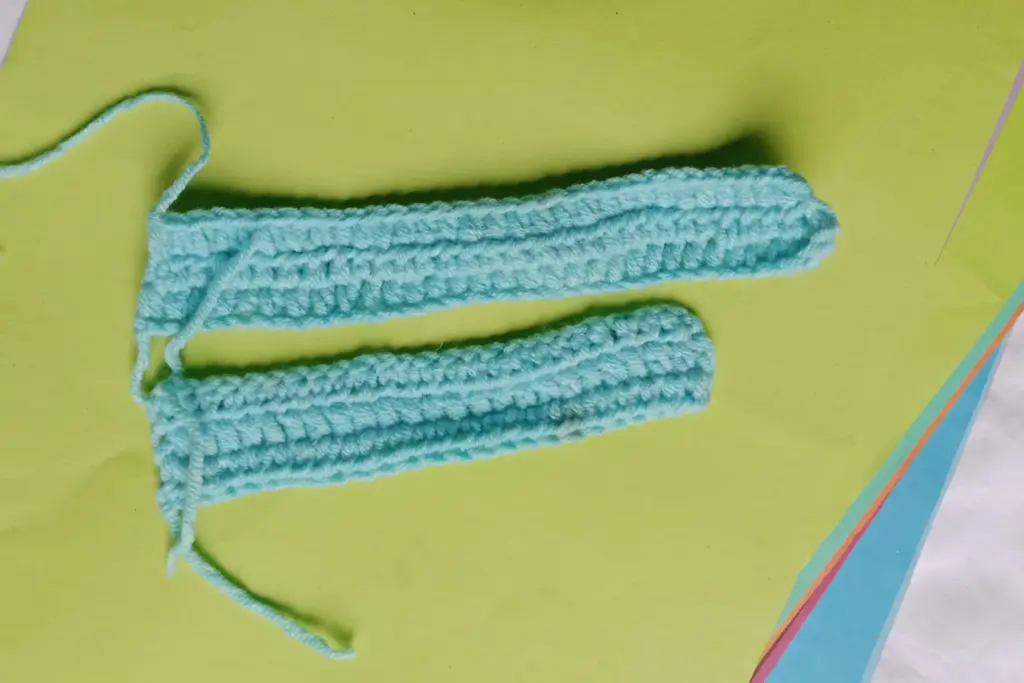
The second rectangle is made in the same way, which helps build confidence and consistency for beginners. You start with a foundation similar to the main panel and build it up with the same stitch, aiming for a piece that visually matches the first. Once finished, the ends are neatly woven in so the tail panel is clean and ready for assembly.
When both rectangles are complete, the project moves on to forming the bow shape, wrapping the center, adding the tail, and finishing off with the keychain attachment.
Folding and Shaping the Bow

Once the main panel is completed and folded, it begins to take on the familiar bow shape. The seam created by joining the short edges is placed at the center so it remains hidden. With the long tail of yarn still attached, the bow is cinched tightly in the middle. This gathering creates two full, rounded sides that curve outward naturally. The tightening process can be repeated several times to ensure the center stays secure and the bow maintains its shape. Adjusting the folds slightly with your fingers helps achieve symmetry between both sides.
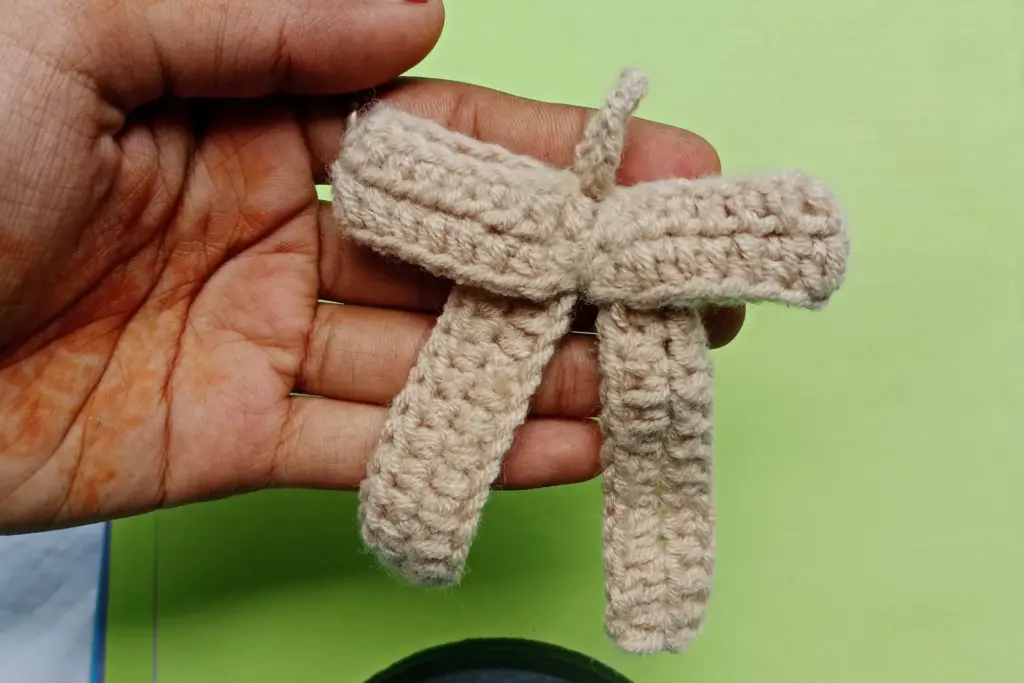
Attaching the Tail Section

After the main bow has been shaped, the tail panel is positioned underneath it. The tail is usually folded slightly to mark the middle, ensuring that it stays centered beneath the bow. When the two pieces are aligned, the remaining yarn from the first panel is wrapped around both sections together. This central wrap pulls the fabric layers tightly, holding them firmly in place and giving the bow its final, polished appearance. Repeating the wrap several times helps keep the layers secure while also building a decorative band around the center.
Securing the Center Wrap
Once the bow and tail are firmly held together, the remaining yarn is brought to the back and tied into a secure knot. This knot should be tightened thoroughly to prevent the wraps from loosening over time. The yarn ends are then woven into nearby stitches, ensuring they are hidden and do not disrupt the look of the bow. Because the center wrap is a noticeable feature, taking extra care to keep the wrapping even and smooth adds a refined touch to the final piece.
Refining the Bow Shape
After the pieces are assembled, the bow can be reshaped slightly with your fingers. The two upper sections can be pulled outward to make them fuller, and the tail ends can be adjusted to appear slightly longer or more defined. This small amount of manual shaping allows each bow to have a unique character. Beginners often find this part satisfying, as the project transforms from simple rectangles into a decorative accessory.
Attaching the Keychain Hardware
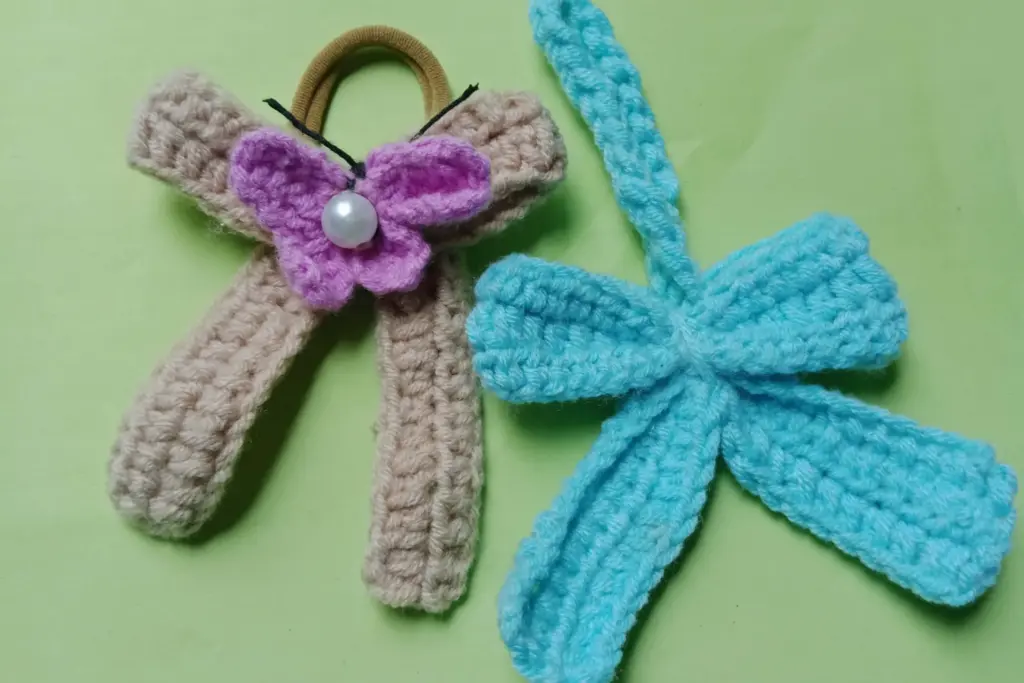
The final step is turning the finished bow into a keychain. The clasp or metal ring is opened and slipped underneath the center wraps. This placement ensures the bow hangs evenly when used as a charm. Once the ring is in place, it is closed firmly, either by hand or with the help of a yarn needle to hold the opening steady. The bow is now ready to be used as a keychain, bag tag, or decorative accessory.
Summary
A bow keychain is a wonderfully approachable project for beginners because it is built from two simple shapes yet results in a polished and decorative accessory. By learning how to create flat panels, fold them, wrap the center, and attach a tail, new crocheters gain confidence in both fabric construction and finishing techniques. The project is easily customizable, allowing you to create bows in various sizes and textures. Whether used as a gift, a personal accessory, or a playful addition to your everyday items, this bow keychain showcases how a basic crochet structure can transform into something beautiful and practical.