
Miniature Crochet Bags For Beginner projects are adorable and practical accessories. Perfect as keychains, bag charms, or small gifts, these mini bags let you practice essential crochet techniques while creating something charming. Quick to make and easy to carry, they offer endless design possibilities based on your choice of yarn and hook.
This beginner-friendly guide helps you explore shaping, joining, and making functional loops with ease. With a simple structure and no tricky color changes, these crochet bags build confidence while delivering cute, personalized results—ideal for fun projects or thoughtful handmade gifts.
Materials Needed
Based on the tutorial and tested variations, here’s what you’ll need to create your own crochet bag:
- Acrylic yarn or cotton thread (size 5 recommended for mini versions)
- Crochet hook (1.5 mm, 1.75 mm, or 2.5 mm depending on yarn weight)
- Stitch marker
- Scissors
- Yarn needle or tapestry needle
- Optional: Keyring or mini clasp for bag attachment
- Optional: Bow or other decorative element
Abbreviations
These terms follow US crochet standards and apply directly to the construction of the crochet bag:
- mr – magic ring
- sc – single crochet
- inc – increase (2 sc in the same stitch)
- slst – slip stitch
- ch – chain
- st – stitch
- * – repeat sequence
- [] – number of stitches at the end of a round
- sk – skip
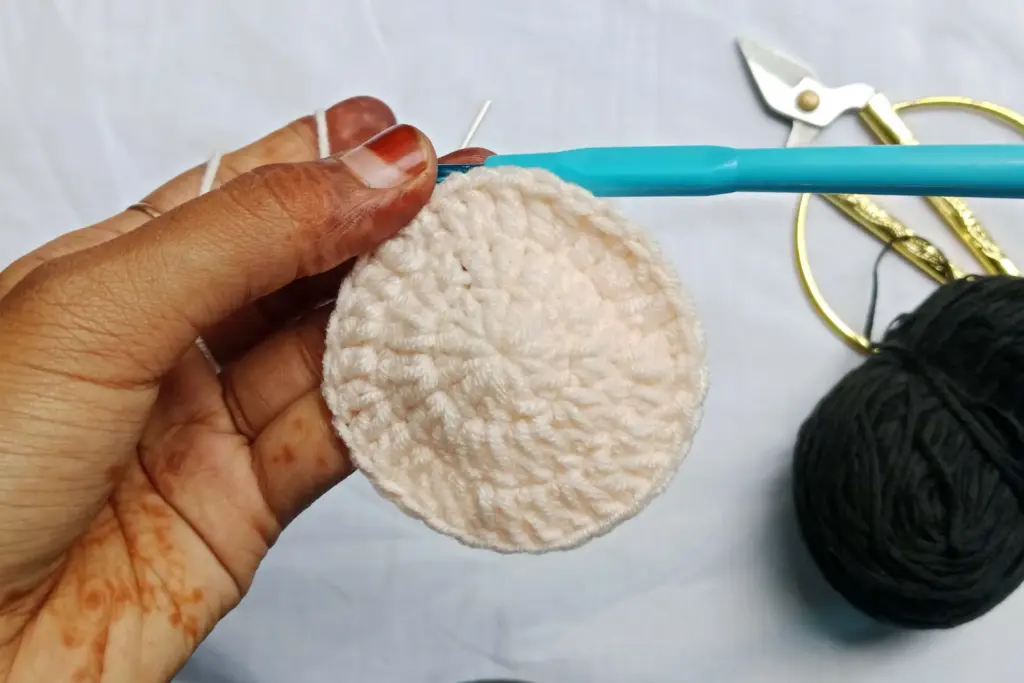
Shaping the Circular Base
The bag begins with a small flat circle, which forms the sturdy bottom foundation. It uses basic crochet increases to expand outward from the center, creating a symmetrical base that supports the rest of the bag’s structure. This technique is excellent for beginners to learn how to maintain shape and count increases consistently.
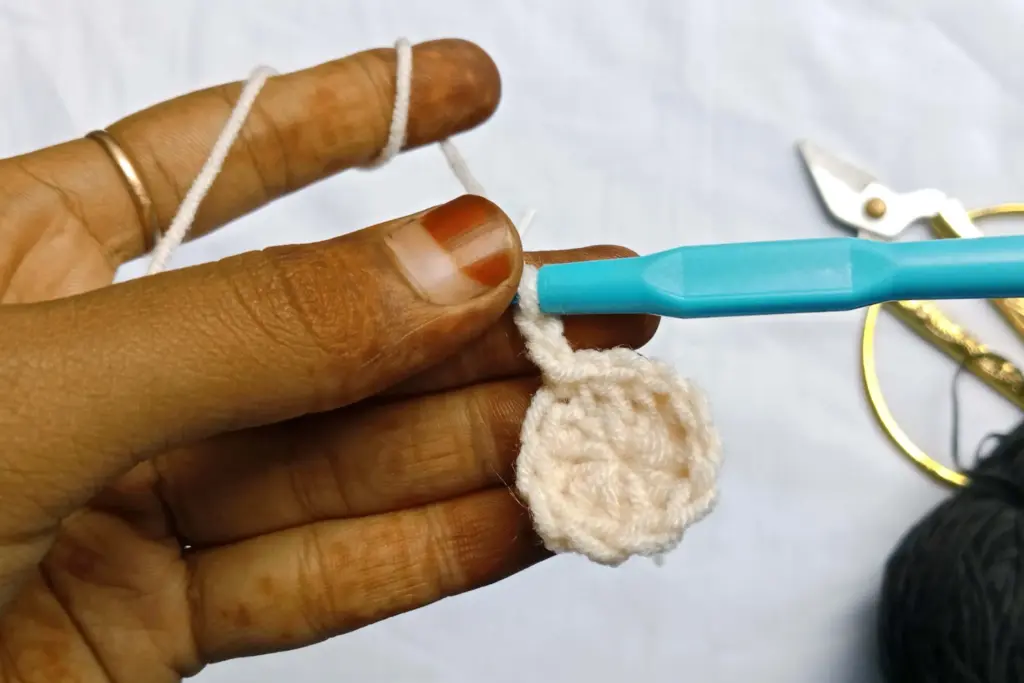
A stitch marker helps keep track of the transition between rounds, which is especially helpful when working in a continuous spiral. The even spacing and gradual growth of the base make this step repetitive yet essential—it lays the groundwork for height and side shaping later.
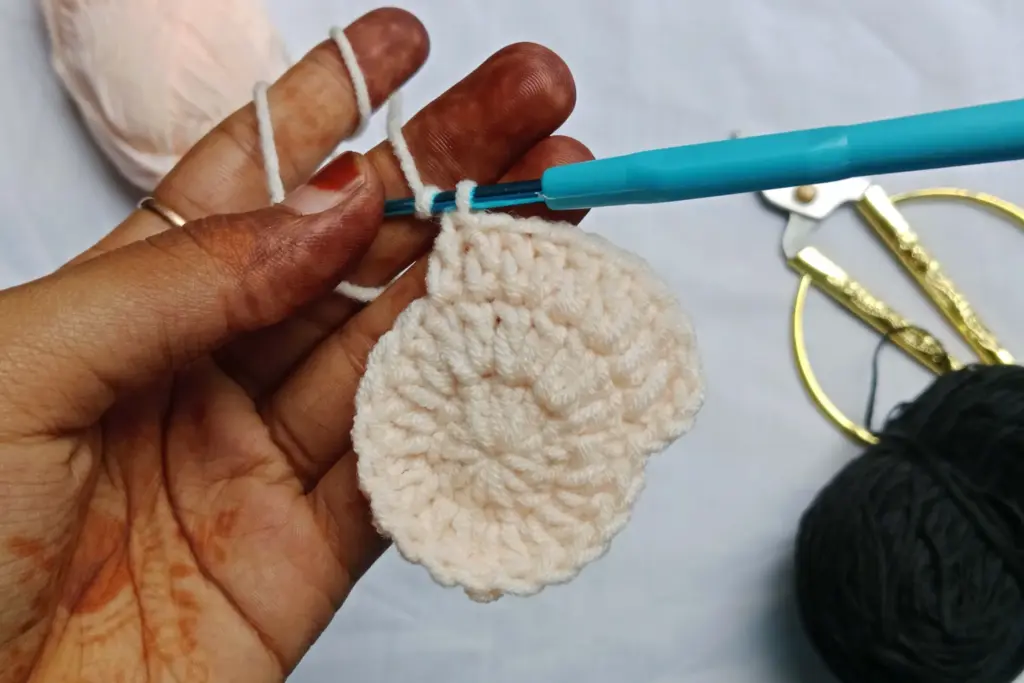
Building the Bag Sides
Once the base is complete, the body starts to rise. This section focuses on maintaining the same number of stitches per round, which forms a soft, straight cylinder. The transition from flat to vertical is seamless, and the stitch pattern remains consistent to provide both structure and flexibility.
This repetitive stage is beginner-friendly, requiring no increases or decreases. You simply build height by maintaining stitch alignment, reinforcing your comfort with tension and flow. As the sides grow taller, the piece becomes increasingly recognizable as a miniature tote or pouch.
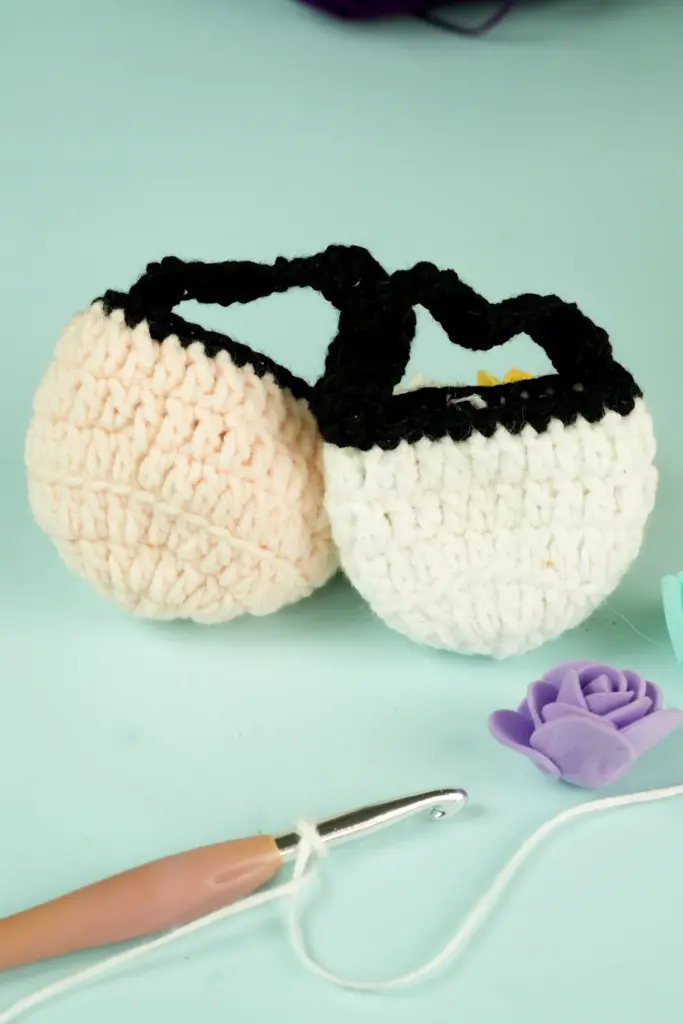
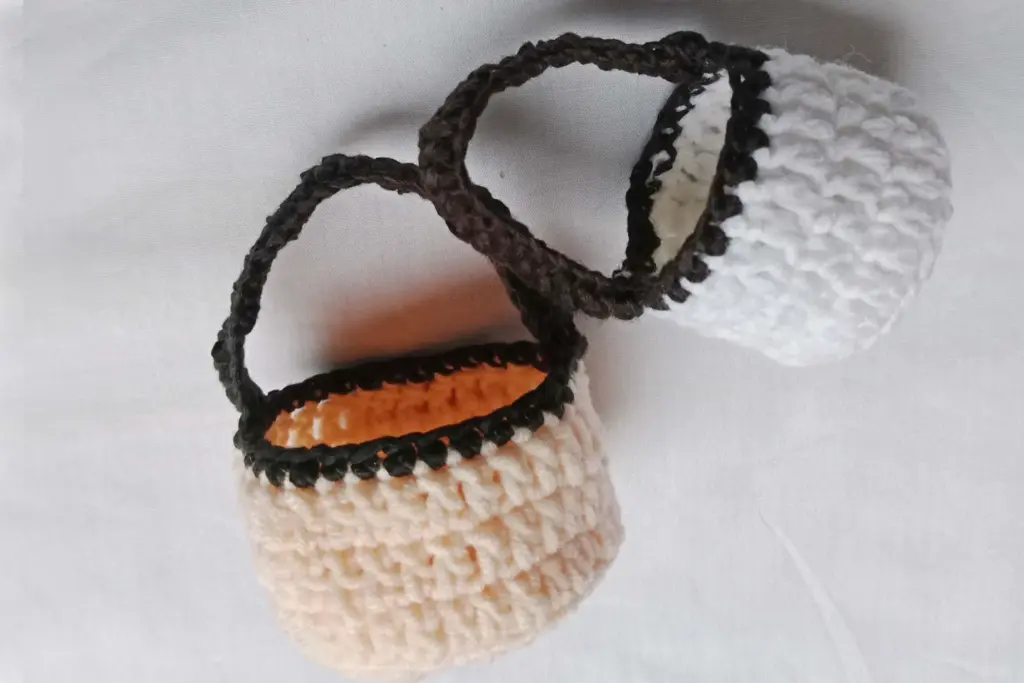
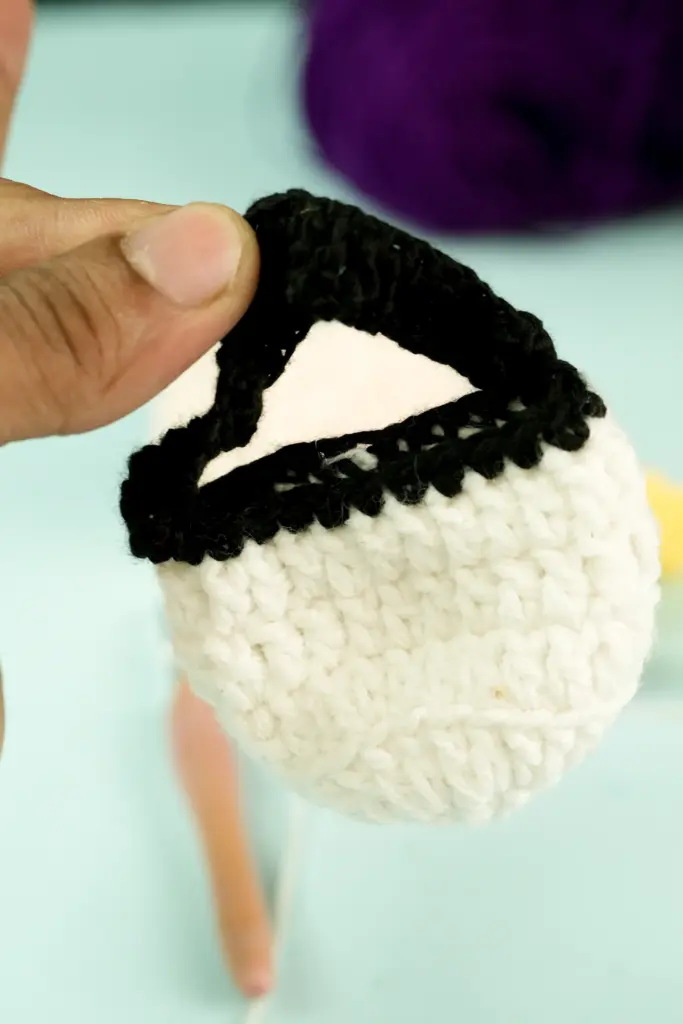
Creating Handle Openings
At this stage, the design introduces simple gaps to form the bag’s handles. These are achieved by working across sections, skipping specific parts to leave spaces, then reconnecting on the other side. This might sound complex, but it’s just a matter of maintaining count and letting the chain replace a section of the circle.
The resulting gaps are clean and symmetrical. They mimic classic handbag handles, giving the piece both function and charm. As long as you count stitches and follow the visual spacing, the openings will align perfectly and maintain the balance of the bag.
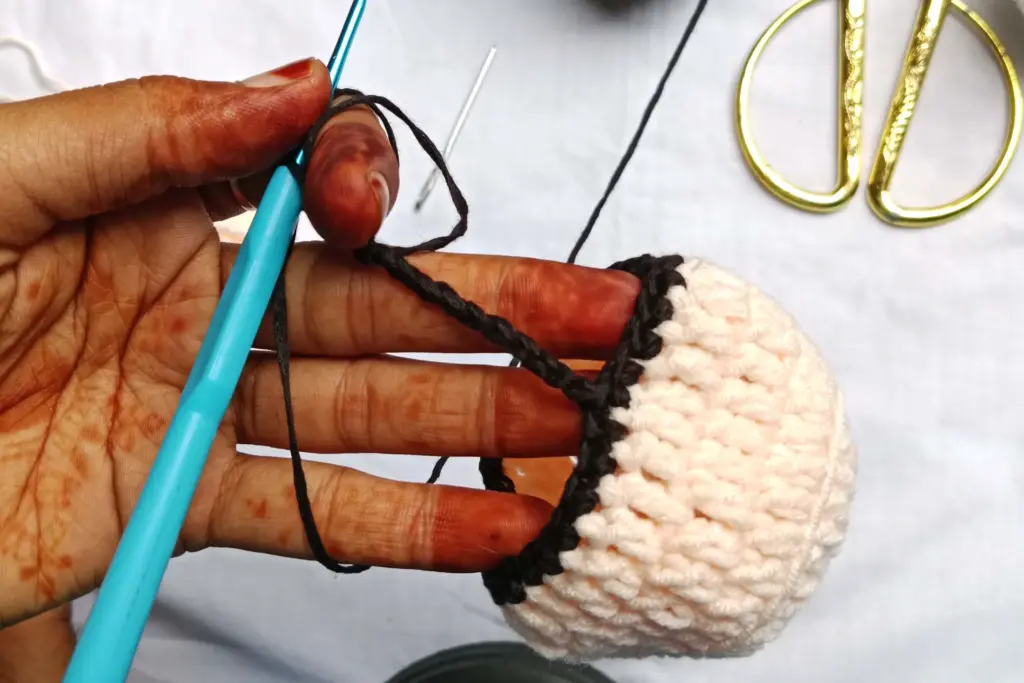
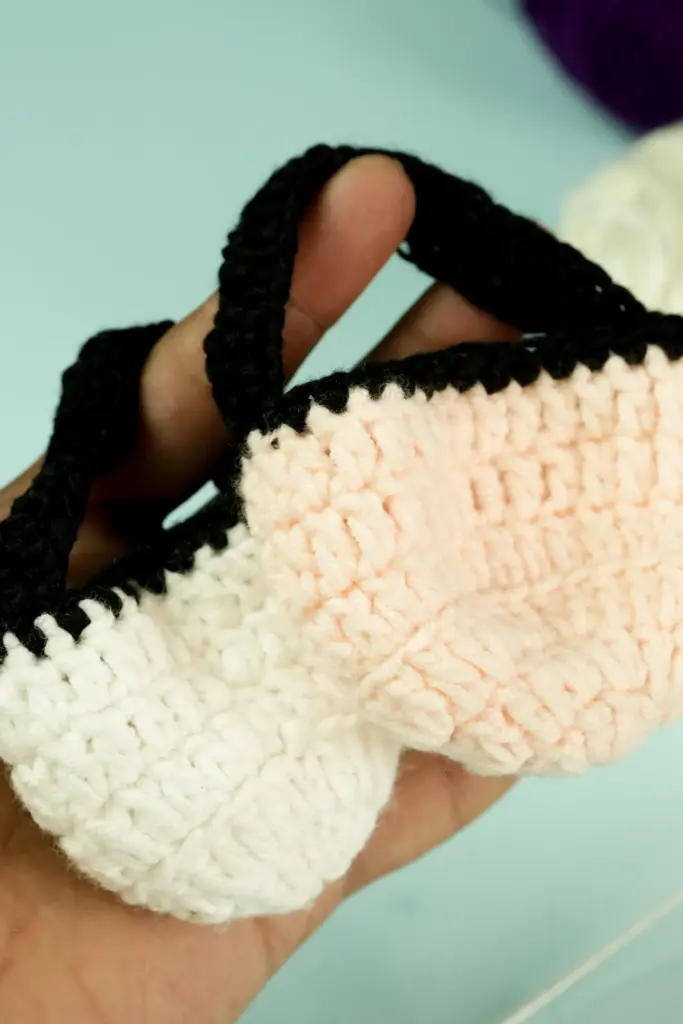
Reinforcing the Handles
Once the handle gaps are formed, the next step involves covering the chains with solid stitches. This reinforces the openings and gives them a clean edge. It also increases the durability of the bag if you plan to attach it to a keyring or hang it from another accessory.
This part of the process uses tight stitches across each chain, closing the open loops and anchoring the ends securely into the surrounding structure. The goal is to blend the handles into the bag’s body without causing bulges or uneven lines, which can be managed by keeping the tension even and working neatly around the gaps.
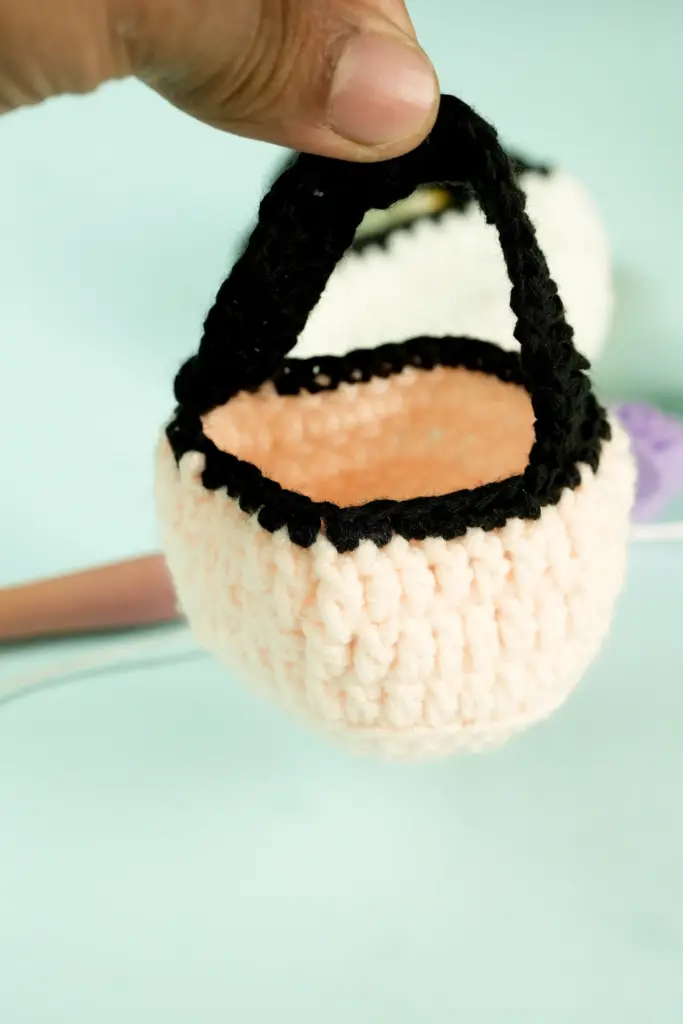
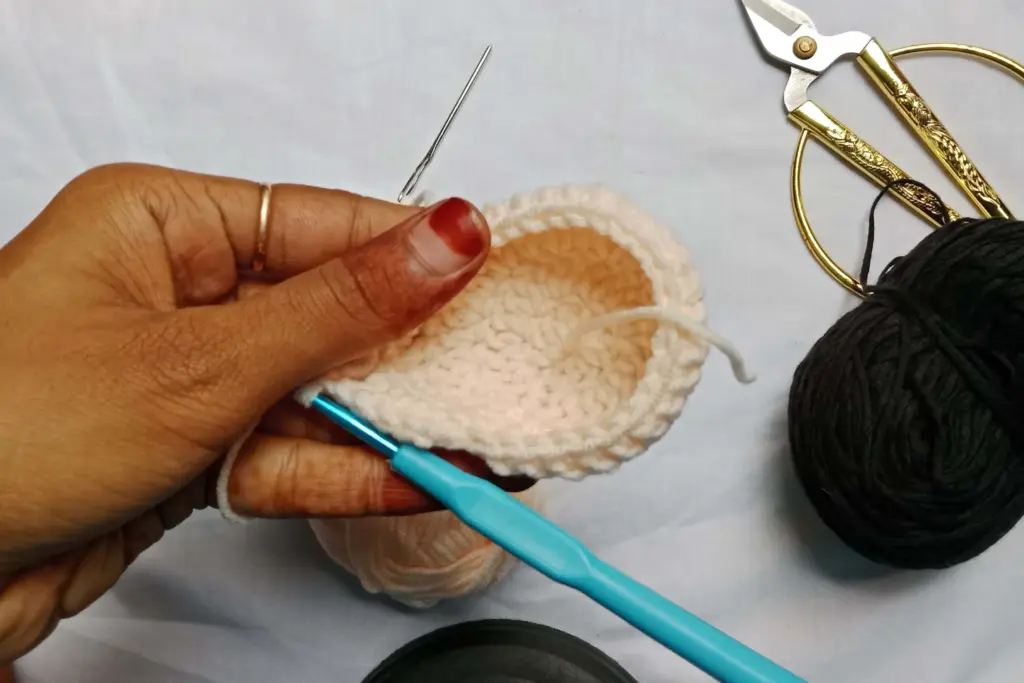
Finishing the Upper Edge
With the structure complete and the handles reinforced, the final rows smooth out the top edge of the bag. This phase introduces slip stitches along the remaining parts, helping shape the bag’s silhouette and secure the upper rim. These finishing rounds subtly flatten any raised areas and create a clean boundary that improves the overall polish.
While the pattern itself remains simple, careful attention is needed to maintain stitch alignment. By continuing around the entire top edge and incorporating the handle areas, the final border brings everything together. It’s a satisfying moment when the piece finally looks like a complete miniature handbag.
Fastening and Weaving Ends
After the last round, the working yarn is fastened off and secured. This small but essential step ensures that the bag remains intact with use. The end is carefully woven through several stitches using a yarn needle or tapestry needle, ideally along the inner lining or close to previous rows to avoid visibility.
Proper fastening prevents unraveling, especially if the bag will be used frequently or attached to another item like a keychain or zipper pull. Keeping the final tail short and hidden is key to achieving a neat and professional result.
Adding Embellishments
This miniature bag is a great canvas for personal touches. A small bow, button, or decorative charm can be sewn near the top for flair. You can even attach a lobster clasp or keyring to turn it into a functioning keychain. Because the design is minimal and structured, it works well with both subtle and bold embellishments.
For a cleaner look, you can also use fabric stiffener to shape or strengthen the handles, especially if the yarn is too soft. Just be careful not to oversaturate the piece, and allow it to dry fully before use.
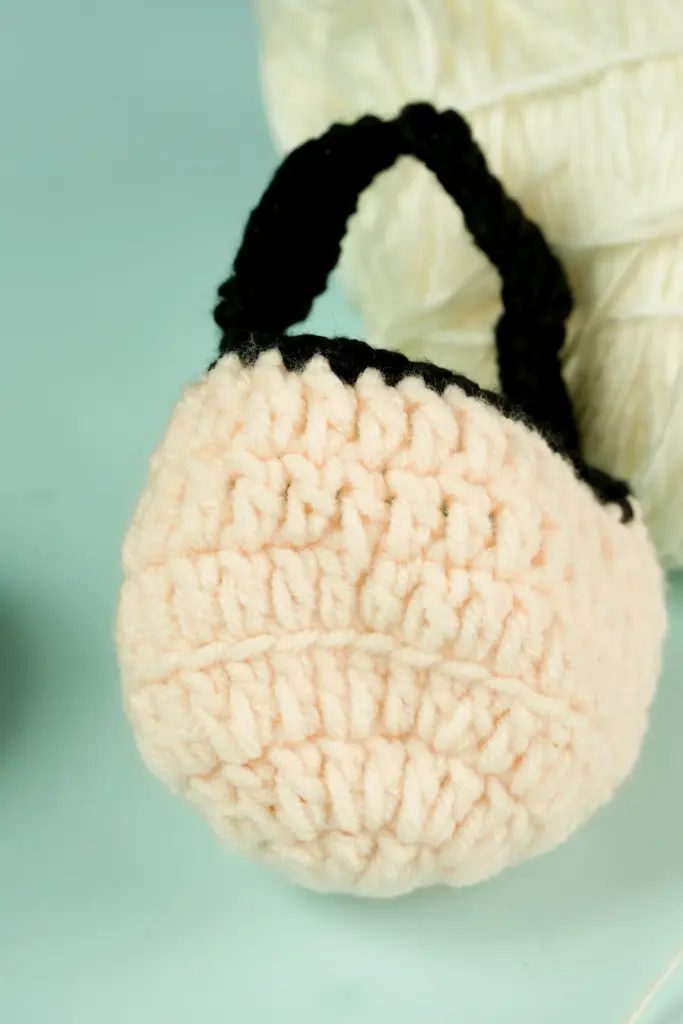
Final Touch and Usage Ideas
The finished piece is lightweight, compact, and surprisingly versatile. Beginners can create multiple bags in one sitting, experimenting with different yarns or hook sizes. Slight changes in material dramatically affect the size and softness, so it’s a great way to explore yarn behaviors without committing to a large project.
You can:
- Use it as a keychain or bag charm
- Add it to gift packaging as a handmade detail
- String several together as garland or décor
- Use thinner thread to make doll accessories
Crochet Bag Pattern Overview Table
| Step | Purpose | Technique Focus | Tip for Beginners |
|---|---|---|---|
| Create circular base | Establish foundation of the bag | Magic ring + increases | Use stitch marker to track rounds |
| Build up vertical sides | Form the height and depth of the bag | Consistent sc rounds | Count every few rows to stay on track |
| Form handle gaps | Shape handles using gaps | Skipped sections + chaining | Check symmetry after placement |
| Reinforce handles | Strengthen and define handle edges | Stitching into chains | Keep tension even for clean look |
| Smooth upper edge | Final border and clean finish | Slip stitches | Work gently to avoid curling |
| Fasten and weave ends | Secure and hide finishing yarn | Fastening off + weaving | Use sharp needle for easy threading |
| Embellish and attach | Add personal or functional elements | Decorative sewing | Keep balance by spacing decorations |
Conclusion
Crocheting a mini bag is a rewarding and accessible project that introduces several useful techniques. From shaping circles and building vertical structures to creating functional gaps and finishing details, this bag covers essential skills in a fun, creative way. The simplicity of the design makes it a go-to item for quick handmade gifts or relaxing weekend projects.
Whether you’re using thick acrylic yarn for a plush version or thin cotton thread for a tiny charm, the pattern adapts beautifully. Try different sizes, experiment with decorations, and make it your own. It’s the perfect beginner project that offers both fun and a finished product to be proud of.
Let your creativity carry it forward—and happy crocheting!