
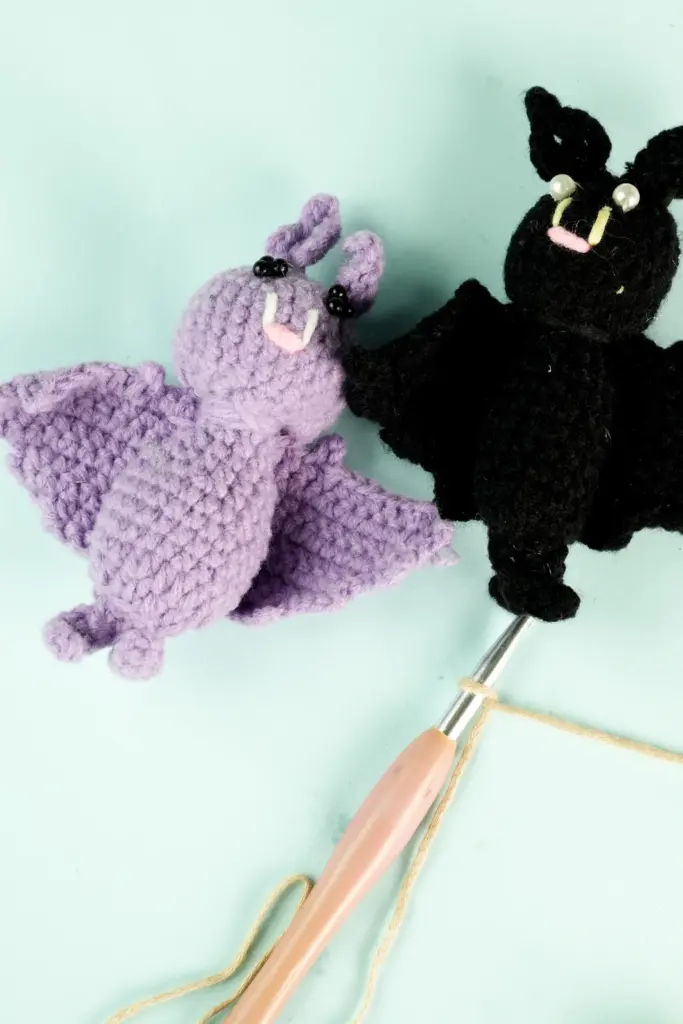
Creating your own Crochet Bat Pair for Halloween Fun is a magical way to celebrate the season. With just a few simple materials and basic stitches, even beginners can make these adorable bats. Perfect for garlands, desk accents, or festive displays, this step-by-step guide shows you how to craft a spooky yet charming decoration. Whether you want to dress up your home, design a playful garland, or simply enjoy a seasonal project, this crochet tutorial makes Halloween both creative and fun.
Materials Needed
To bring your little bat friends to life, you’ll need a combination of yarn, tools, and some helpful add-ons for a professional-looking finish.
- Medium-weight yarn (DK/No. 3) in two colors for the body and wings
- Accent yarn in pink and white for the face details
- 4mm crochet hook
- Tapestry needle for sewing and weaving
- Small safety eyes (approximately 1cm) with backing
- Stuffing material (polyfill or fiberfill)
- Stitch marker
- Scissors
- Measuring tape
These items will help ensure your bat not only looks cute but also holds its shape and lasts through many Halloweens to come.
Abbreviations
Here are the commonly used crochet abbreviations in this project, following US terminology:
- ch – chain
- sc – single crochet
- slst – slip stitch
- inc – increase
- dec – decrease
- mr – magic ring
- st – stitch
- rep – repeat
These terms provide shorthand guidance throughout the process, making instructions easier to read and follow.
Shaping the Head
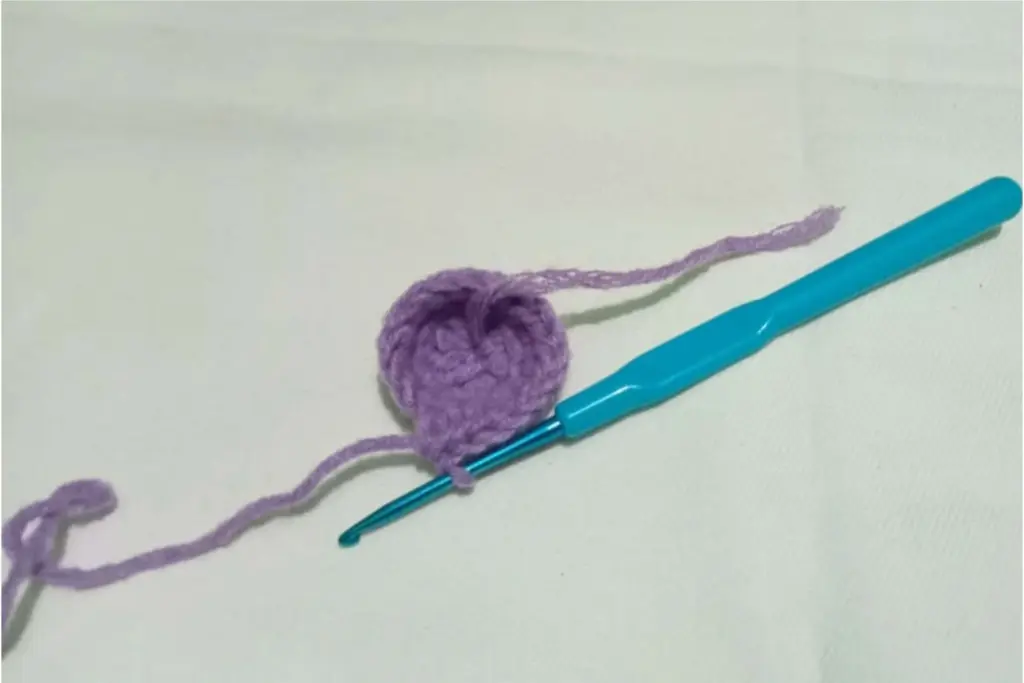
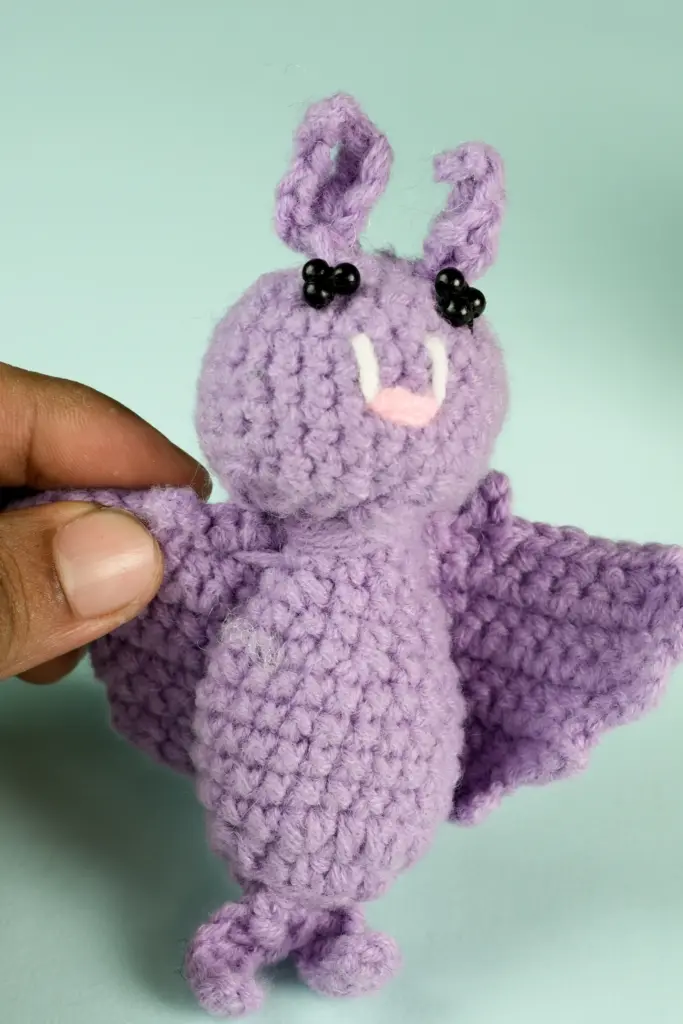
The bat’s head forms the base for most of the character’s charm, giving it a rounded, plush structure. It starts small and gradually builds in size through even stitching, giving it volume. Once the basic shape is created, the decrease begins, helping the head taper naturally. Before closing, the eyes, mouth, and teeth are added. These tiny elements bring the bat’s personality to life and should be placed with care. A little stuffing completes the head, giving it that soft, squeezable feel.
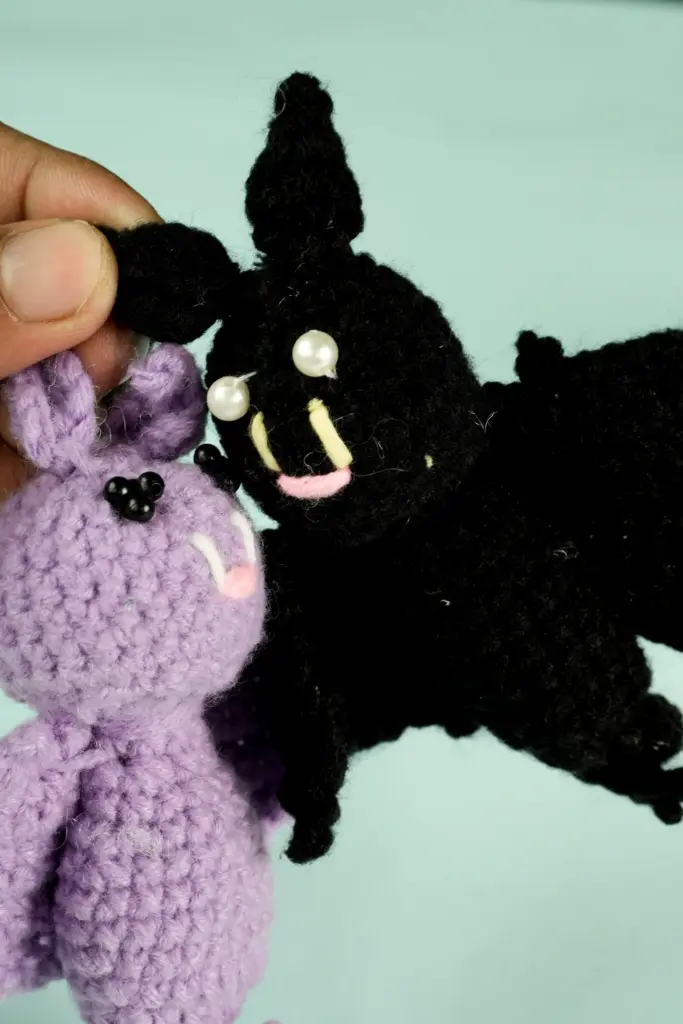
Creating the Facial Details
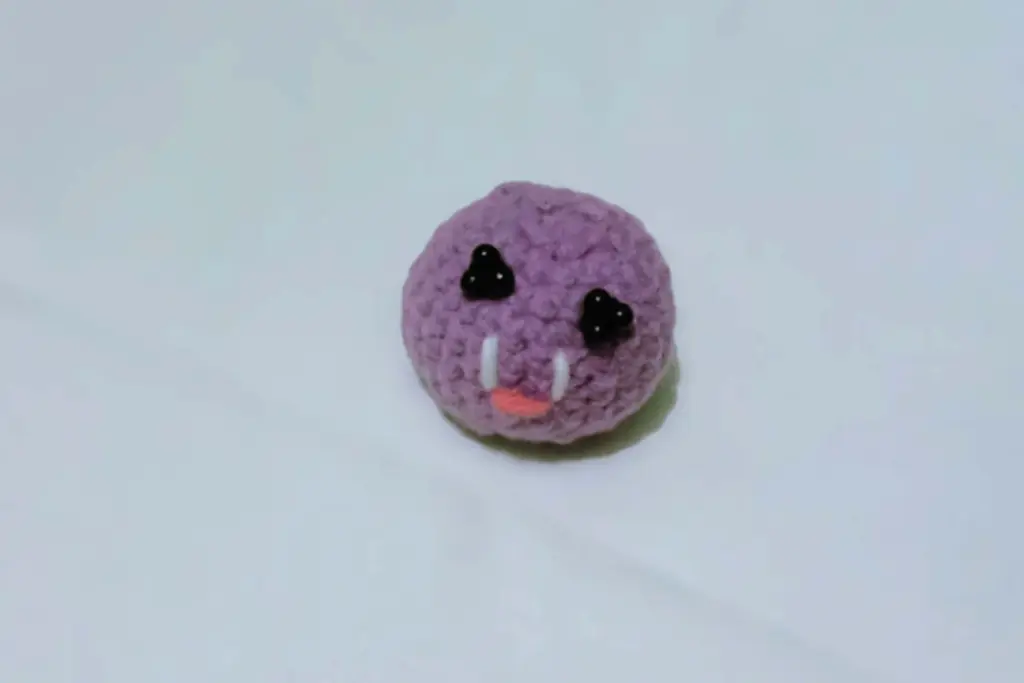
What’s a bat without its mischievous grin and bright little eyes? This part adds character and emotion to the design. Safety eyes are carefully positioned just below the upper edge of the head. A tiny bit of pink yarn forms the nose or mouth — depending on how you see it — while white yarn adds fangs for extra Halloween flair. Even though these pieces are tiny, they’re what make your bat stand out. The facial features are stitched securely, and yarn ends are hidden neatly inside.
Adding the Ears
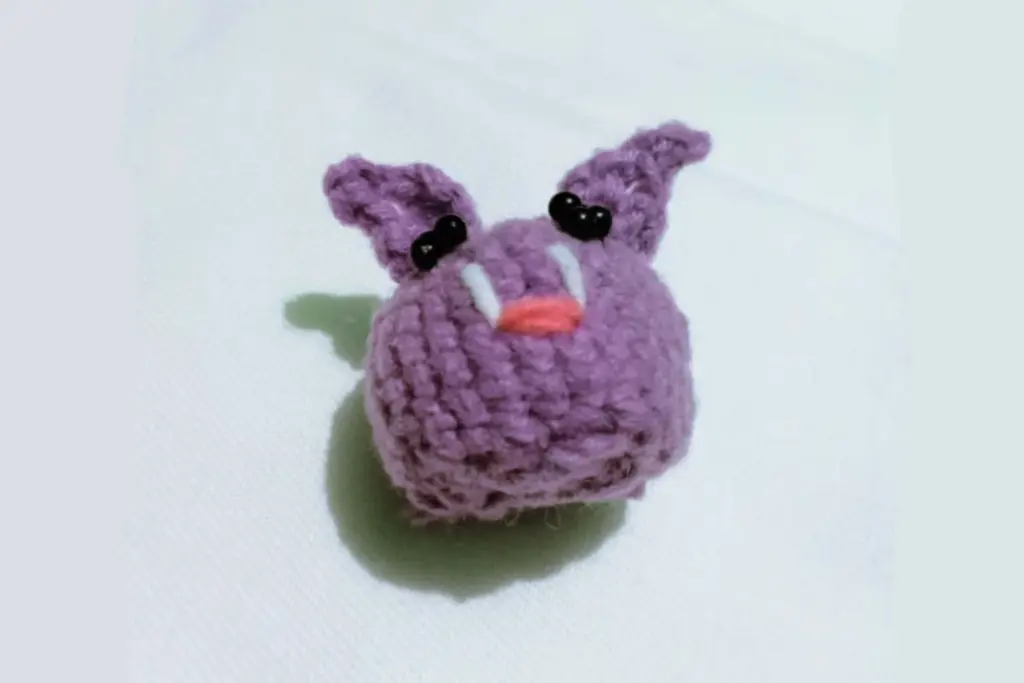
The ears add personality and a distinct bat-like silhouette. Each ear is small, with a slightly curved point, and is made separately before being stitched on. They should sit balanced at the top sides of the head, adding just the right bit of flair. The ears don’t just complete the look — they also help anchor the head visually, making your amigurumi feel finished and symmetrical.
Building the Body
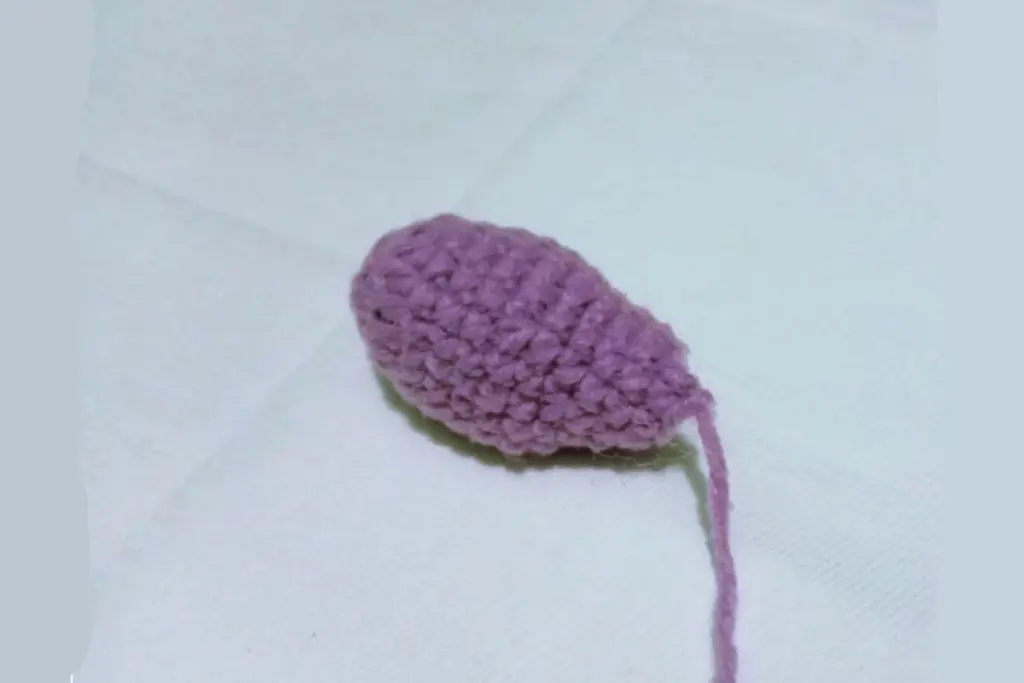
The body forms a simple oval that complements the head in size and proportion. It grows gradually from a small base into a soft, structured form. Once the main body shape is ready, legs are added directly to the base. These legs are kept minimal and whimsical, perfect for hanging the bat upside-down or sitting it upright. The body is then gently stuffed to keep it sturdy but cuddly, and finally closed up.
Adding the Legs

The bat’s little feet are playful and functional. Whether you want your bat to dangle from a garland or rest on a shelf, these legs do the job. They’re crafted directly from the bottom of the body, worked into short chains that are stitched back down. This method creates a clean finish and keeps the legs secure. After forming the legs, the yarn tails are tied off and tucked inside, keeping the surface neat and tidy.
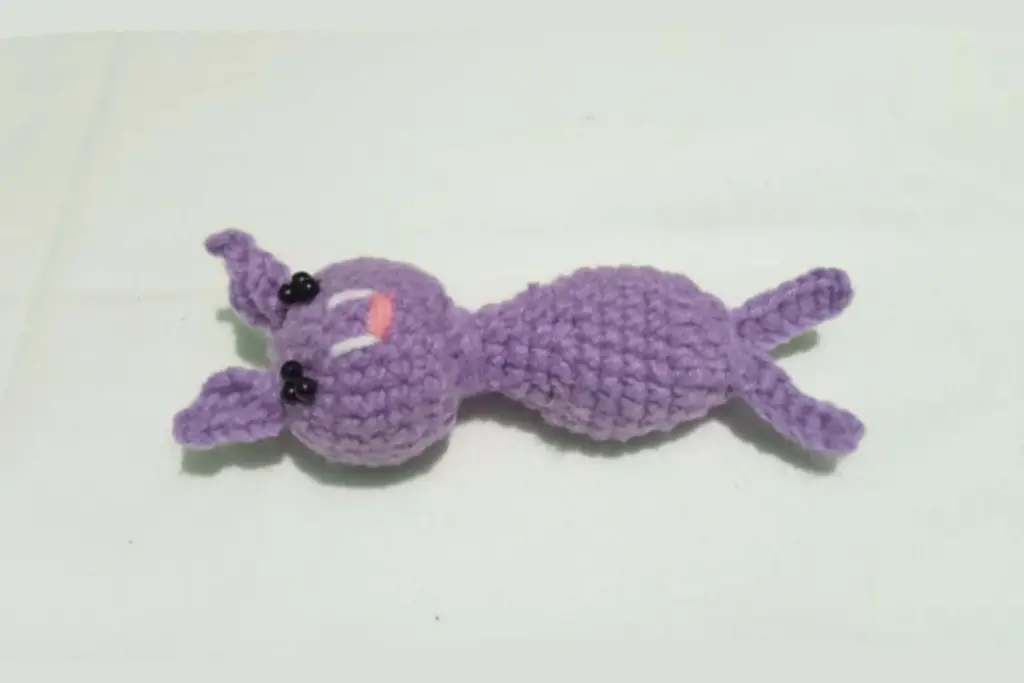
Attaching the Head and Body
Once both head and body are completed, it’s time to bring your bat to life. Lining up the shapes is important to ensure a snug and natural fit. You’ll want to align the bottom of the head and the top of the body so they sit flush. Stitching is done evenly around the perimeter, using the tail left from the head. It helps to sew slowly and double-check your placement as you go, keeping the bat balanced. Once fully attached, the remaining yarn is fastened securely and hidden inside.
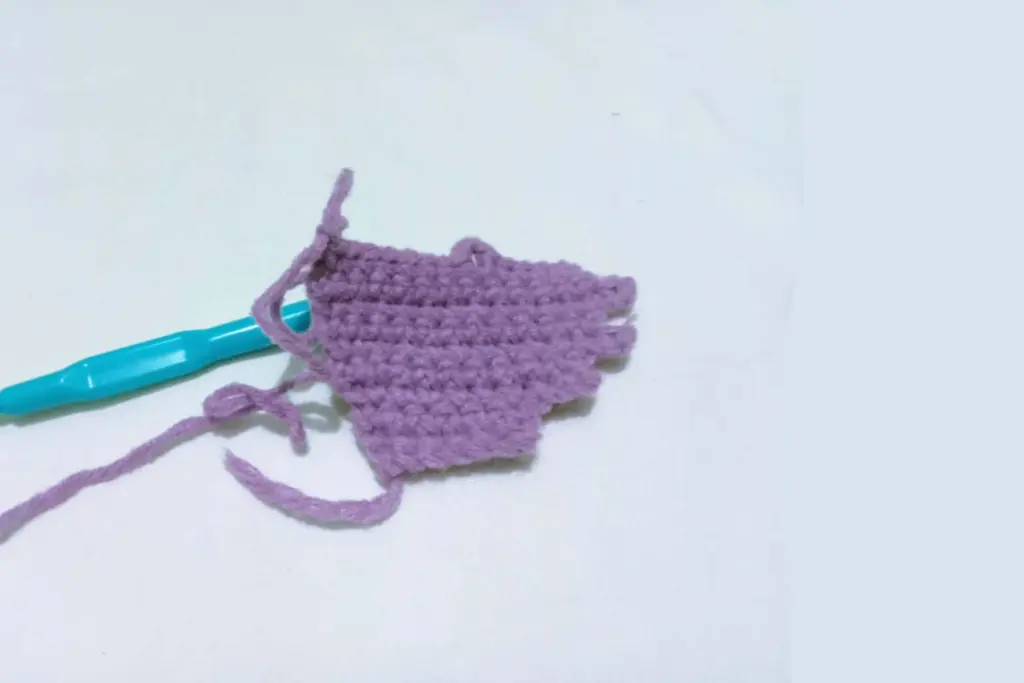
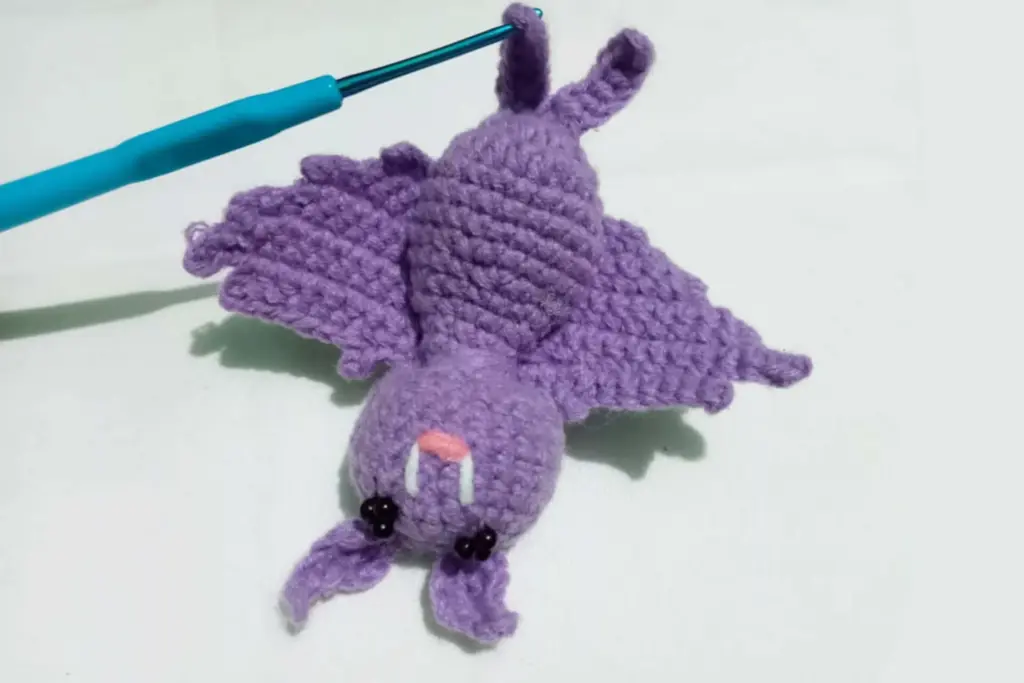
Making the Wings
The wings are the true statement piece of this little bat. Designed with curves and pointed edges, they give the bat its classic silhouette. Each wing is worked flat in rows and includes a small picot-like edge to add dimension. After creating both wings, they’re joined together at the top and stitched to the back of the body. Placement matters — you want them high enough to peek above the head, but wide enough to look spread in flight. Stitch markers can be used to hold them in place before sewing.
Finishing Touches
Before calling it complete, give your bat one last check. Tug gently at the limbs and wings to ensure they’re firmly attached. If you want a more polished look, you can shape the ears, fluff the stuffing, and reposition the legs. At this point, your bat is ready for action—whether that means joining a garland or hanging solo as a festive ornament. Many crocheters even personalize them with tiny accessories or varied yarn colors for a custom flair.
Measurement Reference
Here’s a helpful table to give you a sense of the finished bat’s dimensions. Since handmade items may vary slightly, these are approximate and can shift depending on yarn type and tension.
| Feature | Approximate Size (cm) |
|---|---|
| Head Height | 5.5 cm |
| Head Width | 5.5 cm |
| Body Height | 5 cm |
| Ear Height | 2.5 cm |
| Leg Length | 2.5 cm |
| Wing Width | 9 cm |
| Wing Height | 10 cm (diagonal) |
These measurements help ensure your bat stays proportional throughout the build process, especially when working on a matching pair.
Summary and Tips for Beginners
Crocheting this playful bat pair is a joyful way to sharpen your skills while celebrating the Halloween spirit. From the structured head to the delicate wings, each element teaches useful techniques like shaping, joining, and decorative detailing.
Beginner-friendly tips to keep in mind:
- Use stitch markers generously when working in rounds or attaching parts
- Take your time shaping the facial details for maximum cuteness
- Don’t overstuff — aim for firmness without bulging
- Adjust the wing or ear placement based on your bat’s final shape
- Try making a pair in contrasting colors for display impact
This crochet bat pair makes for the perfect fall craft. Whether you hang them in your room, use them as keychain decorations, or give them as gifts, their charm is undeniable. Handmade pieces like these don’t just decorate your space — they showcase your creativity.
So grab your hook, pick your favorite yarn shades, and start stitching. Your Halloween bat buddies are waiting to be made.