
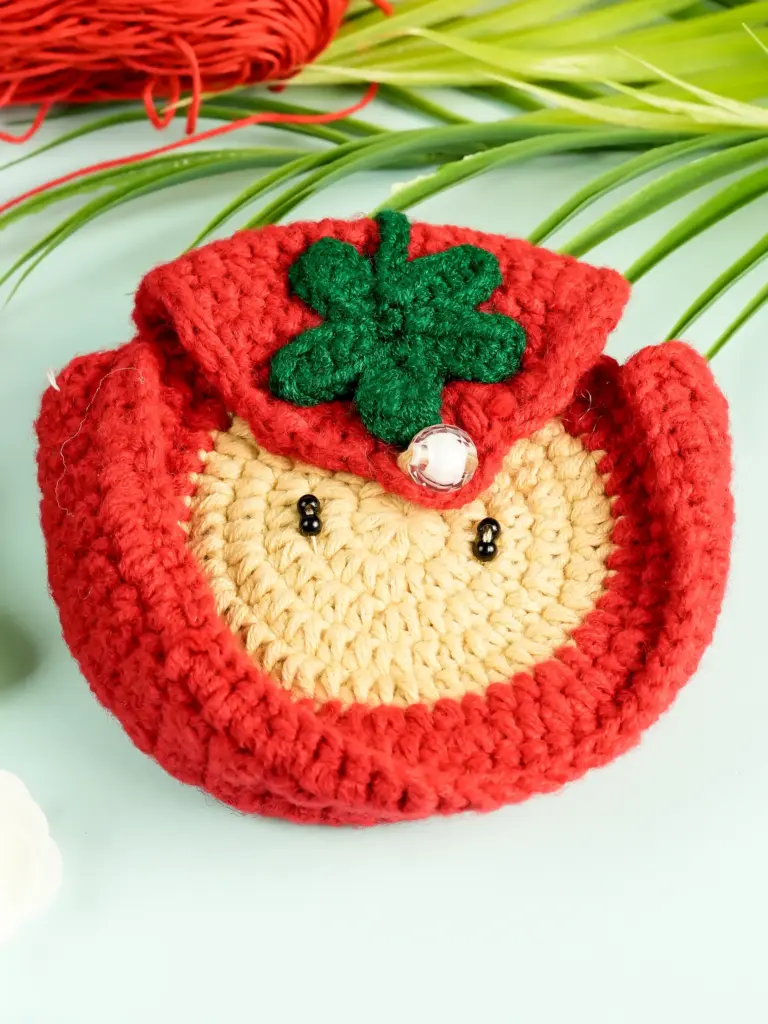
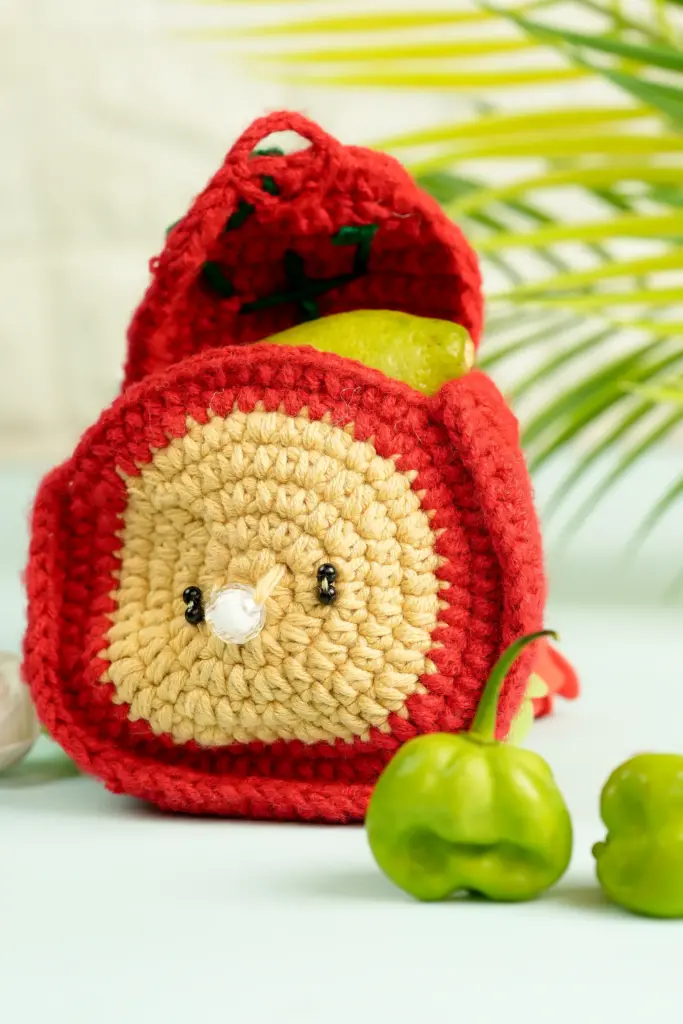
Handmade accessories are both practical and full of charm, and a Crochet Fruit Bag is the perfect example. Designed as a colorful drawstring pouch, it can take the shape of a peach, lemon, orange, or any fruit you like depending on your yarn choice. Originally made for holding small items like dice or trinkets, this bag is also great for gifting, jewelry storage, or simply adding a cheerful touch to your workspace.
This crochet fruit bag is especially beginner-friendly thanks to its simple construction. Worked from the base up with easy stitches and basic shaping, it’s approachable for all skill levels. The leafy drawstring at the top adds both function and a playful, organic detail. Compact yet creative, it’s an ideal project for experimenting with colors and textures without the challenge of larger crochet projects.
Whether you’re just getting started or returning to crochet after a break, this is the kind of project that can reignite your creative spark. It’s relaxing, satisfying, and easy to personalize with different fruit tones or textures. You don’t need advanced skills—just a bit of time, the right materials, and a willingness to play with color.
Materials Needed
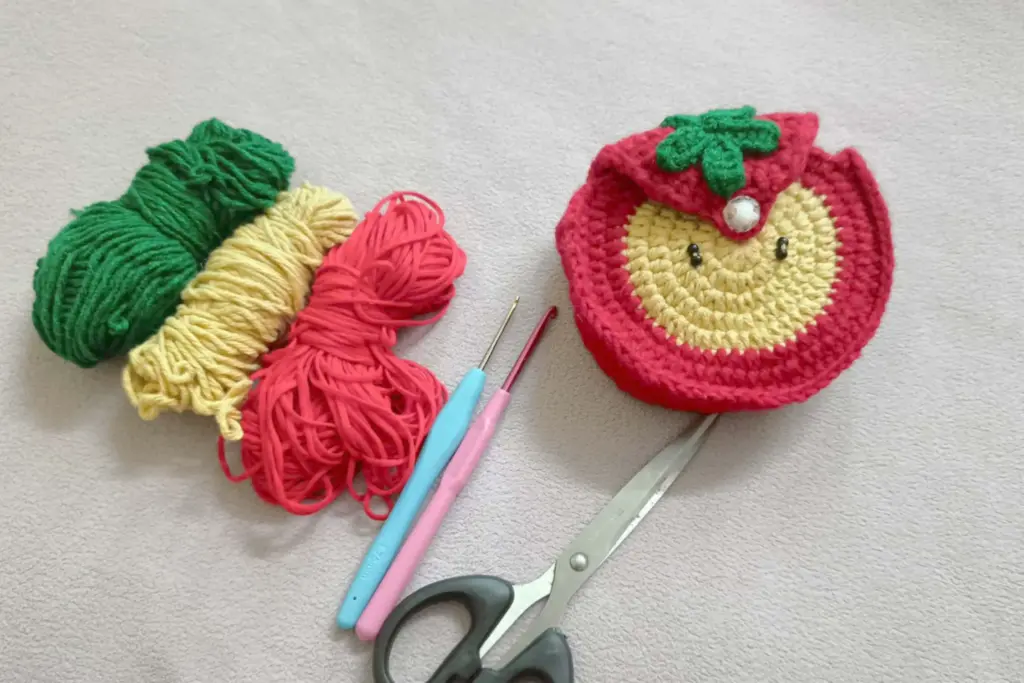
To complete this crochet fruit bag, you’ll need a few accessible tools and supplies:
- Worsted weight yarn in your chosen fruit shade (e.g., yellow, orange, pink)
- Worsted weight green yarn for leaves
- 5mm crochet hook (for the bag)
- 4mm crochet hook (for the leaf drawstring)
- Stitch markers
- Tapestry needle
- Scissors
All materials used are easy to find in most craft stores or online and work well with standard yarn brands. For a more compact finish, acrylic yarn is recommended due to its structure and color vibrancy.
Abbreviations
The following abbreviations follow U.S. crochet terminology:
- sc – single crochet
- hdc – half double crochet
- dc – double crochet
- slst – slip stitch
- inc – increase
- dec – decrease
- ch – chain
- rep – repeat
- st – stitch
- mr – magic ring
These terms are used consistently throughout the crafting process. If you’re unfamiliar with any of them, plenty of visual tutorials can help build confidence.
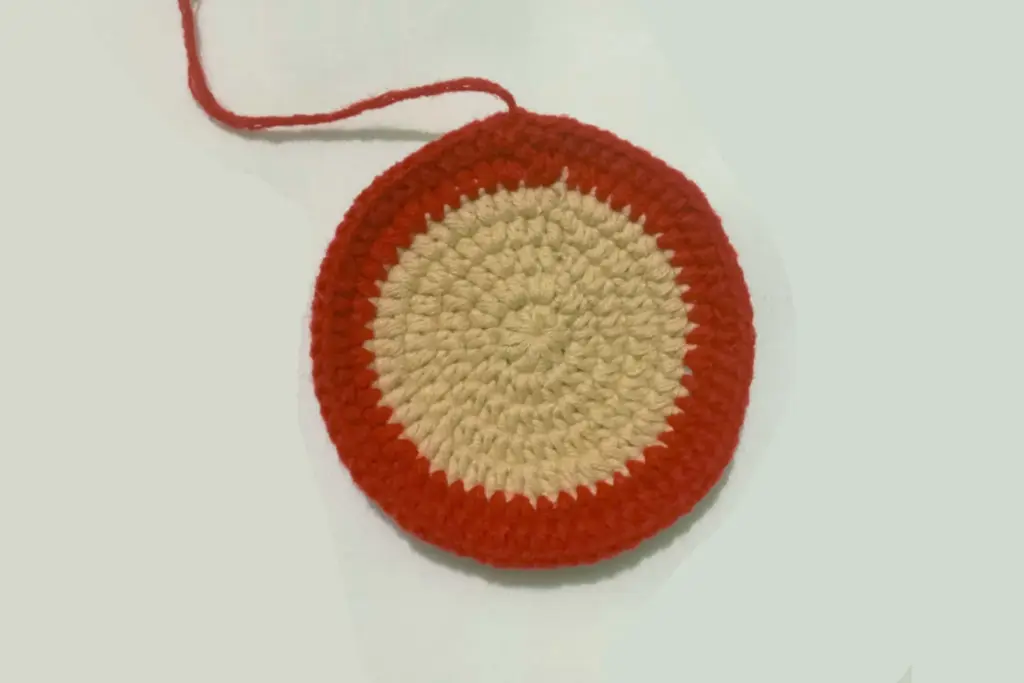
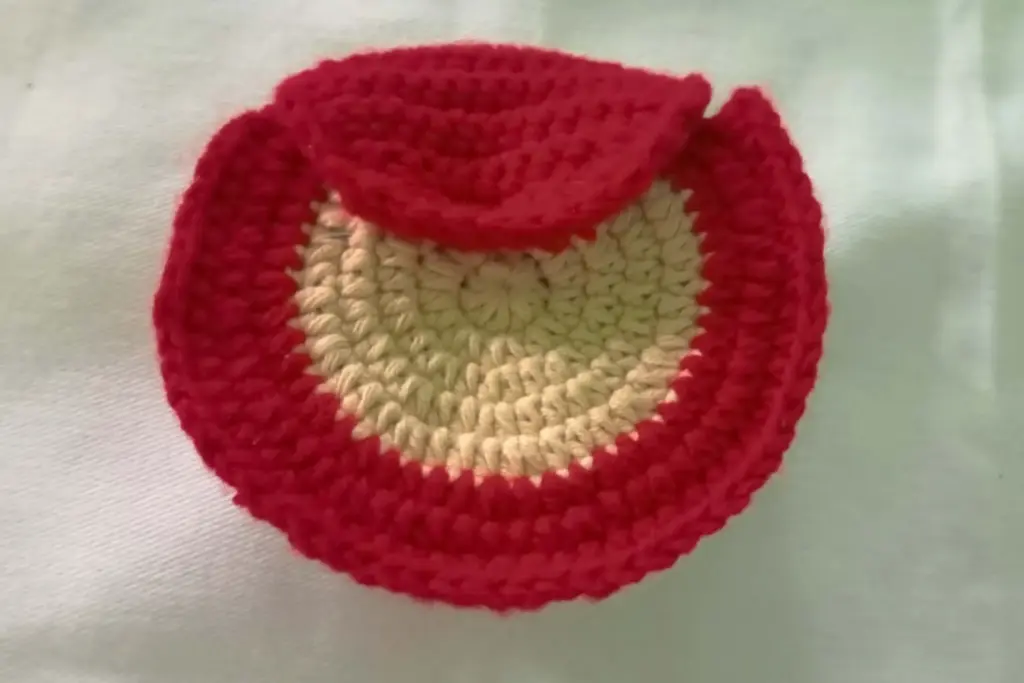
Building the Rounded Base
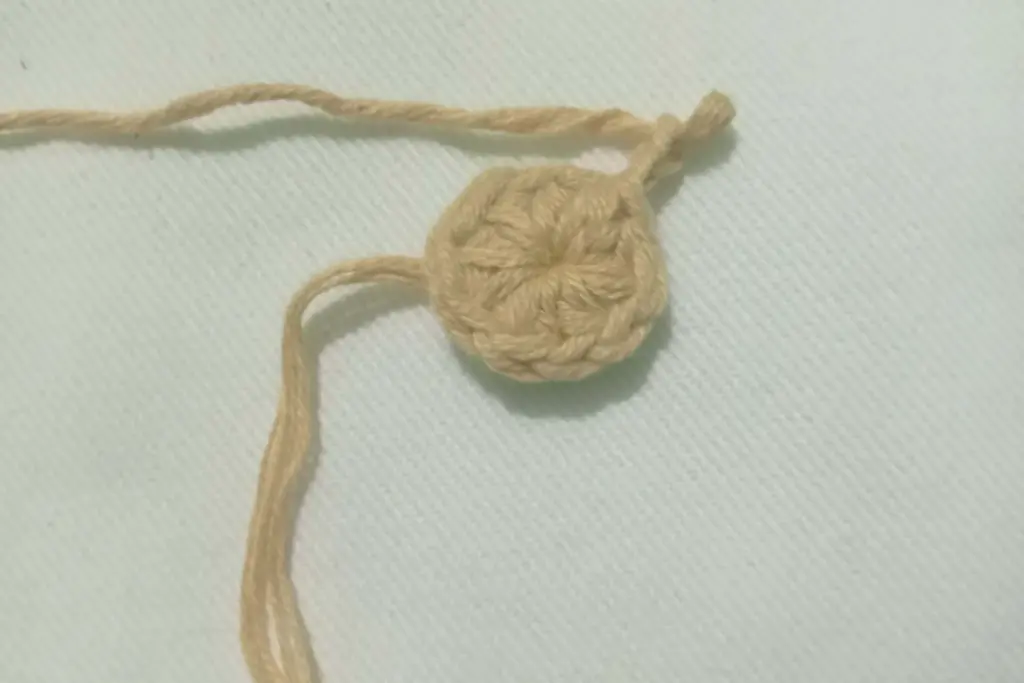
The foundation of the pouch starts with a soft circular base. This shape gives the bag its volume and stability. Working in rounds ensures the pouch maintains a consistent structure as it expands. Instead of counting rows, focus on growing the diameter until it fits comfortably in your hand. Each new layer blends seamlessly into the last, forming a well-balanced shape ready to hold all kinds of goodies.
As the base grows, it’s important to maintain even tension. Don’t rush through this section—getting a clean start here sets the tone for the rest of the bag. Slight adjustments in hand placement and yarn grip can make a big difference in smooth, uniform results.
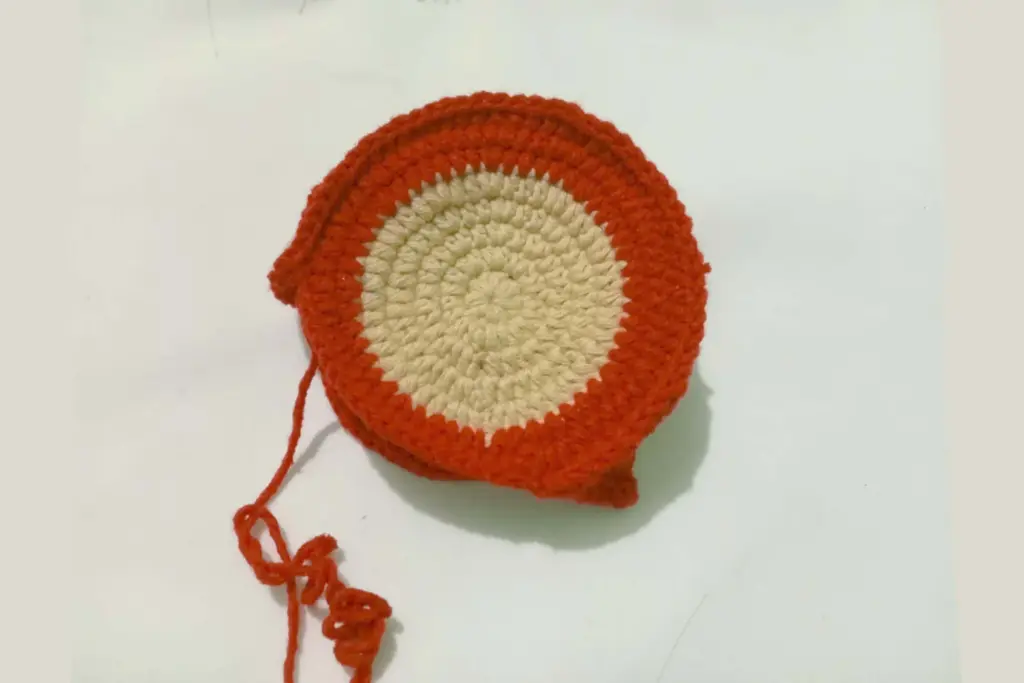
Expanding the Sides
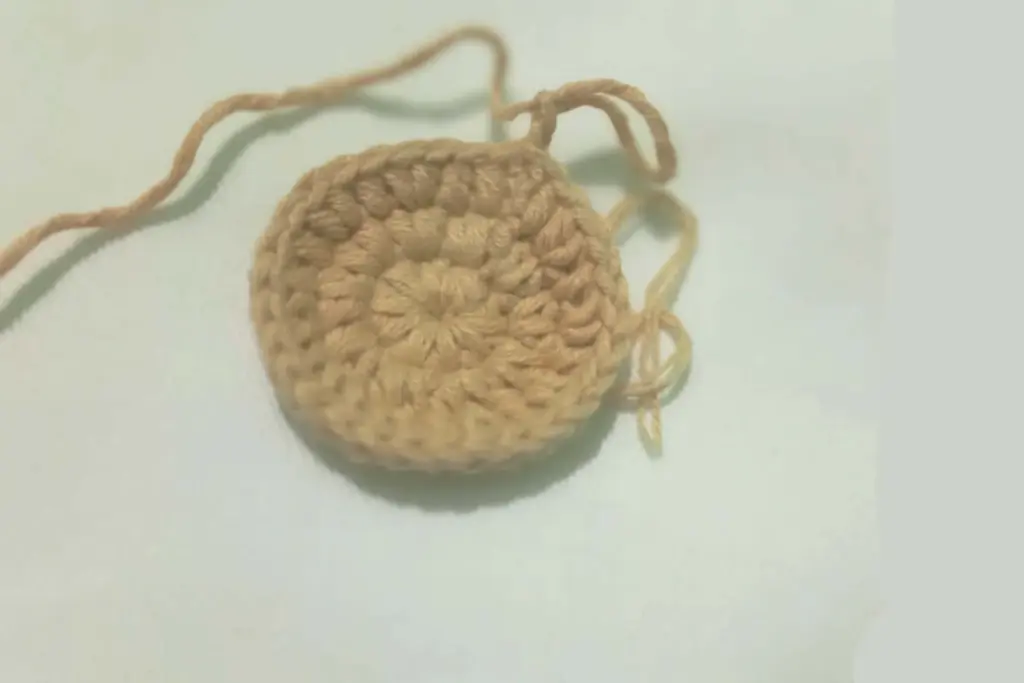
After finishing the base, the sides begin to take shape through gradual increases. This is where the pouch begins its transformation from a flat circle into a dimensional object. The walls grow evenly upward, creating a cozy pocket-like space that can hold anything from keepsakes to small cosmetics.
What makes this part enjoyable is watching the transition unfold. You’re no longer just working with a flat surface—you’re sculpting a form. This stage doesn’t require counting every stitch; rather, just keep building with confidence and consistency. As long as you stay mindful of spacing and avoid pulling too tight, the bag’s sides will naturally begin to rise.
Strengthening the Body
Midway through the project, the pouch maintains its shape with a consistent stitch pattern. At this point, the goal is to reinforce the sides while preserving flexibility. It’s the longest section of the project but also the most meditative. Each round adds height and density, and before you know it, your fruit bag begins to resemble its final form.
Beginners will find this stretch rewarding—it’s simple, repetitive, and forgiving. You don’t need to keep track of complicated patterns, so you can relax into the rhythm. Consider changing the yarn or adding a subtle stripe if you want to get creative. Just remember, the integrity of the body relies on evenness—so check your work periodically for symmetry.
Creating a Tapered Finish
To give the pouch its signature curved top, gentle decreases are introduced. These shape the final rows, closing in the opening without a hard edge. Instead of a flat closure, the design subtly curves inward like the top of a ripe fruit.
This shaping technique is both visual and functional—it prepares the pouch for the drawstring closure while preserving a rounded aesthetic. You don’t need to measure anything precisely. Just focus on reducing gradually, checking to see that the bag feels soft but snug as the opening narrows. It’s a small detail that elevates the entire piece.
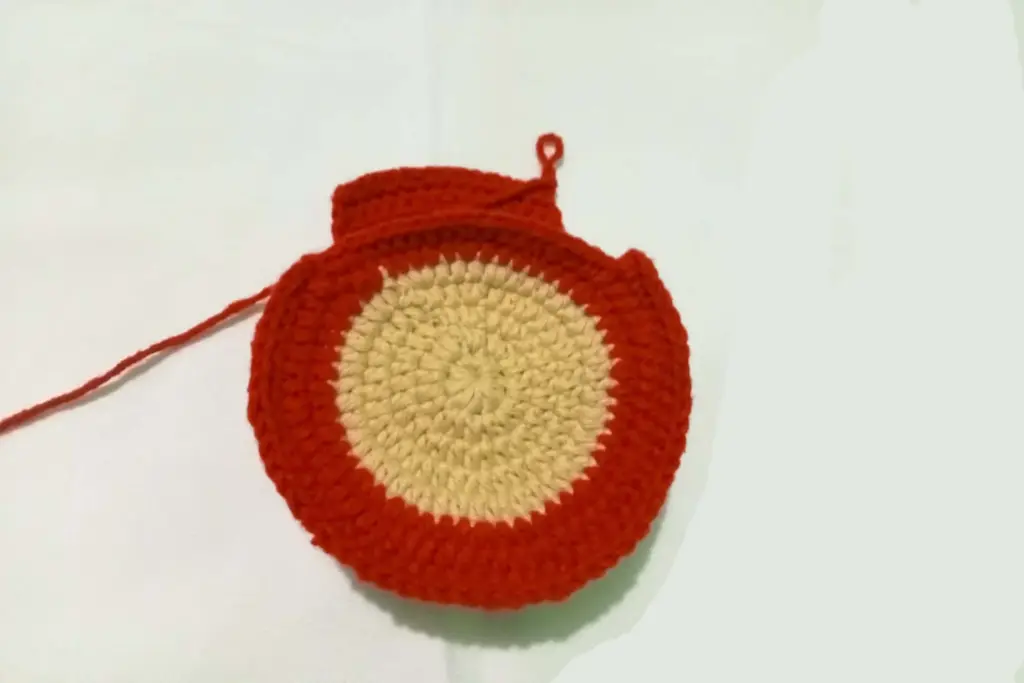
Preparing for the Drawstring
Before the leaf drawstring is attached, a final structural round is added to allow the cord to pass through. This creates small gaps around the upper edge, forming entry points for the cord to weave in and out. It’s a smart and stylish way to combine utility with design.
Think of this round as a transition between the body and the decorative finish. By spacing the gaps evenly, you’ll make it easy to thread the cord later. There’s no need for measuring or pinning—just let the stitches guide you. It’s a quick step, but one that ensures the drawstring functions smoothly without tangling or puckering the fabric.
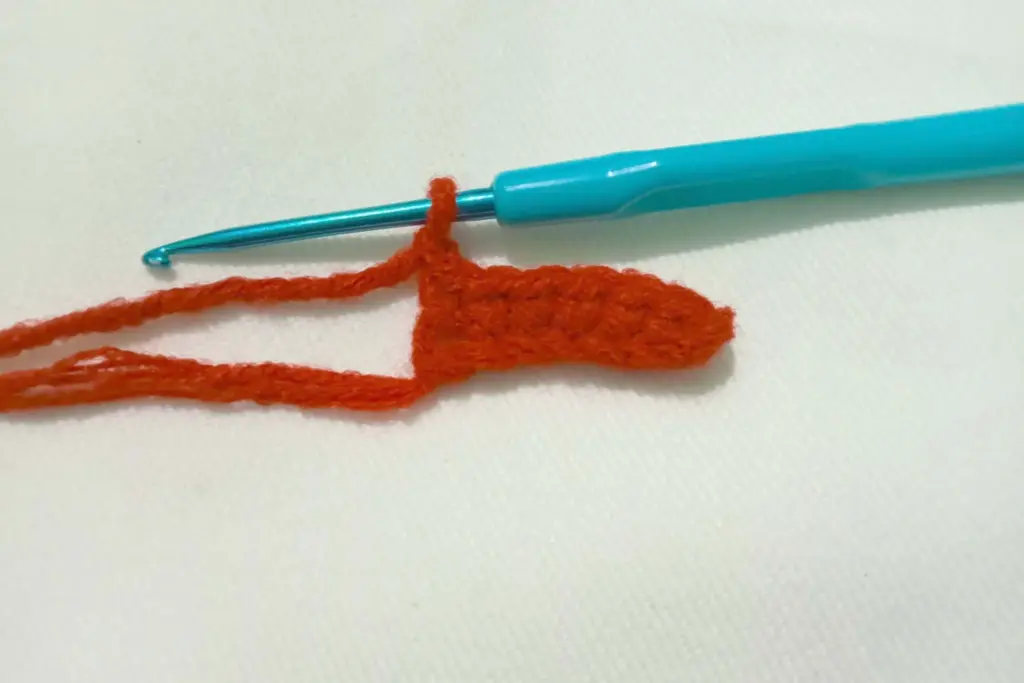
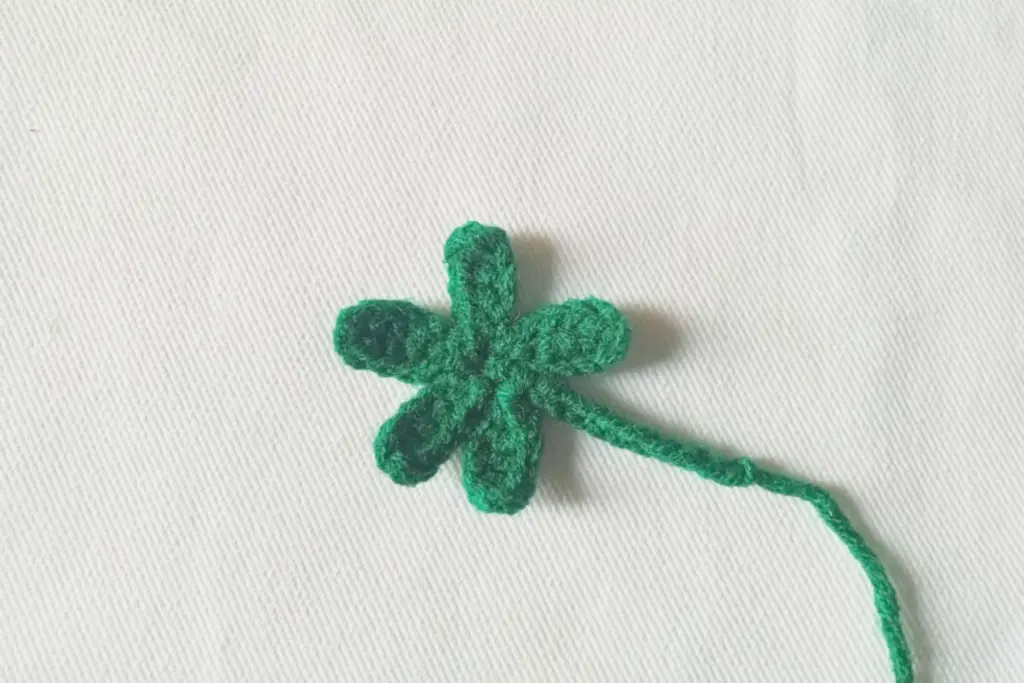
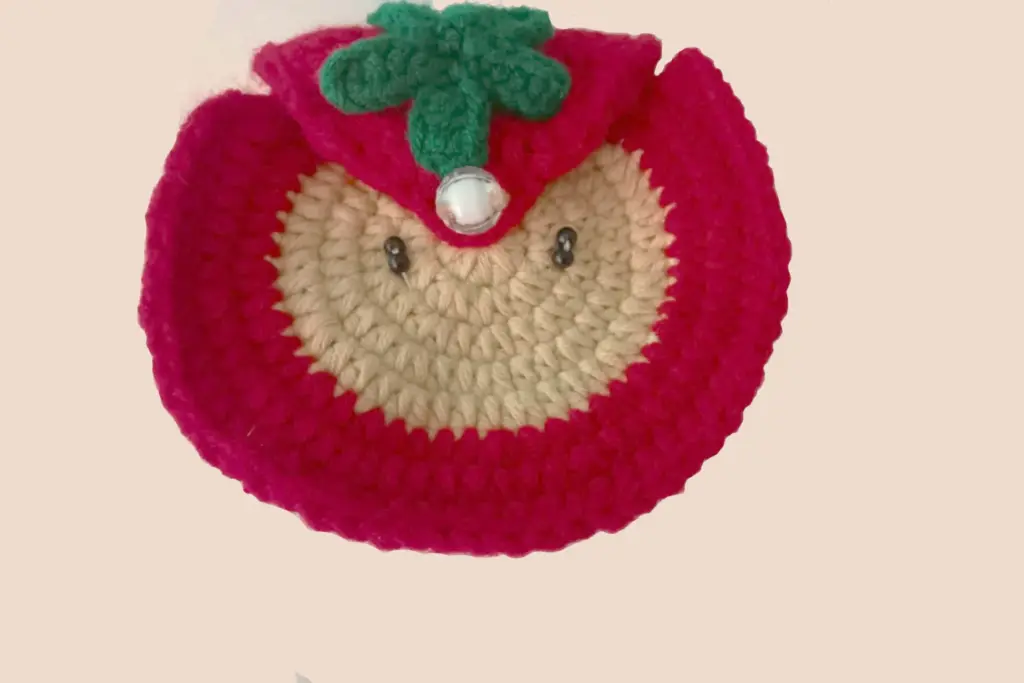
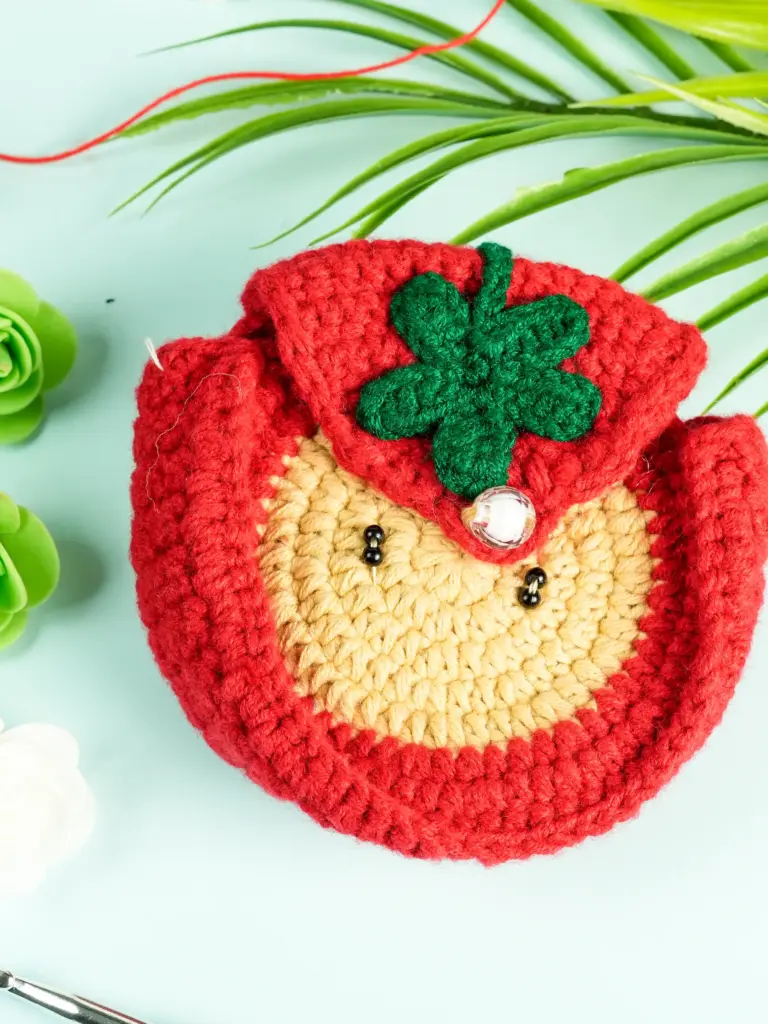
Crafting the Leafy Drawstring
The drawstring isn’t just a closure—it’s a feature that turns the pouch into a fruit. Inspired by leaves, this green cord wraps around the opening, pulling the fabric tight while giving the design its charm. The leaf ends are worked from simple stitches, mirrored on both sides of the cord.
Each leaf begins with a short chain, then fans out into its shape using easy-to-recognize stitch patterns. After reaching the tip, the work rotates naturally back along the chain, closing into a point. This creates a structured but soft silhouette that feels lifelike without being overly delicate. You don’t need to be exact—slight differences in shape only add to the organic feel.
Once one leaf is completed, a long chain extends across the top of the bag, leading to a second leaf. This not only forms the drawstring but ensures both ends of the cord match in style. It’s a clever way to build beauty into function.
Adding Detail to the Leaf Vein
What makes each leaf feel authentic is a subtle vein that runs down its center. This is done using slip stitches through the middle, simulating the natural line you’d see in real foliage. It also helps the leaf stay slightly curled, adding dimension and a bit of spring.
This detail, though small, really ties the look together. It’s not about precision—it’s about creating a handmade look that’s full of personality. If the stitches twist a little or the line curves slightly, that only enhances the charm.
Adding this vein takes just a minute, but it elevates the leaf from a flat shape to a stylized component that completes the illusion of fruit. Beginners can treat this as a bonus flourish, while more advanced crafters may find ways to personalize it further.
Assembling the Drawstring Cord

Once the two leaves and connecting chain are complete, the cord is joined into a single loop. This step involves a neat series of slip stitches that backtrack along the cord, reinforcing it and adding strength. Instead of knotting the ends, everything is fastened with gentle weaving and clever tucking.
This is where you bring the two ends of the drawstring into harmony. If done carefully, the join is nearly invisible, and the cord functions as one continuous piece. For those who want a more secure finish, a few extra slip stitches can be added without disturbing the design.
This technique avoids bulky ends and ensures the pouch closes smoothly every time. Even if you’re new to assembling parts, this method is intuitive and satisfying to complete.
Threading the Drawstring Through the Bag
With the drawstring ready, the next step is to weave it through the top of the pouch. Each open space left earlier becomes a passage for the cord. Folding each leaf gently, the cord slips in and out of the holes in a simple over-under pattern until it circles the bag completely.
This step is more tactile than technical. It’s about feeling the yarn move through the gaps and arranging it evenly. You don’t need to count or measure—just make sure the cord isn’t twisted, and the leaves are balanced on either side.
Once threaded through, a gentle tug pulls the bag closed in a smooth motion. The leaves draw together like a blooming flower or fruit stem, creating a closure that’s as beautiful as it is practical.
Customizing Your Fruit Bag
One of the best things about this project is its adaptability. A quick change in yarn color transforms the pouch into another fruit—yellow for lemon, orange for citrus, pink for peach, or even red for strawberry. The same base pattern works every time, giving you creative control without extra complexity.
You can also switch up the yarn texture for different effects. A matte cotton gives a natural look, while shiny yarns can give the bag a more polished finish. For added fun, consider striping two colors together or using variegated yarn for a more spontaneous fruit tone.
Even the leaves can be personalized. Want to add a second vein or embroider details? Go for it. This project is a playground for experimentation, allowing each crafter to make the bag their own.
Using and Gifting the Bag
Once finished, this pouch is more than just cute—it’s useful. It holds jewelry, dice, coins, earbuds, or any other small items you want to keep handy. It’s lightweight yet sturdy, making it ideal for travel or display.
Even better, it makes a thoughtful handmade gift. Tuck a few candies or earrings inside, and you’ve got a charming present that shows you care. It’s quick enough to make multiples, so it’s perfect for party favors, bridesmaid gifts, or classroom prizes.
The best part? It always sparks conversation. Few people expect a hand-crocheted fruit bag, and even fewer can resist picking it up to admire the leaves and color.
Data Summary Table
Here’s a quick reference for your crochet fruit bag project:
| Feature | Details |
|---|---|
| Skill Level | Beginner |
| Time Required | Approx. 2–3 hours (varies by pace) |
| Yarn Type | Worsted weight (acrylic or cotton) |
| Hook Sizes | 5mm (bag), 4mm (leaves) |
| Primary Shapes | Circular base, cylindrical body, leaf ends |
| Closure Style | Drawstring with decorative leaf cord |
| Customization Ideas | Color changes, texture swaps, added embroidery |
| Common Uses | Jewelry pouch, dice bag, gift bag, travel holder |

Final Thoughts
The crochet fruit bag is a delightful project that blends creativity with practicality. With its cheerful design, simple structure, and endless customization options, it’s perfect for crafters of all levels—especially beginners looking to build skills through play. From the round base to the leafy drawstring, every step invites exploration and adds to the bag’s handmade charm.
Whether you’re crocheting for yourself or someone special, this is a project that delivers joy from start to finish. Don’t be surprised if you end up making more than one.