
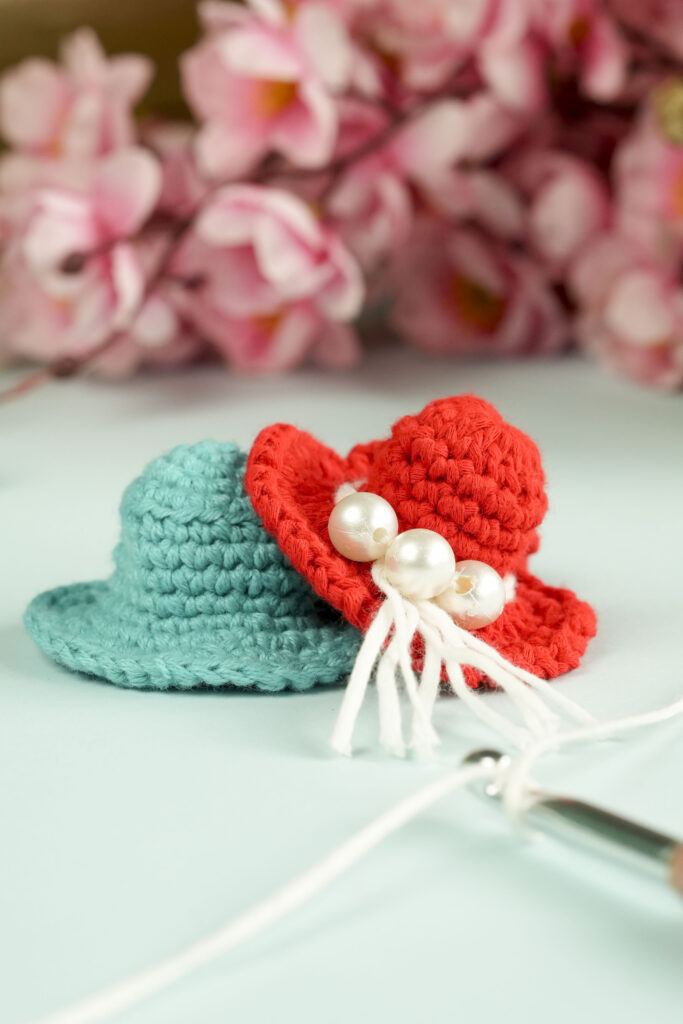
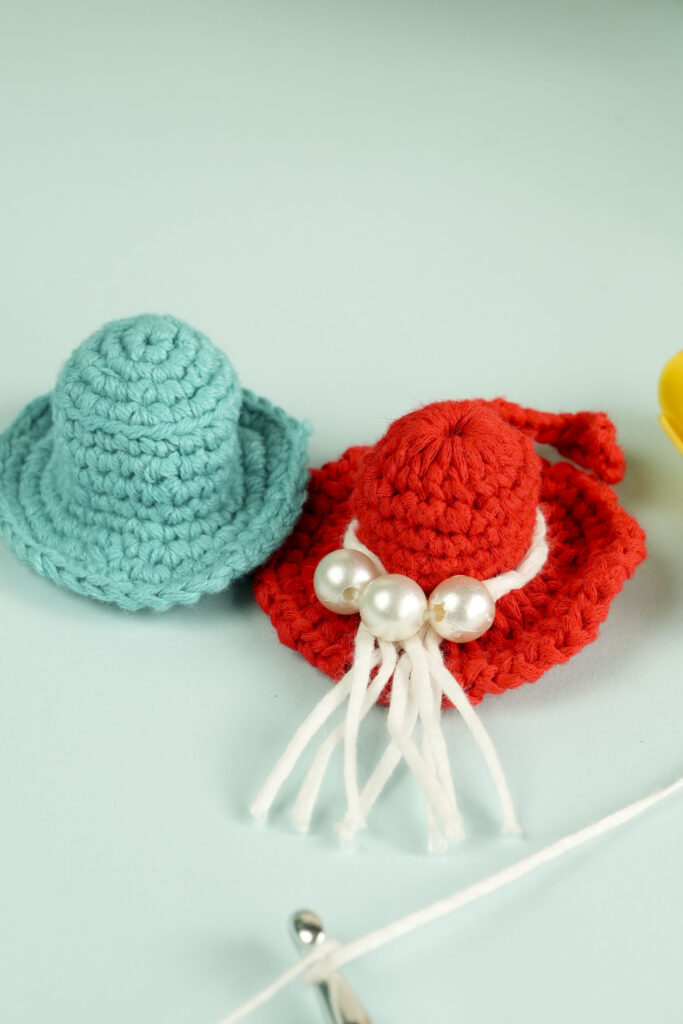
Crochet mini hats are quick, fun, and incredibly cute to make — a perfect beginner project. It is helpful for learning basic crochet techniques.
You can create them as keychains, ornaments, or tiny accessories for dolls. These mini hats are the ideal way to practice shaping and color changes on a small scale.
In this beginner-friendly guide explains How to Crochet a Mini Hat for Beginners using basic stitches and minimal tools. You’ll learn how to form a circular base, build up the hat’s height, and add neat color transitions for a polished finish.
The project takes very little yarn and time, yet the results are delightfully satisfying.
Materials
Before you begin, prepare the following materials:
- Medium-weight or soft acrylic yarn in two contrasting colors
- Crochet hook approximately 3 mm in size
- Yarn needle for weaving in ends
- Scissors
- Stitch marker (optional but useful for tracking rounds)
Notes: Use leftover yarn scraps for this project — mini hats are an excellent way to use up small amounts of yarn while experimenting with new color combinations.
Abbreviations (Us Terms)
- Mr – Magic ring
- Sc – Single crochet
- Inc – Increase
- Sl st – Slip stitch
- YO – Yarn over
These stitches form the entire hat. Practicing each one for a few minutes will make the process smoother and help you understand how the structure builds up from the base.
Step by step guide on How to Crochet a Mini Hat for Beginners
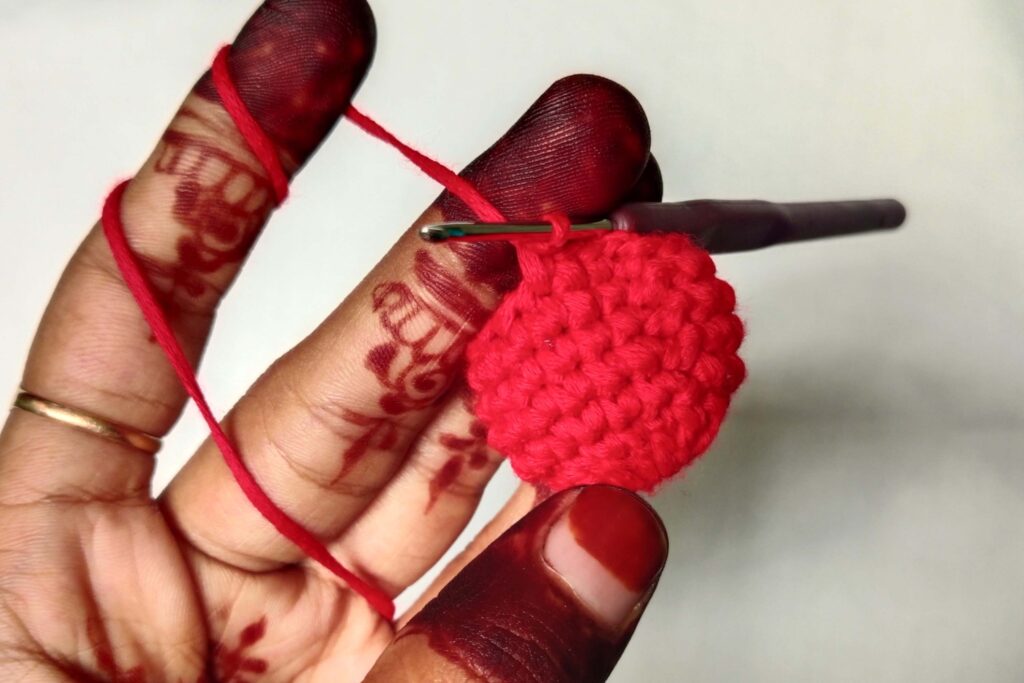
Starting the Hat Base
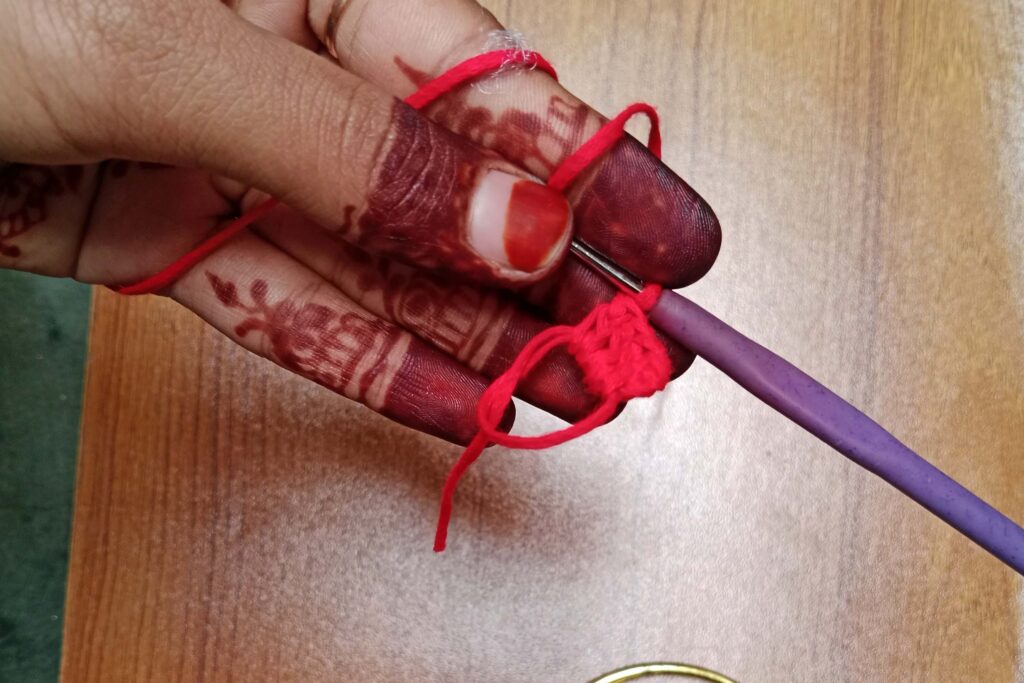
Every mini hat begins with a circular foundation. This is the part that forms the crown — the top of the hat. You’ll start by creating a small adjustable loop, then build out the shape evenly to form a smooth, round surface.
As you add more stitches, the circle naturally expands. Keeping your tension steady helps the base stay flat and prevents the edges from curling. Once you reach the desired diameter, the foundation is ready to shape into the hat’s body.
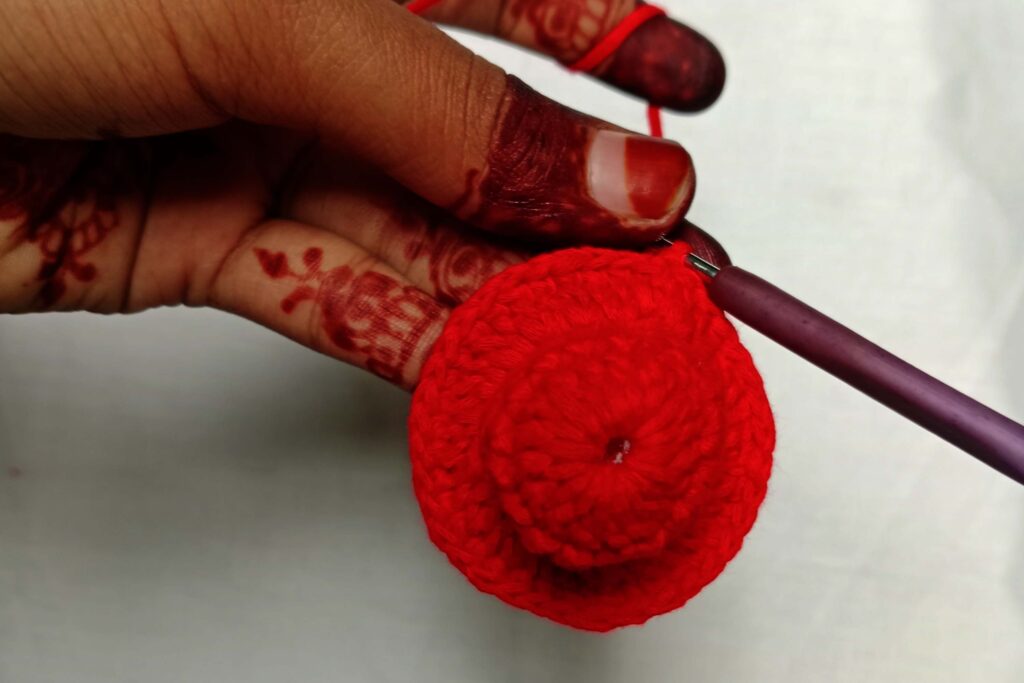
Building the Crown
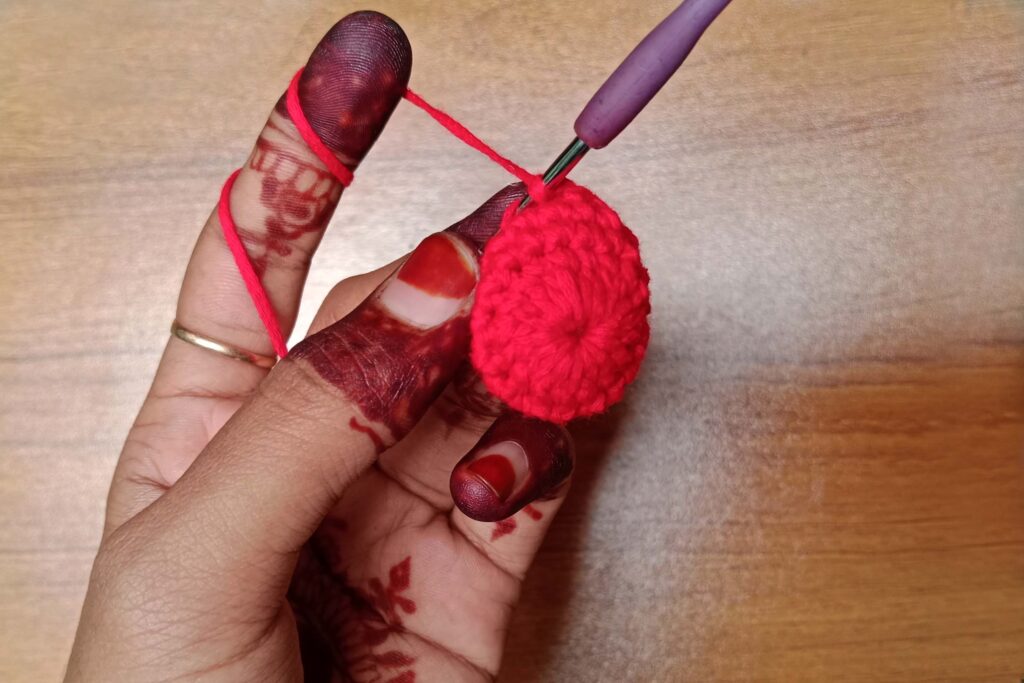
After completing the base, you’ll start forming the sides of the hat. This section gives the hat its depth and rounded silhouette. By continuing with evenly spaced stitches, you’ll gradually see the flat circle transform into a curved crown.
Take care to maintain consistent stitch size and rhythm — this ensures the hat remains symmetrical. You can adjust how tall or short the crown is by adding or removing a few rounds, depending on your preference. This step helps beginners understand how three-dimensional crochet structures are built layer by layer.
Changing Yarn Colors
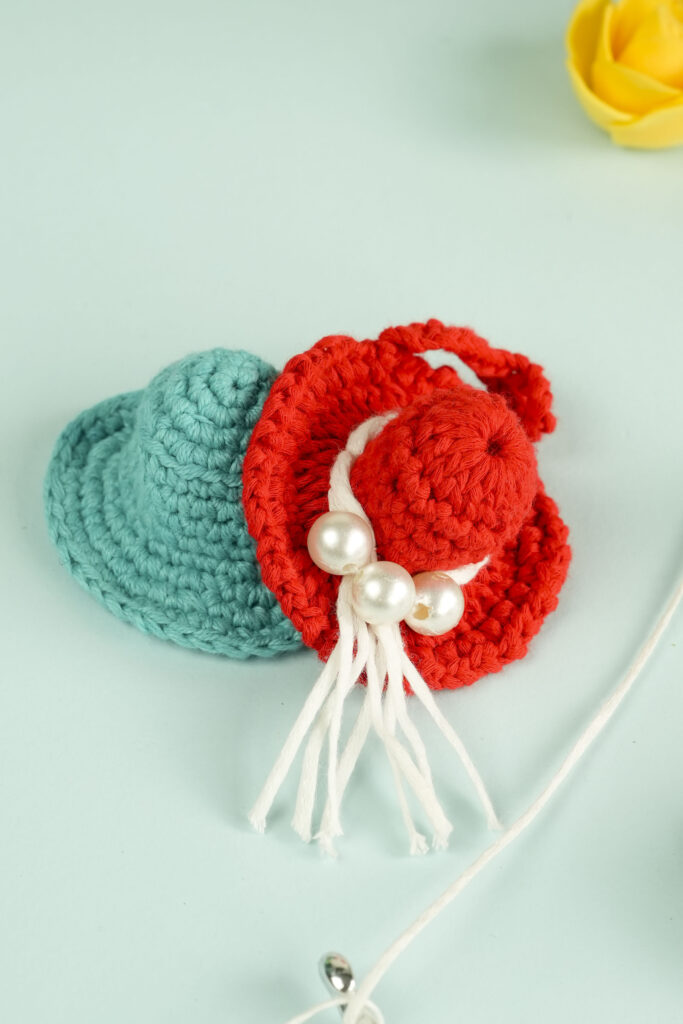
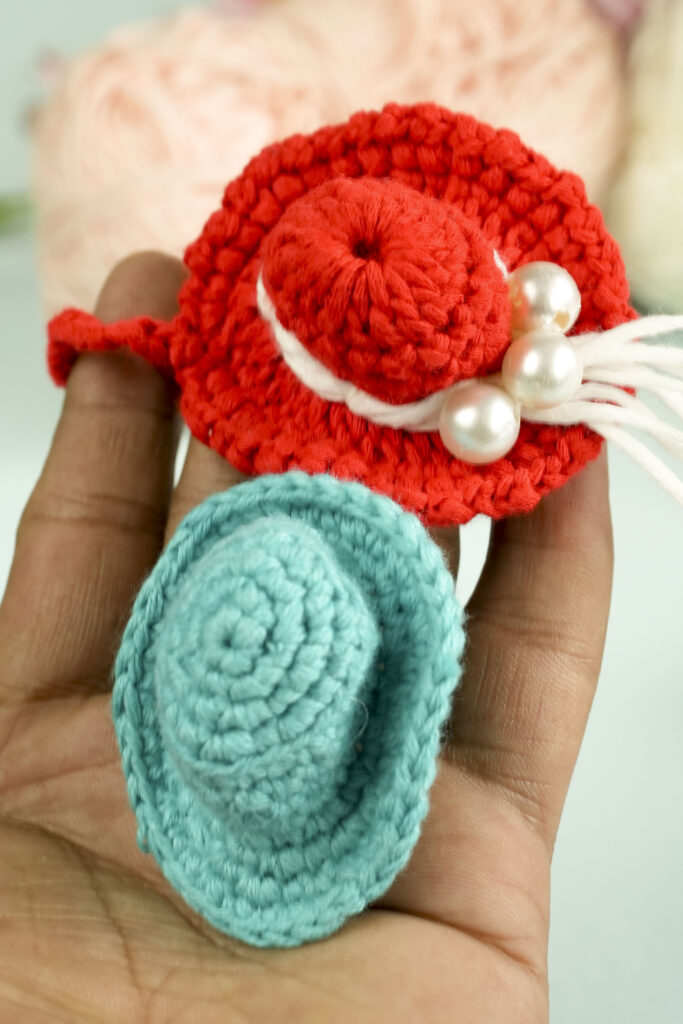
Color changes add personality and contrast to your mini hat. You can switch yarn shades near the middle or just before finishing the edge to create a stylish band. The transition should look clean and smooth — achieved by introducing the new color just before completing the last stitch of the previous shade.
Holding both yarns together briefly while working helps secure the ends without needing extra weaving later. It’s a simple but valuable skill that can be applied to countless crochet projects. Experiment with combinations like bold red and cream or pastel tones for a softer look.
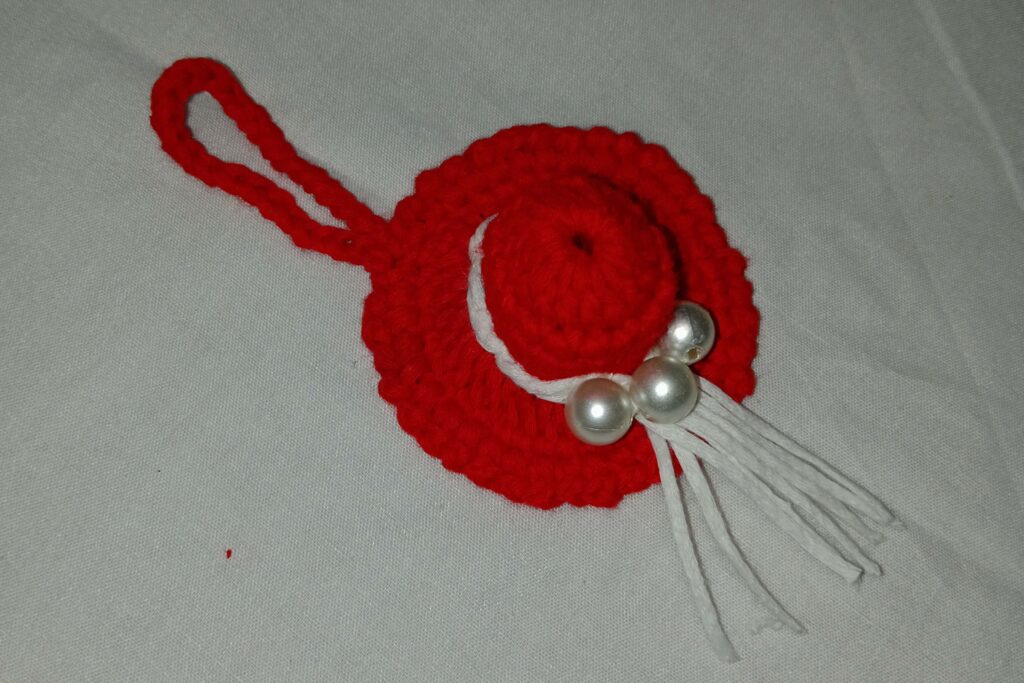
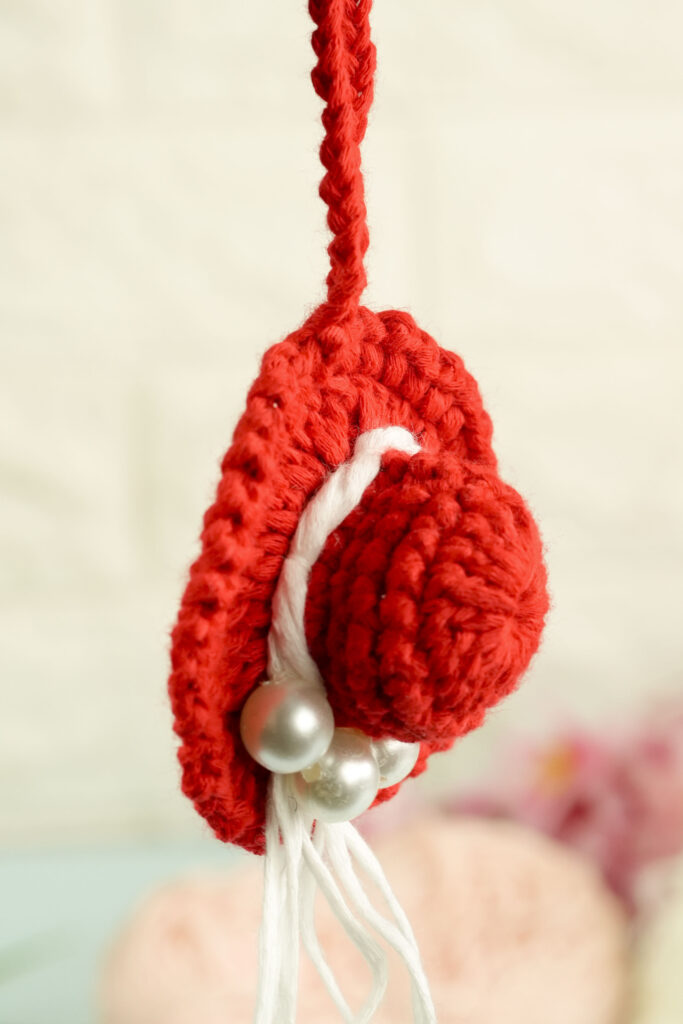
Shaping the Brim
The brim of the mini hat gives it that classic, finished appearance. Once the crown is tall enough, you’ll widen the edge slightly to create a subtle outward flare. This gentle curve gives structure to the design and helps the hat keep its shape.
When shaping the brim, it’s important to keep your tension light so the edges stay flexible. If you prefer a more structured look, you can stiffen the brim later using a light spray of fabric starch. The goal is to create a small, neat edge that frames the hat evenly all around.
You can also experiment with different brim widths — a narrow one for a simple cap style or a wider one for a fun, floppy effect. Either option adds character to your finished piece.
Finishing the Hat
Once the main structure is complete, you’ll close off the final round and weave in any loose yarn ends with your darning needle. This step ensures your hat looks tidy and professional. Make sure to secure any color-change points so the stitches don’t loosen over time.
If you want to give the hat a clean top finish, use a technique called a “false stitch.” It blends the final stitch seamlessly into the edge and makes the ending nearly invisible. For a slightly decorative look, you can add a tiny pom-pom or a small button at the top.
Take a moment to shape the hat with your hands — adjusting the crown and brim so everything sits evenly. The final piece should look symmetrical, rounded, and ready to display or gift.
Adjusting the Size
This mini hat design is easily adaptable. To make a smaller version, simply reduce the number of starting stitches and rounds. For a larger hat, add more rows to the crown and brim until it reaches your desired size.
Yarn type also affects the result. Thicker yarn and a larger hook create a bigger, chunkier hat, while thinner yarn makes a delicate, lightweight piece. Adjusting these small details lets you create a variety of styles — from tiny doll hats to mini beanies for décor or gifts.
Adding Personal Touches
Personalization makes each hat unique. Here are a few creative ideas to try:
- Add embellishments: Attach a pom-pom, bow, or tiny flower for extra flair.
- Play with textures: Use variegated or velvet yarns for a soft, plush look.
- Turn it into a keychain: Add a metal ring or clasp through the top loop to create a cute handmade accessory.
- Make seasonal versions: Use bright colors for summer or deep hues for winter-themed crafts.
These small variations transform your simple hat into something distinct and personal — perfect for gifts or market displays.
Tips for Beginners
If this is your first crochet project, remember that consistency matters more than speed. Keep your stitches even and avoid pulling the yarn too tightly. If your hat starts to curl or feel uneven, gently stretch it into shape before continuing.
Using a stitch marker can also make it easier to track where each round begins and ends. Over time, your hands will develop a rhythm, and the process will become almost meditative — making mini hats one of the most relaxing crochet projects you can try.
Final Thoughts
Crocheting a mini hat is a wonderful way to build your confidence as a beginner. It teaches essential skills like forming a base circle, maintaining consistent tension, and making smooth color changes — all in a compact, manageable project.
These adorable hats can be used as ornaments, doll accessories, keychains, or small gifts that showcase your creativity. Once you’ve mastered one, you’ll find it hard to stop — each new hat becomes a tiny canvas for color, texture, and imagination.
So grab your yarn, pick your favorite shades, and start crocheting your first mini hat today. With just a bit of practice, you’ll have a whole collection of handmade treasures that you can proudly call your own.