
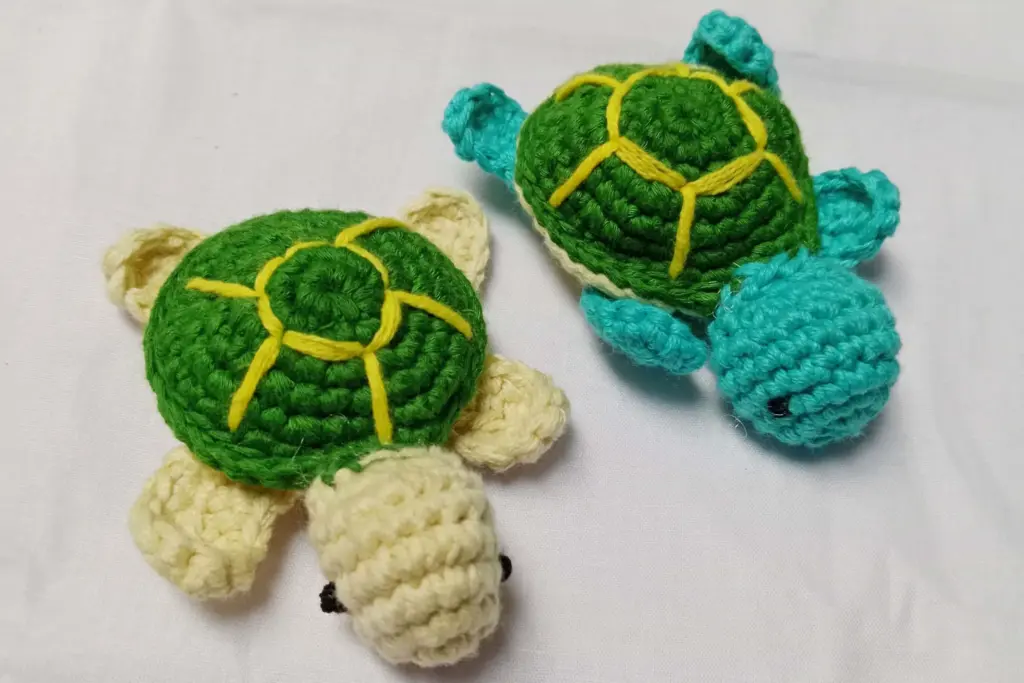
Mini turtle amigurumi keychains are the kind of project that make people say, “Wait, you made that?” They’re small, portable, and full of personality, but still simple enough for a confident beginner to tackle. This design combines a rounded head, a textured shell, a contrasting tummy, and four tiny flippers, then finishes with a keyring so your little turtle can travel everywhere with you.
In this tutorial-style article, you’ll learn how the turtle is constructed from three main components:
- A lightly stuffed head with embroidered or safety eyes
- A layered shell made from an outer dome and a flat underbelly
- Flippers, tail, and keyring attachment added in the final assembly
We’ll walk through the structure rather than a strict row-by-row script so you understand why each section is shaped the way it is. That way you can confidently adjust colors, expressions, and proportions to create your own family of tiny turtles.
Materials Needed
The original video uses three main body shades plus small amounts of accent yarn, along with standard amigurumi tools. Here’s a clear breakdown so you can gather everything before you start.
- Medium-weight yarn for:
- Turtle head and flippers (light shade)
- Shell top (darker complementary shade)
- Underbelly (neutral or pale shade)
- Small scrap yarn for:
- Shell detail pattern
- Optional embroidered eyes if you skip safety eyes
- Safety eyes with backings (small size)
- Stuffing (polyester fiberfill or similar)
- Keyring with jump ring (blank keychain or reused hardware)
- Crochet hook slightly smaller than the yarn label suggests
- Yarn needle
- Stitch marker or paper clip
- Scissors
Abbreviations (US Terms)
All stitch names in this pattern follow US terminology.
SC
: Single crochet – main fabric stitch used throughout the turtle.
MR
: Magic ring – adjustable starting circle that can be pulled tightly closed.
INC
: Increase – two single crochets placed into the same spot to widen the shape.
DEC
: Decrease – two neighbouring spots worked together to narrow the shape.
INV DEC
: Invisible decrease – a neater version of decrease that blends into the fabric, usually worked through selected strands only.
BLO
: Back loop only – inserting the hook through the strand furthest from you, leaving the front strand free for later use.
SL ST
: Slip stitch – joining or edging stitch used to close a section cleanly or move the yarn to a new starting point.
CH
: Chain – the basic foundation strand used only in a few small areas (like flippers and tail).
These few abbreviations are enough to build the entire keychain: head, shell, limbs, and finishing touches.
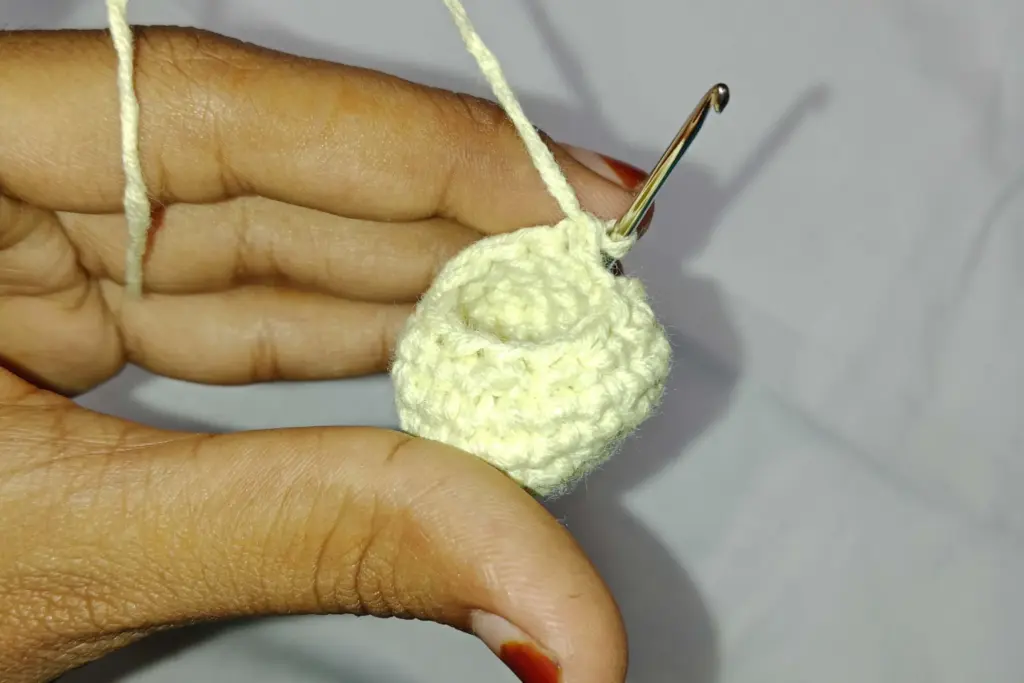
Shaping the Tiny Turtle Head
The turtle’s head is a classic amigurumi sphere: compact, softly stuffed, and worked in a continuous spiral so there are no visible seams. You begin with an adjustable center using a magic ring, which lets you tighten the starting hole completely so no stuffing escapes later.
From that small center, the head gradually widens with regular increases, then levels out, and finally narrows slightly before being closed and attached to the shell. The sequence is simple:
- Start with a small circle of single crochet stitches worked into a magic ring.
- Add fabric evenly by increasing across the next couple of spirals until you reach a gentle, rounded dome.
- Maintain the same stitch count for several spirals so the head has enough height for expressive eye placement.
- Use invisible decreases to subtly taper the lower part of the head, keeping the silhouette smooth.
Because everything is worked in a spiral rather than joined rows, you’ll need a stitch marker to keep track of where each spiral begins. Moving the marker up each time you pass it ensures your counts stay accurate and your shaping remains symmetrical.
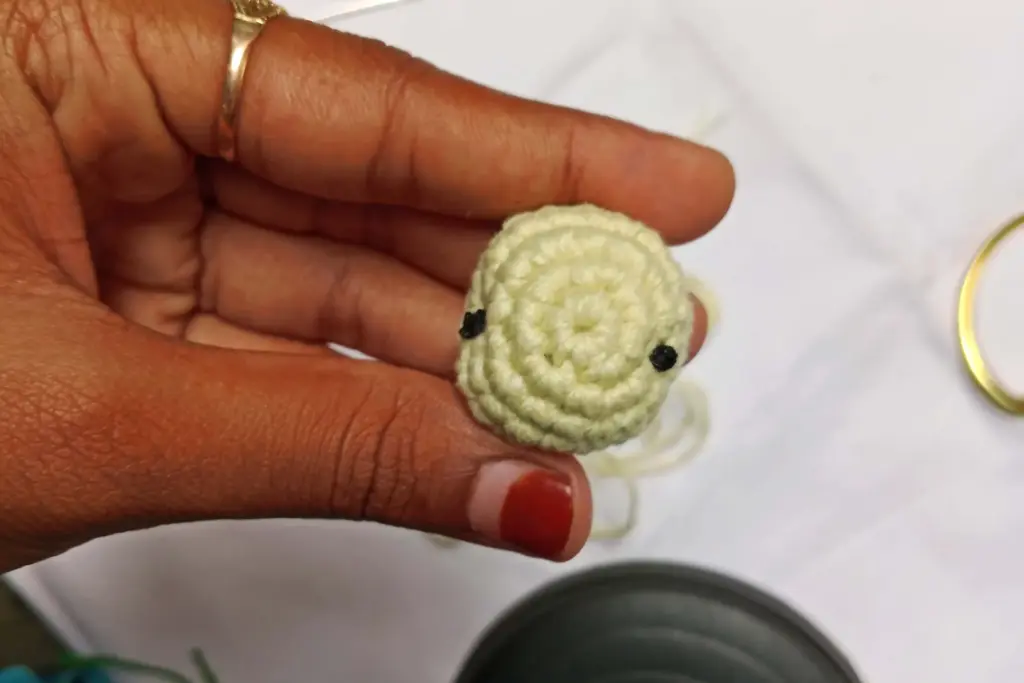
Once the head is close to its final size, small safety eyes are positioned between two mid-level spirals, with a few stitches of space between them so the turtle looks friendly rather than squished. The head is then filled firmly but not rock-hard; the stuffing should support the shape without stretching the fabric. The bottom opening remains slightly open so it can later be sewn neatly into the shell’s front “dip.”
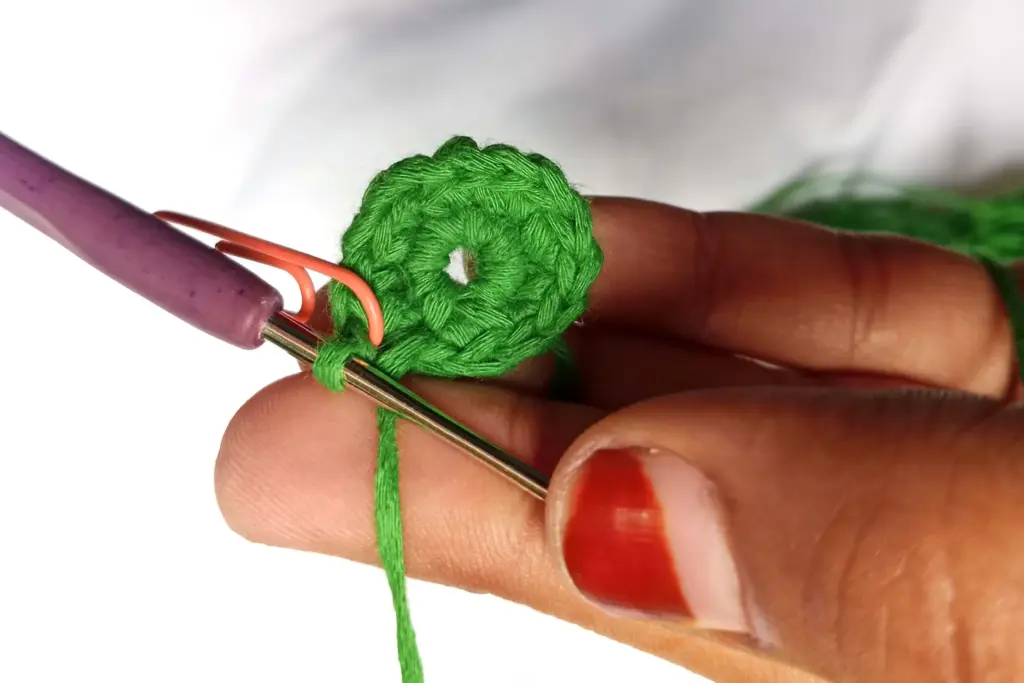
Building the Textured Shell Top
The shell top is worked separately in a darker shade and shaped as a shallow dome. Its structure echoes the head’s starting method but grows wider, forming a flattened, curved disc rather than a full sphere. This is done by:
- Starting again with a magic ring for a seamless center.
- Expanding smoothly with regular increases so the fabric forms a neat circle.
- Adding extra increase spirals beyond what’s needed for the head, creating a broader, flatter curve that reads as a shell rather than a ball.
- Finishing with one spiral of single crochets with no increases to firm up the edge.
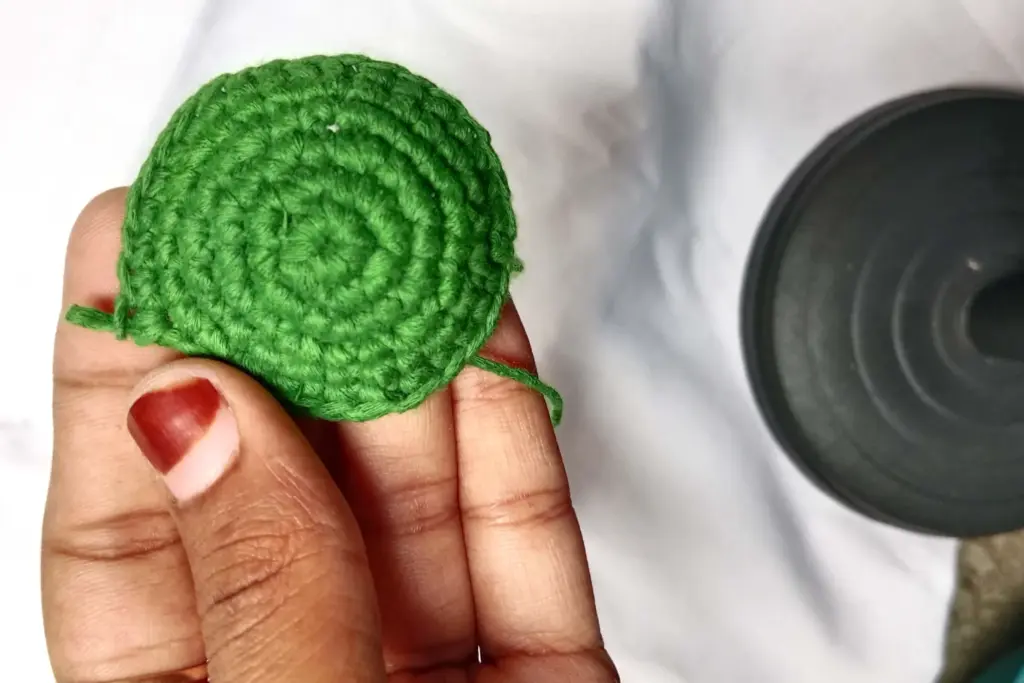
Because increases are spaced evenly, the shell naturally shows a subtle hexagonal structure—the points where increases stack form visual “corners.” The video makes clever use of this geometry by later embroidering a hexagon-shaped pattern over the shell, following those natural segments and emphasizing the turtle’s classic shell look.
At the end of the shell top, the yarn is left attached rather than cut. This is important: that working yarn is used later to join the shell top to the underbelly, which creates a clean, strong seam and prevents a lot of extra ends.
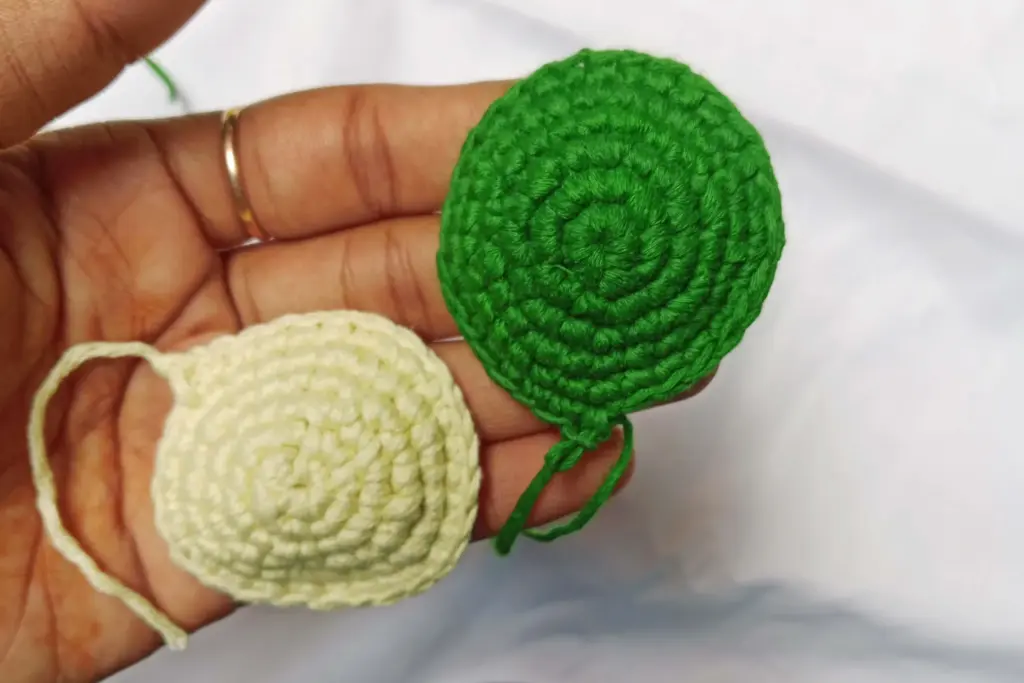
Crocheting the Soft Underbelly Base
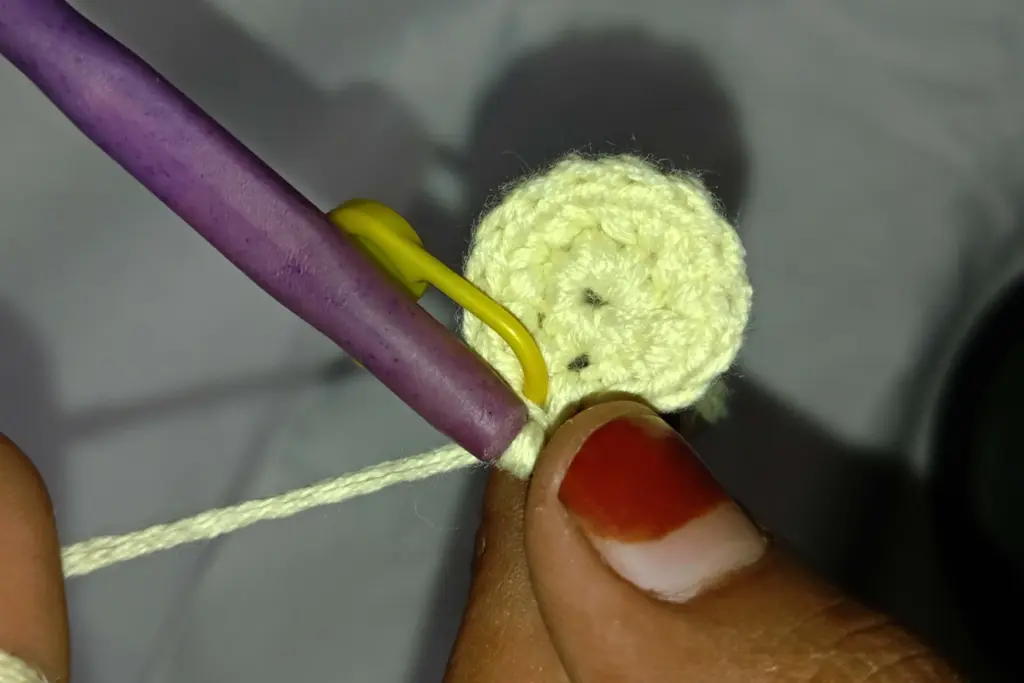
The turtle’s underbelly is a flatter piece in a pale or neutral shade that mirrors the size of the shell top but with slightly fewer increase spirals. This keeps it more disc-like and helps it sit snugly inside the shell rim once both pieces are joined.
The construction is straightforward:
- Start again from an adjustable center, just like the head and shell.
- Widen the circle with a limited number of increase spirals, stopping earlier than you did for the shell top.
- Finish with one calm spiral of plain single crochets to refine the edge.
Once this foundation disc is complete, the yarn is fastened off, leaving a tail that marks the point where stitching will begin when pairing it with the shell top. During assembly, the underbelly and shell are positioned back to back and joined with single crochet worked through selected strands. This joining method leaves a neat raised rim around the shell and creates a clear space where the head will tuck in and the flippers will appear to peek out from underneath.
Embroidering the Shell Pattern

One of the most charming features of this turtle keychain is the decorative design stitched onto the shell. Even though the shell is crocheted in simple rounds, the natural structure created by the increases forms a subtle hexagon. These points become perfect guides for adding a geometric pattern without guessing.
To embroider the design:
- Begin with a contrasting strand of yarn and bring the needle up between two of the middle rounds.
- Use the shell’s natural “corner points” as anchors. The increases from each spiral align into gentle lines that form a hexagonal outline.
- Stitch from one corner to the next, following this natural path until half the shape is outlined.
- Reverse direction to complete the remaining edges, which becomes easier once the first part is visible.
- Add small radiating lines that drop down from each point of the hexagon toward the lower rounds of the shell.
This detail gives the turtle a classic patterned shell that looks far more complex than it actually is. The key is simply following the shell’s built-in geometry rather than trying to force a shape into place.
Once all the lines are stitched, the ends are knotted securely on the inside and hidden so the back remains tidy before assembly.
Joining the Shell and Underbelly
With the two circular pieces completed—the dome-shaped shell top and the flatter underbelly—they are placed back to back, lining up their edges. The joining technique creates a neat lift or ridge around the shell, giving it a more dimensional appearance.
The process flows like this:
- Hold the pieces together with their wrong sides touching so the polished sides face outward.
- Using the working yarn still attached to the shell top, join the two pieces by inserting the hook through the strand closest to you on the shell top and through both strands on the underbelly.
- Work single crochet stitches all the way around the circle, keeping tension even.
This method creates a small raised border around the shell, giving it structure and depth. Before closing the last few stitches, the shell should be lightly stuffed. Use small tufts of fiberfill and press them into the dome so the shape remains smooth and rounded.
The final stitches can be slip stitched instead of single crochet to create a deliberate indentation—a small dip where the turtle’s head will later nestle into place. This tiny design detail ensures the head sits naturally instead of protruding awkwardly.
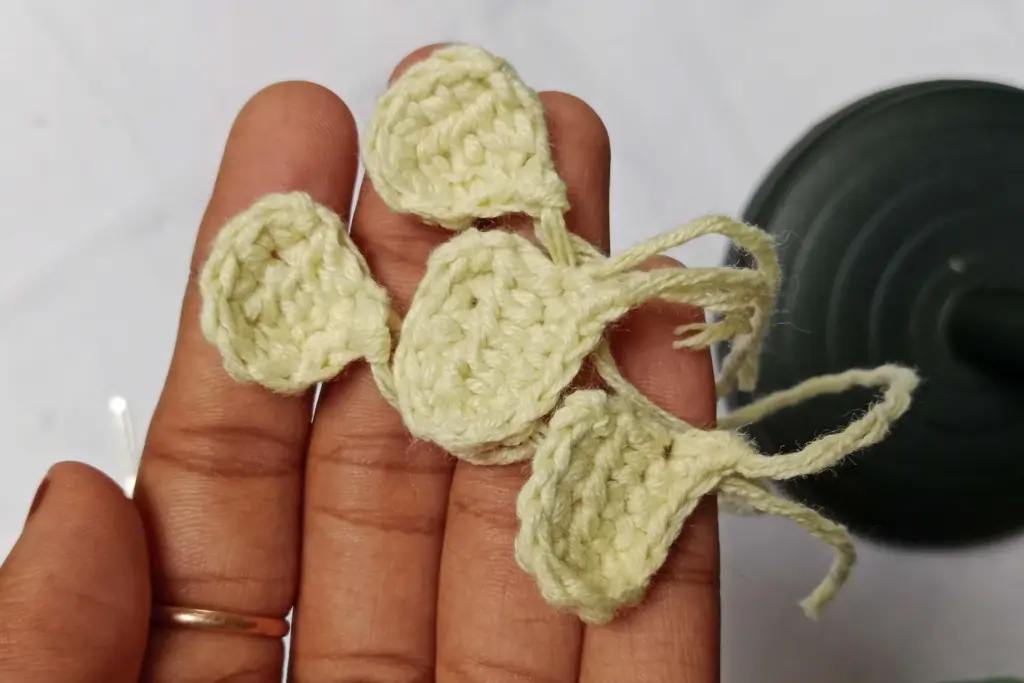
Creating the Flippers
Each flipper is formed from a small oval-like shape built from a short foundation and expanded slightly at one end. Because they’re small, they’re quick to make and beginner-friendly.
You’ll create two flippers in the same shade as the head and two in the underbelly shade. Each pair is then sewn together back-to-back to form a thicker, more stable piece. Joining flippers this way ensures the finished turtle has tidy edges, no exposed backs, and limbs that hold their shape.
The assembly method is simple:
- Place the two matching flipper pieces together.
- Sew around the outer edges using small back-and-forth stitches or a ladder-style seam.
- Keep the seam slightly inset to avoid creating bulk on the outer edge.
- Once sewn, all yarn ends are tucked inside the flipper so nothing remains visible.
You will need four finished flippers total, each one identical in size and shape.
Attaching the Head
The head is sewn into the small divot created earlier on the shell. This placement creates a natural resting spot for the head and gives the finished turtle its adorable forward-facing posture.
To attach the head:
- Position the head slightly forward, aligning its eyes so they face straight ahead and not downward.
- Make sure the center of the embroidered shell pattern aligns with the center of the face. This keeps the overall appearance balanced.
- Sew around the base of the head using small, hidden stitches, catching a bit of the shell and a bit of the head with each pass.
- As you go, adjust the positioning so the head sits firmly and doesn’t tilt sideways.
A securely attached head ensures the keychain stays durable and can handle being tossed in bags, pockets, or backpacks.
Adding the Flippers and Tail
With the head attached, the next step is sewing on the flippers. Positioning plays a major role in getting the right look:
- The flippers should sit along the inner ridge created where the shell meets the underbelly.
- The upper pair is placed closer to the head, aligned with the angles created by the shell pattern.
- The lower pair is positioned slightly back, helping the turtle appear balanced and symmetrical.
- Each flipper is sewn through its thickness and into the edge of the underbelly so it appears to emerge from beneath the shell.
A small triangular tail is added last. It’s made from a short, simple piece attached at the back of the underbelly, nestled along one of the lines radiating from the shell’s pattern. Both tail ends are pulled inside and woven in to remain invisible.
Attaching the Keyring
The final step transforms the turtle from a soft toy into a functional accessory.
There are two common attachment points:
- The top of the shell, which keeps the turtle upright when hanging
- The top of the head, for a slightly more playful look
Using the long tail left from joining the shell, you can loop the yarn through the jump ring several times to ensure a strong grip. Each pass should go back through the same opening so the hardware doesn’t wobble. Once secured, the ends are knotted and tucked inside.
A securely anchored keyring ensures the turtle can withstand regular movement and the weight of keys without tearing or loosening.
Troubleshooting Guide
| Issue | Possible Cause | Suggested Fix |
|---|---|---|
| Shell looks lopsided | Uneven stuffing or uneven joining tension | Remove a small amount of stuffing, reshape, and resew a few stitches. |
| Head tilts downward or sideways | Off-center placement | Unpick small section and realign using shell pattern as guide. |
| Flippers curl inward | Stitches too tight | Lightly stretch flippers or loosen tension next time. |
| Embroidery looks uneven | Corners not aligned | Follow the natural hexagon created by increases for accurate placement. |
| Keyring feels loose | Not enough anchor passes | Add an extra loop through the jump ring before knotting. |
Customization Ideas
This turtle keychain pattern is wonderfully flexible. Try these beginner-friendly variations:
- Use a multicolored yarn for the shell to mimic natural turtle patterns.
- Switch the accent embroidery color for seasonal themes.
- Add tiny embroidered eyebrows or a blush under the eyes for extra personality.
- Make a family of turtles in different sizes by adjusting hook size or yarn weight.
- Add beads or charms to the keyring for personalization.
Simple changes like these keep each turtle unique and make the pattern ideal for gifts, craft fairs, or personal collections.
Final Thoughts
A crochet turtle keychain is the perfect beginner project—small, quick to assemble, and full of adorable charm. The combination of simple shaping, light embroidery, and thoughtful assembly teaches essential amigurumi techniques while still being relaxing and enjoyable.
Once you finish one, it’s hard not to make more. Experiment with colors, shell designs, and expressions, and soon you’ll have a whole clutch of tiny turtles ready to accompany you wherever you go.
If you want additional variations, printable formatting, or help writing a matching pattern description for your store or blog, just let me know!