
A crochet wristlet keychain is a small, practical project that lets you keep keys close at hand while showing off your handmade work. It is especially friendly for beginners who want to learn how to make a sturdy strap that doesn’t stretch out easily. The thermal stitch used in this project creates a dense, double-layered fabric that feels strong in the hand and holds up well to daily use.
Materials Needed
Based on the tutorial, you will need the following items:
- Lightweight yarn (often labeled as a fine or size 3 category), in one or two coordinating shades
- A small crochet hook suited to fine yarn
- Yarn or tapestry needle for weaving in ends and sewing
- Scissors
- Flat key fob hardware with matching pliers
- Lobster clasp (optional alternative to the key fob)
- Small clips or pins to hold the strap together while sewing (for the lobster clasp version)
These are all standard supplies that many crocheters already have, and the only specialty items are the key fob fitting and the clasp.
Abbreviations
All terms follow US crochet terminology.
MR
: Magic ring
SC
: Single crochet
HDC
: Half double crochet
SLST
: Slip stitch
YO
: Yarn over
Thermal stitch
: A dense fabric created by working into strands from the current and previous rows, forming a doubled structure that is ideal for straps and handles
You will mainly rely on single crochet and the thermal method rather than a long list of special stitches, which makes this a good technique-building project for beginners.
Beginning the Wristlet Strap
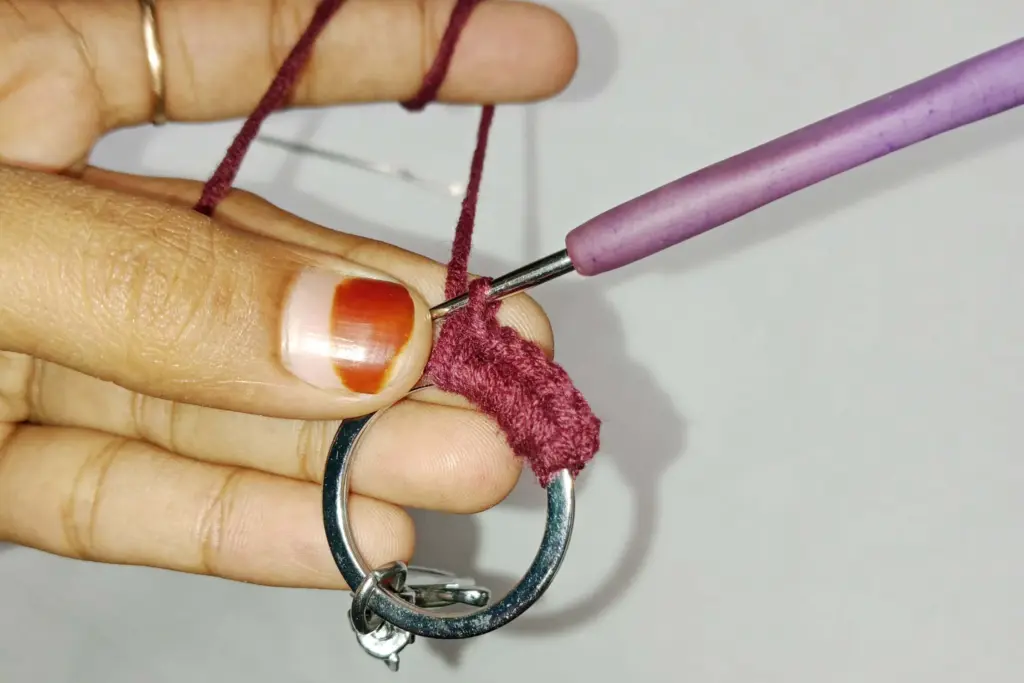
The wristlet begins as a short foundation that defines the width of the strap. Instead of working into the front side of this foundation, the tutorial shows how to work into the back bumps along the underside. This approach makes the edges crisp and evenly rounded, which really improves the finished look.
For beginners, this first section is where the fabric can feel a little fiddly. The strands are close together and it may take a moment to see exactly where to insert the hook. Going slowly and checking each space before forming the next stitch helps keep the edge straight and prevents the strap from narrowing unintentionally. Once you complete the first few passes, the structure settles in and becomes easier to read.
Building Thickness and Texture
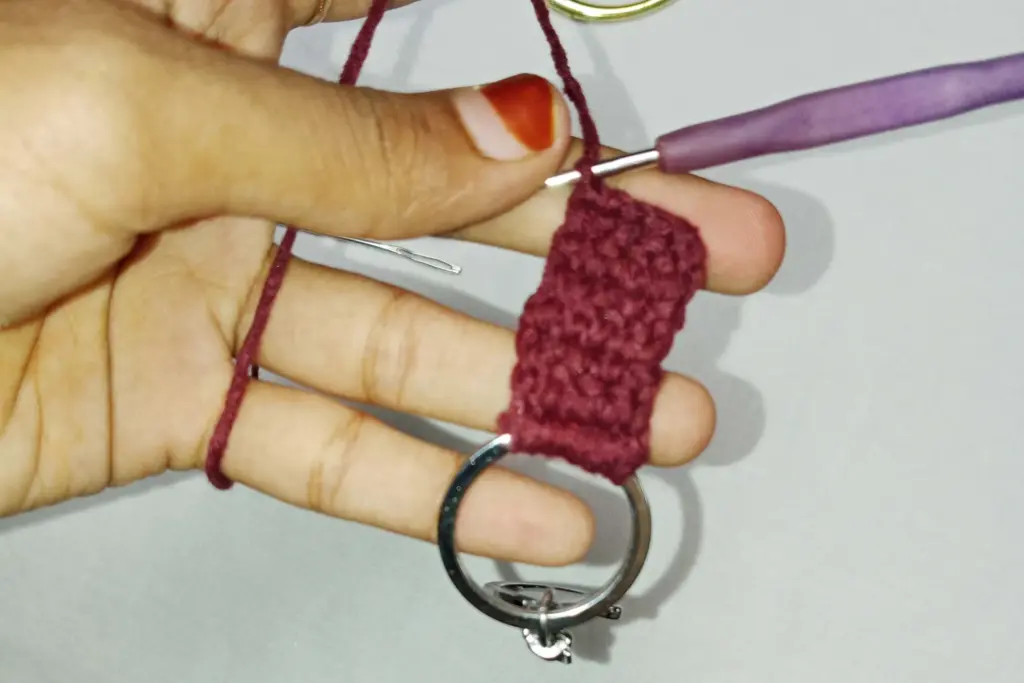
After the foundation is ready, every new row is built the same way to form the thermal effect. The hook is inserted through a strand on the current edge and then through an open strand from the row beneath it. Pulling the yarn through both layers connects them into one thicker fabric.
As you repeat this process, the strap begins to show clear raised ridges along the surface. These ridges run lengthwise and act as visual guides, making it much easier to find the correct places to work into. The tutorial notes that while the first few rows can feel confusing, the longer the strap gets, the more obvious the texture becomes and the faster you can work.
This repetitive structure is perfect for practicing even tension. Because you are always working through two layers, your hands naturally learn how tightly or loosely to pull the yarn to keep the strap flat, not wavy or twisted.
Maintaining an Even Width
One key detail in the video is that every row keeps the same number of stitches from beginning to end. This is essential for a neat strap that doesn’t flare or taper. Losing or accidentally adding stitches will cause the edges to curve, so beginners should occasionally count the stitches across the width to make sure nothing has changed.
Helpful habits for staying consistent
- Pause every few rows and quickly count the stitches across the width
- Keep the starting and ending stitches clearly visible by gently straightening the strap before turning your work
- Watch that you are always working into both the upper strand and the matching open strand from the previous row
By checking in regularly, you avoid surprises later when you reach the end and realize one side is slightly wider than the other.
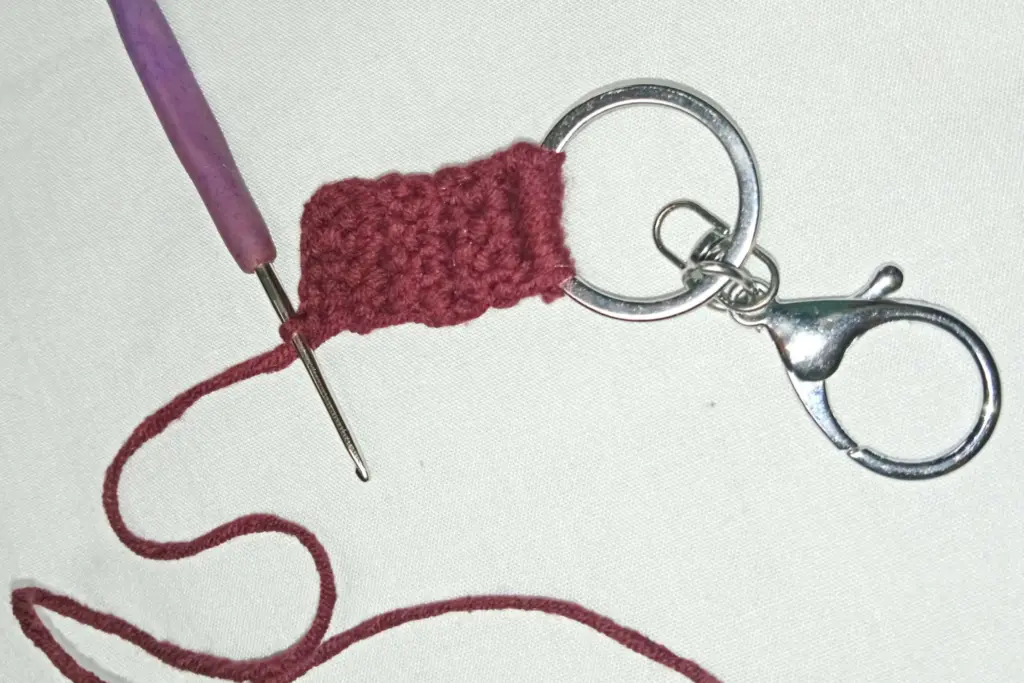
Finishing the Strap End
Once the wristlet reaches its full length, the final rows shift into a finishing method that closes the fabric neatly. Instead of continuing the thermal structure, the last pass anchors the edge by tightening the strands together, preventing the layers from separating. This creates a cleaner, flatter end that is easier to insert into hardware or fold for sewing.
After closing off the fabric, the remaining yarn is trimmed and secured. The tutorial demonstrates how short the tail can be for the key fob version since this end will be covered by metal hardware. Keeping your finishing minimal here helps reduce bulk inside the clasp.
Preparing the Key Fob Hardware
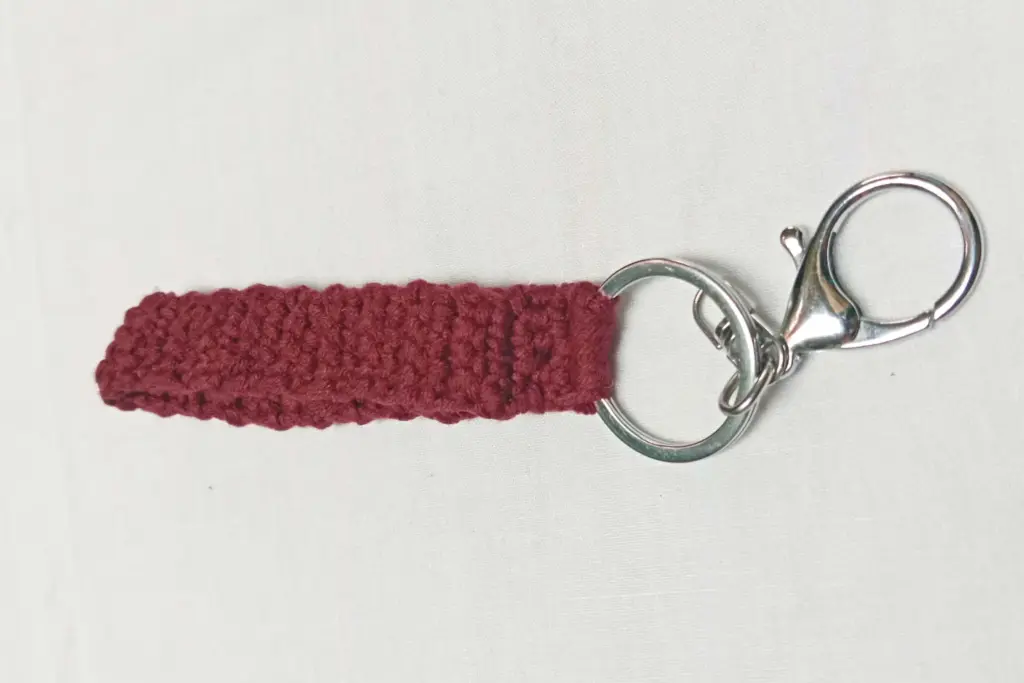
For the key fob option, the strap is folded so both ends meet evenly. The metal fitting has small teeth on the inside that grip the yarn and prevent slipping. The strap is positioned carefully so the edges align evenly inside the clasp. The maker demonstrates a helpful technique: nestling one side of the strap under the teeth first to hold it steady before adjusting the opposite side.
Once both halves are centered, the pliers are used to press the hardware closed. A light test squeeze helps confirm placement before applying a firm closure. This two-step method prevents the strap from shifting and reduces the risk of uneven alignment. A gentle tug test afterward ensures the clasp is fully secure.
Choosing the Lobster Clasp Alternative
The second option uses a lobster clasp rather than metal fob hardware. The strap construction is identical, but finishing requires a longer tail. This tail becomes the thread used to attach the clasp directly to the folded end of the wristlet.
Clips or pins are used to keep the folded strap aligned. This stabilizes the fabric and makes sewing more precise. The clasp has a small opening at the base, and the yarn needle is passed through the metal and then through both layers of the strap. This creates a firm anchor that keeps the clasp from pulling away under tension.
The sewing continues down the folded edge, catching both sides of the strap. The clasp may shift during the first few passes, but it naturally settles into position as the stitching progresses. Before reversing direction, the tutorial adds a clever strengthening stitch: tacking along the outer edge to reinforce the seam.
Reversing the sewing direction doubles the strength of the attachment. Once the stitching returns to the starting point, the yarn is tightened, knotted discreetly, and woven into the strap so no ends show.
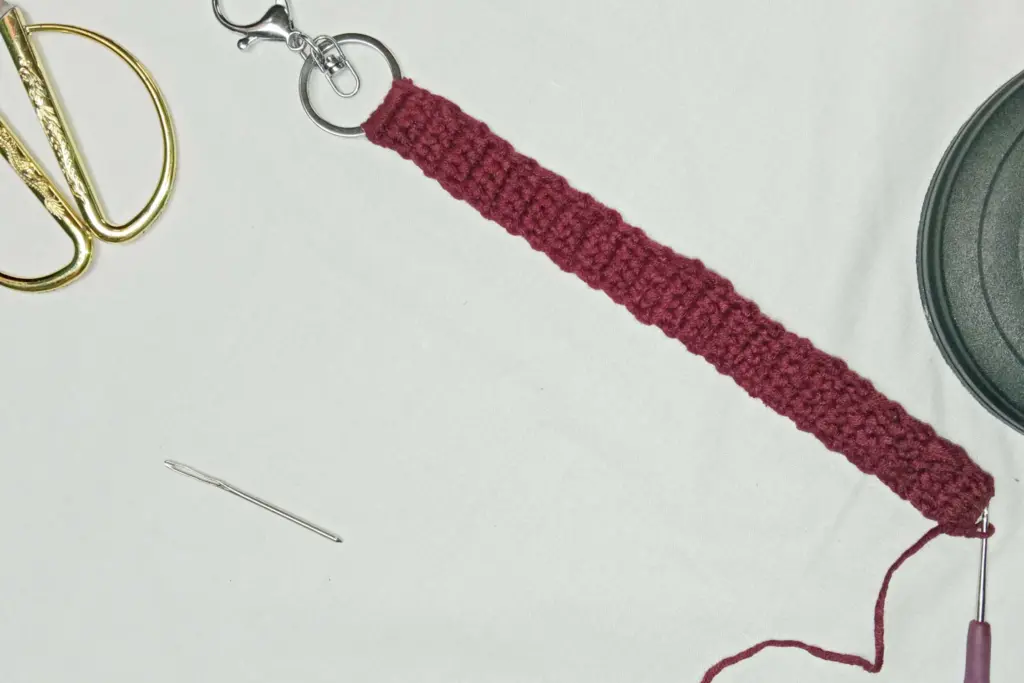
Ensuring Durability in Everyday Use
A wristlet keychain must withstand frequent pulling, twisting, and pressure from attached keys. Both attachment methods shown in the tutorial emphasize structural security. With thermal fabric providing a dense base and either hardware or reinforced sewing at the end, the final keychain resists stretching and wear.
To maintain durability:
- Use smooth pliers when working with metal hardware to avoid damaging the fitting
- Keep stitches tight but not overly compressed to prevent puckering
- Test the strap with a gentle pull before regular use
- Choose lightweight yarns with a firm twist to preserve the crisp ridges of the thermal stitch
These practices help the wristlet remain strong and attractive over time.
Wristlet Construction Comparison Table
Below is a detailed table comparing both wristlet versions demonstrated in the tutorial.
| Feature | Key Fob Version | Lobster Clasp Version |
|---|---|---|
| Method of Attachment | Metal clasp pressed closed with pliers | Clasp sewn directly onto folded strap |
| Tail Required for Finishing | Short tail | Long tail for sewing |
| Tools Needed | Pliers | Yarn needle, clips |
| Strap Construction | Identical thermal stitch | Identical thermal stitch |
| Strength | Very strong due to metal grip | Very strong due to double-stitched seam |
| Difficulty Level | Beginner-friendly | Slightly more advanced but still suitable for beginners |
| Best Use | Minimal sewing; quick finish | Customized finishes and adjustable attachment |
| Visual Appearance | Clean, modern, metallic accent | Softer handmade finish with visible stitching |
Tips for Beginners
- Work slowly during the first rows until the thermal texture becomes clear.
- If you struggle to see where the hook goes, stretch the fabric gently to reveal the ridges.
- Keep tension even so the strap does not twist or ripple.
- Count across the width occasionally to maintain consistency.
- When attaching hardware, spend extra time aligning the edges for a polished final look.
- Use yarn with good stitch definition so the thermal ridges stand out.
These small habits improve accuracy and help beginners produce a high-quality strap on the first try.
Summary
A crochet wristlet keychain is a simple, practical project that teaches valuable stitch control while providing a finished item you can use every day. The thermal stitch offers strength, structure, and a beautifully textured band that looks professional even for newer crocheters. Whether you prefer the sleek look of a key fob or the versatility of a lobster clasp, both finishing options create a secure, attractive wristlet.
With basic materials, a consistent rhythm, and a little attention to detail at the ends, you can create a durable strap with a stylish handmade touch. This project is ideal for beginners who want to build confidence while making something functional and gift-worthy.