
A crochet pompon flower is one of those projects that looks impressively detailed but is surprisingly approachable once you break it into parts. This design combines three main elements
- a flat base shaped like a small star
- a wired leaf that can be bent and posed
- a fluffy pompon bloom mounted on a wrapped stem
Because each part is made separately and then joined with hot glue and yarn, beginners get time to practice small, manageable sections instead of diving into one complicated piece. The result is a decorative flower that can be displayed in a vase, used in arrangements, or gifted as a single stem.
In this guide, we will walk through the structure and flow of the project rather than strict step-by-step counts. You will understand what each section of the flower is doing, how the wiring supports the shape, and how the pompon texture is created and attached.
Materials Needed
The following list is based directly on what is used in the video tutorial, adapted into simple categories for easy reference.
- Soft yarn for the pompon bloom (any shade you like)
- Green yarn for the base and the stem wrapping
- Crochet hook suitable for the yarn weight (the original uses a small metal hook)
- Yarn or darning needle
- Scissors
- Floral stem wire of standard flower length
- Craft wire of a slightly thinner gauge for the leaf
- stitch marker
- Small amount of fiber stuffing
- Hot glue gun with glue sticks
- Wire cutters
You can substitute brands and fiber types, but it is helpful to use a smooth yarn with good definition so the base and leaf shapes look crisp.
Abbreviations
US crochet terminology is used.
MR
: Magic ring
SC
: Single crochet
HDC
: Half double crochet
DC
: Double crochet
INC
: Increase (two stitches worked into the same space)
DEC
: Decrease (two stitches pulled together into one)
BLO
: Worked into the back strand of the top of the stitch only
Even though this article does not spell out every stitch count, understanding these terms will help you follow the original video if you want to crochet along.
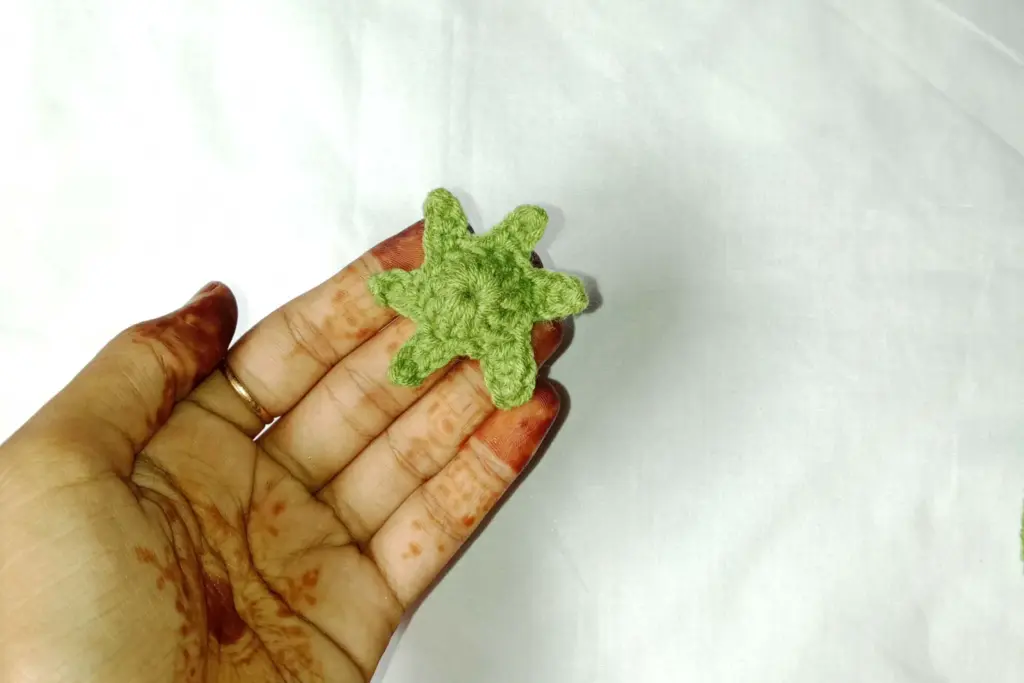
Building the Round Flower Base
The first part of the pompon flower is a small circular base that looks almost like a simple coaster with petal points. It starts from the center using a gathered beginning, then grows outward into a flat disc. Once that disc is established, the maker continues by working a series of small petal shapes around the edge.
Each petal is formed by starting from the center of the base, moving outward using gradually taller stitches, and then returning back down. After finishing one petal, the yarn is anchored a little further along the edge before starting the next. Repeating this pattern around the entire base produces a neat, star-like flower with six evenly spaced points.
When the base is complete, the yarn tails are woven into the underside so the top remains clean and ready for gluing later.
Understanding the Petal Structure
The petals on the base are not separate pieces; they are grown directly off the central disc. This gives the flower base more stability and saves time. A single strand of yarn forms the entire round of points by shifting stitch height gradually, which creates a gentle taper.
Conceptually, each petal follows this pattern of movement
- begin close to the edge of the center
- step outward with a series of taller stitches
- step back down to meet the base again
- skip a small space along the disc before starting the next point
Because the number of petals stays consistent, the finished shape looks balanced from every angle. Beginners get an excellent opportunity to practice changing stitch height smoothly and maintaining an even tension.
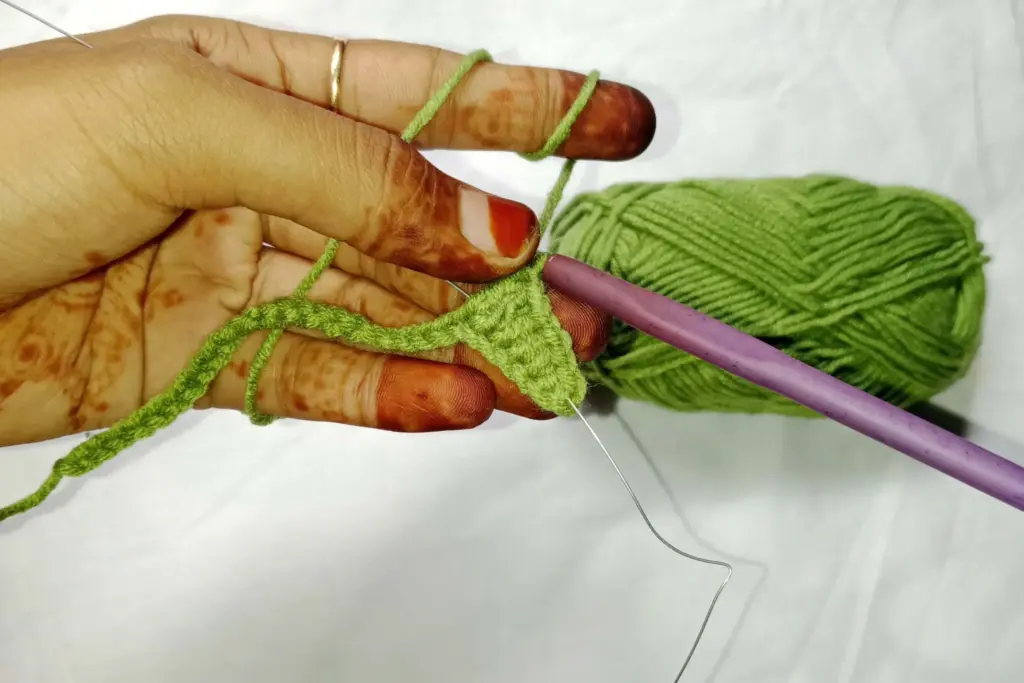
Creating the Wired Leaf Shape
The leaf is built around a piece of craft wire, which allows you to bend and pose it after the flower is finished. The wire is first cut to a suitable length and folded so there is some excess at the end that can later be twisted together with the floral stem.
To form the leaf, the maker works along one side of a foundation, covering both yarn and wire at the same time. This effectively traps the wire inside the crocheted fabric so it cannot slip out. When the far end is reached, several stitches are concentrated in a single space to create a gentle curve, and then the yarn continues down the other side. The result is a neat, symmetrical, pointed leaf that hugs the wire closely.
At this stage the leaf looks fairly simple and smooth, but the wired core already allows you to adjust its angle and give it a natural curve once it is attached to the stem.
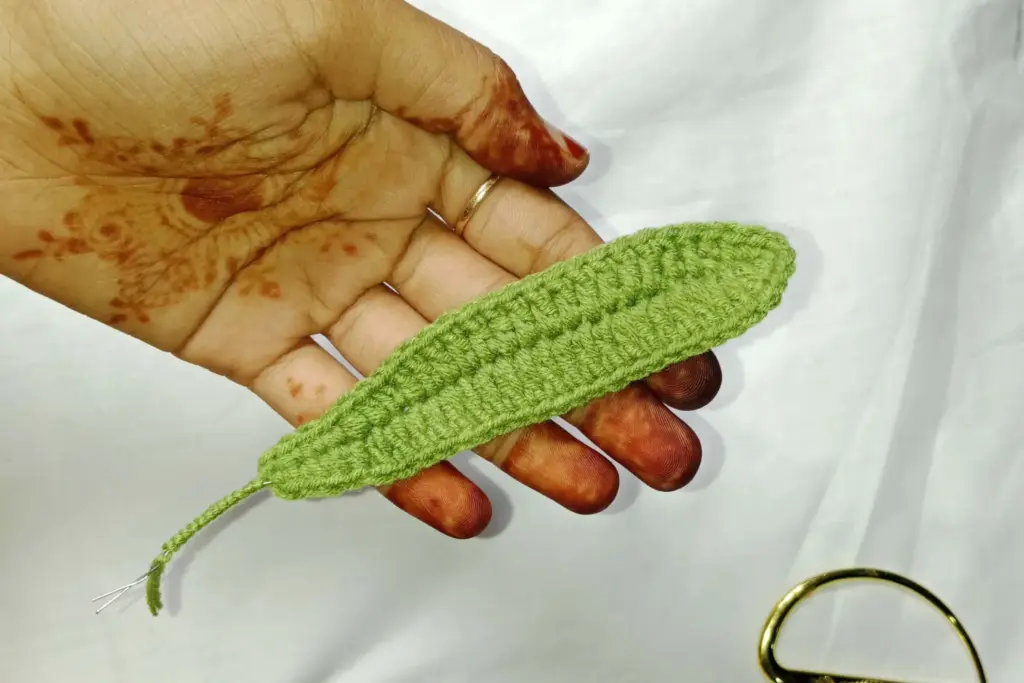
Adding Texture Around the Leaf Edge
To bring the leaf to life, a decorative edging is added. This is done by working small paired decreases with tiny chain-like segments in between, all the way around the outer edge. Each decrease pulls two neighboring stitches together, creating subtle dips, while the little raised sections formed between them give the appearance of serrations or gentle scallops.
This edging is intentionally irregular and organic. The instructor even mentions that it does not have to look perfect because real leaves are not perfectly uniform. That relaxed approach makes this part especially beginner-friendly: you can focus on rhythm more than precise counting, and the finished leaf still looks charming and natural.
Once the edging is complete, the yarn is wrapped around the two exposed wire ends at the base of the leaf. Twisting the metal first and then binding it with yarn creates a padded junction point that will later sit against the main floral stem.
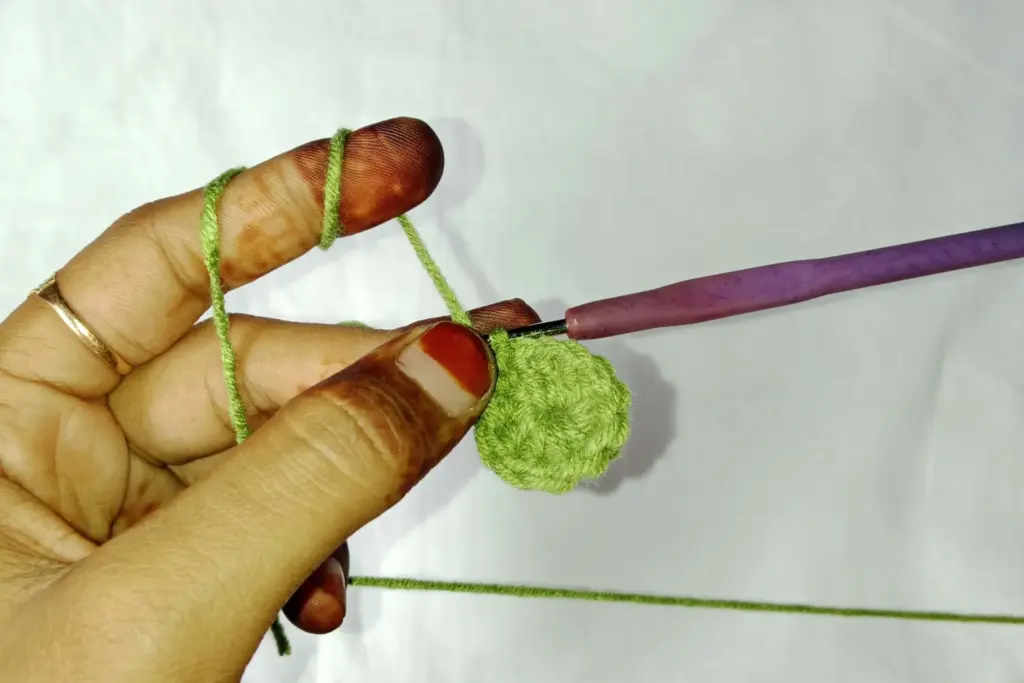
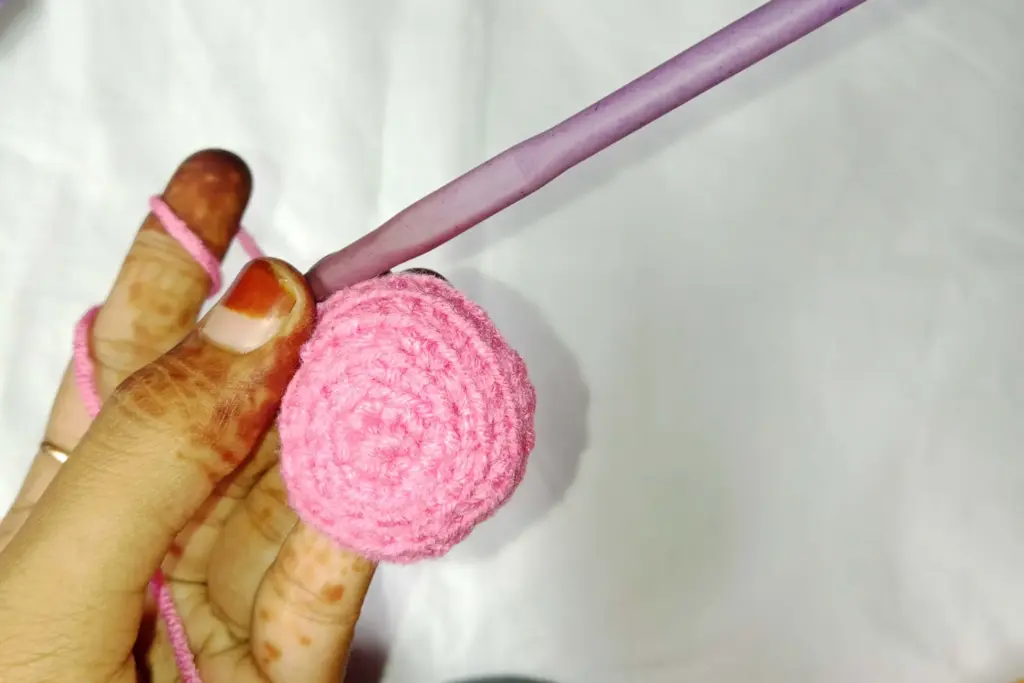
Shaping the Pompon Bloom
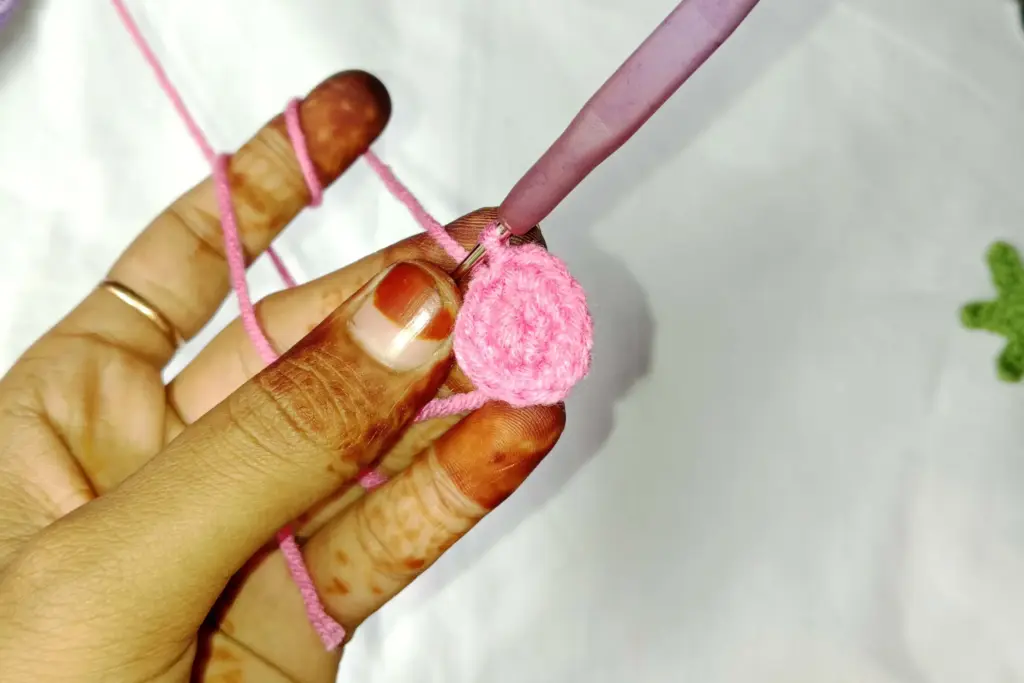
The pompon bloom is created as a soft, rounded ball. It begins with a compact center that gradually expands through a series of increases. Because the shaping focuses on the outer stitches, the top forms a dome that will later be fully enclosed. Working into the back strand only allows the unused front strand to remain visible. These preserved strands serve as anchor points for the textured outer layers that give the pompon its fluffy appearance.
Once the ball reaches its widest point, the shaping narrows again through a sequence of decreases. Before the final closing stitches, a small amount of stuffing is inserted to give the bloom its fullness. The stuffing helps the ball maintain shape and prevents it from collapsing once the outer loops are added.
After closing the bottom, the ball looks simple—but the magic happens when the surface texture is added.
Adding the Pompon Texture
The tufted pompon effect comes from building multiple rounds of chains worked only into the exposed front strands left earlier. Each small segment begins by anchoring the yarn to one of these strands, growing outward into a short decorative arc, and then attaching again at the next exposed strand. As these arcs repeat around the ball, they form loops that sit close together and give the illusion of a dense pompon.
These rounds are worked in a spiral, not a closed circle, so the textured rings stack naturally without visible seams. Two or more layers are added depending on how full you want your flower to appear. The instructor notes that you simply continue working along the exposed rows until you achieve the height and fluff you like.
After the final arc is completed, the yarn tail is woven to the top of the ball and tucked away.
Assembling the Base and Pompon

Once the textured bloom is ready, the flat star-shaped base is attached. A thin layer of hot glue is applied across the center of the base—enough to secure the pieces without letting glue seep through the yarn. The pompon ball is then pressed onto the base and held in place briefly until the glue cools.
This step not only secures the flower but also aligns the rounded bloom perfectly with the points of the base. The petals peek out just enough to frame the pompon without overwhelming it. When properly positioned, the bloom appears to sit naturally atop the base, similar to a daisy or chrysanthemum form.
Inserting and Wrapping the Main Stem

The floral stem wire is inserted through the center of the pompon and guided down into the base. A small amount of glue helps lock it in place inside the bloom so it will not wobble. From here, the green yarn is used to wrap the entire length of the metal stem. The glue residue at the top helps anchor the first few wraps, allowing the yarn to grip securely.
The wrapping continues down the full length of the wire, creating a smooth, yarn-covered stem. This not only hides the metal but also adds a gentle matte texture that contrasts nicely with the bloom above.
As you approach the midpoint of the stem, the leaf you created earlier is positioned and incorporated. The yarn is wrapped around the leaf’s wired base several times to secure it, and then the wrapping continues toward the end of the stem.
A final touch of glue holds the last few wraps in place.
Finishing Touches
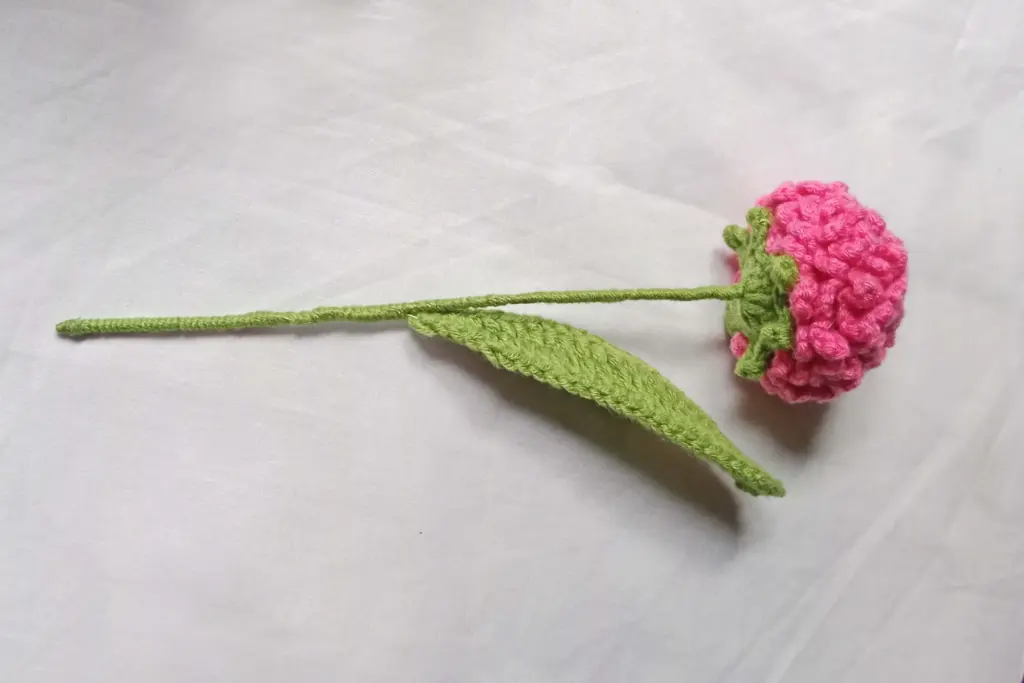
To elevate the appearance of the flower, the maker quickly uses warm air to smooth any stray yarn fibers along the stem and leaf. This step slightly seals the yarn surface, giving the stem a cleaner, more polished finish. Although optional, it adds professionalism to the final piece.
Finally, the leaf is gently bent into a natural curve, and the pompon loops are fluffed by hand. The result is a soft, rounded bloom sitting atop a long, graceful stem—simple, charming, and perfect for arrangements.
Comparison Table of All Components
| Component | Material Used | Construction Method | Key Features | Difficulty Level |
|---|---|---|---|---|
| Flower Base | Green yarn | Built from a center and expanded with small petal points | Flat, star-like support for bloom | Beginner |
| Leaf | Green yarn + craft wire | Wrapped foundation, curved edge shaping, wired core | Bendable, realistic shape | Beginner–Intermediate |
| Pompon Ball | Yarn of choice | Small stuffed sphere formed with increases and decreases | Soft, round structure for textured bloom | Beginner |
| Pompon Texture | Same bloom yarn | Surface chains anchored in exposed strands | Creates dense, tufted effect | Beginner |
| Stem | Floral wire + yarn | Wrapped from top to bottom; leaf added midway | Smooth, durable, fully covered finish | Beginner |
| Assembly | Hot glue + wiring | Bloom attached to base, stem inserted and wrapped | Strong construction for display use | Beginner |
Tips for Beginners
- Use smooth yarn for the base and leaf so the stitches stand out and are easy to see.
- When wrapping wire, keep tension consistent for a clean finish.
- Avoid using too much stuffing in the pompon ball—overfilling can distort the shape.
- Add glue sparingly; small amounts secure the pieces without making them stiff.
- Make the pompon texture in a relaxed manner; the loops do not need to be identical because fluffiness hides small inconsistencies.
- For a fuller flower, add an extra round of surface loops.
These small details ensure the finished flower looks attractive and stands upright.
Summary
The crochet pompon flower is a delightful blend of soft texture and structured form. By working in stages—a flat floral base, a wired leaf, a fluffy pompon bloom, and a fully wrapped stem—beginners gain experience in shaping, texturing, and assembling crochet components. Each piece is simple on its own, yet when combined, they create a flower that looks intricate and professional.
With just yarn, wire, stuffing, and a little hot glue, you can build a handmade bloom that brightens displays, bouquets, and gifts. It’s a satisfying, approachable project that encourages creativity through color, size, and arrangement variations.
If you need a shorter version, a printable pattern-style layout, or help adapting this design into a bouquet, just let me know!