
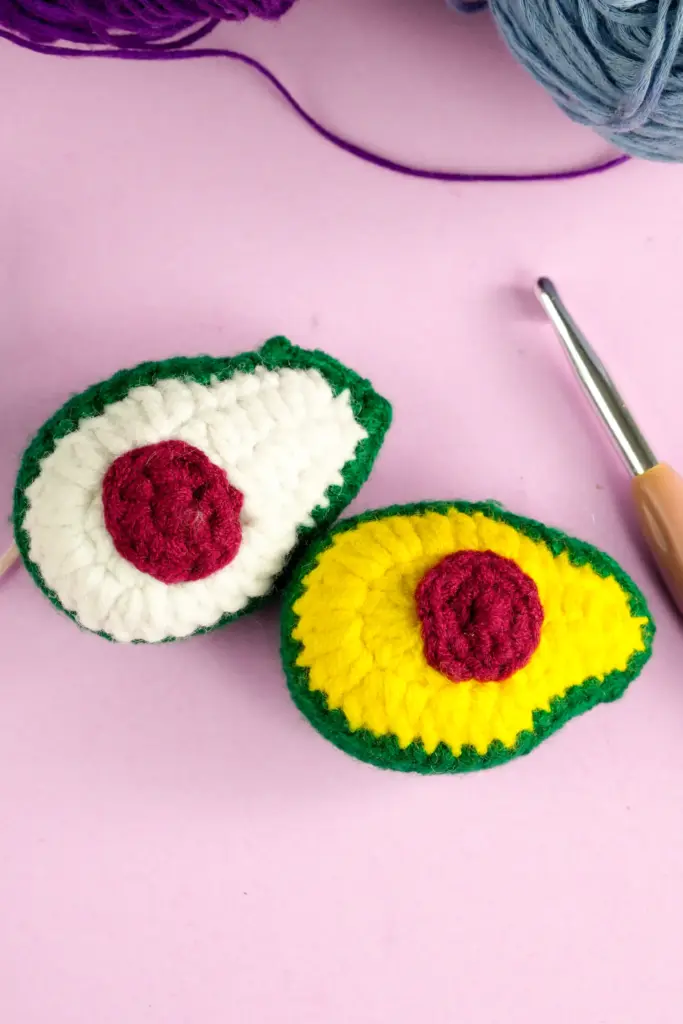
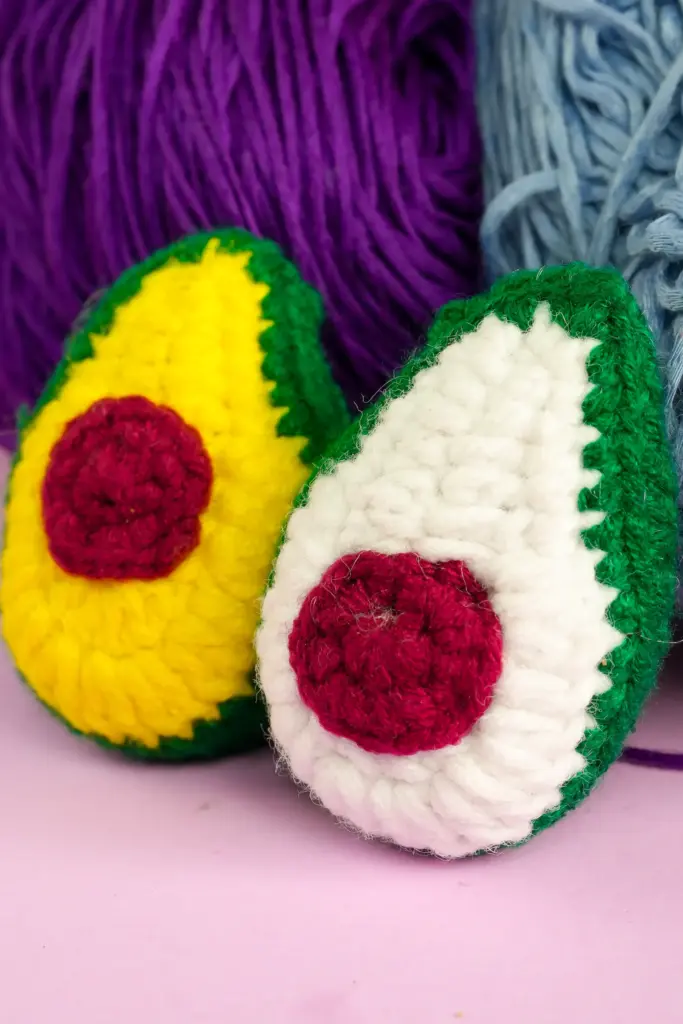
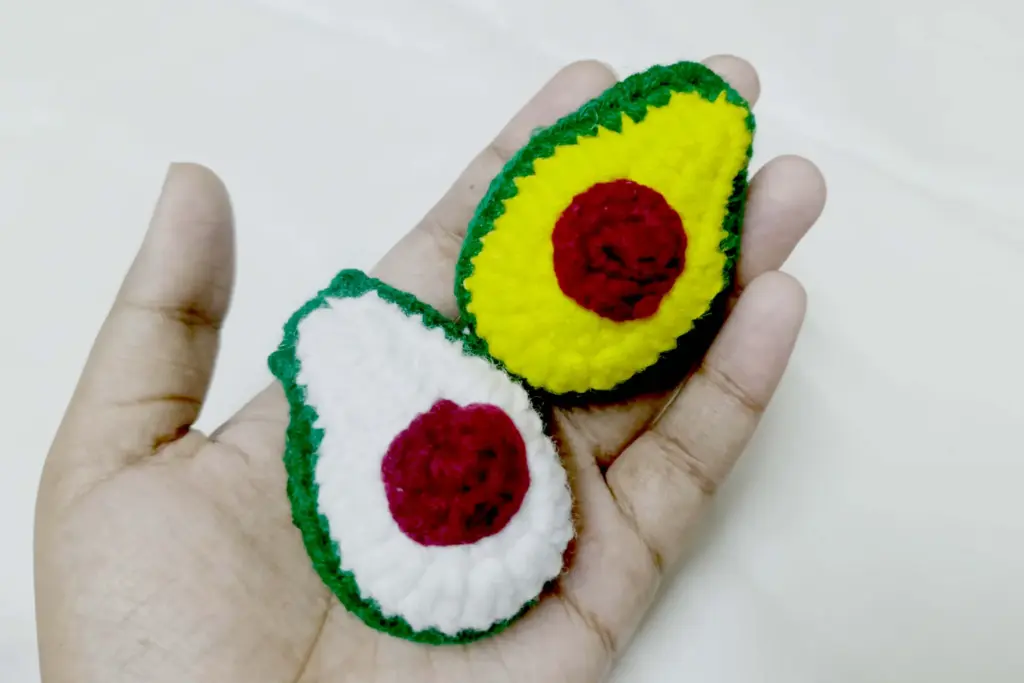
Crocheting small, fun items is one of the best ways for beginners to practice while still creating something cute and useful. One such project is the beginner friendly crochet avocado. This little fruit-inspired piece can be made as a toy, a charm, or even turned into an accessory like a necklace or keychain. With its soft pit and bright peel, it’s a project that teaches you how to shape, color-change, and join pieces together — all essential crochet skills.
In this guide, we’ll go through the materials you’ll need, the abbreviations commonly used in patterns, and the step-by-step flow to crochet your very own avocado. The process is simple, enjoyable, and a great confidence booster for anyone just starting their crochet journey.
Materials Needed
To create your crochet avocado, you’ll need the following:
- Yarn:
- Brown yarn for the pit
- Light yarn for the inner flesh
- Green yarn for the peel
- Crochet Hook: Medium-sized hook (around 3 mm works well for this project)
- Stitch Marker: To keep track of the start of each round
- Tapestry Needle: For sewing the pieces together
- Scissors: For cutting yarn ends neatly
- Stuffing Material: Polyester fiberfill to give the avocado shape
Optional: A braided chain or leather cord if you want to turn it into a charm or necklace.
Abbreviations
This project uses US crochet terminology. Below are the main abbreviations:
- MR – Magic Ring
- SC – Single Crochet
- INC – Increase (two stitches in one space)
- DEC – Decrease (two stitches worked together)
- Slst – Slip Stitch
- Ch – Chain
- FO – Fasten Off
These are the building blocks for your avocado. As a beginner, becoming familiar with these terms will make reading any crochet pattern much easier.
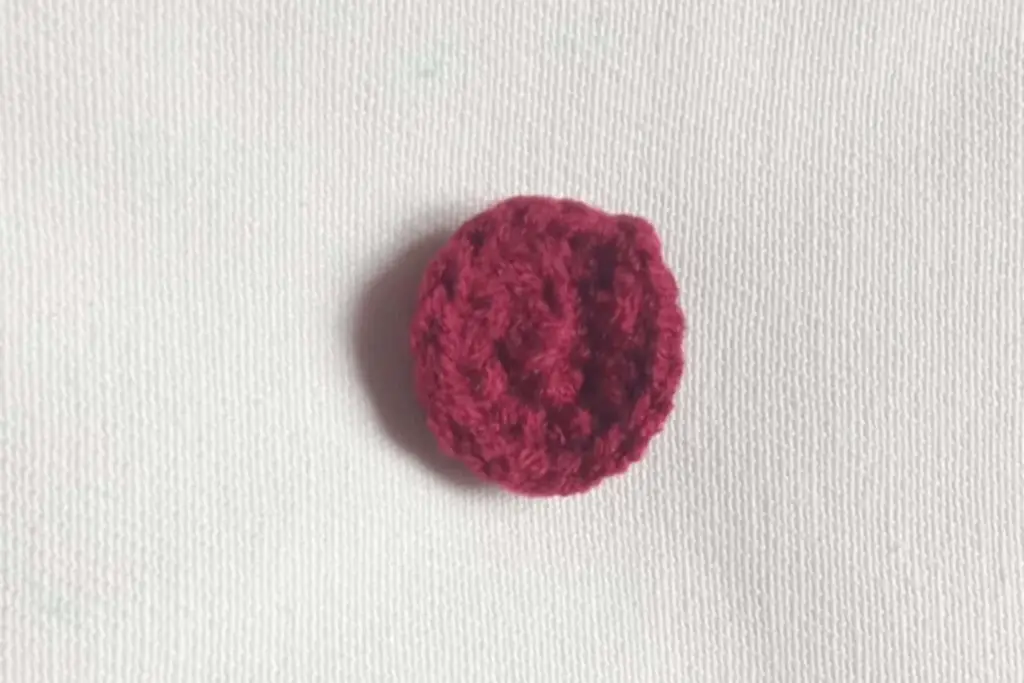
Step 1: Making the Pit
The pit is the heart of the avocado and usually the first piece to crochet. It starts as a small, tightly closed circle that gradually grows wider through increases. Once you reach the desired size, you keep the stitches even to give it a round, firm shape. The pit can be lightly stuffed so it stays raised when joined to the rest of the avocado.
This stage is a great practice in learning how to form a small 3D object with yarn. It also introduces you to using stitch markers to keep your count correct — a habit that will help in all future projects.
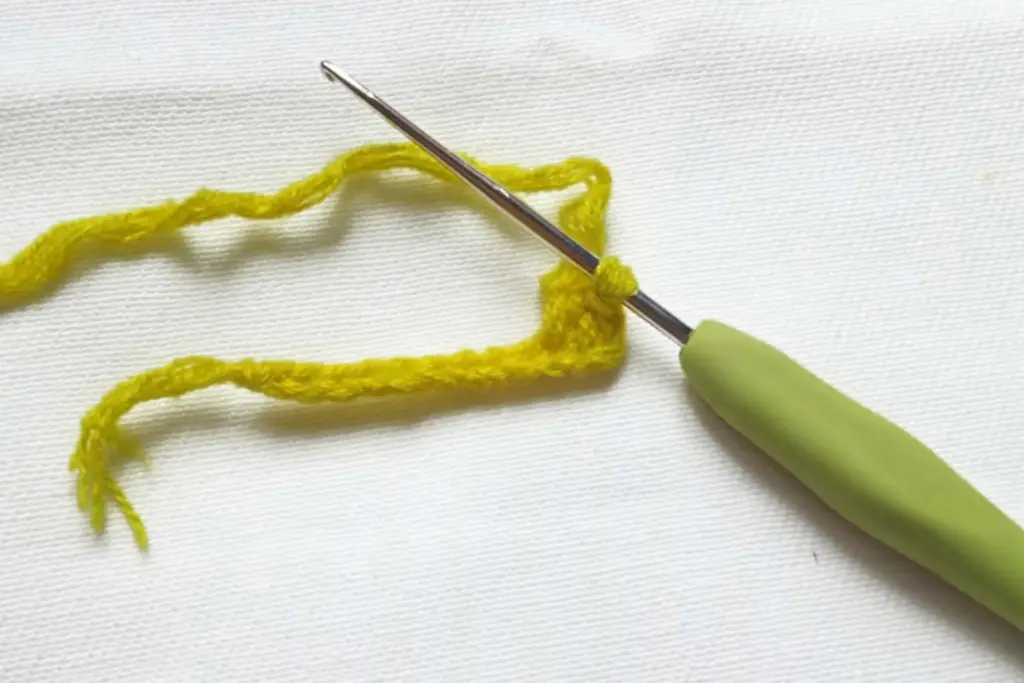
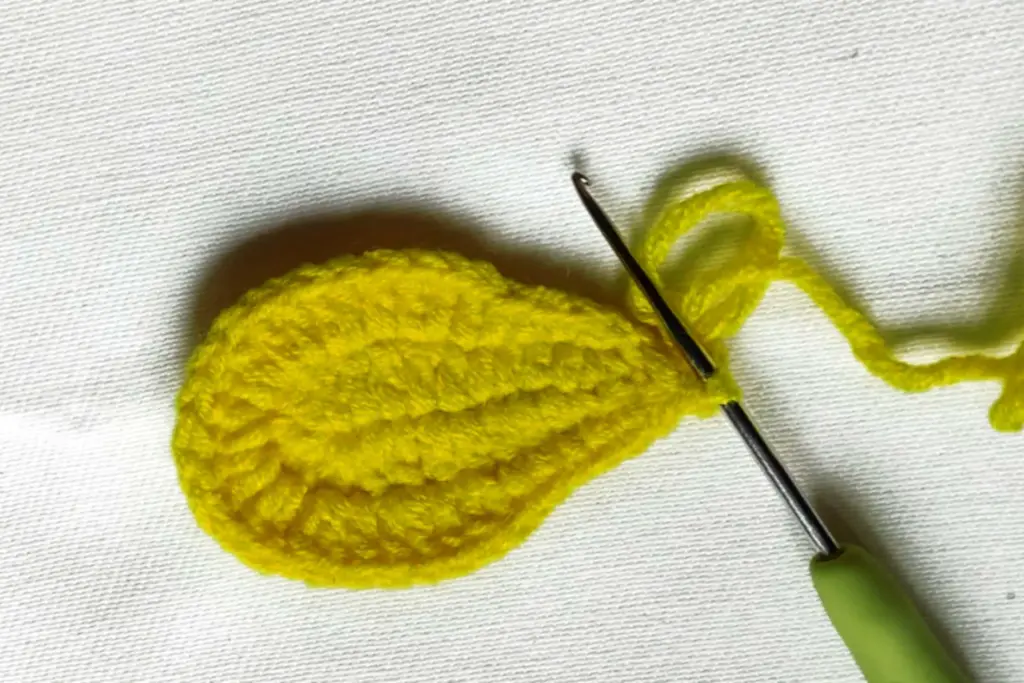
Step 2: Crocheting the Avocado Flesh
After the pit comes the inner flesh. This piece is shaped like an oval and is larger than the pit to allow it to sit inside. The base begins with the same method as the pit but soon incorporates chains to extend the length. By combining increases and chains, the circle transforms into an avocado-like oval.
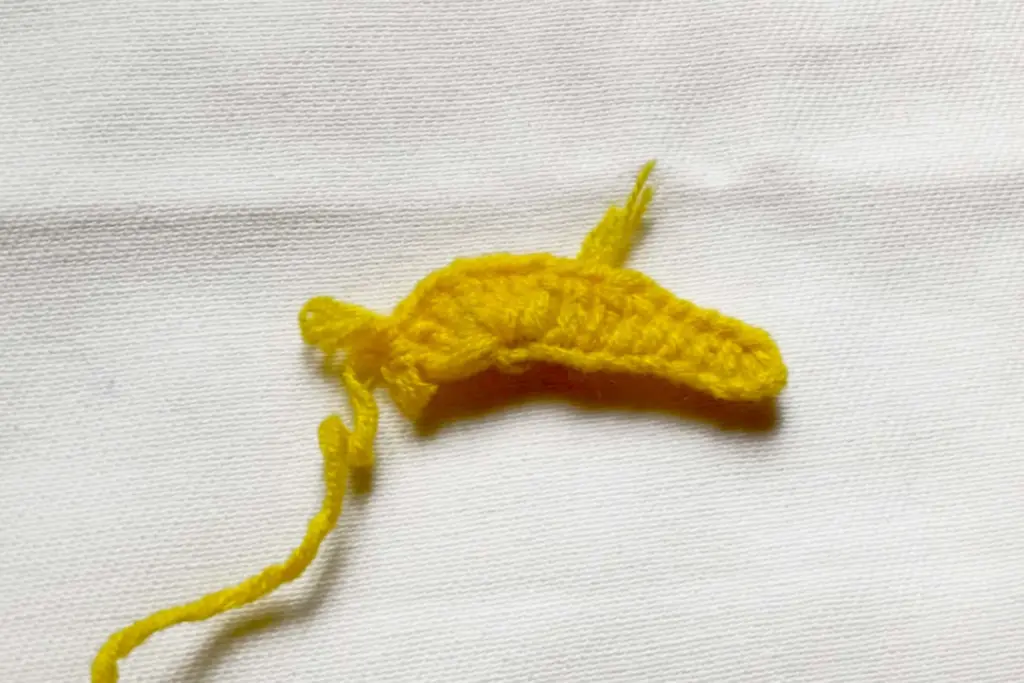
The yarn color is switched here to represent the lighter part of the avocado. Beginners get to practice color-changing techniques — an important skill when working on multi-colored projects. This inner flesh becomes the main backdrop for the pit.
Step 3: Creating the Peel
The peel forms the outer green part of the avocado. Like the flesh, it starts as a small base and gradually grows into a larger oval. The main difference is that the peel is slightly bigger so that when joined together, it creates a nice rounded edge around the avocado flesh.
This step teaches you how to replicate a shape you’ve already crocheted but in a different size, which is useful when making items with multiple layers.
Step 4: Joining the Pit and the Flesh
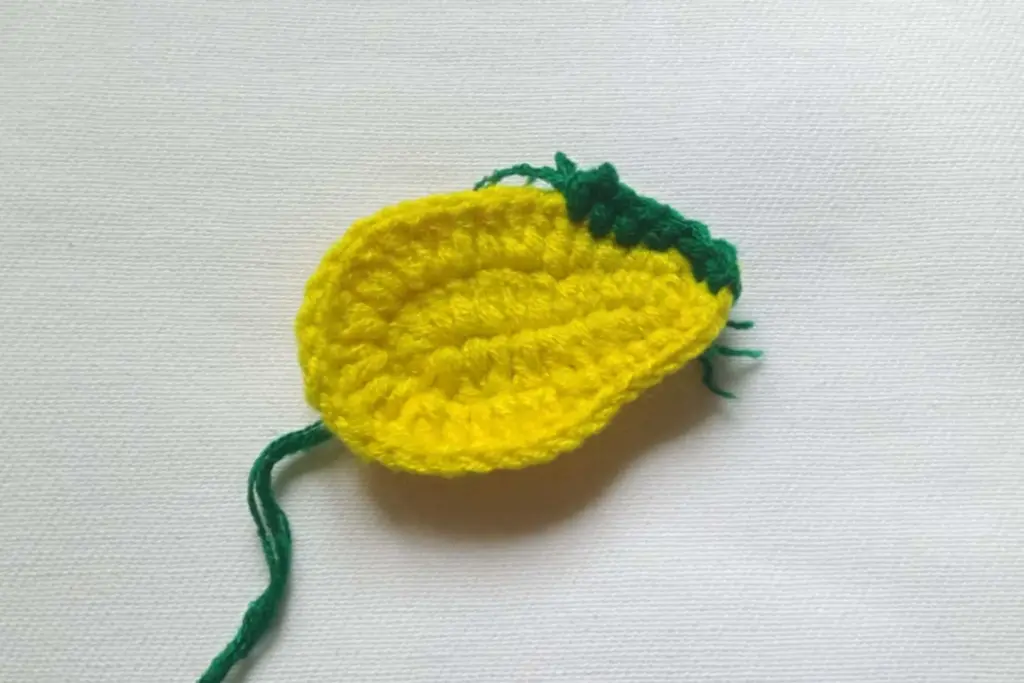
Once both the pit and the flesh are completed, it’s time to bring them together. There are two common ways to do this: sewing them with a tapestry needle or crocheting them together with slip stitches. Beginners often prefer sewing because it feels more controlled and allows you to align the shapes carefully. Whichever method you choose, make sure the pit is centered on the flesh piece so it looks realistic.
This step also introduces the idea of alignment in crochet — making sure that pieces with different stitch counts match up evenly. Taking a little extra care here will ensure your avocado looks neat and symmetrical.
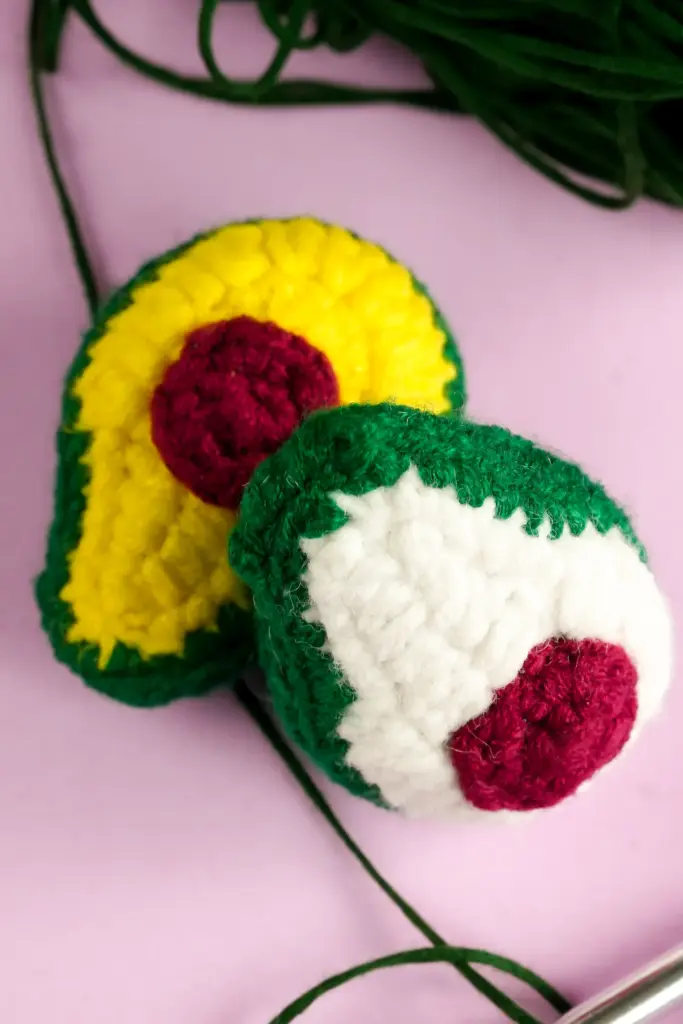
Step 5: Attaching the Peel
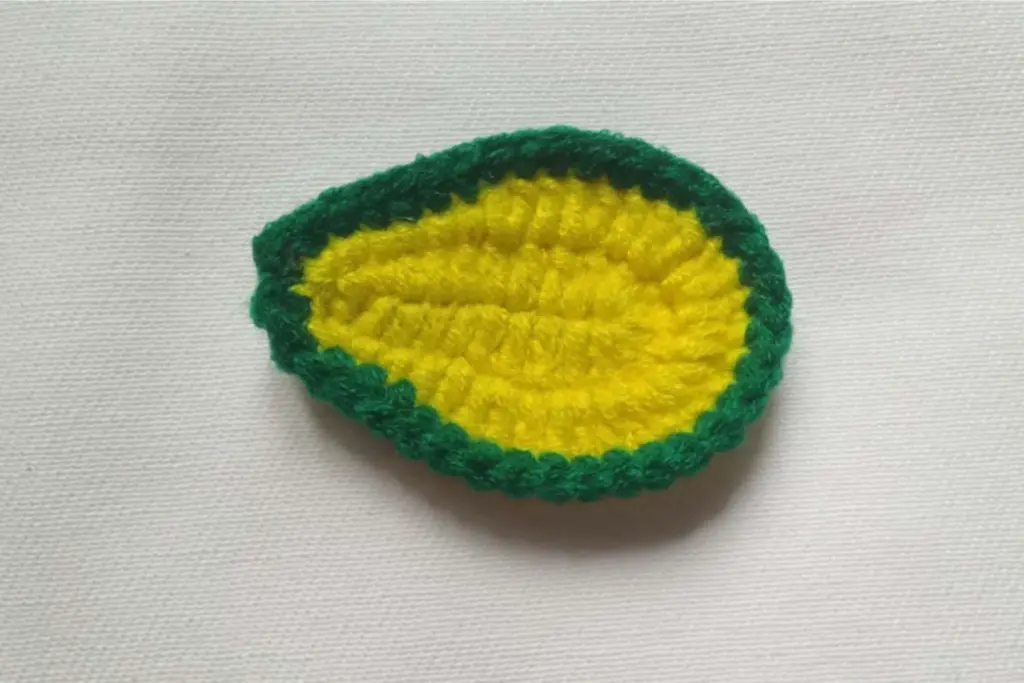
With the pit in place, the next layer to add is the peel. This is where the avocado takes on its complete form. Place the peel behind the flesh and match up the edges. You can either sew the peel to the flesh or use single crochet stitches all around the border to connect them. Both techniques create a tidy finish, so you can choose based on your comfort level.
Adding the peel not only gives the avocado its signature green outline but also strengthens the piece, making it sturdier and more durable if used as a charm or toy.
Step 6: Stuffing the Avocado
Before completely closing up the edges, it’s a good idea to insert a bit of stuffing. Polyester fiberfill works best because it’s soft, lightweight, and holds its shape. Adding stuffing helps the avocado feel plump and makes the pit stand out more prominently against the flat flesh.
Be sure not to overstuff, as this can stretch the stitches and distort the shape. A small amount is usually enough to give it a gentle puff.
Step 7: Closing the Avocado

Once the stuffing is in place, finish sealing the edges. If you’re sewing, continue stitching carefully around the oval until it’s closed. If crocheting, work evenly all the way around to create a border that locks the layers together. This final step secures everything and ensures that the stuffing remains neatly inside.
It’s important to weave in the yarn ends properly here. By tucking them inside the avocado, you prevent unraveling and give your project a clean, polished finish.
Step 8: Adding Personal Touches
The best part about crochet projects is how customizable they are. You can leave your avocado as is, or add details to make it even cuter and more personal. For example:
- Sew on safety eyes and a small smile to create a kawaii-style avocado.
- Attach a braided chain to turn it into a bag charm.
- Thread a leather cord through the top to wear it as a necklace.
- Create a pair and sew them together as a “best friends” charm set.
These small touches make the avocado unique and give it personality, making it perfect as a handmade gift.
Final Thoughts
The beginner friendly crochet avocado is an excellent project for anyone new to crocheting. It combines simple stitches with layering, color changes, and assembly techniques, all while staying small and manageable. By the end, you’ll not only have a cute avocado but also a stronger grasp of essential crochet skills.
This project is versatile, fun, and practical — perfect for learning, gifting, or adding to your own handmade collection. With practice, you can experiment with different yarns, sizes, or embellishments to create a whole variety of adorable avocados.