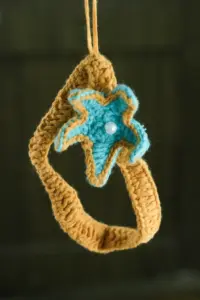
A crochet lanyard is one of those projects that proves beautiful accessories do not need to be complicated to be impressive. This handmade item is designed to be worn comfortably around the wrist or attached to bags, pouches, and keys, making it both decorative and highly practical. Because it works up quickly and does not require large amounts of yarn, it is especially appealing to beginners who want to build confidence while creating something useful.
Unlike flat decorative pieces, a crochet lanyard introduces texture and structure. It is formed as a narrow band that feels soft in the hand yet remains strong enough for everyday use. This makes it ideal for holding keys, identification cards, small tools, or charms. With only a few essential materials, you can create a personalized accessory that reflects your crafting style and adds a handmade touch to daily routines.
This guide walks you through the general flow of creating a crochet lanyard in a beginner-friendly way. Instead of focusing on technical stitch-by-stitch details, it highlights the overall process, key materials, and practical tips so you can understand how each stage contributes to the final result.
Materials Needed
Preparing your materials in advance will help the project progress smoothly. The supplies below are based on commonly used tools and fibers for this type of crochet lanyard and provide a good balance of comfort and durability.
-
Acrylic yarn suitable for lightweight accessories
-
Crochet hook that matches the recommended yarn size
-
Scissors
-
Darning needle
-
Carabiner or clip-style connector
Having these items within reach allows you to focus fully on shaping the lanyard without unnecessary interruptions.
Abbreviations
Most crochet patterns use abbreviated terms to make instructions easier to read. Becoming familiar with these abbreviations helps you follow tutorials and adapt designs with confidence.
-
ch – chain
-
sc – single crochet
-
st – stitch
-
sl st – slip stitch
-
rep – repeat
-
inc – increase
-
dec – decrease
These terms appear frequently in beginner crochet projects and are helpful to know even beyond this lanyard design.
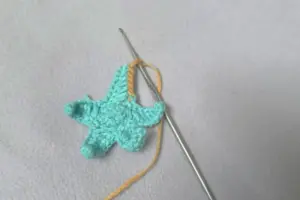
Starting the Lanyard Base
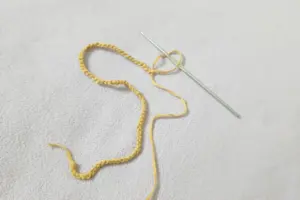
Every crochet lanyard begins with a narrow foundation that sets the width and flexibility of the finished piece. This base is formed to create a slim band that feels comfortable against the skin while remaining firm enough to support items attached to it.
At this stage, maintaining even tension is essential. A consistent fabric ensures the lanyard will not twist or curl once it is complete. This foundational section establishes the overall character of the accessory, so working steadily and carefully is encouraged.
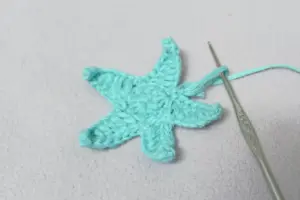
Building the Textured Pattern
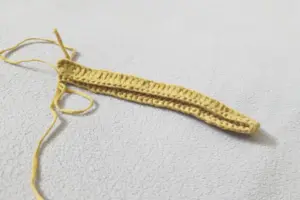
Once the base is complete, a repeating textured pattern is developed along the length of the lanyard. This repeating structure adds both visual interest and strength to the design. The raised areas create a soft, padded feel that makes the lanyard pleasant to hold and wear.
Although the pattern may seem unfamiliar at first, it becomes easy to repeat after a few cycles. This makes the project enjoyable and relaxing, especially for crafters who like rhythmic, flowing designs.
Adjusting Length for Personal Use
One of the most appealing aspects of a crochet lanyard is its flexibility in length. You can create a short strap that sits neatly around the wrist or a longer version that drapes comfortably from a bag or belt loop.
This customization allows you to adapt the lanyard to your personal needs. Whether you want to carry keys, tools, or decorative charms, adjusting the length ensures your finished piece fits your lifestyle.
Securing and Hiding Yarn Ends
After the lanyard has reached your preferred length, attention turns to refining the finish. Loose yarn ends are carefully guided into the fabric so that they are hidden from view and protected from wear. This step improves both appearance and durability.
Taking a few extra minutes to secure these ends ensures that the lanyard remains neat over time and does not unravel with daily use. A clean finish also gives your handmade accessory a more professional look.
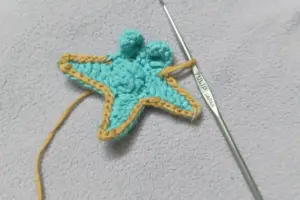
Folding and Joining the Ends
To prepare the lanyard for use, the two ends of the band are brought together and joined. This process transforms the flat crochet strip into a functional loop that can support attachments and be comfortably worn around the wrist.
The joining should feel firm but flexible. This balance allows the lanyard to move naturally while remaining strong enough to hold personal items securely. Careful alignment at this stage helps maintain a smooth, symmetrical appearance.
Attaching the Clip or Connector
With the lanyard structure complete, a connector is introduced to make it functional. A carabiner-style clip or similar hardware is fastened to the joined end, allowing the lanyard to hold keys, identification tags, or small accessories.
Proper attachment is important for everyday safety and convenience. A well-secured clip prevents items from slipping off and ensures that the lanyard performs reliably in daily use.
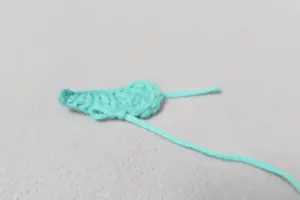
Enhancing the Overall Look
Once the hardware is attached, small refinements can elevate the appearance of your crochet lanyard. Light reshaping, trimming stray fibers, and smoothing the fabric all contribute to a polished result.
You may also choose to add charms, beads, or decorative elements to personalize your piece. These additions allow your lanyard to reflect your style while maintaining its functional purpose.
Caring for Your Crochet Lanyard
A crochet lanyard is easy to maintain with simple care habits. Keeping it clean and dry will help preserve its shape and texture.
Basic care recommendations include:
-
Avoid soaking in water for extended periods
-
Gently spot clean when needed
-
Allow to air dry fully before reuse
-
Store flat when not in use
These small practices extend the life of your handmade accessory and keep it looking fresh.
Why This Project Is Ideal for Beginners
This crochet lanyard project is particularly well suited for beginners because it combines simplicity with visible progress. The repeating structure allows new crafters to develop rhythm and consistency while producing a useful accessory.
Key benefits of this project include:
-
Minimal material requirements
-
Short completion time
-
Opportunity to practice consistent tension
-
Easy customization for personal needs
Completing this project helps beginners gain confidence and prepares them for more advanced crochet designs.
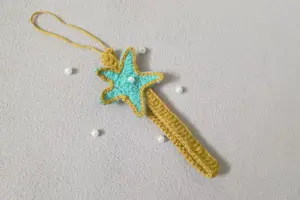
Final Thoughts and Action Point
The crochet lanyard is a practical and attractive accessory that showcases how simple techniques can create meaningful handmade items. From forming the base to attaching hardware and refining the finish, each stage plays an important role in producing a durable and stylish piece.
As your next step, consider making several lanyards in different textures and lengths to experiment with variety and discover your personal crafting preferences. These handmade lanyards also make thoughtful gifts and useful additions to everyday life.