
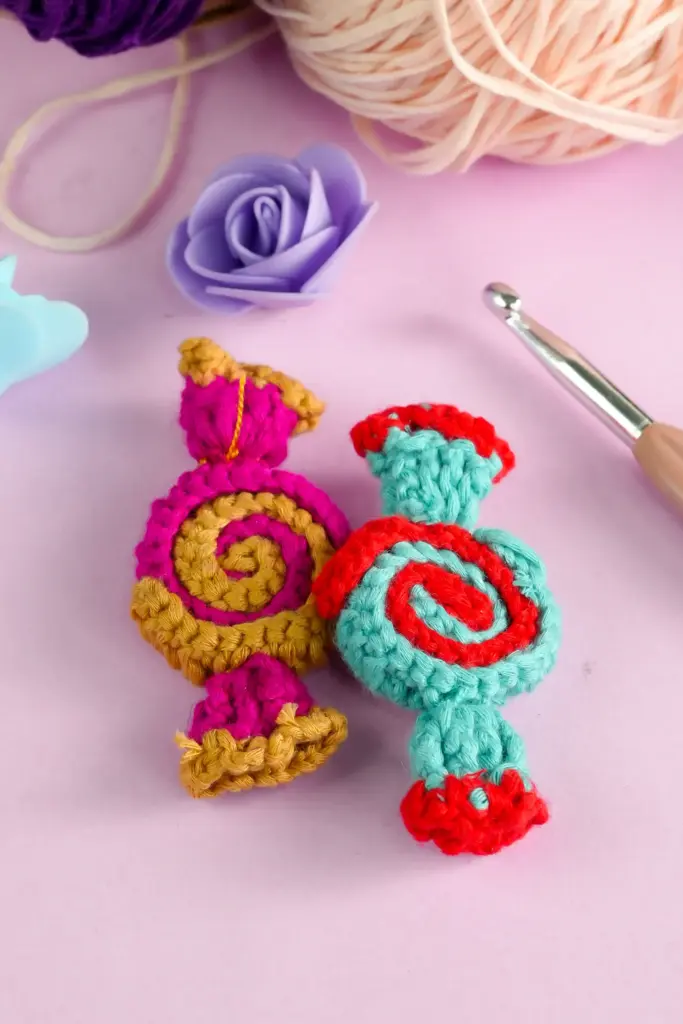
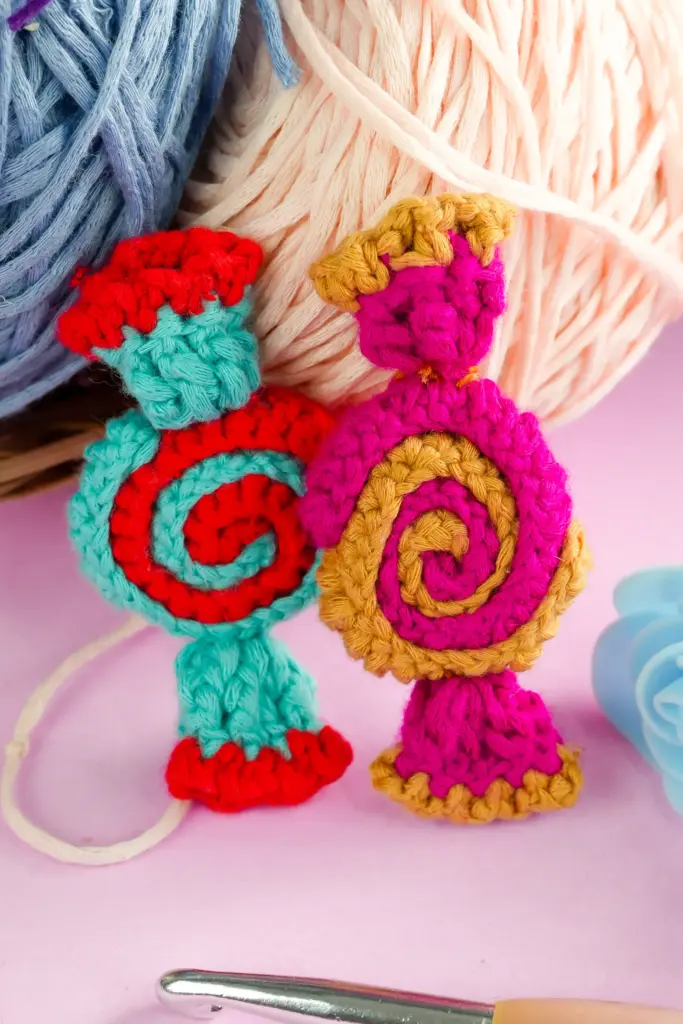
Crocheting fun, festive items like candy can be a delightful way to brighten up your home during the holidays. A crochet peppermint candy is an easy and beginner-friendly project that requires just a few basic crochet skills. This cute and colorful decoration is perfect for adding a sweet touch to Christmas trees, garlands, or even as a gift tag for presents. The pattern includes making the candy base, creating the swirl effect, and finishing it with a decorative wrap to complete the look.
In this article, we will guide you through each step of creating a crochet peppermint candy from start to finish. Whether you’re new to crochet or simply looking for a quick project, this tutorial will help you create a lovely, handmade piece for the festive season.
Materials Needed
To make your crochet peppermint candy, you’ll need the following materials:
- Yarn:
- Two colors of 3-ply yarn (typically red and white for the candy effect)
- Crochet Hook: A 2.5 mm crochet hook
- Scissors: For trimming yarn ends
- Needle: A tapestry needle for sewing and weaving in the yarn ends
- Stitch Marker: Optional, but useful for keeping track of your rounds
These materials are easy to find and make this project an affordable and enjoyable crochet project.
Abbreviations
The following abbreviations will be used throughout the tutorial. Familiarizing yourself with these terms will make the crochet process easier:
- Ch – Chain
- SC – Single Crochet
- INC – Increase (two stitches in the same space)
- TR – Triple Crochet
- Slst – Slip Stitch
- FO – Fasten Off
These are the basic stitches that form the foundation of your peppermint candy. Understanding how and when to use them will ensure your candy comes out beautifully.
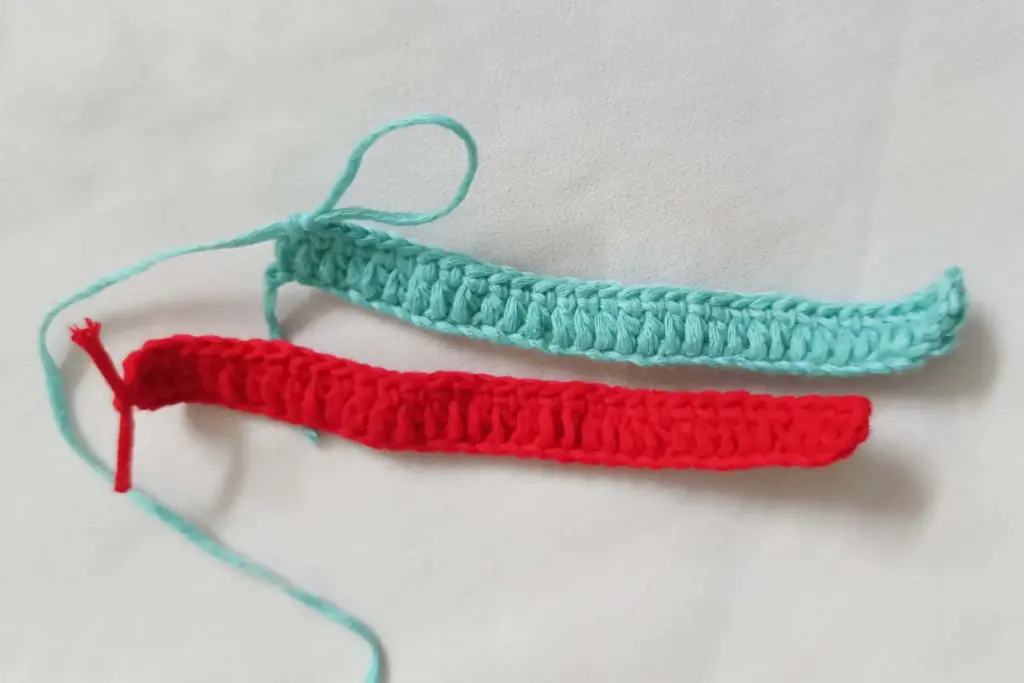
Step 1: Making the Candy Base
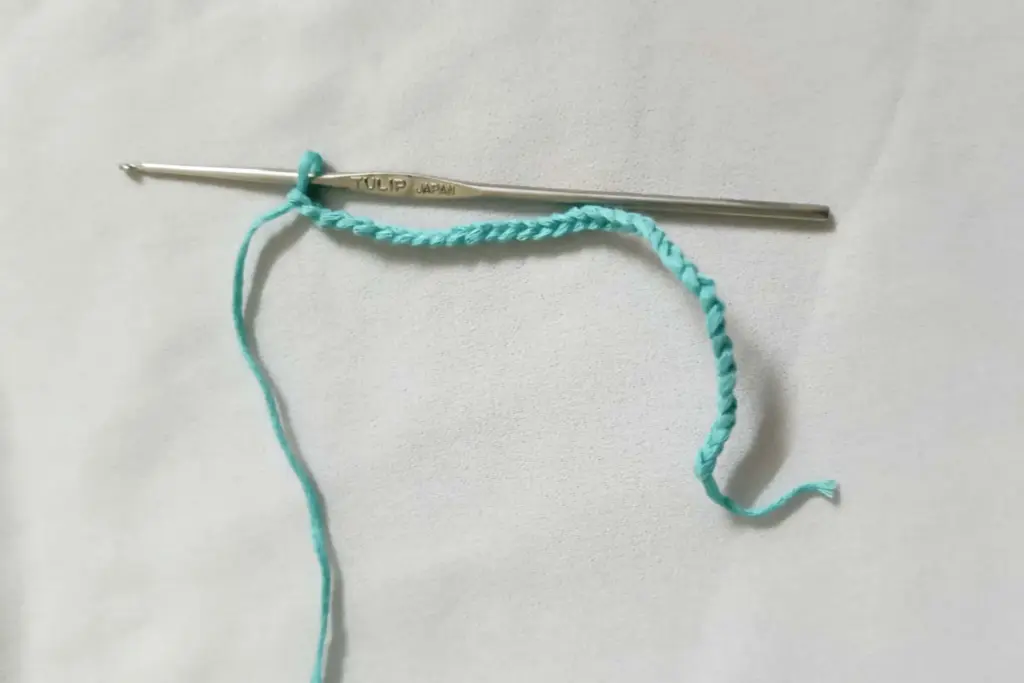
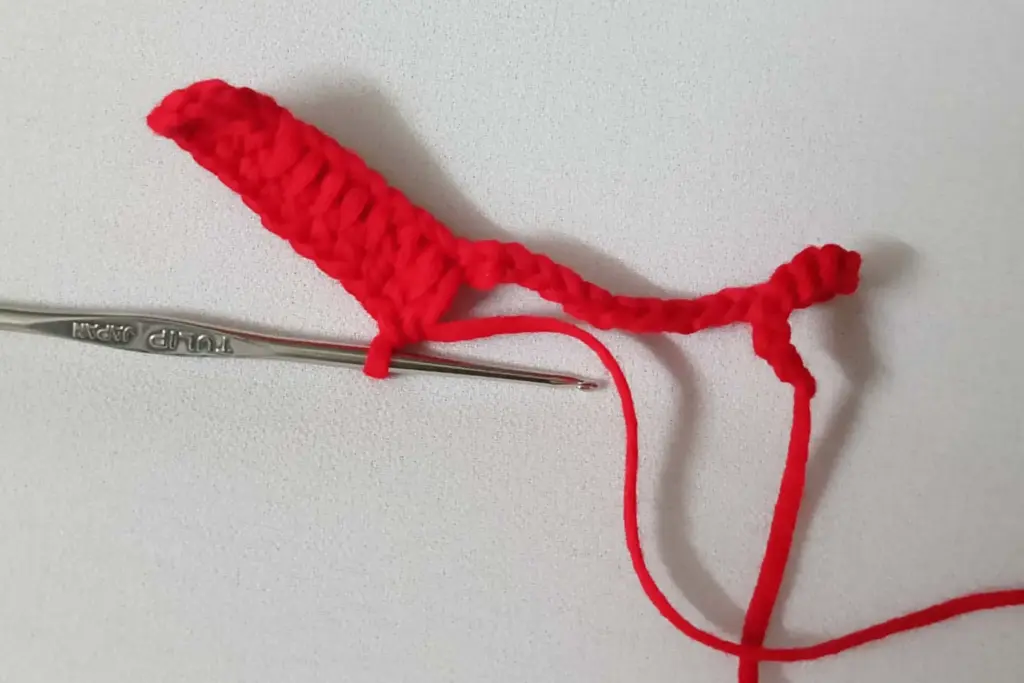
The base of the candy is worked in a simple crochet pattern that forms a flat rectangle. You will begin by chaining a set number of stitches, followed by a row of double crochets. This step sets up the foundation for your candy and helps you practice even tension and stitch consistency. At the end of the row, you will join the yarn ends and begin the next row, continuing the pattern.
Once the base is complete, you can fasten off and prepare for the next phase, which will involve creating the distinct swirl pattern on the candy. This base is the backbone of the candy, and keeping your stitches even and consistent will help the final piece look neat.
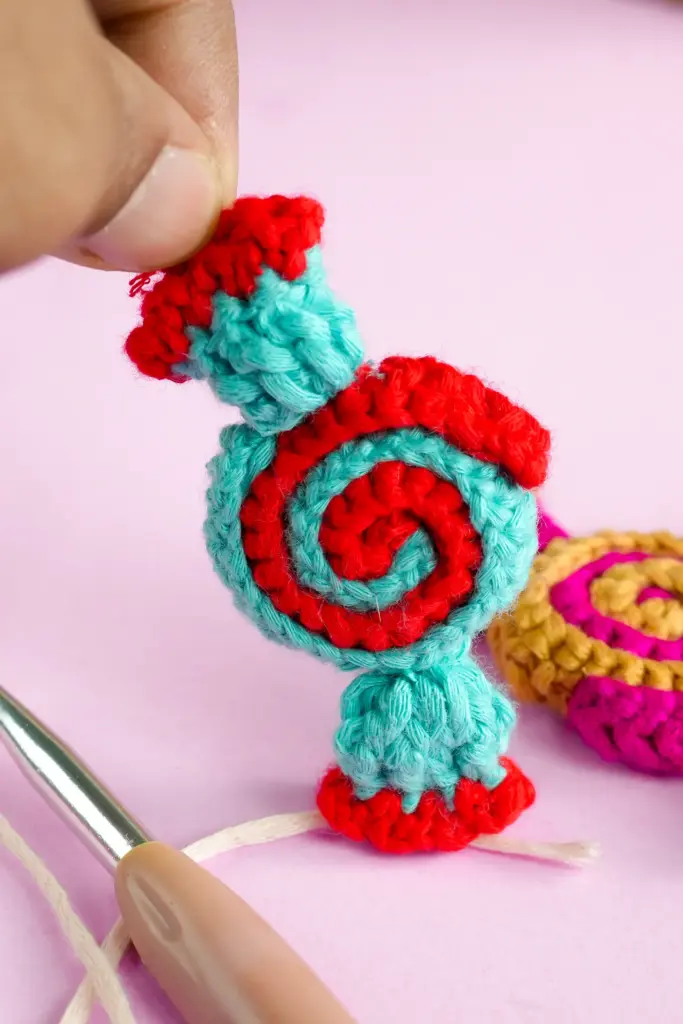
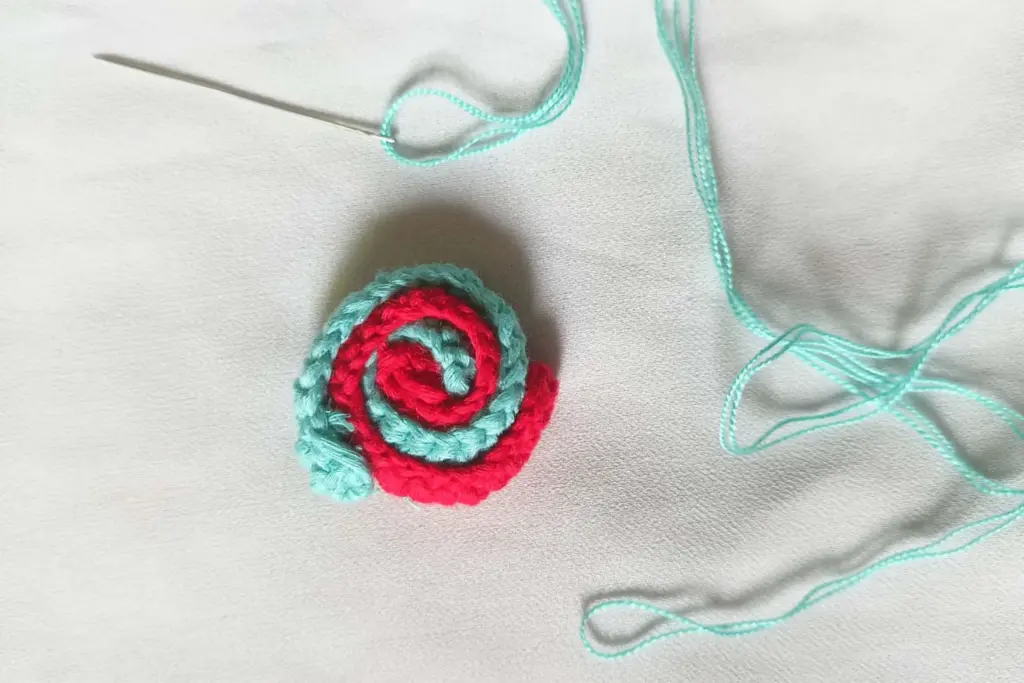
Step 2: Creating the Peppermint Swirl
The swirl is what gives the peppermint candy its signature look. To create this, you’ll be working with two colors of yarn. The idea is to alternate between the two colors to form a spiral that mimics the classic peppermint design. You can use a variety of techniques to form the swirl, but it’s essential to switch colors at the correct spots to get a sharp, clean spiral effect.
Begin by working in a round shape, and continue the swirl until you achieve the desired pattern. This step might take a little practice to ensure that the colors flow smoothly, but once mastered, you can use this technique for other candy-themed crochet projects as well.
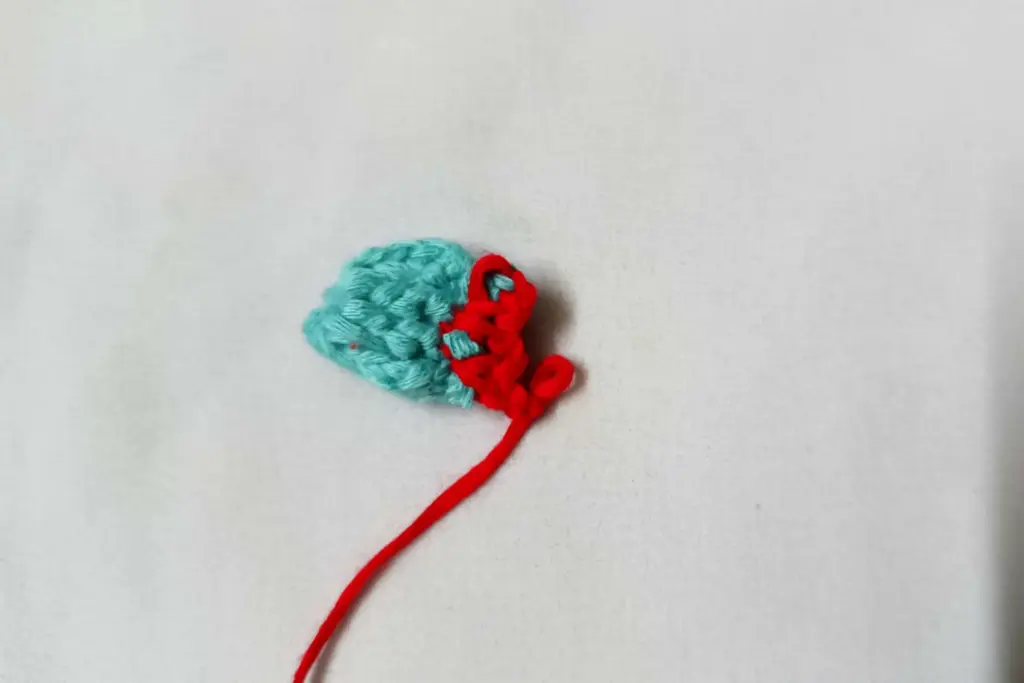
Step 3: Creating the Wrap for the Candy
The wrap around the peppermint candy is what makes it look like a real piece of candy. This part of the project is simple yet adds a lot of visual impact. You’ll start by creating a small loop using a chain, then work into it with triple crochets to give the wrap a full, fluffy look. This piece will be attached to both sides of the candy to give it a completed appearance.
When you start the wrap, make sure to crochet the triple crochets tightly to maintain a neat, uniform look. Once you have finished the wrap, you’ll join it with a slip stitch to complete the round. This step gives the candy a festive and fun design, making it look like the perfect treat for any occasion.
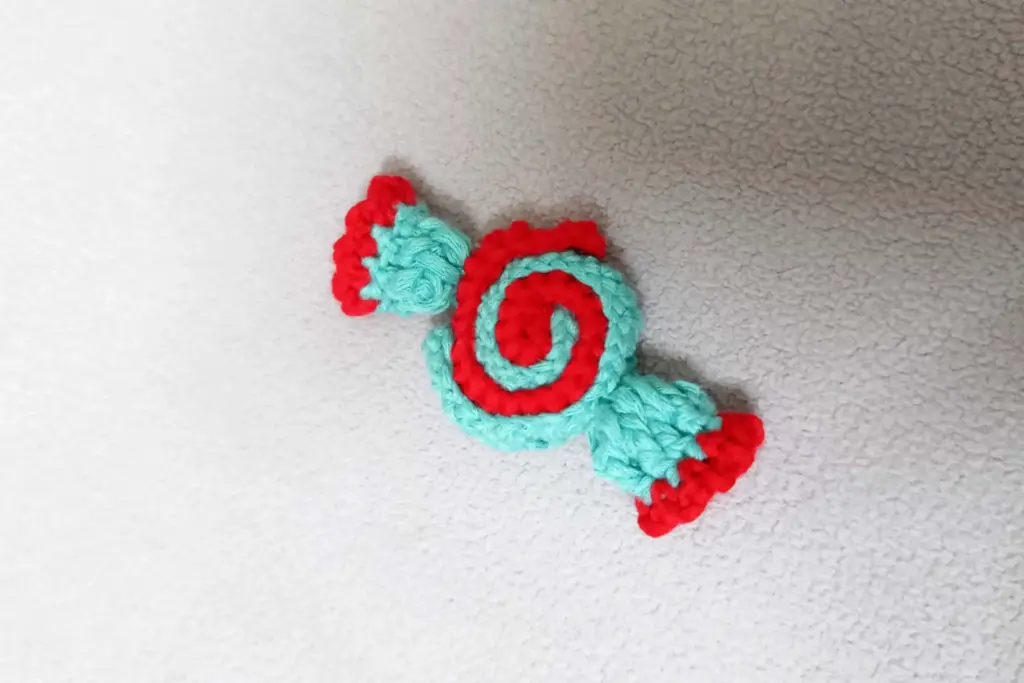
Step 4: Attaching the Wrap to the Candy Base
After creating the wrap, it’s time to attach it to the candy base. To do this, you can either sew the wrap onto the base with a tapestry needle or use a crochet hook to join the two pieces together. When attaching the wrap, make sure that it is evenly distributed around the edges of the candy to ensure a smooth, professional-looking finish. You’ll join the ends of the wrap to the base, creating the perfect balance between the soft swirls and the hard candy center.
Be careful when sewing or crocheting the wrap to the base, as this is a critical step in making the candy look as realistic as possible. Take your time to make sure both pieces are securely attached and aligned.
Step 5: Fastening Off and Hiding the Yarn Tails
After you’ve joined the wrap to the base, it’s time to fasten off the yarn and hide any loose ends. This is an essential step to ensure that your crochet project looks neat and clean. Use a tapestry needle to weave in the yarn ends, hiding them inside the project. This will prevent them from showing on the outside and keep your candy looking tidy.
Make sure to securely weave in the ends, so they don’t unravel later. Once you’re done, trim any excess yarn for a polished finish.
Step 6: Customizing and Final Touches
Now that the basic structure of your crochet peppermint candy is complete, you can add some custom touches to make it your own. You can use different colors to make a variety of candy designs or even add a loop at the top to turn it into a hanging ornament. If you’re feeling creative, you can add glittery yarn or small beads to enhance the holiday charm.
Feel free to experiment with different yarn types as well — using thicker or thinner yarns can change the texture and appearance of your candy. If you want to make a larger or smaller candy, you can adjust the size by adding or removing stitches to the base or wrap.
Final Thoughts
The easy crochet candy pattern is a fun and accessible project for beginners. It combines basic crochet skills like chain stitches, single crochets, and color changes to create a festive decoration that can be used in many different ways. Whether you use it as a Christmas ornament, a keychain, or a cute gift for friends and family, this crochet candy is sure to bring a sweet touch to any occasion.
By following the steps in this tutorial, you’ll not only have a lovely handmade item but also gain confidence in your crochet abilities. As you practice, you can try out different shapes, sizes, and color combinations to create your very own candy collection!
Happy crocheting, and may your holiday season be filled with sweet, handmade creations!