

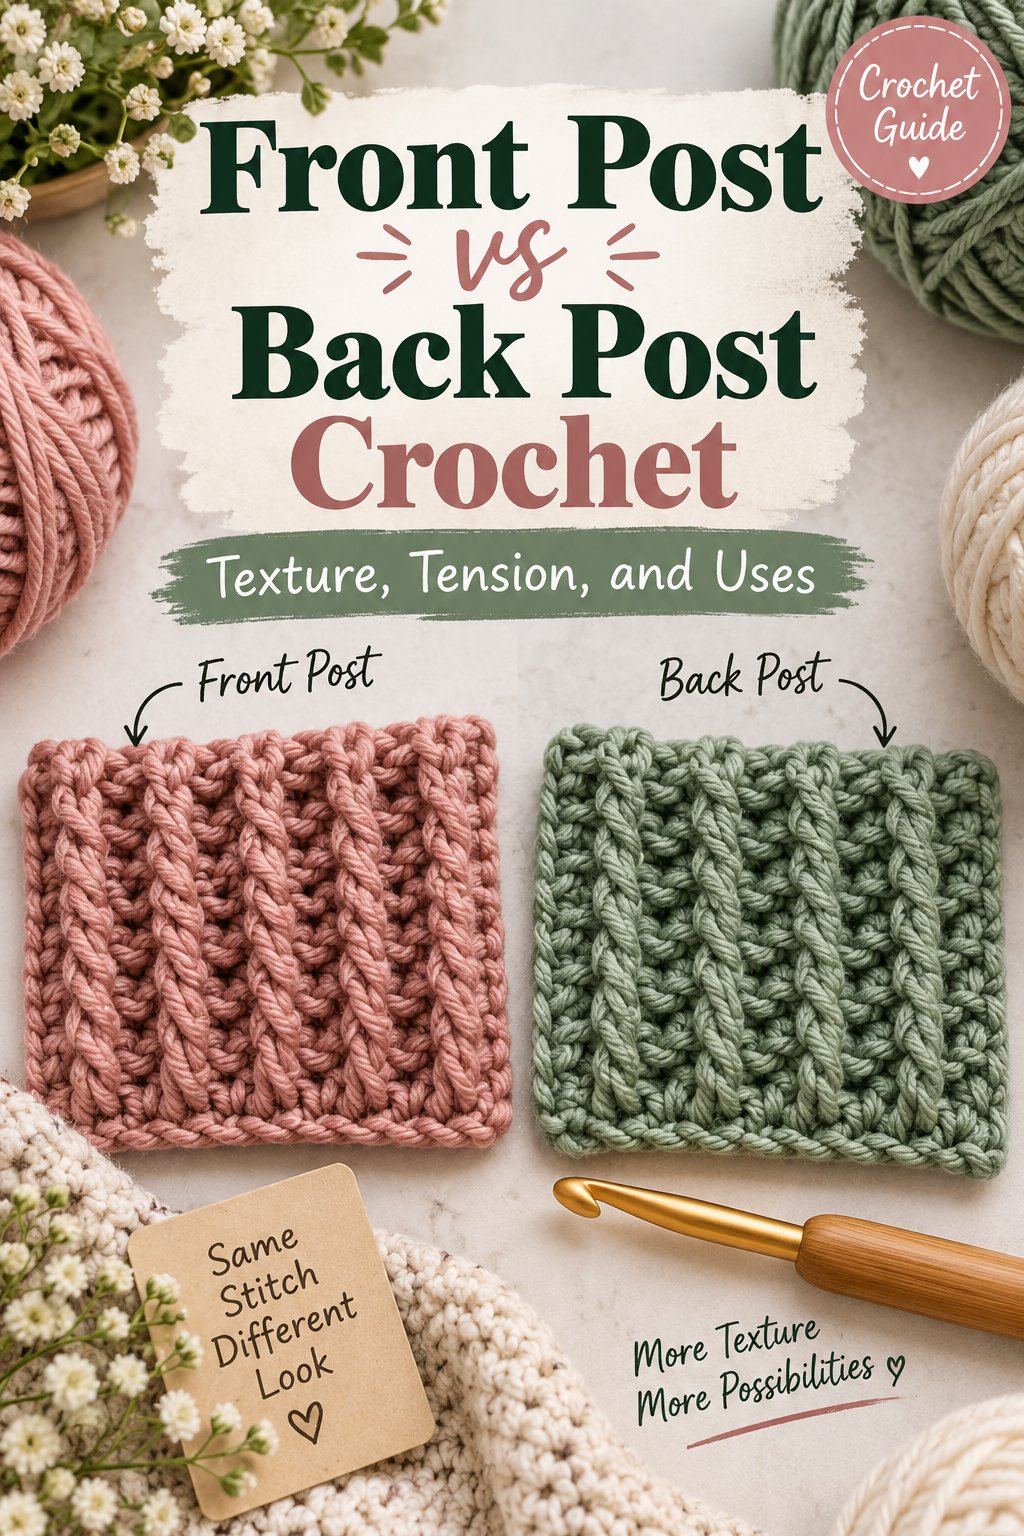
Front post vs back post crochet compares two ways to wrap a hook around the vertical body, or post, of an existing stitch instead of its top loops. A front-post stitch pushes that post toward the viewer and forms a raised ridge, while a back-post stitch pushes it away and forms a recessed channel on the working side.
Key facts
Front-post stitches are worked front-to-back-to-front around a stitch post.
Back-post stitches are worked back-to-front-to-back around a stitch post.
Alternating FP and BP stitches creates flexible 1×1 or 2×2 ribbing.
Post stitches usually consume more yarn and reduce row height compared with ordinary stitches.
A 0.5-1.0 mm larger hook is a useful starting adjustment for tight post-stitch fabric.
The post belongs to the stitch body, not the two loops forming the stitch top.
What Are Post Stitches?
Post stitches are crochet stitches worked around the vertical stem of a previous stitch. The technique exposes the sides of stitches, allowing the crocheter to move selected stitch bodies forward or backward and build ridges, grooves, ribs, basketweave, and cables.
A standard double crochet is easy to identify because it has a top made of two loops and a front-facing vertical shaft below those loops. A post stitch wraps around that shaft. The hook does not enter the top V unless the pattern separately instructs you to work into it.
The Craft Yarn Council uses familiar abbreviations such as FPdc for front-post double crochet and BPdc for back-post double crochet in standardized crochet terminology. Abbreviations vary slightly by designer, so a pattern may write FPDC, FP dc, or front post double crochet for the same construction.
Post Stitches Compared With FLO and BLO
Front-loop-only and back-loop-only stitches manipulate the horizontal top loops of a stitch. Post stitches manipulate the vertical body, so the resulting texture is usually deeper, thicker, and more architectural.
| Technique | Hook location | Typical surface result | Common use |
|---|---|---|---|
| Ordinary double crochet | Both top loops | Flat V-shaped stitch rows | Blankets and garments |
| FLO crochet | Front top loop | Horizontal flexible ridge | Fold lines and ribbed panels |
| BLO crochet | Back top loop | Horizontal ridge on reverse side | Simple ribbing |
| FPdc | Vertical post from front | Raised vertical ridge | Cables and ribs |
| BPdc | Vertical post from back | Recessed front channel | Valleys and alternating ribs |
A post stitch can be applied to half double crochet, double crochet, treble crochet, and other tall stitches. Single crochet posts are possible, but their short bodies are harder to enter cleanly and produce less dramatic relief.
How Front-Post and Back-Post Stitches Work
Front-post and back-post stitches use opposite hook paths around the same vertical stitch body. Front-post crochet passes from the front to the back and returns to the front, while back-post crochet passes from the back to the front and returns to the back.
For either method, first locate the target stitch post below its top V. The post generally appears as a vertical bar, although its angle changes when the fabric is turned or worked in the round. Insert the hook around the entire bar, not through one strand.
Front-Post Hook Path
A front-post double crochet, abbreviated FPdc, follows this sequence:
- Yarn over.
- Insert the hook from front to back beside the target post.
- Pass the hook behind the post.
- Bring the hook back from back to front on the opposite side.
- Yarn over and pull up a loop.
- Complete the double crochet by working through two loops twice.
The finished post projects toward the side facing you. On the reverse side, that same physical ridge appears recessed.
Back-Post Hook Path
A back-post double crochet, abbreviated BPdc, reverses the path:
- Yarn over.
- Insert the hook from back to front beside the target post.
- Pass the hook in front of the post.
- Return the hook from front to back on the opposite side.
- Yarn over and pull up a loop.
- Complete the double crochet through two loops twice.
The finished post recedes on the side facing you and forms a ridge on the opposite side. This reversal explains why a ribbed fabric can look different when turned over.
A Reliable Direction Test
Do not decide whether a visible stitch is “front post” or “back post” by its name on the previous row. Decide by the side from which your hook currently approaches the post. If the hook travels in front of the fabric and the post moves toward you, you are making a front-post stitch from that working side.
This distinction matters in turned rows. A pattern can alternate FPdc and BPdc by written instruction, but the visual ridge may appear to change sides after every turn. Experienced crocheters read the raised and recessed channels rather than relying only on labels.
Which Post Stitch Should You Use?
The best post stitch depends on the desired height, flexibility, and relief. Half double crochet produces dense texture, double crochet provides the clearest balance for beginners, and treble crochet gives enough vertical length for cable crossings.
| Stitch type | Typical height | Fabric behavior | Best application |
|---|---|---|---|
| FPhdc or BPhdc | 8-12 mm | Dense and firm | Thick cuffs and subtle texture |
| FPdc or BPdc | 12-18 mm | Flexible and clearly ridged | Ribbing and everyday cables |
| FPtr or BPtr | 18-28 mm | Tall and open | Cable crossings and deep relief |
| FPsc or BPsc | 5-8 mm | Very firm and compact | Small motifs and edging |
Measurements in the table are typical for worsted-weight yarn and vary with hook size and tension. The Craft Yarn Council’s yarn-weight system places many worsted yarns in category 4, but the label’s recommended hook range remains the practical starting point because two category 4 yarns can have different fiber content and loft.
Front-Post Half Double Crochet
FPhdc is compact because the half double crochet has less height than a double crochet. The resulting ridge is broad and firm, which suits hat brims, boot cuffs, and dense sweater bands where excessive stretch would be undesirable.
Front-Post Double Crochet
FPdc is the standard teaching stitch because its post is tall enough to see and flexible enough to wrap without excessive force. BPdc pairs with it to produce 1×1 ribbing, 2×2 ribbing, vertical columns, and many cable backgrounds.
Front- and Back-Post Treble Crochet
FPtr and BPtr create taller relief and more room for crossing stitches. They also lean more easily, so cable patterns often combine treble post stitches with ordinary double crochet or chain spaces to control width.
Front Post vs Back Post Crochet Compared
Front post vs back post crochet differs mainly in direction and surface placement, not in basic stitch completion. A front-post stitch raises the targeted post on the working side; a back-post stitch recesses that same post and makes the neighboring structure appear more prominent.
| Feature | Front-post stitch | Back-post stitch |
|---|---|---|
| Entry direction | Front to back to front | Back to front to back |
| Working-side result | Raised ridge | Recessed groove |
| Reverse-side result | Recessed groove | Raised ridge |
| Typical role | Cable face or rib column | Valley between ribs or cables |
| Stretch contribution | Compresses adjacent fabric | Compresses adjacent fabric |
| Best visual use | Prominent relief | Shadow and separation |
Alternating one FPdc with one BPdc creates 1×1 ribbing. Two front posts followed by two back posts create 2×2 ribbing. The exact elasticity depends on yarn fiber, stitch height, and whether the ribbing is worked horizontally or vertically.
Post ribbing is especially useful for cuffs because the fabric contracts across the post columns and expands when pulled. It is less suitable when a project needs a thin, flat seam allowance, since the raised columns add bulk at joins.
How Post Stitches Change Yarn, Height, and Time
Post stitches usually require more yarn and produce shorter rows than ordinary stitches of the same nominal height. A practical planning estimate is 20-30% more yarn for heavily textured fabric and 25% less row height, although a gauge swatch is more reliable than either percentage.
| Planning factor | Ordinary double crochet | Dense post-stitch fabric | Typical planning difference |
|---|---|---|---|
| Yarn for a 20 cm swatch | 8-12 g | 10-15 g | 20-30% more |
| Ten-row height | 12-16 cm | 9-12 cm | 20-30% shorter |
| Beginner practice time | 10-20 minutes | 15-30 minutes | Additional 5-10 minutes |
| Stitching speed | 100% baseline | 50-60% baseline | 40-50% slower |
| Additional blanket skeins | 0 baseline | 2-3 skeins typical | Depends on blanket size |
These are typical worsted-weight estimates, not universal specifications. A loose FPdc fabric may use less yarn than a tightly packed BPdc cable panel, and a chenille yarn can consume more material per gram because its bulk changes the apparent coverage.
Why the Fabric Gets Shorter
Wrapping around a post pulls the new stitch downward and draws neighboring stitches toward the textured column. The row therefore occupies less vertical space than a standard double crochet row. Patterns that substitute post stitches without recalculating gauge can finish several centimeters shorter.
How to Budget Yarn and Money
For a blanket that would ordinarily cost about $40-$60 in yarn, heavy post texture may bring the typical material budget to $55-$80 if the design needs two or three additional skeins. Actual cost depends on skein yardage, fiber, local pricing, and whether the pattern uses post stitches across the entire surface or only in panels.
The safest calculation is to weigh a finished swatch. If a 20 cm square uses 14 grams and the blanket requires 30 times that area, the estimated yarn usage is 420 grams before adding a 10% reserve for borders, joining, and swatch error.
How to Make a Front-Post or Back-Post Double Crochet
A correct post double crochet has six essential actions: yarn over, surround the post, pull up a loop to the working height, and complete two ordinary double-crochet reductions. The key control point is loop height, because pulling up too little creates a tight, distorted ridge.
Use a smooth, light-colored worsted yarn and a hook that lets you see the post clearly. For early practice, work over at least 12 stitches so the fabric shows whether the columns are aligned.
- Chain a foundation and work one ordinary double-crochet row.
- Turn the fabric and chain the turning chain required by the pattern.
- Identify the first target post below its top V.
- Yarn over and approach the post from the specified side.
- Wrap around the complete post without splitting the stitch.
- Pull up the loop to the height of the current row.
- Yarn over, pull through two loops, then yarn over and pull through the last two loops.
- Repeat across the row, checking the stitch count after every four or five stitches.
- Compare the new ridge with the target side before turning again.
The loop pulled up in step six is often called the golden loop in practical crochet instruction. It should reach the height of neighboring stitches. A loop that is too short makes the post pinch; a loop that is too tall creates loose bars and weak definition.
The Hidden Top Loop Problem
The top loops of the original stitch remain visible above a post stitch. Those loops can look unused, but they are not automatically missing. Working into them as well as around the post may add an unintended stitch and increase the row count.
Read the pattern literally. If it says “FPdc around the next stitch,” do not also work a second stitch into that stitch top unless the instructions explicitly require both actions.
Choosing Yarn and Projects
Smooth, light-colored yarn with moderate twist gives the clearest post definition. A hook 0.5-1.0 mm larger than the yarn label’s recommendation often prevents rigid fabric, but the final choice should come from a blocked gauge swatch.
| Project | Recommended stitch | Typical hook adjustment | Main design reason |
|---|---|---|---|
| Beanie brim | FPdc and BPdc | +0.5 mm | Stretch across the head |
| Sweater cuff | FPhdc and BPhdc | +0.5-1.0 mm | Dense recovery with less bulk |
| Cable blanket | FPdc and FPtr | +0.5-1.0 mm | Deep relief and visible crossings |
| Sock or boot cuff | FPdc and BPdc | 0 to +0.5 mm | Controlled elasticity |
| Decorative panel | FPtr and BPtr | +1.0 mm | Tall architectural texture |
Wool and wool blends generally recover better after stretching than cotton, which can relax permanently. Cotton can still work for dishcloths and warm-weather garments, but a cotton ribbed cuff may lose snap after repeated wear.
Avoid bouclé, eyelash yarn, and highly variegated color changes for a first sample. Their surface obscures the post, and color contrast between ridge and valley becomes harder to inspect. Chenille can produce attractive plush relief, but it hides dropped stitches and makes correction slower.
When Another Texturing Method Is Better
Post stitches are a poor choice when the project needs a flat surface, minimum yarn use, or predictable stitch-top alignment. Back-loop-only ribbing, slip-stitch ribbing, surface crochet, and linked crochet can provide texture with less thickness or simpler edge control.
| Method | Typical thickness | Stretch behavior | Better choice when |
|---|---|---|---|
| BLO double crochet | 3-5 mm ridge | Moderate | You need flatter ribbing |
| Slip-stitch ribbing | 2-4 mm | High across rows | A narrow elastic band is needed |
| Surface slip stitch | 1-3 mm relief | Low | Decoration sits on finished fabric |
| Linked double crochet | 4-7 mm | Low to moderate | You want dense fabric with fewer gaps |
| Post double crochet | 6-12 mm relief | Moderate to high | Strong vertical texture is the priority |
Post stitches also complicate neat edges. A front-post column can pull the side inward, so many patterns add ordinary edge stitches, chains, or a border row to restore width. For a garment seam, test the seam before committing to the full panel.
Common Problems and Precise Fixes
Most post-stitch errors come from misidentifying the post, pulling the loop too short, or counting the hidden top loops as separate stitches. The fabric usually reveals the cause before the crocheter can see the individual error.
| Visible symptom | Likely cause | Immediate fix | Prevention |
|---|---|---|---|
| Ridge pinches inward | Loop pulled too short | Undo the last stitch and raise loop height | Match neighboring stitch height |
| Extra stitches appear | Top loops worked twice | Remove the duplicate stitch | Count post targets only |
| Columns slant randomly | Posts entered inconsistently | Rework the affected section | Mark cable columns |
| Fabric curls severely | Tension is too tight | Use a larger hook and block swatch | Relax yarn hand |
| Texture disappears | Yarn is fuzzy or dark | Change yarn or improve lighting | Use smooth solid yarn |
| Edge shrinks | First or last post pulls inward | Add ordinary edge stitches | Measure row width |
Working Too Tightly
Post stitches naturally resist the hook because the shaft is narrower than the surrounding opening. Forcing the hook through a small gap often splits yarn and shortens the loop. Rotate the fabric slightly, use the hook throat rather than the tip to enter, and loosen the working loop before completing the stitch.
Expert insight: A larger hook does not always solve stiff post ribbing. If the foundation chain is tight, the lower edge can remain restrictive even after increasing hook size. Make the foundation with a hook 0.5-1.0 mm larger, or use a chainless foundation when the pattern allows it.
Losing the Row Direction
After turning, the previous front-post ridge may look like a back-post valley. The safest method is to identify the side facing you, locate the post’s visible bar, and follow the written hook path from that side. Place a removable marker at the first rib column while learning.
Expert insight: In a turned ribbing panel, the physical column does not change identity, but its visual description does. Designers may write alternating FP and BP instructions from the working side, so copying the previous row’s visual labels can reverse the pattern.
Blocking Away Texture
Steam or wet blocking can flatten tall post relief, especially in acrylic or loosely spun yarn. Block ribbed pieces to the intended relaxed width without stretching the columns aggressively, and pin cable valleys rather than pulling every ridge flat.
How to Read a Post-Stitch Pattern
Pattern abbreviations usually identify the stitch height after the FP or BP prefix. FPdc means front-post double crochet, BPdc means back-post double crochet, FPtr means front-post treble crochet, and BPhdc means back-post half double crochet.
Before starting, identify four details:
- Whether the turning chain counts as a stitch
- Whether the first stitch is worked around a post or into a top loop
- Which side is the right side
- Whether cable crossings use front or back post stitches
A chart may show post stitches as symbols that wrap around vertical bars instead of entering stitch tops. Written instructions remain authoritative when a chart’s perspective is difficult to interpret, especially in cable panels with crossed posts.
Count the completed columns rather than only the top loops. For example, a 2×2 ribbed row should show two raised columns followed by two recessed channels on the working side, even if the top edge appears uneven.
Frequently Asked Questions About Front Post vs Back Post Crochet
Can post stitches be worked in the round?
Yes. Post stitches are frequently used in hats, cowls, and sleeves worked in the round. Because the fabric is not turned, the same FP or BP instruction continues to produce the same working-side effect each round, although joining methods can create a visible seam.
Why does my post-stitch ribbing have little stretch?
Tight tension, cotton yarn, short stitch height, and a restrictive foundation chain can all reduce stretch. Make a swatch, increase the hook by 0.5-1.0 mm, and compare the relaxed and stretched widths. If recovery remains poor, wool or a wool blend usually performs better than non-elastic cotton.
Can single crochet be used for front-post texture?
Single crochet can be worked around a post, but the short post is difficult to enter and creates dense, subtle relief. Half double crochet is usually easier for compact texture, while double crochet provides a clearer target and more flexible fabric for beginners.
How do post stitches create crochet cables?
Cable designs use raised post stitches that cross over or under neighboring columns. Treble post stitches provide extra height for the crossing, while ordinary stitches or recessed post stitches fill the background. Cable patterns often require front and back cable-specific instructions, so the crossing direction must be followed exactly.
Should I block front-post and back-post crochet?
Yes, but block gently. Wet blocking can even the width and open valleys, while aggressive stretching can flatten ridges. Shape the swatch to its measured dimensions, allow it to dry fully, then judge texture, elasticity, and row height before calculating project quantities.
Is front-post crochet always better for visible texture?
No. Front-post stitches make the chosen columns prominent, but back-post stitches create the shadow channels that make relief readable. Strong texture usually depends on the relationship between both techniques, yarn contrast, stitch height, and consistent tension rather than on front-post stitches alone.
Conclusion
Front post vs back post crochet is a directional choice around a stitch’s vertical body. Front-post stitches create working-side ridges, back-post stitches create recessed channels, and alternating both techniques produces ribbing with controlled elasticity. Choose FPdc and BPdc for accessible texture, swatch for yarn and height changes, and use FPtr or BPtr when a cable needs deeper relief.