

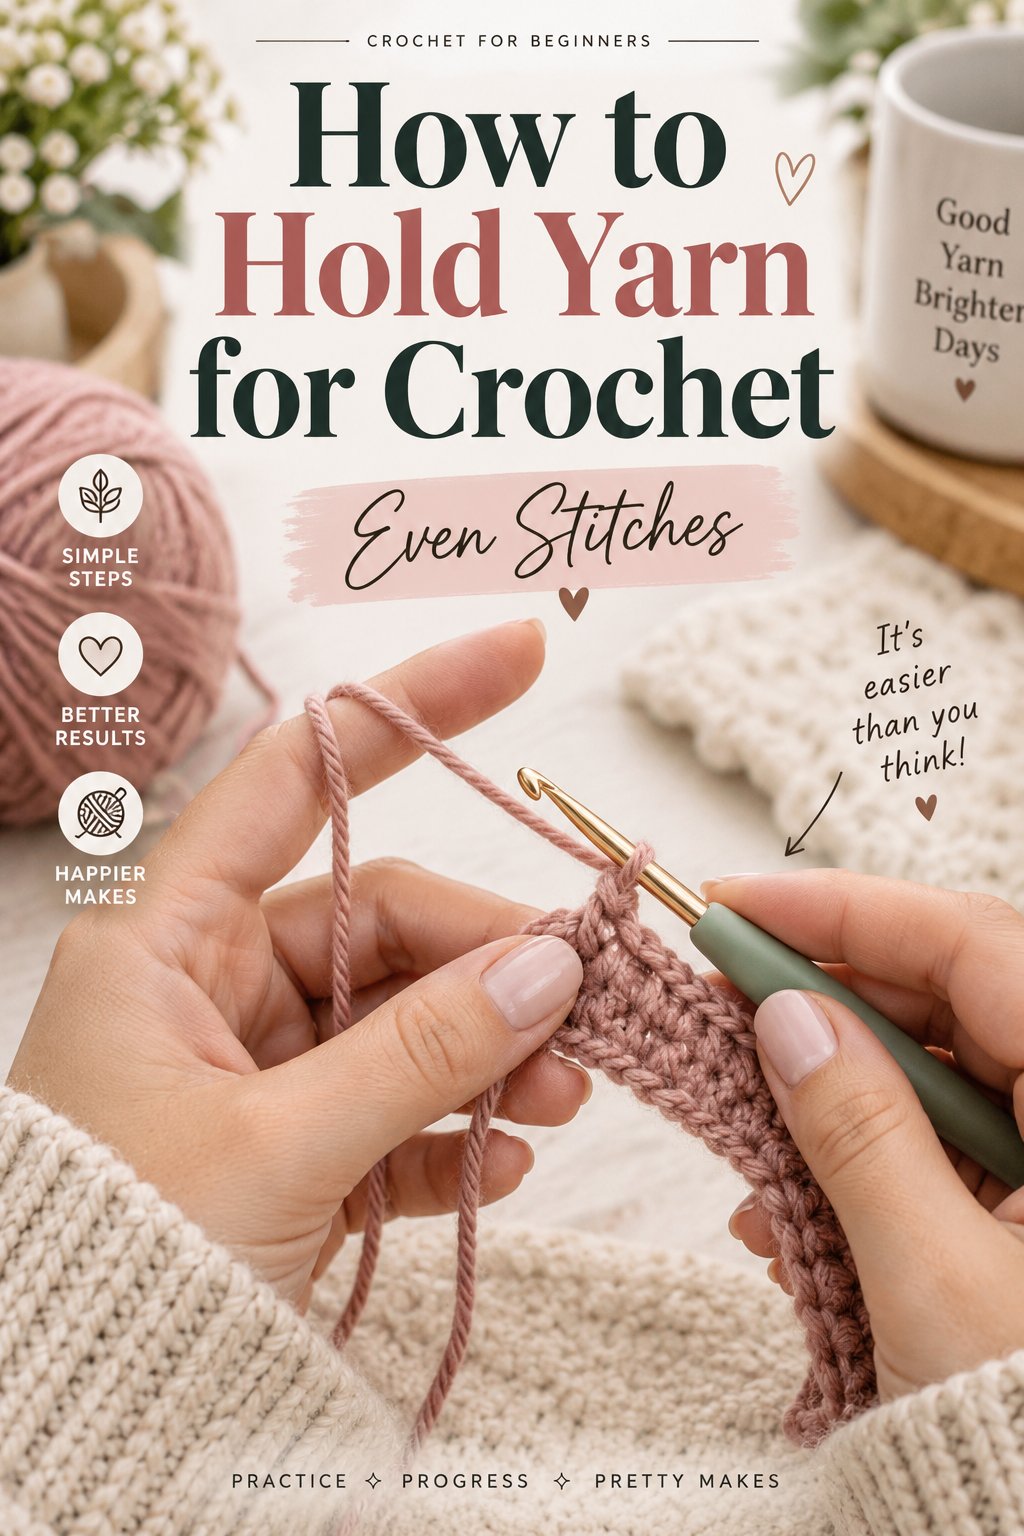
How to hold yarn for crochet means guiding working yarn through the non-dominant hand so friction controls its feed rate while the thumb and middle finger stabilize the active stitch. A relaxed yarn hand produces more consistent loop height, reduces repeated gripping, and lets the hook hand form stitches without fighting the yarn.
Key Facts / Quick Answer
Feed yarn from the ball through the lower palm, around selected fingers, and over the index finger toward the hook.
Use a full wrap for slick yarn, a zig-zag hold for general-purpose yarn, and an index drape for bulky or sticky yarn.
Pinch the stitch base with the thumb and middle finger, not the working loop itself.
A gentle tug should pull yarn through the fingers without forcing the hand open.
Change one variable at a time, such as removing a wrap or lowering the index finger.
Typical beginners need 3-5 short practice sessions before a new hold feels automatic.
How Yarn Tensioning Works
Yarn tensioning is a controlled-friction system between the yarn and the fingers of the non-dominant hand. The yarn hand does not pull every stitch to size; it regulates how quickly yarn leaves the ball while the hook hand draws loops through the work.
In practice, the best posture is semi-open rather than clenched. The fingers create adjustable contact points, the elevated index finger presents yarn to the hook, and the thumb-middle-finger pinch stops the fabric from sliding during a yarn-over.
| Hand component | Position | Function | Useful check |
|---|---|---|---|
| Yarn entry | Lower palm or little-finger side | Receives yarn from the ball | Yarn does not snag at the wrist |
| Friction fingers | Pinky, ring, and middle fingers | Regulate feed speed | Fingers remain curved, not flattened |
| Index finger | Raised 2-4 cm above the work | Presents yarn to the hook | Yarn crosses smoothly over the finger |
| Stitch anchor | Thumb and middle finger | Stabilizes the active stitch base | Work does not rotate during a yarn-over |
| Wrist | Nearly straight | Limits unnecessary strain | Forearm and hand stay in one line |
A useful test takes less than 10 seconds. Hold the work still, pull the yarn gently with the hook hand, and observe the response. If the yarn will not move until the fingers open widely, friction is excessive; if several centimeters spill out before the hook catches it, friction is insufficient.
The Craft Yarn Council’s yarn standard labels commonly identify yarn from #0 lace through #7 jumbo. Those labels describe yarn thickness, not a required hand position, so the same hold may behave differently with wool, cotton, acrylic, silk, or chenille.
How to Hold Yarn for Crochet Step by Step
The basic setup takes four actions: place the yarn hand beside the work, route yarn through the fingers, elevate the index finger, and pinch the stitch base. The goal is controlled movement, not a rigid pose that must look identical for every crocheter.
- Place the yarn ball on the side of the non-dominant hand. Let the ball feed without rolling across rough flooring or catching on furniture.
- Bring the working yarn into the lower palm. Keep the strand aligned with the forearm instead of twisting it around the wrist.
- Thread the yarn around one or more fingers. Start with the pinky, ring, and middle fingers loosely involved.
- Drape the yarn over the index finger. Raise the finger slightly, usually 2-4 cm above the fabric.
- Pinch the work near the active stitch. Use the thumb and middle finger to hold the stitch base or foundation chain.
- Make one yarn-over and pull through. Watch whether the strand slides before the loop forms.
- Adjust only one contact point. Add a wrap for loose stitches or remove a wrap for tight stitches.
- Recheck after five stitches. Tension often changes when a row becomes longer or the fabric becomes heavier.
The hook hand should not compensate for a poorly regulated yarn supply by pulling harder. That habit enlarges some loops while compressing others, especially during double crochet, where the hook must draw through multiple loop groups.
Where Should the Stitch Be Pinched?
The thumb and middle finger should hold the base of the current stitch, usually within 1-2 cm of the hook. Pinching the working loop itself restricts its height and produces tight, undersized stitches.
Move the pinch point as the row grows. At the start of a project, the fingers may hold a foundation chain; later, they should hold the newest completed stitch or the fabric immediately below the hook. Release and reposition after each stitch or pair of stitches rather than stretching the fabric from a distant point.
Four Yarn-Holding Methods
The four practical methods are the full wrap, zig-zag, index drape, and forefinger anchor. None is universally correct; each changes the amount and location of friction between the yarn, fingers, and palm.
| Method | Finger route | Friction | Best match | Typical setup time |
|---|---|---|---|---|
| Full wrap | Around pinky, under ring and middle, over index | High | Silk, bamboo, lace thread | 20-40 seconds |
| Zig-zag | Over and under alternating fingers, then over index | Medium | #4 worsted acrylic or wool | 15-30 seconds |
| Index drape | Under lower fingers, directly over raised index | Low | Chenille, blanket, jumbo yarn | 10-20 seconds |
| Forefinger anchor | One or two loose turns around index | Medium-high | Standard cotton, mobility-limited hands | 10-25 seconds |
Full Wrap or Pinky Loop
The full wrap routes yarn completely around the pinky, under the ring and middle fingers, and over the index finger. Its multiple contact points create strong friction, making it useful when silk, bamboo, mercerized cotton, or laceweight thread escapes too quickly.
The drawback is localized pinky pressure. If the pinky bends sharply or the yarn cuts into one groove, loosen the loop before changing hook size. A full wrap is also a poor starting choice for sticky wool because added friction can force the hook hand to yank each loop.
Zig-Zag or Over-Under Hold
The zig-zag method alternates the yarn over and under the fingers before bringing it across the index finger. Medium friction and easy release make this a practical default for #4 worsted acrylic, wool, and many cotton blends.
Beginners often let the yarn fall out between stitches. Keep the fingers curved and lower the index finger slightly rather than squeezing the entire hand. If the strand still slips, add one pinky loop instead of tightening every finger.
Index Drape for Bulky Yarn
The index drape sends yarn under the lower fingers and directly over a raised index finger. It creates low friction, which suits bulky, chenille, blanket, and jumbo yarns that already drag against the fabric.
The index finger should rise only enough to separate the strand from the work. Holding it perfectly straight or very high increases tendon load and makes the hand tire sooner. A lower, gently curved finger usually provides enough clearance.
Forefinger Anchor
The forefinger anchor uses one or two loose turns around the index finger and leaves the other fingers relatively open. The method concentrates friction in one location, so it can help crocheters who have limited finger mobility or dislike complex weaving.
Localized friction has a limit. If the index finger develops a red groove, rotate the contact area, switch to a soft yarn guide, or move to a zig-zag route. No method should produce numbness, burning, or persistent pain.
Match the Hold to the Yarn
The correct yarn hold depends on surface friction, diameter, twist, and project weight. Fiber labels predict some behavior, but the strand’s finish and construction matter just as much: mercerized cotton can be slick, while brushed wool can resist movement.
| Yarn situation | Starting hold | First adjustment | Common mistake | Result to seek |
|---|---|---|---|---|
| Silk or bamboo, laceweight | Full wrap | Add a second pinky contact | Gripping the palm tightly | Smooth feed with no sudden slack |
| Mercerized cotton | Full wrap or anchor | Lower index finger 1 cm | Letting yarn slide over dry skin | Stable small loops |
| #4 acrylic | Zig-zag | Add one wrap if loops vary | Using too much friction | Even loop height |
| Worsted wool | Zig-zag | Remove a wrap if yarn drags | Treating stickiness like slipperiness | Moderate pull resistance |
| Chenille or blanket yarn | Index drape | Raise index 1-2 cm | Using a tight full wrap | Continuous, low-force feed |
| Jumbo yarn | Index drape | Support the fabric with palm | Pinching the thick loop | Open stitches without distortion |
A strand’s direction from the ball also affects feed. Pulling from the center of a center-pull skein can create a loose pile that catches around the ball; pulling from the outside can make the skein roll. Place either type in a bowl or bag when the ball repeatedly stops the yarn.
Expert insight: Many “tension problems” begin at the yarn source, not the fingers. If the ball rotates, collapses, or catches every few stitches, the yarn hand must repeatedly accelerate and stop the strand, creating inconsistent loops even when the finger pattern remains unchanged.
Should Hook Size Change Before the Yarn Hold?
Change the yarn hold first when loop size changes within the same row. Change the hook size when the loops are consistently too tight or too loose across several rows and the pattern’s gauge requires correction.
For example, if ten stitches alternate between 9 mm and 12 mm loop height, adjust the hand. If every stitch is consistent but the swatch is 2 cm narrower than the pattern gauge, test a larger hook or a different yarn. A hook cannot reliably correct irregular feed.
Choosing a Method by Goal
The best method for beginners is usually the zig-zag hold because it offers moderate friction and several easy adjustment points. The best method for slick yarn is usually the full wrap, while bulky yarn generally behaves better with an index drape.
| Goal | Recommended method | Why it fits | Alternative | Typical limitation |
|---|---|---|---|---|
| Learn basic stitches | Zig-zag | Medium, adjustable friction | Forefinger anchor | Strand may slip initially |
| Control fine thread | Full wrap | Several friction points | Index anchor | Pinky fatigue |
| Crochet a blanket | Index drape | Low resistance for thick yarn | Loose zig-zag | Index elevation |
| Reduce finger movement | Forefinger anchor | Few routing steps | Yarn guide ring | Pressure in one spot |
| Work with slick cotton | Full wrap | Prevents sudden slack | Zig-zag plus pinky loop | Can over-tighten |
| Work left-handed | Any mirrored method | Mechanics remain the same | Neutral palm hold | Practice direction changes |
A useful selection rule is to begin with the least friction that prevents uncontrolled slack. Extra friction feels secure but often causes the hook hand to enlarge loops by force. Lower friction encourages smoother motion until the yarn begins to spill, then one contact point can be added.
Diagnose Tension Problems
Uneven crochet tension usually comes from changing finger pressure, moving the index finger, or failing to reposition the stitch anchor. The visible symptom points to a specific correction, so avoid changing yarn, hook, and hand position simultaneously.
| Symptom | Likely cause | Immediate correction | Verification test |
|---|---|---|---|
| Loops are too tight | Closed fingers or low index | Remove one wrap | Five stitches pull through gently |
| Loops are too loose | Insufficient friction or high index | Add pinky contact | No slack hangs between hook and hand |
| Yarn stops mid-stitch | Death grip or yarn snag | Open fingers and check ball | Strand feeds during a 10-second tug |
| Stitch bases look twisted | Weak thumb-middle pinch | Move pinch within 2 cm of hook | Fabric stays oriented |
| Pinky cramps | Tight full loop | Loosen route or switch to zig-zag | Pinky remains curved, not curled |
| Index aches | Finger held too high | Lower and soften the index | Yarn clears work without strain |
The “death grip” occurs when the fingers flatten against the palm. It stops yarn flow, then makes the crocheter compensate with a sharp pull. Open the hand until the strand moves with a light tug.
The “flying pointer” occurs when the index finger extends rigidly into the air. That posture increases effort without improving control. Keep the index finger gently bent and use only enough elevation to separate yarn from the stitch.
Expert insight: A tighter grip can create looser-looking stitches. When yarn stops, the hook hand often pulls a larger loop to complete the stitch, so the same person may produce both compressed and oversized loops in one row.
What If the Yarn Keeps Slipping?
If yarn slips from the fingers, shorten the route before increasing pressure. Add a loose pinky loop, lower the index finger, or place the yarn between the ring and middle fingers. These changes increase contact without clenching the palm.
Check the yarn surface too. Nylon, rayon, polished cotton, and mercerized fibers need more friction than brushed wool or chenille. Dry skin can also increase drag unpredictably, so a small amount of non-greasy hand cream, applied well before handling yarn, may reduce catching; avoid oily residue that stains fibers.
What If the Fabric Feels Too Tight?
If the fabric feels rigid, first open the yarn hand and raise the index finger slightly. Then check whether the hook is entering the correct stitch and whether the working loop is being pulled above the hook’s shaft.
A larger hook can improve overall drape, but it will not repair alternating loop sizes. Make a five-stitch test after every change. Keep the adjustment that produces similar loop height with the lowest hand effort.
Practice Plan and Helpful Tools
Most beginners can make a new yarn hold feel familiar in 3-5 days when they practice for 10-15 minutes at a time. Short sessions provide more useful feedback than a single long session that ends with fatigue and reinforces a clenched posture.
| Practice day | Exercise | Duration | Measurement |
|---|---|---|---|
| Day 1 | Chain with zig-zag hold | 10 minutes | Count uneven chain loops |
| Day 2 | Single crochet in rows | 10-15 minutes | Compare stitch width |
| Day 3 | Double crochet with repositioning | 15 minutes | Check loop height |
| Day 4 | Repeat with a different yarn | 10-15 minutes | Note friction change |
| Day 5 | Make a gauge swatch | 15-20 minutes | Compare stitches per 10 cm |
Before each session, open and close the fingers slowly five times, rotate the wrist five times in each direction, and pause if pain increases. Stretching should feel mild, not sharp. The 10-15 minute practice interval is a practical fatigue-control target, not a medical treatment or guarantee against repetitive strain injury.
| Option | Typical USD cost | Setup time | Best use | Limitation |
|---|---|---|---|---|
| Manual finger hold | $0 | 15-40 seconds | Any yarn and skill level | Requires practice |
| Yarn guide ring | $3-$10 | 1-2 minutes | Chafing or limited movement | May snag fine yarn |
| Ceramic yarn bowl | $20-$45 | 2 minutes | Preventing ball travel | Does not regulate fingers |
| Project bag with feed hole | $8-$25 | 2-5 minutes | Portable crochet | Opening may catch yarn |
| Finger sleeve | $2-$8 | 30 seconds | Localized friction | Can reduce tactile feedback |
A guide ring is an alternative, not an automatic improvement. Test it with scrap yarn because some metal rings create a sharper bend than the fingers and can split loosely spun strands.
Situational Adjustments
Hand position should change with the project, not remain fixed as a rule. Left-handed crocheters mirror the route, people with reduced mobility may need fewer contact points, and large fabric pieces require more support from the lap or table.
- For left-handed crochet: Mirror the finger route while keeping the yarn in the non-dominant hand.
- For arthritis or reduced flexion: Try the forefinger anchor, a soft yarn guide, or a palm-supported hold.
- For long rows: Lower the index finger periodically and move the stitch pinch closer to the hook.
- For color changes: Keep each strand in a separate loose route so one color does not tighten the other.
- For Tunisian crochet: Allow extra yarn slack because the forward pass holds many loops on the hook.
- For amigurumi: Use controlled friction, but do not compensate for tight fabric by crushing the yarn hand.
- For foundation chains: Use a relaxed hold because excessive friction makes the chain difficult to insert into later.
When the fabric becomes heavy, support it with the lap or a nearby surface. Holding several hundred grams of crochet fabric in the non-dominant hand can make the fingers appear to have a tension problem when the actual issue is load.
Expert insight: The correct hand position can change after turning a project. The new row pulls from a different angle, so a hold that worked for the first row may need a lower index finger or a new stitch-anchor point after the work rotates.
Honest Limits and Safety Signals
A yarn hold improves feed control, but it cannot correct an unsuitable hook, inconsistent stitch technique, damaged yarn, or a pattern with unclear gauge. It also cannot guarantee that a person will avoid hand pain, particularly during long sessions or when the wrist remains bent.
Stop crocheting when pain becomes sharp, persistent, or associated with numbness, tingling, weakness, swelling, or loss of grip. Rest the hand, change position, and seek qualified medical advice if symptoms continue or affect daily activities.
Do not apply thick lotion immediately before working with absorbent cotton or pale yarn. Residue can transfer to the fiber and alter how the strand slides. A clean, dry hand with trimmed nails usually gives more predictable contact than heavily moisturized skin.
Frequently Asked Questions About How to Hold Yarn for Crochet
Which hand holds the yarn during crochet?
The non-dominant hand normally regulates the working yarn, while the dominant hand holds the crochet hook. A right-handed crocheter commonly holds yarn in the left hand, and a left-handed crocheter commonly holds it in the right. Comfort and control matter more than strict tradition.
Should yarn go over or under the index finger?
Yarn usually passes over the index finger because the raised finger presents a stable path to the hook. The strand can pass under the finger if that route feels smoother, but the hand should still maintain gentle friction and a clear path from the ball to the active stitch.
Why does my yarn hand hurt when I crochet?
Yarn-hand pain usually follows excessive finger pressure, a sharply bent wrist, a rigid index finger, or a stitch anchor held too tightly. Loosen one contact point, support the fabric, and take a break after 10-15 minutes. Persistent numbness, tingling, or weakness warrants medical guidance.
Is a yarn tension ring better than using your fingers?
A yarn tension ring can reduce repeated finger movement and help with chafing, but it does not automatically create even stitches. Manual holds cost $0 and adapt to every yarn, while a typical ring costs $3-$10 and may snag textured or loosely spun fibers.
How can I hold yarn for crochet with small hands?
Use a short route with a loose forefinger anchor or a simple zig-zag hold. Keep the index finger close to the work, pinch the stitch base within 1-2 cm of the hook, and support bulky fabric on your lap so the hand does not carry its full weight.
Why are my crochet stitches different sizes in the same row?
Stitches vary when yarn feed, index-finger height, or hook-loop height changes during the row. Make a five-stitch test, watch the working loop rather than the finished fabric, and adjust one contact point. If the yarn supply catches at the ball, correct that obstruction first.
Conclusion
How to hold yarn for crochet is a matter of regulating friction while keeping the yarn hand relaxed and the stitch base stable. Start with a zig-zag hold for ordinary yarn, add friction for slick fibers, reduce friction for bulky or sticky yarn, and practice for 10-15 minutes across 3-5 days. The best hold is the one that delivers consistent loops without pain or force.