

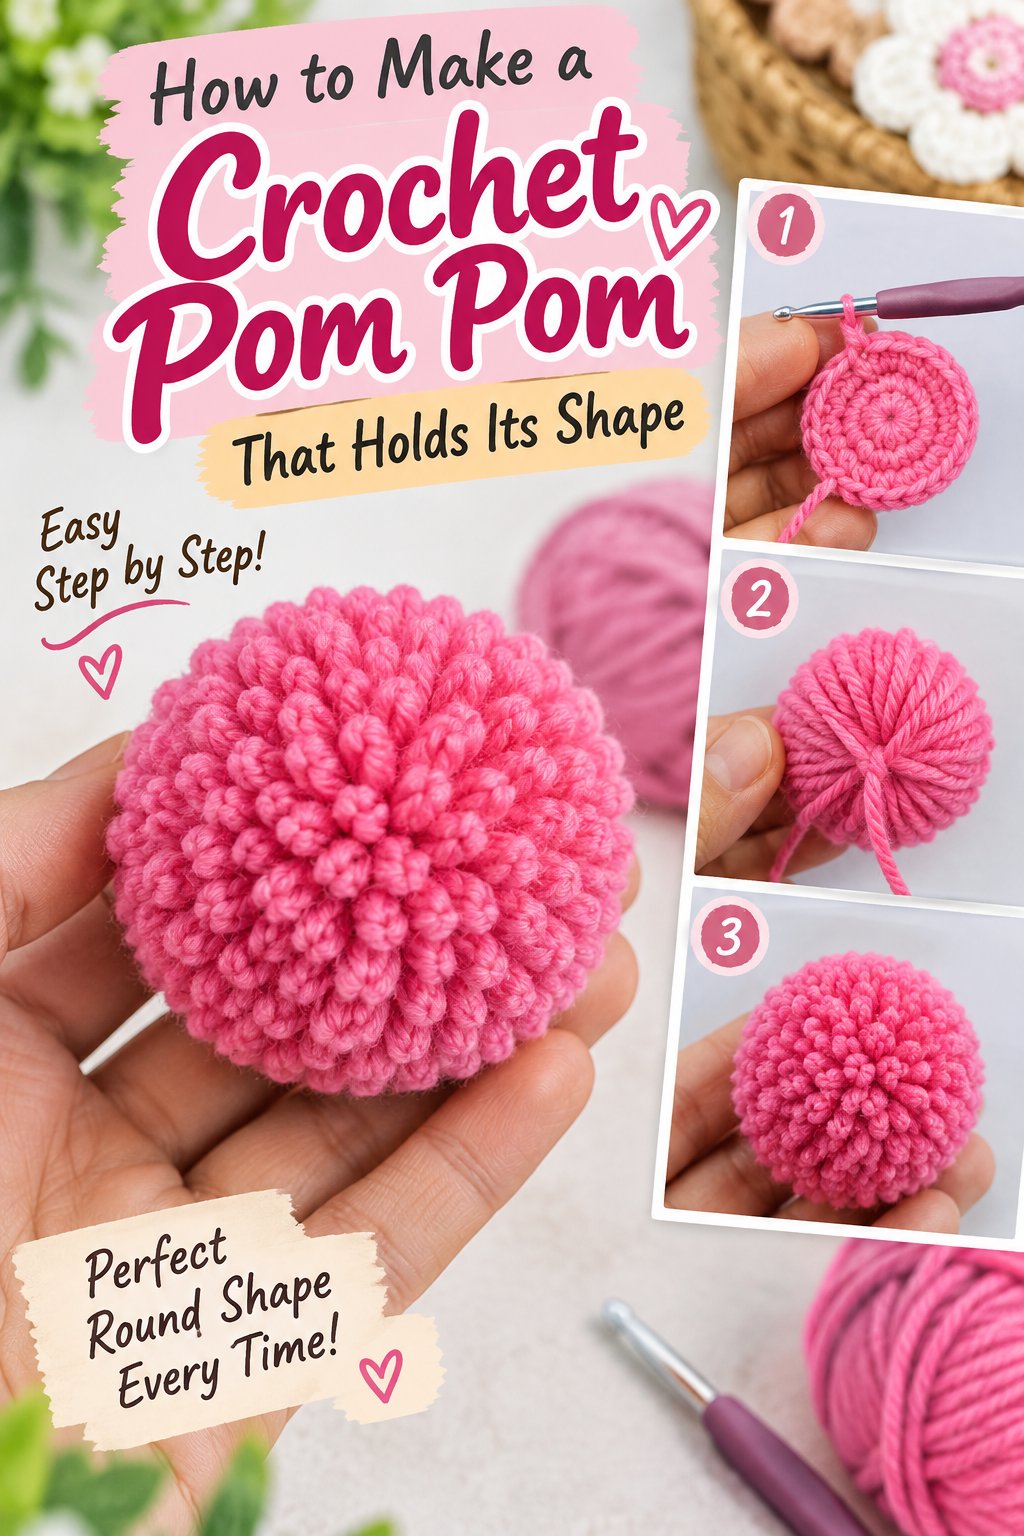
A crochet pom pom is a small, stuffed yarn sphere made with crochet stitches rather than wrapped and cut strands. A tight single-crochet fabric, rapid increases, several shaping rounds, and matching decreases create a durable ball for beanies, blankets, toys, bags, and home décor.
Key Facts
A medium crocheted pom pom usually takes 5-15 yards of yarn and 5-20 minutes to complete.
Use a hook 1-2 sizes smaller than the yarn label suggests, often 3.5 mm for worsted-weight yarn.
The widest round commonly contains 18-30 single crochet stitches.
Polyester fiberfill usually requires less than 0.1 ounces for a small or medium ball.
Firm stuffing creates a round shape, but excessive stuffing can stretch the fabric and expose the filling.
A sewn attachment is permanent; a button-and-cord attachment makes a hat topper removable for washing.
How Does a Crochet Pom Pom Work?
A crochet pom pom uses the same shaping principle as a small amigurumi sphere: increase from a closed center, crochet without increases to build the wall, stuff the cavity, and decrease until the opening closes. The method produces a fabric-covered ball with controlled density instead of loose cut yarn.
The center starts with a magic ring, which closes the first six single crochet stitches without leaving a visible hole. A chain-2 loop or a few chains joined with a slip stitch can replace the magic ring, although that substitute may leave a small opening.
A typical medium sphere follows this structure:
| Stage | Typical stitches | Purpose | Visual checkpoint |
|---|---|---|---|
| Center | 6 single crochet | Close the base | Flat disk, no large hole |
| Increase round 1 | 12 stitches | Double the circumference | Small flat circle |
| Increase round 2 | 18 stitches | Widen the sphere | Circle begins to cup |
| Wall rounds | 18 stitches for 2 rounds | Add height | Half-sphere shape |
| Decrease rounds | 12, then 6 stitches | Close the ball | Opening narrows evenly |
| Final closure | 0 visible stitches | Secure the tail | Firm, round surface |
The ball is worked continuously in a spiral unless you prefer joined rounds. Continuous rounds reduce a visible seam, while joined rounds make stitch counting easier for beginners. Place a locking stitch marker in the first stitch of every round because one missed increase changes the finished shape.
The Craft Yarn Council describes yarn weight as the thickness category used to match yarn, hook, and project requirements. For a pom pom, the label recommendation is only a starting point: dense fabric matters more than ordinary garment drape.
What Materials and Measurements Do You Need?
A crochet pom pom needs yarn, a small crochet hook, a stitch marker, a yarn needle, scissors, and lightweight stuffing. The precise quantities depend on the finished diameter, yarn weight, tension, and whether the ball is solid or loop-covered.
| Finished diameter | Yarn weight | Hook range | Widest round | Typical yarn |
|---|---|---|---|---|
| 1-1.5 inches | Sport or DK | 2.25-3.0 mm | 12-18 stitches | 3-7 yards |
| 2 inches | Worsted, category 4 | 3.0-3.5 mm | 18-24 stitches | 5-10 yards |
| 2.5-3 inches | Bulky, category 5 | 4.0-5.0 mm | 24-30 stitches | 10-15 yards |
| 3.5-4 inches | Super bulky, category 6 | 5.0-6.5 mm | 30-36 stitches | 15-25 yards |
These figures are typical planning ranges, not fixed pattern limits. A tightly tensioned crocheter may need more rounds to reach the same diameter, while a loose crocheter may reach it with fewer stitches but create gaps.
Choose a smooth, resilient yarn for a defined sphere. Acrylic and wool hold stuffing well, cotton creates a crisp surface, and chenille produces a soft result but can hide individual stitches. For a dark ball, use dark yarn scraps or color-matched fiberfill because white filling can show through even tiny gaps.
Use polyester fiberfill for the lightest result. Clean yarn scraps can work, but chopped fabric, rice, beans, and other heavy fillings make a hat topper sag and are unsuitable for items that may be washed or handled by children.
A smaller hook is the practical control point. If worsted yarn normally uses a 5.0 mm hook, begin with a 3.5 mm hook and move up only if the fabric becomes difficult to work.
How Large Should the Ball Be?
The finished ball should usually measure 20-35% of the hat’s crown width when used as a beanie topper. A 2-inch ball suits many adult hats, while a 3-inch ball gives a more visible decorative effect on a large winter cap.
| Project | Recommended diameter | Attachment concern | Suitable construction |
|---|---|---|---|
| Child’s beanie | 1.5-2.25 inches | Keep weight low | Single crochet sphere |
| Adult beanie | 2-3 inches | Reinforce crown | Single crochet sphere |
| Blanket corner | 1.5-2.5 inches | Secure through several stitches | Sphere or loop stitch |
| Tote bag or zipper pull | 1-1.5 inches | Prevent snagging | Firm, small sphere |
| Home décor garland | 1-2 inches | Match repeated sizes | Batch-made spheres |
The most common sizing mistake is increasing diameter without increasing wall rounds. That creates a flattened disk rather than a sphere. For every additional increase round, plan a corresponding plain round before beginning the decreases.
How to Make a Crochet Pom Pom Step by Step
The following pattern makes a compact ball approximately 2 inches across with worsted-weight yarn and a 3.5 mm hook. Exact dimensions vary with tension.
- Make the center. Form a magic ring and crochet 6 single crochet into it. Pull the yarn tail to close the ring, then place a marker in the first stitch.
- Increase to 12 stitches. Crochet 2 single crochet in every stitch around. Count before moving on.
- Increase to 18 stitches. Work 1 single crochet in the first stitch, then 2 single crochet in the next. Repeat around.
- Build the wall. Crochet 1 single crochet in each of the 18 stitches for two complete rounds. Keep the tension firm and even.
- Begin stuffing. Add a small amount of fiberfill through the opening. Push it toward the far side with the blunt end of the yarn needle, but do not fill the ball completely yet.
- Decrease to 12 stitches. Work 1 single crochet in the first stitch, then single crochet two stitches together. Repeat around.
- Finish the stuffing. Add fiberfill until the sphere feels springy and the surface is smooth. The stitches should remain closed without stretching into visible holes.
- Decrease to 6 stitches. Single crochet two stitches together around. Stop if the opening is too tight to add stuffing, because an empty center cannot be corrected easily afterward.
- Close the opening. Cut the yarn, leaving a 10-12 inch tail. Thread the tail through the front loops of the remaining stitches, pull closed, and weave through the center.
- Shape and attach. Roll the ball between your palms, distribute the filling with your fingers, and use the remaining tail to sew it to the project.
The increases and decreases should align evenly around the sphere. If the ball develops six sharp ridges, your tension may be too tight at the increase points; rotate the increase positions in later rounds or use an invisible increase.
Magic Ring Alternative
To avoid a magic ring, chain 3-4 stitches and join them with a slip stitch to form a loop. Crochet 6 single crochet into the loop, pull the starting tail firmly, and continue the pattern. This method is easier for some beginners but may leave a small central bump.
Invisible Decreases
An invisible decrease uses the front loops of two adjacent stitches rather than inserting the hook through both complete stitches. It reduces visible dimpling and gives the final ball a smoother surface, especially with cotton or tightly twisted acrylic yarn.
Which Type Should You Make?
A single-crochet sphere is the best general-purpose option because its compact fabric resists shedding, catches stuffing securely, and works on hats or blankets. Loop-stitch balls create more surface fuzz, while bobble and popcorn clusters make tiny accents rather than full stuffed spheres.
| Type | Construction | Typical size | Best use | Main limitation |
|---|---|---|---|---|
| Single crochet sphere | Increase, plain rounds, decrease | 1.5-4 inches | Beanies and toys | Less fluffy than cut yarn |
| Loop stitch ball | Elongated loops over a sphere | 2-4 inches | Shaggy décor | Loops can snag |
| Bobble cluster | Grouped double crochet stitches | 0.5-1 inch | Borders and motifs | Cannot hold much stuffing |
| Popcorn cluster | Completed raised stitch groups | 0.5-1 inch | Blanket edges | Not a separate round ball |
| Double crochet sphere | Taller, looser stitches | 2-4 inches | Fast decorative pieces | Filling may show |
A loop stitch surface works well when the goal is a fluffy appearance without trimming dozens of strands. Keep the loops consistent, then brush them lightly with a yarn needle if you want more separation. Do not use this style where repeated snagging is likely.
Bobble and popcorn stitches are often called pom poms in pattern descriptions, but they are attached surface clusters, not stuffed spherical accessories. Check the pattern terminology before substituting one for the other.
How Long Does It Take and What Does It Cost?
A small crocheted ball generally takes 5-8 minutes for an experienced maker and 15-20 minutes for a beginner who is counting and shaping carefully. Typical material cost is $0.05-$0.20 when using leftover yarn and shared stuffing, although a single purchased skein costs more than the portion consumed.
| Production situation | Time per ball | Yarn consumed | Typical material cost |
|---|---|---|---|
| Experienced maker, 2-inch sphere | 5-8 minutes | 5-10 yards | $0.05-$0.20 |
| Beginner, 2-inch sphere | 15-20 minutes | 5-10 yards | $0.05-$0.20 |
| Three-inch bulky sphere | 8-15 minutes | 10-15 yards | $0.10-$0.35 |
| Ten-ball batch after setup | 4-7 minutes each | 50-100 yards total | $0.50-$2.00 total |
The cost calculation assumes a $4-$8 skein containing roughly 180-364 yards and inexpensive polyester filling. A specialty wool, hand-dyed yarn, or manufactured faux-fur attachment can raise the per-piece cost substantially.
Batch-making improves speed because the same hook, stitch count, and stuffing routine are repeated. Make all center rounds first, then all wall rounds, rather than completing each ball from start to finish.
How Does a Crochet Pom Pom Compare With Alternatives?
A crocheted sphere is the strongest choice when washability, low shedding, and shape retention matter more than maximum fluff. A traditional cut-yarn pom pom is airier and fuller, while faux fur gives a luxury texture but often needs to be removed before laundering.
| Feature | Crochet sphere | Cut-yarn pom pom | Faux-fur pom pom |
|---|---|---|---|
| Surface texture | Firm textile | Fluffy and airy | Silky or shaggy |
| Typical making time | 5-20 minutes | 10-25 minutes | 1-3 minutes to attach |
| Yarn or material waste | 5-15 yards, little waste | 20-50 yards, trimming waste | No making waste |
| Washability | Usually high | Moderate to low | Often requires removal |
| Shape control | High through stuffing | Depends on winding | Determined by backing |
| Shedding risk | Low | Moderate | Moderate |
| Best attachment | Sewn tail or cord | Tie or sewn center | Snap, loop, or button |
A cut-yarn ball remains the better choice for a classic round, cloudlike topper. The crocheted version is better for children’s garments, frequently washed hats, and projects where loose fibers would be irritating.
No crocheted pom pom is literally indestructible. A pet can pull the attachment loose, an exposed loop can snag, and repeated hot drying can shrink wool or distort synthetic fibers. The advantage is structural: the surface consists of interlocked stitches rather than individually cut strands.
How Should You Attach the Finished Ball?
Sew a crocheted pom pom through the hat’s crown stitches for a permanent attachment, or use two yarn tails and a small interior button when the accessory must be removable. A secure attachment distributes force across several stitches instead of relying on one loop.
Permanent Hat Attachment
Leave a 10-12 inch closing tail. Thread it through the ball and then through at least four crown stitches, moving from the outside to the inside and back again. Tie two firm knots inside the hat, weave the ends through nearby stitches, and trim only after testing the connection with several gentle pulls.
Removable Button Attachment
Sew a 0.5-0.75 inch flat plastic button inside the hat crown. Pass the pom pom’s two tails through the crown, thread them through the button, and tie a bow or secure knot. The topper can then be detached before washing.
Avoid a hard button on the outside of a baby or toddler hat. Keep small detachable components away from children who may place them in their mouths, and follow the safety requirements relevant to the garment’s intended user.
Blanket and Home Décor Attachment
For a blanket corner, pass the tail through the corner space and the adjacent two or three stitches. Tie on the wrong side, then bury the tail inside the ball and blanket edging. A single corner loop is weak because blanket movement creates repeated pulling in one direction.
What Goes Wrong and How Do You Fix It?
Most misshapen crochet balls result from loose tension, inaccurate stitch counts, uneven stuffing, or closing the opening before the filling reaches the far side. The fastest correction is usually structural, not cosmetic: count the widest round and redistribute the fiberfill before tightening the final stitches.
| Symptom | Likely cause | Correction | Prevention |
|---|---|---|---|
| White filling shows | Hook too large or tension too loose | Remove some filling or remake with smaller hook | Use 1-2 hook sizes below label |
| Ball looks flat | Too few wall rounds | Add one plain round in the pattern | Match plain rounds to increase rounds |
| Surface has dents | Uneven stuffing | Open final stitches and refill gradually | Add filling in small pinches |
| Ball feels floppy | Under-stuffed or thin fabric | Add lightweight fiberfill | Test compression before closing |
| Ball has ridges | Increases align tightly | Rotate increase points | Use staggered increases |
| Opening puckers | Tail pulled too sharply | Loosen and reshape before weaving | Close gradually in two passes |
| Hat droops | Attachment or filling is too heavy | Remove dense scraps and reinforce crown | Use polyester fiberfill |
Expert insight: stuffing should be added in several small portions, not one compressed wad. A large wad forms a hard center while the outer wall remains empty, so the ball feels firm but still looks lumpy.
Expert insight: the correct hook is determined by the stuffing pressure, not by the yarn label alone. If the filling is visible when the ball is gently squeezed, change the hook or yarn before adding more stuffing.
Expert insight: a slightly underfilled sphere can often be corrected, but an overfilled sphere permanently distorts the stitches. Stop when the surface is smooth and springy, not when the cavity is packed as tightly as possible.
How Do You Wash and Maintain It?
A crocheted ball can usually be washed with its project when the yarn, filling, and attachment are washable. Acrylic and cotton tolerate ordinary gentle laundering better than wool, while high heat can flatten fiberfill, tighten wool, or distort a heavily stuffed shape.
| Material or condition | Washing approach | Drying approach | Main risk |
|---|---|---|---|
| Acrylic yarn, polyester fill | Cool gentle cycle | Low heat or air dry | Heat distortion |
| Cotton yarn, polyester fill | Cool or warm gentle cycle | Air dry preferred | Slow drying inside |
| Wool yarn | Hand wash or wool cycle | Dry flat | Felting and shrinkage |
| Faux fur attachment | Remove first | Air dry separately | Matting and backing damage |
| Heavy embellishment | Hand wash | Reshape while damp | Stretching at attachment |
Press water out with a towel rather than twisting the ball. Reshape the sphere while damp, then allow the project to dry completely so moisture does not remain inside the stuffing.
If the pom pom becomes lumpy after washing, massage the filling through the fabric and roll the ball gently between your hands. Do not use a hot iron or direct high heat.
Frequently Asked Questions About How to Make a Crochet Pom Pom
Can I make a crocheted pom pom without stuffing?
A small bobble or popcorn cluster needs no stuffing, but a separate crocheted sphere does. Without fiberfill or yarn scraps, the walls collapse and the result becomes a hollow, wrinkled shell. For a lightweight alternative, use clean acrylic yarn scraps packed loosely enough to preserve a round shape.
Why is my crochet ball not perfectly round?
A crocheted ball becomes uneven when the increase count, wall length, or stuffing distribution is inconsistent. Count the widest round, check that both halves contain comparable decreases, and add filling in small amounts while rotating the sphere. One extra plain round often corrects a flattened shape.
Can I use bulky or chenille yarn?
Bulky yarn works well with a 4.0-5.0 mm hook and a widest round of about 24-30 stitches. Chenille creates a soft, plush surface, but its fuzzy pile makes stitch counting difficult and can hide gaps. Use a stitch marker and check the shape by touch as you work.
How do I make the accessory extra fluffy?
Use loop stitch over a tightly crocheted base, or choose a fuzzy yarn such as brushed acrylic or chenille. A standard single-crochet sphere will remain relatively smooth and structured. Do not loosen the base fabric to create fluff, because loose stitches expose filling and weaken the shape.
Is a crocheted ball safe for a baby hat?
A firmly sewn ball without detachable buttons, beads, bells, or plastic parts is generally the safer construction. Inspect the attachment regularly for loose strands and follow the applicable child-product safety guidance. A removable topper with a button is unsuitable for unsupervised infants and toddlers.
How do I make several balls the same size?
Use one hook, the same yarn, an identical stitch count, and a kitchen scale if the pieces must match closely. Weigh the first finished ball, then use its yarn and filling amounts as a batch reference. Stuff every sphere to the same springiness before closing.
Conclusion
To make a crochet pom pom, build a tight single-crochet sphere from a magic ring, increase to 18-30 stitches, work enough plain rounds to form the wall, stuff gradually, and decrease until the opening closes. Use 5-15 yards of yarn, a smaller hook, and a reinforced attachment for a durable result.