A mini bouquet keychain is a charming, petite project that blends simple floral motifs into a decorative accessory perfect for gifts, bags, or everyday use. Beginners love this pattern because it introduces small-scale flower construction, easy assembly, and basic finishing techniques without overwhelming steps. Each tiny bloom has its own structure, allowing you to explore how yarn shapes different petals, textures, and stems. With a handful of materials and a bit of practice, you can create a miniature bouquet that looks polished, playful, and beautifully handmade.
This guide breaks the project down into approachable sections, walking you through materials, terminology, and the general process behind each type of flower included in the bouquet. You will gain a clear understanding of how the parts come together, how stems support the blossoms, and how the final arrangement becomes a sturdy little keychain you can carry anywhere.
Materials Needed
The items below are based on what is shown and used in the video transcript:
- Regular acrylic or cotton yarn in several colors (yellow, white, brown, purple, green, red or other floral shades)
- A small crochet hook appropriate for thin or lightweight yarn
- Scissors
- A metal keychain ring
- A darning needle for weaving ends
- A toothpick for helping arrange flower placement
- A small amount of double-sided tape (optional for stability)
These basic tools allow you to craft multiple tiny flowers, shape stems, and secure the whole bouquet neatly.
Abbreviations
US crochet terminology is referenced throughout.
- MR – Magic ring
- CH – Chain
- SC – Single crochet
- HDC – Half double crochet
- DC – Double crochet
- SLST – Slip stitch
- YO – Yarn over
Only essential terms are included to support beginners without overwhelming them.
Forming the Base Mini Daisy
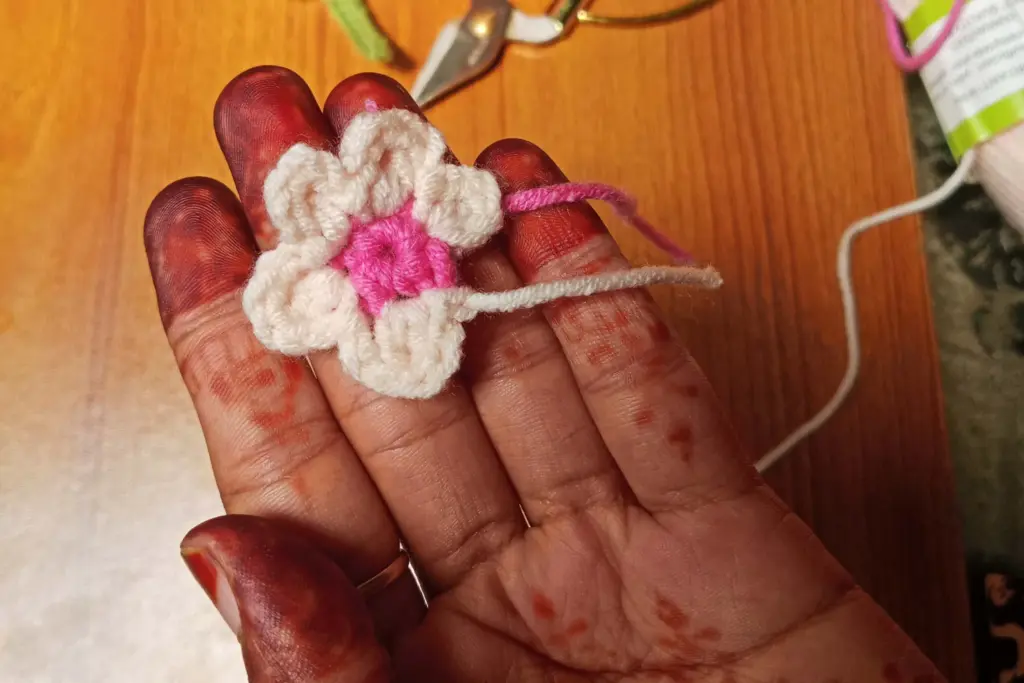
The mini daisy serves as one of the foundational flowers in the bouquet. The process begins with creating a circular base, giving the flower a small, structured center that supports its petals. After establishing the initial shape, a contrasting yarn is introduced to form the outer petals. The petals grow outward by alternating short and tall stitches, allowing each one to curve naturally and take on a soft, rounded appearance. Because the flower is small, it maintains its shape easily and works well in clusters.
Once all petals are complete, the ends are hidden on the inner side so the front remains clean. This design is simple for beginners yet visually detailed enough to stand out when grouped with other mini blossoms.
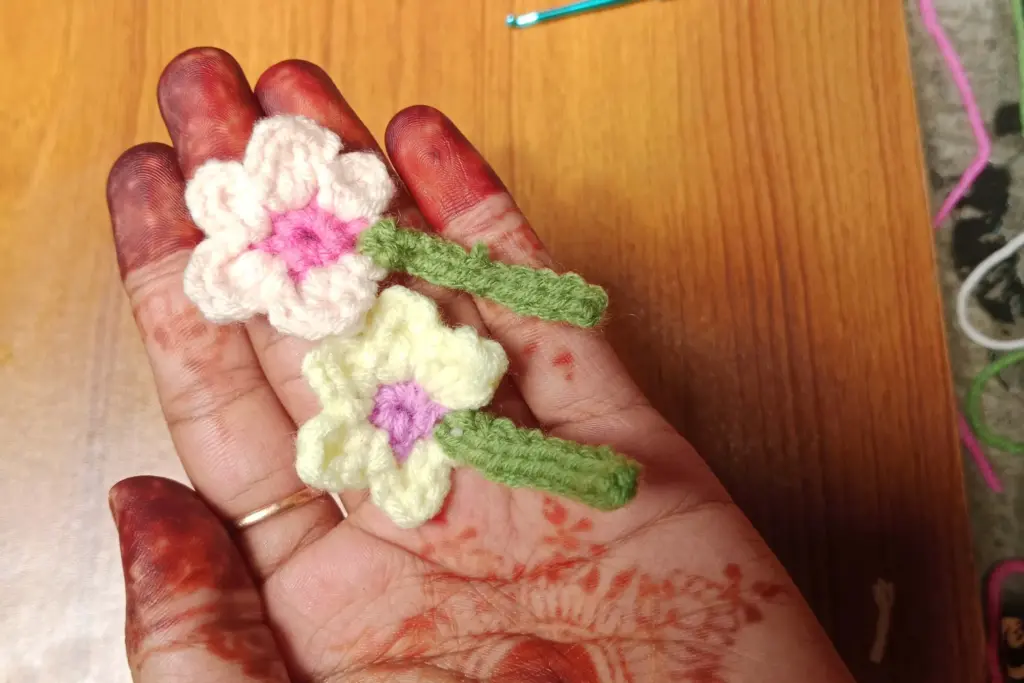
Creating the Stem of Each Daisy
Every flower needs a supportive stem to keep the arrangement upright. For the daisy, the stem begins with a narrow foundation created from a series of folded stitches. It forms a thin, flexible strip that mimics the look of a real stem without adding bulk. Working on the back side of the foundation gives the stem a tidy, uniform texture that pairs well with delicate petals.
The stem is shaped to stay firm while still allowing you to position the flowers easily when arranging the bouquet. Once finished, the excess yarn is secured and hidden for a neat final look.
Building the Center for the Mini Sunflower
The sunflower starts with a darker center that forms a slightly thicker disc than the daisy’s middle. This central portion uses dense stitches that create a textured look, similar to actual sunflower seeds. The structure holds its shape well and becomes a solid base for adding bright, decorative petals.
After forming this circular middle section, a new yarn is added for the petals. The color change is done directly at the edge so the petals radiate outward in even segments.
Adding Sunflower Petals
Sunflower petals differ from daisy petals by being narrow, pointed, and consistent in height. They are formed by using taller stitches that rise from the center edge and then return back down into the next space. Repeating this around the entire disc results in a uniform ring of petals with a starburst effect.
Because each petal is constructed individually, beginners can work slowly and focus on developing control and tension. The petals create a lively, cheerful appearance that balances beautifully with the softer textures of the other flowers.
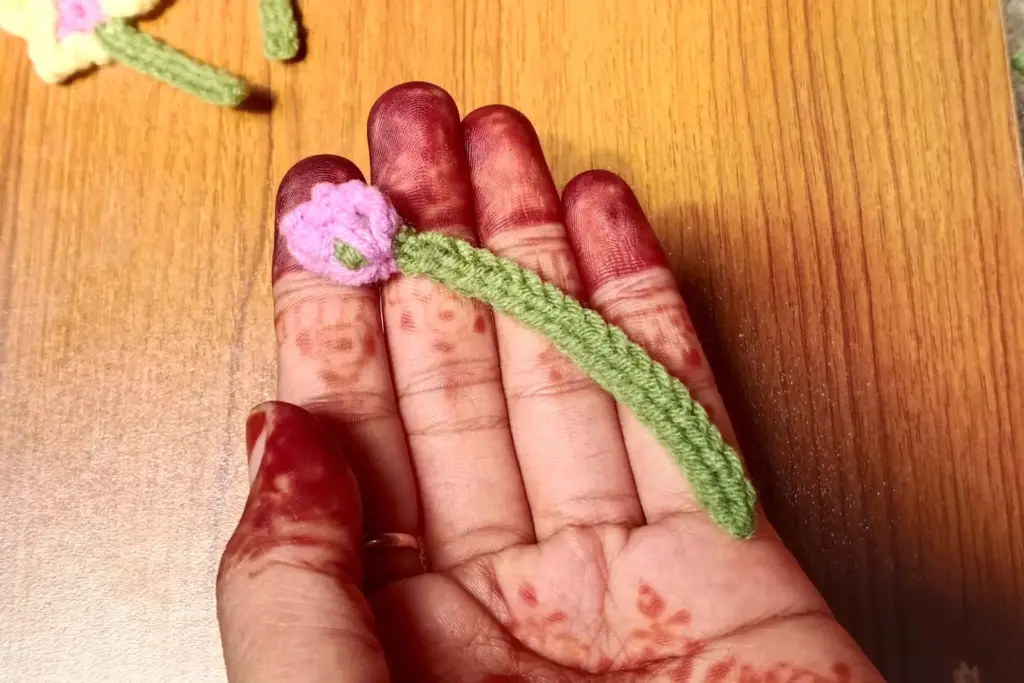
Shaping the Lavender Stalk
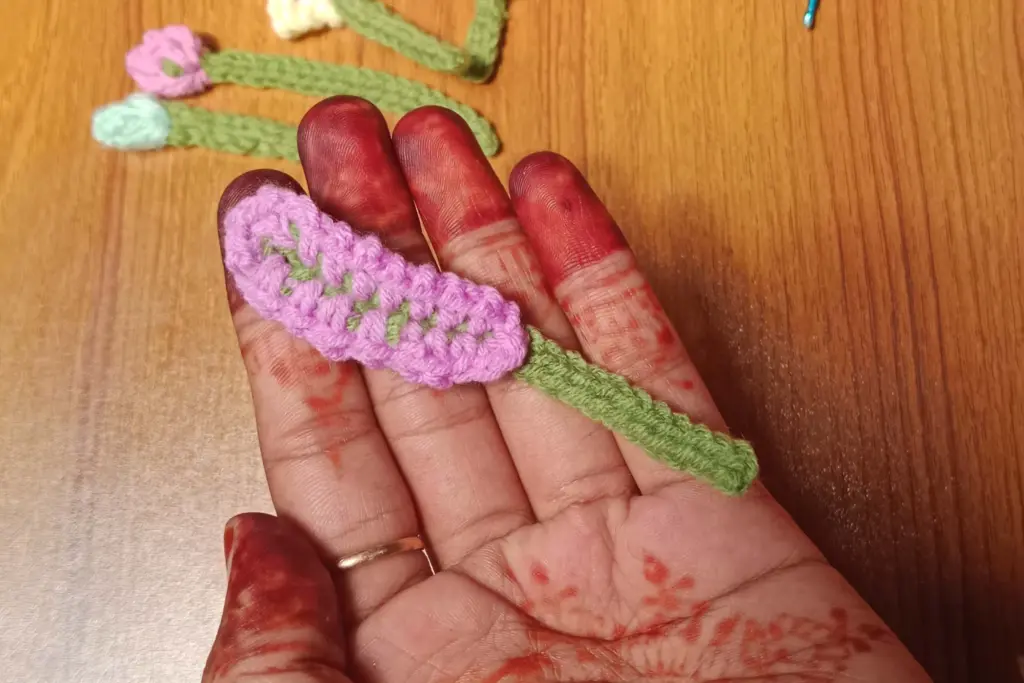
Lavender adds height and visual contrast to the mini bouquet. Its structure begins with a slim, elongated foundation that forms the stem. This stem is longer than the stems of the other flowers, which gives the bouquet a more natural layered effect.
Small decorative bumps are added across the length to resemble individual lavender buds. These tiny clusters are attached on both sides of the stem, forming a soft, textured braid-like shape. The resulting piece is flexible, light, and visually distinct from the round blossoms in the bouquet.
Attaching the Lavender to the Keychain
Once the lavender stalk is shaped, it becomes the first piece to join directly with the keychain ring. The top of the stem is slightly loosened so it can loop through the ring, and the yarn at the end is pulled securely to anchor it in place. Adding a slip-style locking stitch ensures the lavender does not shift upward or detach during use.
This attachment acts as a structural anchor for the entire bouquet. Since lavender is long and flexible, placing it at the back of the arrangement creates a layered silhouette while keeping the keychain neatly balanced.
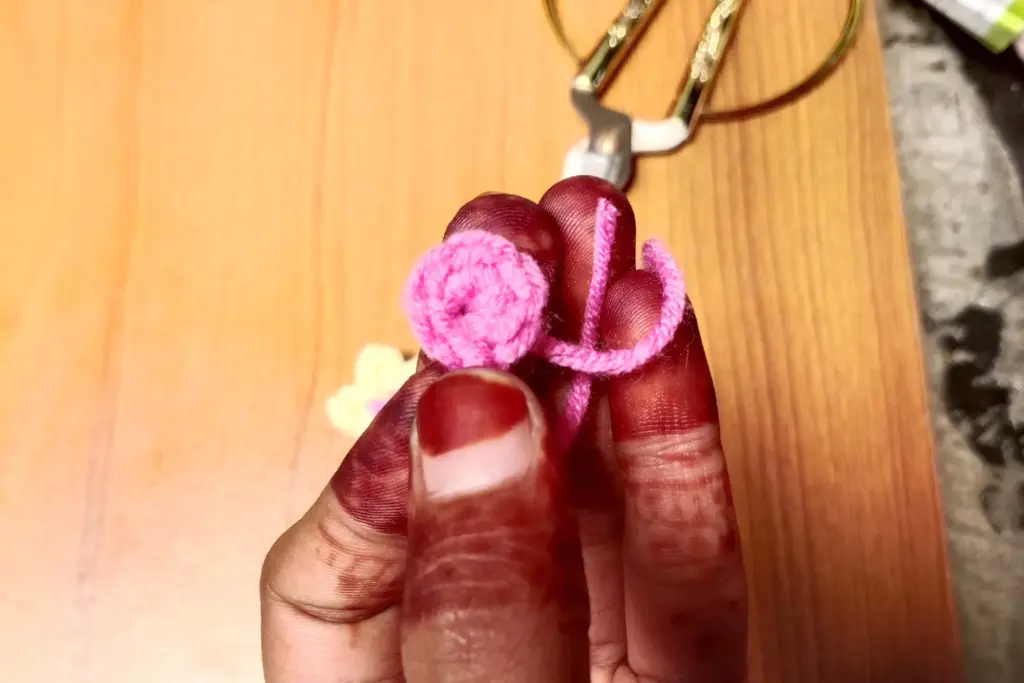
Forming the Tulip or Rose Shape
The tulip or rose variation begins with a short strip that rolls naturally when manipulated. After preparing its base strip, a new color is introduced at one end to form a cluster of tightly grouped stitches. These stitches form a curved petal edge that wraps inward when folded.
Once the petal cluster is complete, the strip is curled into a spiral, creating a compact bloom. Securing the inner edge keeps the flower from unfolding. This simple rolling technique gives the tulip or rose a realistic layered appearance without complex shaping.
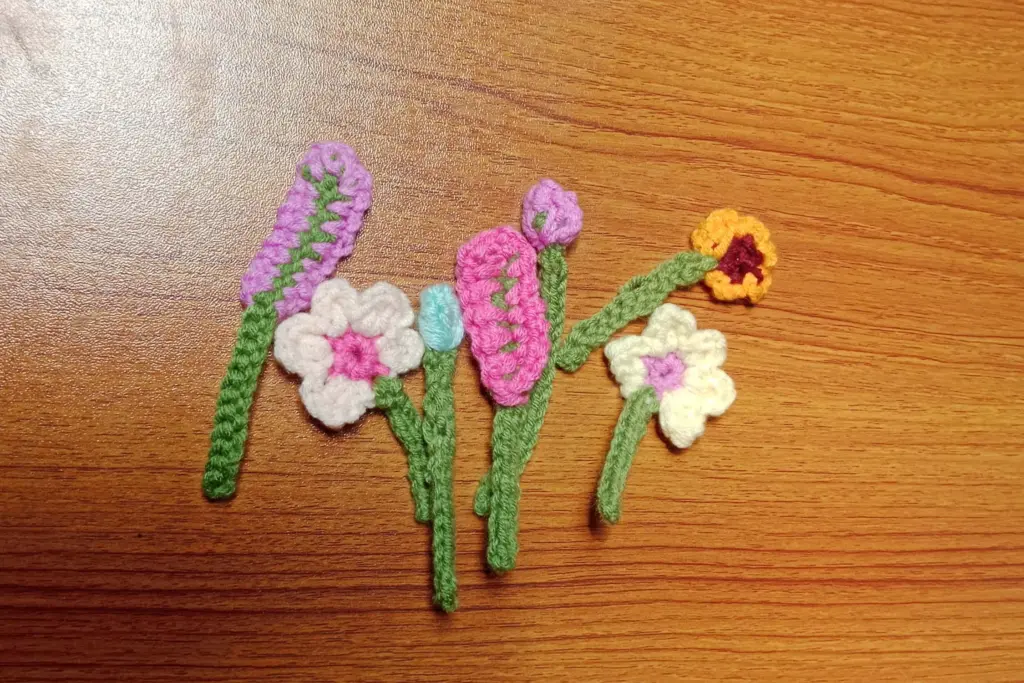
Arranging the Bouquet
Once all flowers are crafted, arranging them into a bouquet is the key step that gives the project its charm. A toothpick is used as a temporary support to help position stems tightly together. Taller pieces like lavender are placed in the back, while rounded flowers such as daisies and sunflowers are positioned in the front.
To prevent the front flowers from bending forward, a small piece of double-sided tape can be added to the back of the petals. This creates extra stability, ensuring the bouquet faces outward when carried.
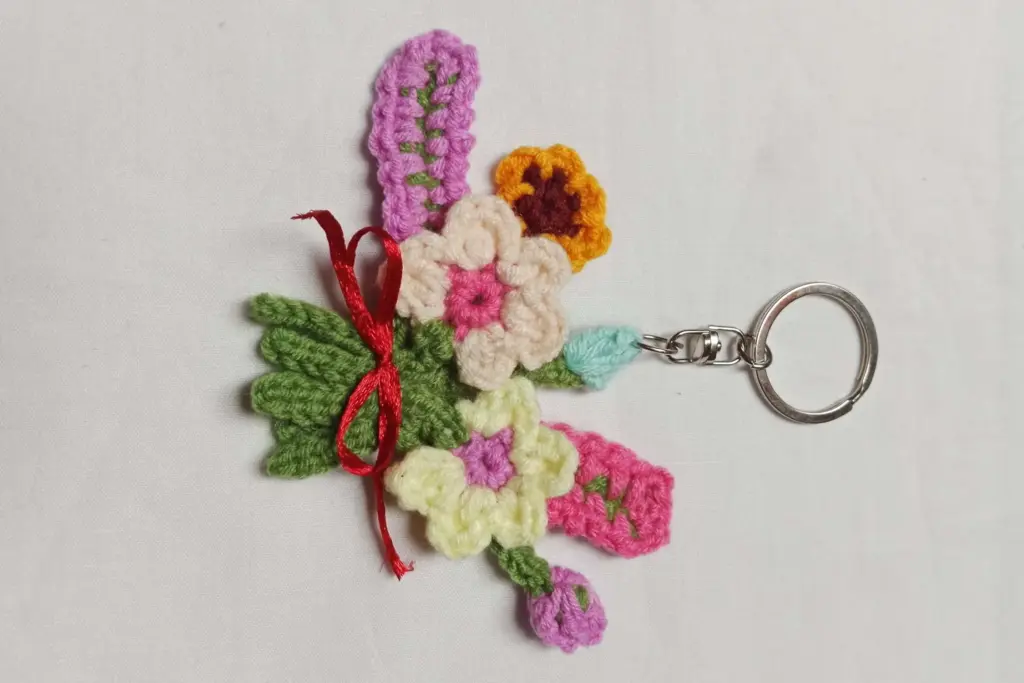
Securing the Bouquet
With the arrangement set, a durable thread is wrapped tightly around the base of the stems to hold everything together. This binding creates a clean bouquet shape and prevents the flowers from shifting over time. Once fully secured, the temporary toothpick is removed and the bouquet settles naturally into its final form.
The keychain ring stays attached at the top, completing the transformation from standalone flowers to a miniature portable bouquet.
Yarn and Flower Comparison Table
Below is a detailed reference table to help beginners understand the role of each yarn color and flower element within the bouquet. This helps when choosing substitutes or planning variations.
| Flower Type | Center Structure | Petal Style & Height | Stem Style | Color Used in Video | Difficulty Level | Notes |
|---|---|---|---|---|---|---|
| Daisy | Small round base | Soft rounded petals | Short narrow stem | Yellow + white | Very easy | Great first flower for beginners |
| Sunflower | Thick textured center | Narrow pointed petals | Short narrow stem | Brown + yellow | Easy | Slightly denser middle than daisy |
| Lavender | Thin elongated strip | Small clustered bumps | Long flexible stem | Green + purple | Easy | Adds height and texture contrast |
| Tulip/Rose | Foldable strip base | Rolled layered petals | Short stem | Green + red | Moderate | Rolled form gives realistic bloom |
| Bouquet Base | — | Mixed arrangement | Bound with thread | Neutral thread | Very easy | Structural step for final assembly |
Tips for Beginners
- Choose yarn shades that contrast well so each flower stands out.
- Keep your tension gentle; mini pieces curl or distort easily if stitched too tight.
- Weave ends inside the flower bodies to avoid bulk at the bouquet base.
- If arranging feels tricky, take photos of different layouts before tying the bouquet.
- Start by practicing one flower type several times to gain confidence.
These practices help produce a clean, well-shaped mini bouquet even if it’s your first time crocheting small motifs.
Summary
A mini bouquet keychain is an inviting project for beginners who want to explore different flower textures without committing to a large pattern. By learning to create small floral elements like daisies, sunflowers, lavender sprigs, and tulip-style blooms, you build skills in shaping, color changes, stem construction, and basic assembly. Arranging the finished flowers into a tiny bouquet creates a satisfying final piece that makes a thoughtful handmade gift or personal accessory.
With simple materials, approachable techniques, and plenty of room for color play, this project offers a perfect introduction to creative crochet craftwork.