

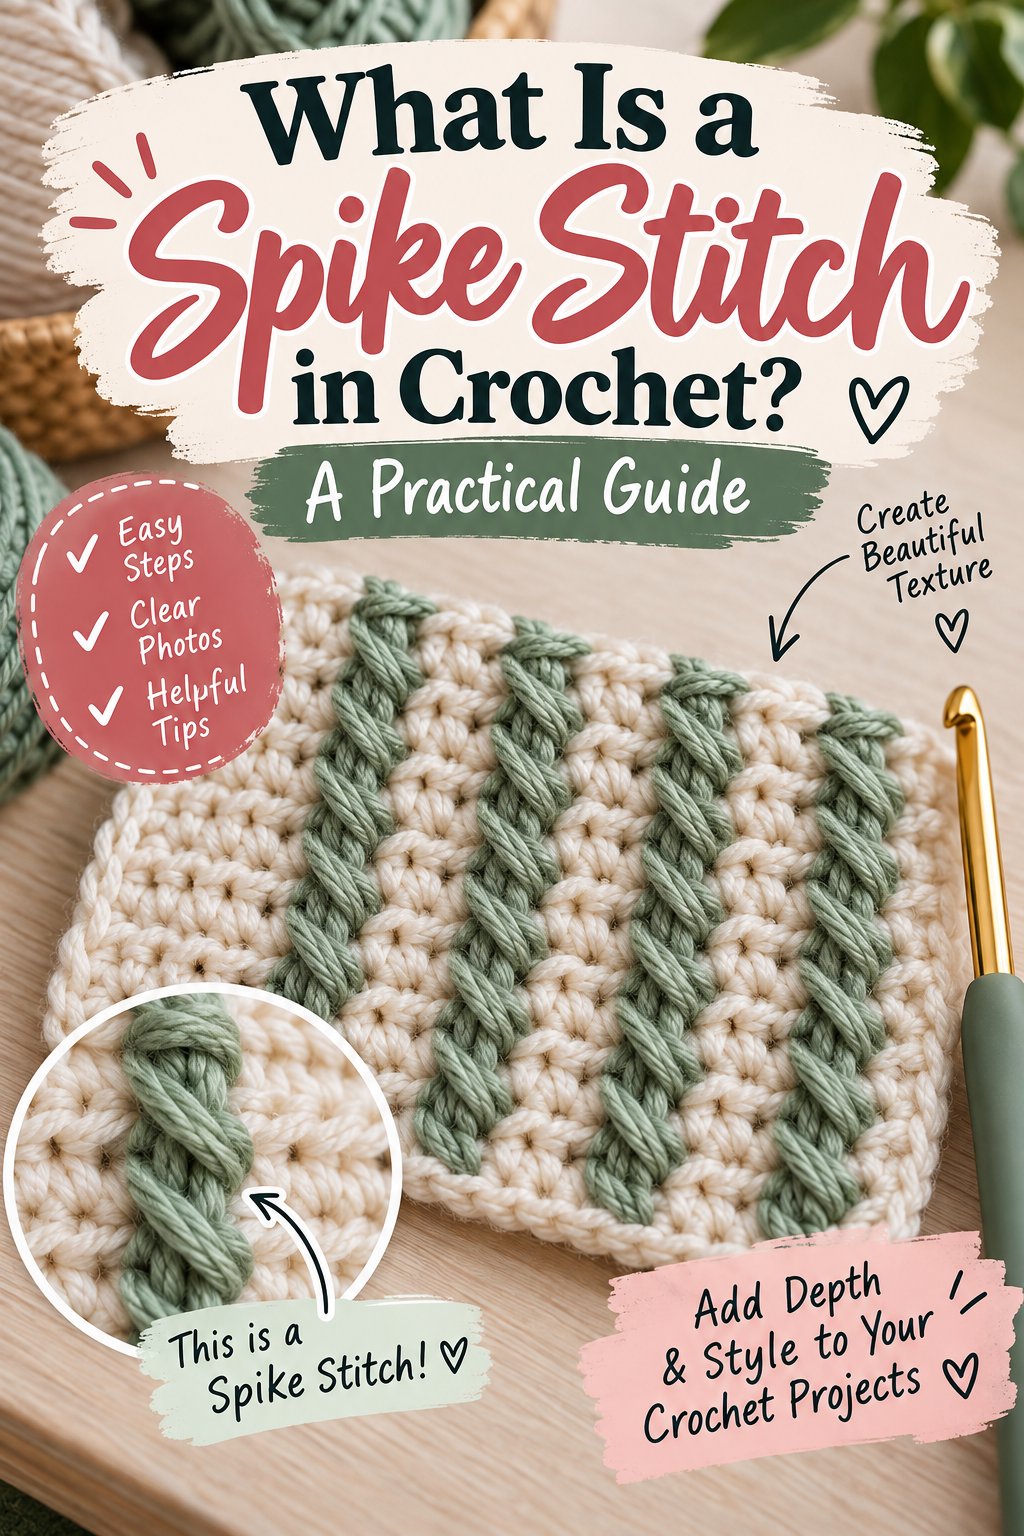
A spike stitch in crochet is a decorative stitch made by inserting the hook into a lower row and pulling up an elongated loop to the height of the current row. The resulting vertical strand covers part of the fabric above it, creating colorwork, geometric lines, and a denser surface without wrapping around a stitch post.
Key Facts About Spike Stitches
- A spike stitch is usually a single crochet worked into a row below the active row.
- The hook may enter one, two, or more rows down, depending on the pattern.
- The elongated loop must reach the current working height before the stitch is completed.
- Spike stitches become most visible when the lower-row yarn contrasts with the surrounding fabric.
- They usually consume more yarn and take longer than ordinary stitches.
- A spike stitch is different from a front-post stitch because the hook enters a lower stitch or space rather than wrapping around the stitch post.
The abbreviation is not completely standardized. Many designers use sp, sp st, or a written instruction such as “sc in row below,” so the pattern’s abbreviation key takes priority over a general glossary.
A spike stitch does not create a separate raised ridge in the same way a post stitch does. Its defining action is vertical: the crocheter reaches downward, draws up yarn, and completes the stitch at the height of the active row.
What Is a Spike Stitch in Crochet?
A spike stitch in crochet is a standard crochet stitch whose insertion point has been moved downward into an earlier row. The stitch remains a single crochet, half double crochet, or another named stitch, but its drawn-up loop travels farther before completion, producing an elongated mark on the fabric.
The simplest version uses single crochet. If the current row is being worked across the top of the fabric, the hook passes through a stitch or designated space one row below the previous row. The crocheter draws up a loop, raises it until it aligns with the current row, then yarns over and pulls through both loops.
The lower insertion point determines the spike’s length. A one-row drop creates a short accent, while a two- or three-row drop creates a longer vertical line. The fabric does not gain extra height from the spike because the loop is pulled up rather than left short.
A spike is therefore a drop-down colorwork or texture technique, not a separate family of stitches with one universal formula. Pattern writers can combine it with single crochet, half double crochet, double crochet, skipped stitches, stripes, and charted motifs.
How Does the Stitch Work?
The stitch works by replacing a normal insertion point with a lower one while preserving the height of the active row. Correct loop height controls the fabric’s tension, alignment, and shape.
For example, imagine a fabric with a current single-crochet row and a target spike one row below. The spike is worked into the corresponding lower-row stitch, not automatically into the stitch directly beneath the hook. The crocheter then draws the loop upward until it reaches the top edge of the current row.
Single Crochet Spike Stitch Method
- Locate the target row. Count from the active row downward according to the pattern. Confirm whether “one row below” means the immediately exposed row or the row beneath the previous working row.
- Find the insertion point. Insert into the top of the selected lower-row stitch unless the pattern specifically names a space, front loop, or back loop.
- Draw up yarn. Yarn over with the working yarn and pull a loop through the lower stitch.
- Match the height. Raise the loop to the top of the current row. Do not pull it tight against the lower row.
- Complete the stitch. Yarn over and pull through both loops for a single crochet spike.
- Check the next stitch. Make sure the surrounding stitches remain at the same height and that the spike has not consumed an unplanned stitch.
A half double crochet or double crochet spike follows the same insertion principle, but the completion steps change. A pattern should specify both the stitch type and the target row because “spike stitch” alone does not always identify the complete action.
How Many Rows Down Should the Hook Go?
The correct depth is the number stated by the pattern, not a fixed rule. A common beginner exercise uses a target one row below the current row, while decorative charts may use two, three, or four rows below to create stepped motifs.
| Pattern wording | Typical insertion depth | Visual result | Main risk |
|---|---|---|---|
| Spike in row below | 1 row below active row | Short vertical dash | Loop can disappear in dense fabric |
| Long spike | 2 rows below active row | Noticeable vertical bar | Tight loop can pull fabric downward |
| Extended spike | 3 rows below active row | Tall geometric accent | Wrong counting distorts the motif |
| Spike to foundation row | 4 or more rows below | Dramatic elongated line | Lower stitch may be difficult to identify |
Row terminology varies because crocheters count the active row differently. Before beginning a motif, make a small sample and label each completed row with a removable marker or sticky note.
What Are the Main Types?
Spike stitches are classified by the depth of the insertion and the stitch used to complete them. The labels SP-1, SP-2, and SP-3 are useful working descriptions, but they are not universal standards across all publishers.
- Short spike: A shallow drop that creates a subtle line.
- Single crochet spike: A lower insertion followed by single crochet completion.
- Double crochet spike: A lower insertion followed by double crochet completion.
- Long or triple-row spike: A deeper insertion that produces a taller stripe.
- Clustered spikes: Several lower-row stitches arranged into a motif.
- Stepped spikes: Spike depths increase and decrease to form triangles or diamonds.
Spike Patterns and Motifs
An A-line or pyramid motif may use a sequence such as SP-1, SP-2, SP-3, SP-2, SP-1. The center reaches farthest downward, while the shorter outer stitches form sloping sides.
A spike griddle alternates ordinary stitches with lower-row stitches. In a two-color version, the contrast between the horizontal ground fabric and the vertical accents becomes easy to read.
A designer can also place spikes in columns, stagger them like brickwork, or combine them with skipped stitches. The pattern repeat must account for the base stitch count, the turning chain, and any edge stitches that keep the motif centered.
| Structure | Example repeat | Typical width | Best visual effect |
|---|---|---|---|
| Vertical column | 1 spike every 4 stitches | 4 stitches | Pinstripes and borders |
| Griddle | SC, spike, SC, spike | 4 stitches | Regular textured grid |
| Pyramid | SP-1, SP-2, SP-3, SP-2, SP-1 | 5 stitches | Triangle or arrow motif |
| Staggered bars | Spike positions shift 2 stitches each row | 6-8 stitches | Brick and woven effects |
How Do Color Changes Affect Visibility?
Color contrast determines whether a spike reads as a graphic line or blends into the fabric. A spike made with the same color as its surrounding rows may add subtle texture, but its vertical shape can become difficult to see.
For a strong stripe, change to the accent color before working the row that contains the spike, or carry the accent yarn along the wrong side if the pattern uses frequent repeats. Changing color after the spike is completed places the new color in the wrong stitch and can hide the intended vertical segment.
The safest method is to complete the preceding stitch with the new color when the pattern calls for it. In single crochet, make the final yarn over of the preceding stitch with the next color, then work the spike using that yarn.
| Color arrangement | Visibility | Yarn management | Suitable project |
|---|---|---|---|
| Same color throughout | Low to moderate | Simplest | Texture sampler |
| Alternating rows | Moderate | Loose ends at intervals | Scarf or cowl |
| Contrast spike columns | High | Multiple carried strands | Blanket panel |
| Three-color motif | Very high | More ends and tension checks | Wall hanging or bag |
A dark spike on a pale ground usually appears sharper than two colors with similar value. A color-wheel contrast is less important than light-dark separation when the goal is a clearly visible vertical mark.
How Much Yarn, Time, and Fabric Does It Use?
A spike stitch usually uses more yarn than an ordinary stitch because the loop travels down and back up the fabric. A practical planning allowance is 15-25% more yarn for the portions containing frequent spikes, although the total project increase may be lower when spikes occupy only occasional stitches.
The extra consumption is not a universal percentage. Yarn weight, fiber elasticity, spike depth, stitch frequency, hook size, and tension all change the result. A blanket with one spike every ten stitches will not use the same additional amount as a blanket made almost entirely from long spikes.
Frequent spikes also make fabric feel thicker and can reduce working speed by roughly 20-30% for beginners. Those figures are practitioner planning ranges, not a published crochet standard. A swatch provides better information than a generic percentage.
| Project example | Base yarn budget | Typical spike allowance | Adjusted planning budget |
|---|---|---|---|
| Small scarf | $12-$20 | $2-$5 | $14-$25 |
| Medium throw | $45-$80 | $7-$20 | $52-$100 |
| Market bag | $10-$18 | $2-$4 | $12-$22 |
| Accent cushion | $18-$30 | $3-$8 | $21-$38 |
For a project that normally requires 1,000 yards, adding 15-25% gives a planning range of 1,150-1,250 yards. Buy by yardage rather than skein count because skeins vary by brand and yarn weight.
Does a Spike Stitch Make Fabric Thicker?
A spike stitch can make the surface feel denser because extra yarn spans the face of the fabric. The change is usually localized around the spike columns, rather than a uniform 20% increase across every project.
The stitch is useful for bags, cushions, warm scarves, and blanket motifs where a firm surface is beneficial. It is less suitable for lightweight summer garments when drape and breathability matter more than surface decoration.
A spike does not automatically strengthen a fabric. A tight stitch density, weak fiber, or poorly balanced tension can still produce distortion. Structural durability comes from the entire fabric, including yarn fiber, gauge, stitch construction, and seam design.
Which Hook and Yarn Work Best?
A hook with a defined throat can help the crocheter enter a lower stitch cleanly, but no hook style is universally superior. Inline hooks, such as Susan Bates designs, often provide a sharper transition into the hook throat; tapered hooks can glide more easily through tight fabric.
Smooth yarn makes the lower insertion point easier to see. Splitty roving yarn, loosely plied cotton, and brushed fibers make it harder to draw up a clean loop without catching individual strands.
| Material choice | Recommended specification | Advantage | Limitation |
|---|---|---|---|
| Smooth acrylic | Worsted, category 4 | Clear stitches and low cost | May show uneven tension |
| Mercerized cotton | DK or worsted | Crisp definition | Limited stretch |
| Wool blend | DK or worsted | Elastic loops and easy blocking | Can felt with heat or friction |
| Brushed or fuzzy yarn | Any weight | Soft surface | Lower-row insertion is difficult |
Use the hook recommended for the yarn label as a starting point. If the spike loop repeatedly tightens the fabric, changing hook size alone may not solve the problem. The loop must be lifted deliberately to the working height.
How Should You Read and Plan a Pattern?
A spike instruction contains at least three pieces of information: the stitch used to finish it, the lower row or space used for insertion, and the position within the repeat. Missing one of those details creates ambiguity.
Before starting a project, mark the repeat on the chart or written instructions. Count the foundation chain, identify the turning chain, and note whether the designer treats the turning chain as a stitch.
| Pattern detail | Question to answer | Why it matters | Swatch check |
|---|---|---|---|
| Base stitch | Is the spike an SC, HDC, or DC? | Completion steps change | Compare stitch height |
| Target row | How far below is insertion? | Controls spike length | Count visible rows |
| Target location | Stitch top or space? | Changes alignment | Inspect the lower V |
| Repeat width | How many stitches repeat? | Centers the motif | Measure one full repeat |
A chart may show a vertical line extending downward, but the chart symbol does not always reveal whether the hook enters the front loop, back loop, or full stitch. Written instructions and the designer’s key should resolve that distinction.
Spike Stitch Compared With Alternatives
Spike stitches differ from post stitches and mosaic crochet in both construction and visual behavior. The lower-row insertion creates a mostly flat vertical mark, while post stitches wrap around a stitch stem and mosaic methods build motifs through skipped stitches and later drop-down stitches.
| Technique | Hook action | Surface profile | Typical yarn demand |
|---|---|---|---|
| Spike stitch | Insert into lower row or space | Flat to lightly raised | About 15-25% extra in frequent sections |
| Front-post stitch | Wrap around front of stitch post | Raised ridge | Often higher than spike sections |
| Back-post stitch | Wrap around back of stitch post | Recessed rib | Moderate to high |
| Mosaic crochet | Work overlay stitches into lower rows | Graphic, layered face | Moderate to high |
| Tapestry crochet | Carry or switch colors within row | Dense, two-sided structure | Moderate, with carried yarn |
The percentages sometimes quoted for post and mosaic techniques are not universal measurements. Project totals vary with motif density and tension, so comparison should focus on construction and fabric behavior rather than fixed cost claims.
A spike stitch is usually the simpler choice for occasional vertical accents. Mosaic crochet is better for repeated charted colorwork, while post stitches are better for ribs, cables, and strong relief.
When Should You Choose a Spike Stitch?
Choose a spike stitch when a project needs vertical color accents without the heavy relief of post stitches. It works particularly well in striped blankets, scarf borders, geometric bags, and sampler squares.
Avoid relying on spikes for fitted garment shaping or load-bearing seams. The stitch changes local tension and may create diagonal pull if concentrated on one side of a panel.
What Problems Can Occur?
Most spike-stitch problems come from loop height, row identification, or insertion location. The stitch itself is simple, but the hook reaches into a part of the fabric that is easy to misread.
| Symptom | Likely cause | Visible consequence | Correction |
|---|---|---|---|
| Fabric puckers downward | Loop pulled too short | Vertical depression | Unravel and redraw to row height |
| Spike looks loose | Loop pulled too high | Slack strand or loop | Match the active row edge |
| Motif shifts sideways | Wrong lower stitch | Uneven columns | Count from the repeat marker |
| Hole appears below spike | Missed stitch or space | Open gap | Verify insertion and stitch count |
| Yarn splits | Blunt or crowded insertion | Fuzzy strand | Use a smoother yarn or sharper hook |
The most common beginner mistake is treating the lower insertion point like a shortcut. The hook must enter a real stitch or named space, and the working loop must be controlled while the hook travels back to the active row.
A second mistake is correcting a tight spike by pulling neighboring stitches wider. That disguises the symptom but changes gauge. Undo the spike and redraw it instead.
What Happens If the Loop Is Too Short?
A short spike loop pulls the surrounding rows toward the insertion point. The result may be puckering, a diagonal ridge, or a fabric edge that curls inward.
A long loop creates the opposite problem. The vertical strand becomes loose, and the spike can catch on jewelry or snag during washing. Both errors are easier to correct immediately than after several completed rows.
Blocking can even out small differences, but it cannot reliably repair a loop that is structurally too short or too long. Treat blocking as finishing, not as a substitute for correct tension.
How Should Spike-Stitch Fabric Be Blocked?
Blocking relaxes uneven loops and helps geometric motifs align, especially in wool and many acrylic yarns. The correct method depends on fiber content and the care instructions on the yarn label.
Wet blocking suits wool, cotton, and many blends when the fabric can be immersed safely. Steam blocking can shape acrylic, but excessive heat may permanently flatten the fibers or create a shiny surface.
| Fiber | Preferred method | Typical drying or cooling time | Main caution |
|---|---|---|---|
| Wool | Wet block with mild soap | 12-24 hours | Avoid agitation and heat |
| Cotton | Wet block and pin | 12-24 hours | Stretch can remain after washing |
| Acrylic | Light steam or damp block | 1-4 hours | Do not press hot iron directly |
| Alpaca blend | Gentle wet block | 18-30 hours | Fibers may lengthen under weight |
Pin the outer edges first, then adjust the spike columns so they run vertically. Measure the swatch before and after blocking if the project depends on a specific finished size.
Can Beginners Use This Stitch?
Beginners can use a short, single-crochet spike after learning to identify row tops and maintain even tension. The technique is easier in a solid, light-colored worsted yarn than in dark, fuzzy, or highly split yarn.
Practice a ten-stitch swatch with one spike every five stitches. Work one row with short spikes, then another with deeper spikes, and compare the fabric from the front and back.
A beginner-friendly progression is:
- Work five rows of ordinary single crochet.
- Add one short spike in the center.
- Repeat with a two-row drop.
- Change color before a spike row.
- Count the same motif from a chart and written instructions.
- Unravel one spike and repair it without disturbing the surrounding stitches.
This sequence teaches row depth, loop height, color placement, and pattern reading separately. Combining all four skills in a large blanket creates unnecessary troubleshooting.
Frequently Asked Questions About What Is a Spike Stitch in Crochet
Is a spike stitch the same as a drop-down stitch?
A spike stitch is one type of drop-down stitch. Both terms describe reaching into a lower row, but “spike stitch” usually refers to the elongated vertical result, while “drop-down” may describe a broader family of overlay and colorwork techniques.
Can spike stitches be worked on the wrong side?
Yes. A spike can be worked from either side when the pattern specifies the insertion direction. The visible strand will appear on the side facing the crocheter during the insertion, so alternating right-side and wrong-side work can change the motif’s appearance.
Are spike stitches reversible?
Most spike-stitch fabrics are not fully reversible. The front usually shows the elongated vertical accent more clearly, while the back may show the lower-row strand and a less defined outline. Same-color spikes can produce a more balanced reverse side.
Do spike stitches replace a normal stitch?
Usually, a spike replaces the next ordinary stitch in the row while counting as one stitch. The pattern may instead place a spike into a lower space without replacing a top stitch, so stitch counts must follow the written instruction rather than assumption.
Why does my spike stitch disappear?
A spike may disappear when the yarn colors have similar lightness, the insertion depth is too shallow, or the surrounding fabric is highly textured. Use a smoother contrasting yarn, verify the lower row, and pull the loop to the active row height.
Can I use spike stitches in a blanket border?
Yes. Spike stitches work well in borders when the repeat fits the edge count and the corner increases are planned separately. Place the motif on straight sections first, then test the corner because concentrated spikes can make a border tighten or flare.
Conclusion
A spike stitch in crochet is a lower-row insertion technique that creates an elongated vertical loop at the height of the active row. Its strongest uses are controlled colorwork, geometric accents, borders, scarves, bags, and blanket motifs where modest texture and clear lines are useful.
For reliable results, identify the target row, insert into the correct stitch or space, raise the loop without compressing the fabric, and check the repeat after every motif. Budget roughly 15-25% extra yarn for sections with frequent spikes, then confirm the actual requirement with a gauge swatch before committing to the full project.